Topic: Stamping
A while back I was using a shadow stamp on card projects and stamped up a bunch extras in a variety of pastel colors on white cardstock. So, in a push to use them all up, I pulled out some other stamps and treated them in similar ways.
First I stamped over all of them using a script background in coordinating colors. Then I used a tall flower stamp on the right side of the blocks. I have a set that offers 4 different flowers. So I used each of them twice, except for the lily. Then each of them was colored with watercolor markers and cut out with a nestabilities die - using a variety of them. Finally, each got a text stamp.
I then pulled out base cards, background papers, and ribbons in suitable colors and set about assembling the following--
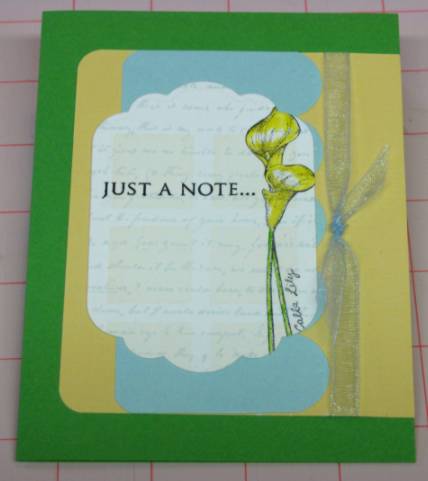
With the lily stamp I colored in yellow, layered with green, yellow and blue and added a sheer blue ribbon:
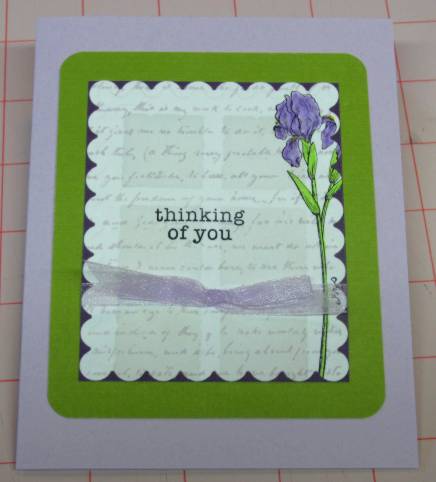
This Iris was colored with light purple, cut with a scallop die, layered with dark purple, lime green and light purple. It got a sheer purple bow:
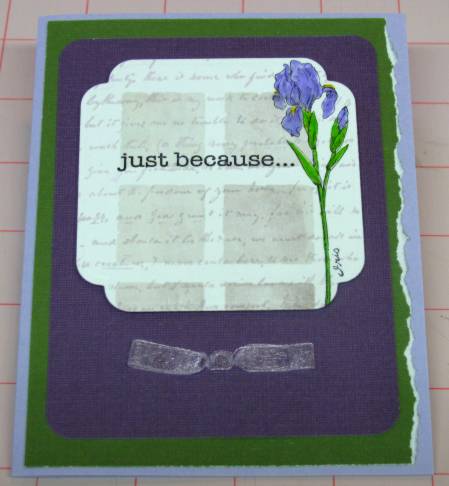
The second iris was colored with a blue-violet marker and has a darker shadow stamp background. A faux bow on the purple cardstock layer balances out the image panel which is popped up on foam tape. The green layer is torn on the right to soften the layout and this is finished off with a violet card base:
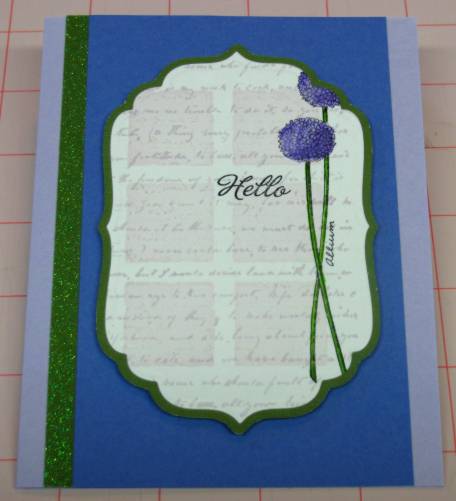
Next is the Allium. The first is a blue-violet version which has a thin green border peeking out from the image panel. This is popped up on foam tape over a blue panel and bordered with a glitter-green strip on the left. The base card is pastel violet:
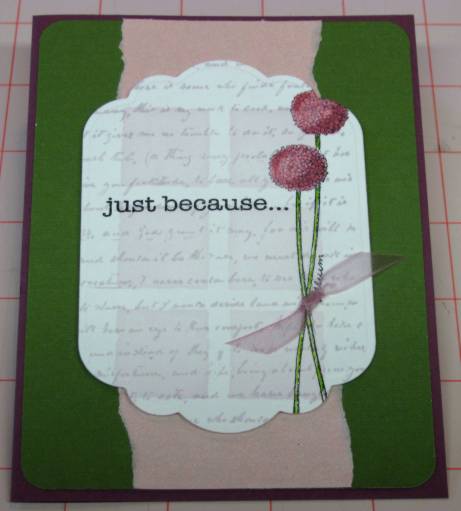
The secons Allium was colored with a raspberry coloring so I added a shimmery pink torn panel behind it to reinforce the palette. A sheer ribbon is knotted through slits on either side of the stems before popping it up over the pink/green layer. Dark red-violet card base on this one:
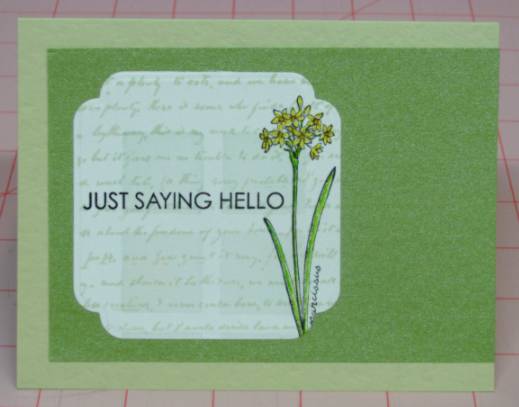
These final flowers are labeled paperwhite narcissus which one presumes would mean they should be 'white'. However, that would be boring! So I made them yellow and orange. The first I gave a simple layout since the flower itself is more detailed. A borl text stamp adds some weight to the panel to anchor it. Both the backing and the base card are in tones of spring green:
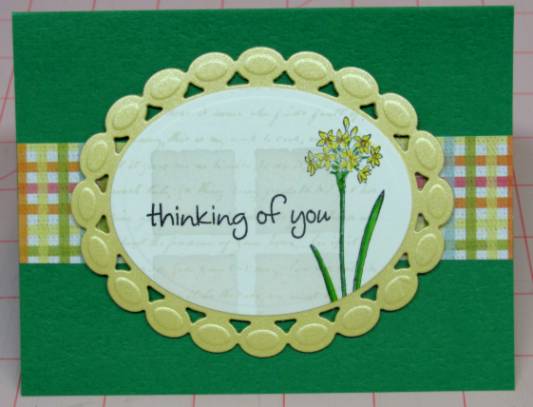
The second paperwhite also got a horizontal treatment (it just worked out that way). I got a new nestabilities die with a cool 'beaded' edge that the ovals die fits precisely. I used it on a shimmery yellow cardstock and popped both on foam tape over a grass-green card base and a strip of playful plaid:
Isn't it fascinating how much the look changes from one card to another with different shapes and colors?
Ddd
