Topic: Multi-Technique
So I was quilting the other day. Actually I had designed a quilted wall hanging and had to work out the assembly as I was going along. I must have been more absorbed in it than I realized because I ended up dreaming up other quilting projects in my sleep.
But the projects I dreamed about were not quilted and they were extremely tiny. In fact, they were made up of 1/4 inch squares of fabric. Some of these squares were even to be cut in two to make itty-bitty triangle pieces. As many of my 'dreamed up' projects do, these worked out exactly like I envisioned. Here are the three projects I ended up with:
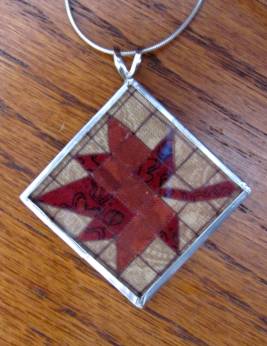
A necklace: squares of fabric were backed with Steam-a-Seam 2 then cut into 1/4 inch squares. These were laid out on a backing fabric along with those that needed to be cut into triangles plus a stem piece. They were ironed into place and a brown thread was used to stitch a grid where a real quilt would have had seams. I used more Steam-a-Seam 2 to adhere a backing fabric and trimmed the block down to 1 1/4 inches. This was sandwiched between two pieces of microscope slide glass and the edges sealed with silver foil tape. I adhered a bail with E6000 glue and added a rhinestone on the back of the bail.
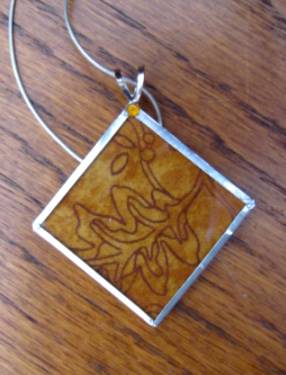
A Pin: I used the same technique to adhere the fabrics but started with 1/4 inch strips of color and arranged them in a reversing pattern. Then I turned the block 1/4 turn and cut strips of varying widths. These were arranged from the center out using equal widths on each side and moving them up or down one color block to create a baragello design. I covered the back of a Tim Holtz 2-inch fragment with Glossy Accents and pressed it onto the fabric. When the glue was dry I cut around the piece, attached a silver cardstock to the back and bound the entire thing with silver foil tape. I used E6000 glue to attach a pin back.

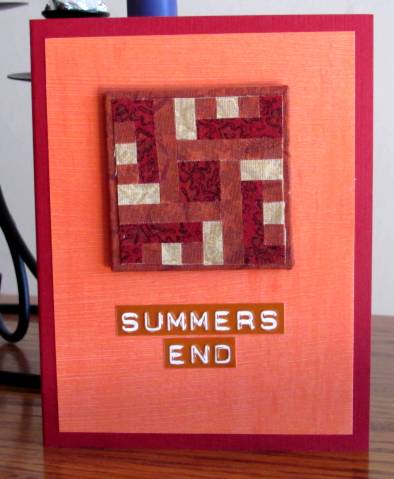
A Card: For the last one I just played with strips and tiny blocks to create a fabric block. I created a backing by gluing fabric to a square of cardstock and attached the quilt block to it. This was popped up on foam tape on a scrapbook paper over a folded card base. A sticker text greeting was the finishing touch.
Now back to quilting in real size.
Ddd
