Topic: Stamping
For National Scrapbooking Day (last weekend) OWH had a weekend of challenges for those uf us being 'rebels'. Our rebellion? We were making cards instead of scrapbook pages.
The first challenge was to make cards for kids with paper pieced stamping. I got this stamp as a prize in a challenge last year and had never used it. It is much cuter than I thought it was! I got the butterfly stamp in a grab bag of craft supplies at Goodwill.
For the girl I stamped on 5 scrapbook papers and cut out the hair, the stuffed bunny, the dress, the pinnafore, and the boots. I stamped her again on a white card base with an oval flower wreath embossed on it, having first glued a green paper strip at the bottom for grass. I colored her face, arms and legs with Copic marker and then layered the cut pieces over top. Then I stamped the butterfly on 4 papers and cut our various parts to layer. A piece of scrappers floss was glued from the hand to the sky and then placed the butterfly at the end. The butterfly is glued at the back and raised at the front on foam tape. Finally, I tied some knots in 1/8" ribbon and trimmed tiny ends. Three of these were glued to the strings to turn the butterflies into kites. The last step was to stamp a text sentiment at the bottom.
Here is the first with rather bright colors:

And here is version two, with pastels:
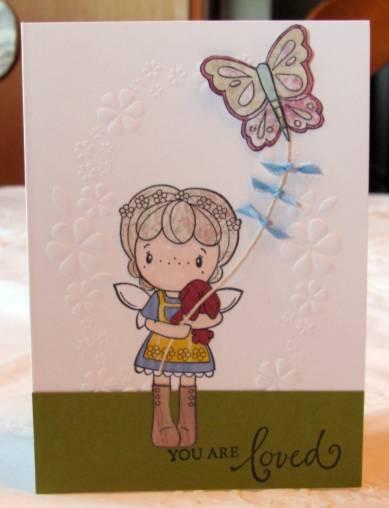
And the title of the blog post? This paper piecing is SO time consuming that it took hours to make these two cards. I would much rather use a fraction of that time coloring with markers and getting more production for my efforts. However, the final effect is nice.
Ddd
