Topic: Sketch Challenge
I went with a sketch for this set of cards (OWH#28) and a plan (from ClubScrap) that uses three 8.5 x 11 papers to plan-cut and mix and match. I started with a yellow/white dot, a brown antique print and an apricot fabric print. Here is the sketch:
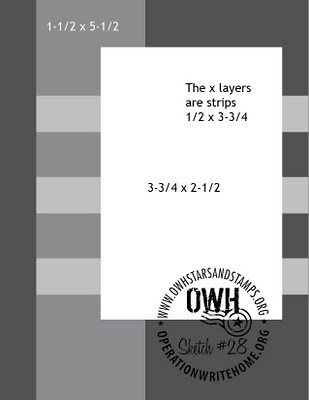
By using the cutting diagram it allows for the large block and the long strip to be backed with an opposing color.
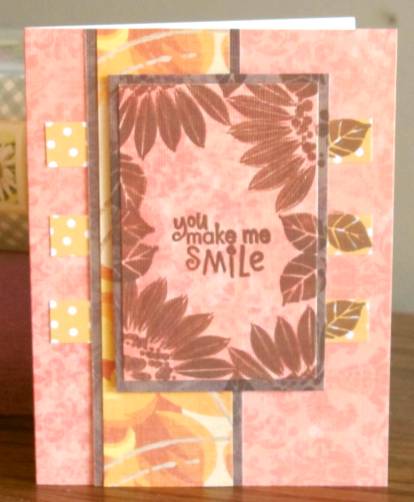
For the first one I started with the apricot base. The big strip in yellow dots was just too much so I turned it over and revealed a floral print! On the big block I used a brown chalk ink to stamp a silhouette daisy off the edges and added in some leaves from the same set. The same brown ink was used for the sentiment and this layer was popped up on foam tape. I added stamped leaves to the right ends of the skinny strips to tie them into the design.
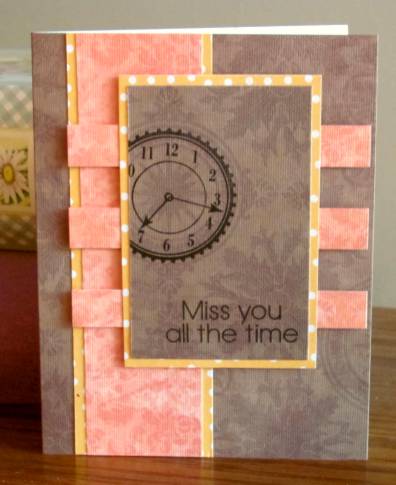
For the second one I started with the brown card base. The skinny strips did not stand out from the big strip enough so I popped up all of them on foam. The brown center block had a round element on it so I stamped in that area with a clock face. This called for a particular sentiment and I kept it simple. I added foam tape so this piece would float over the skinny strips.
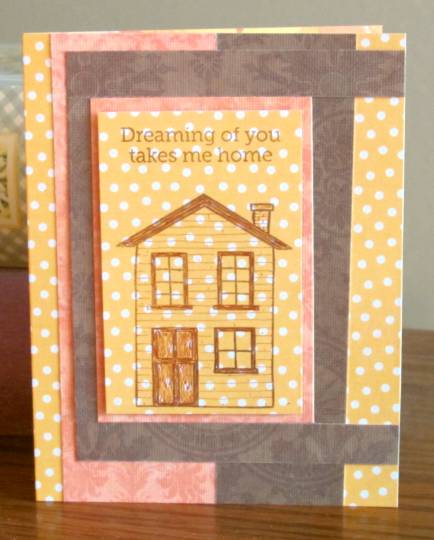
Then I got tired of the arrangement and used the skinny strips to band the big block. I also un-stacked the long strips and placed them side by side. This covers up a lot of the yellow dot paper and keeps it from taking over. I used brown chalk ink to stamp the house and added details with brown fine-line pen. These include bricks on the chimney, wood grain on the door and sills and clapboard siding.A stamped sentiment is the finish.
Three more done!
Ddd
