Topic: Stamping
Yesterday's set was supposed to start with 8.5 x 11 cardstock but I had 12 x 12 on hand and cut them down. That meant I had blocks of those same colors left over but none large enough to use as card bases. I got out three cream card bases to build upon and chop, chop, chopped parts to use on them for cards.
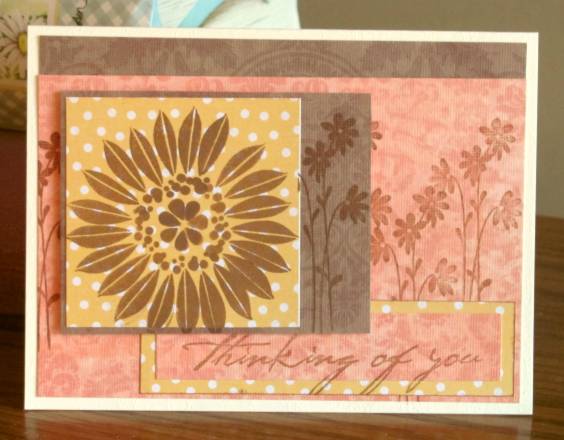
First I stamped across the biggest piece with a floral silhouette. Then I used a large silhouette of a daisy on the square piece.This stamp is actually only 1/3+ of the flower so there was some judicious arranging to make a full flowerhead. Another of the small silhouettes was added to the extension backing and this was popped up on foam tape. I stamped a greeting on the long slip and tucked it behind the feature block.
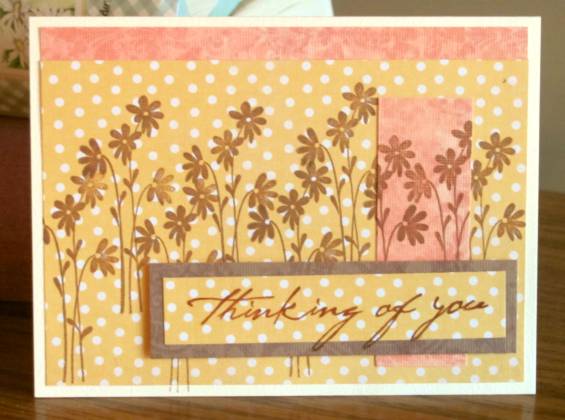
I dropped the center block entirely from this next card and just went nuts with stamping the daisy silhouette including adding it to a contrasting piece. I used the same sentiment and really like this card.
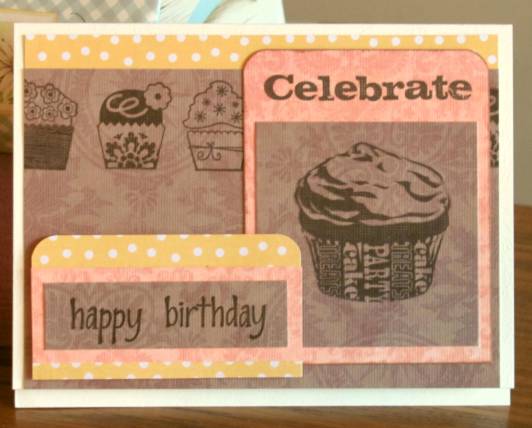
When I saw how much 'chocolate' there was going to be in this arrangement I grabbed some sets of cupcake stamps to make a birthday card. YUM! I had a set of four little cupcakes and arranged them on the block to stamp all in a line. I stamped the group twice to reach all the way across the card. I stamped a larger cupcake on the big block and layered it with the apricot. Rounding the top corners sets off the sentiment. I used chalk ink to tint the edges. Then I created a multi-layer block to stamp the greeting and rounded the top corners of that, too. This layer is popped up on foam tape.
Scrappy, scrappy, scrappy and awesome, awesome, awesome!
Ddd
