« October 2012 »
S M T W T F S
1 2 3 4 5 6
7 8 9 10 11 12 13
14 15 16 17 18 19 20
21 22 23 24 25 26 27
28 29 30 31
You are not logged in. Log in
Entries by Topic
All topics  «
3D paperwork
A - Z challenge 5
A - Z challenge 7
A - Z challenge round 4
A to Z challenge round 3
A to Z round 2
A to Z round 6
A-Z round 1
Around the House
Art Challenges
Artist Trading Cards
Backgrounds
Beads
Bible Journaling
Books
Boxes
Collage
Color Challenge
Coloring
cookbook
Die Cuts
Digital Projects
Digital Stamps
Drawing
Dry Embossing
Fabric Stuff
Fantastic Folds
Field Trip
Home Decor
How Does Your Garden Grow?
Hymnal Art
In The Kitchen
In the studio
Jewelry
Lettering
Links
Multi-Technique
Music to Work By
Musings
Nail Art
New Work
Online Class
Other Hobbies
Other Projects
Painting
Paper Embroidery
Paper Piecing
Photo
Pretty Paper
Quilting
Random
reading
Scrap Recovery
scrapbooking
Sewing
Sketch Challenge
Some Backlog
Stamping
Stencils
Stickers
Supplies
Teabag Folding
Techniques
Testing
tips and tricks
Tutorial
Web resources
Welcome to my Blog
Work By My Friends
workflow
Writing
Blog Tools
Edit your Blog
Build a Blog
RSS Feed
View Profile
Group One
In & Out of Studio 3D
Friday, 5 October 2012
Better and Better
Topic: Sketch Challenge

I think these winter and Christmas cards using OWH sketches are getting better and better as I go. I hope you agree! Don't forget - I will be featuring the best one on October 6 for an OWH bloghop for World Card Making Day. Be sure to check back then and I'll provide a link to the rest of the bloghop for you.

Sometimes the sketch itself tells you what it wants to be. That was the case the first time I saw sketch 103:


My very immediate thought was 'those should be Christmas ornaments'! I found some paper in the stach that had round elements and cut circles around three of them to create the baubles. They got their edges darkened with 'old paper' distress ink so they would appear to be spherical. I also cut out three of the little trees and opped them up on foam in the middle of the ornaments and created a little 'cap' for each out of gold cardstock. The baubles are mounted with foam tape in the center and ATG glue around the edges so they are actually 'puffy' on the card. A length of scrappers floss is caught underneath each of the caps and wrapped to the back of the front panel.


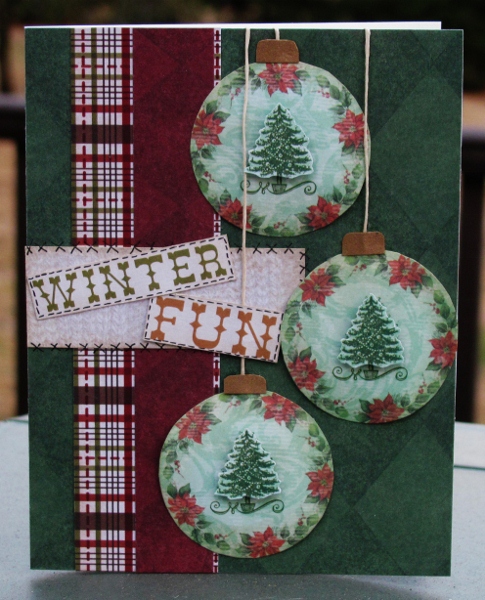
I cut the words from the paper with the overall text print and mounted them to some of the cable knit printed paper. These were attached over the background collage of masculine prints and then each was given some faux stitching. The larger one got X stitching which I think looks cozy and cute.

Ddd


Posted by studio3d@ccgmail.net at 12:01 AM PDT

Saturday, 6 October 2012 - 6:02 AM PDT

Name: "Rachel G"
Home Page: http://everypagecounts.blogspot.com/

I love love love your ornaments! Thanks for such great tips, like the edging and putting foam only in the center. Brilliant! I'm going to definitely try it out. 

Sunday, 7 October 2012 - 12:11 AM PDT

Name: "Anjenic G"
Home Page: http://www.anjenicgibson.blogspot.com

Wow such lovely cards! I really love the traditional colors used. TFS AJ -

Sunday, 7 October 2012 - 7:46 AM PDT

Name: "Teresa Inman"

Love your cards very pretty !

View Latest Entries