« September 2014 »
S M T W T F S
1 2 3 4 5 6
7 8 9 10 11 12 13
14 15 16 17 18 19 20
21 22 23 24 25 26 27
28 29 30
You are not logged in. Log in
Entries by Topic
All topics  «
3D paperwork
A - Z challenge 5
A - Z challenge 7
A - Z challenge round 4
A to Z challenge round 3
A to Z round 2
A to Z round 6
A-Z round 1
Around the House
Art Challenges
Artist Trading Cards
Backgrounds
Beads
Bible Journaling
Books
Boxes
Collage
Color Challenge
Coloring
cookbook
Die Cuts
Digital Projects
Digital Stamps
Drawing
Dry Embossing
Fabric Stuff
Fantastic Folds
Field Trip
Home Decor
How Does Your Garden Grow?
Hymnal Art
In The Kitchen
In the studio
Jewelry
Lettering
Links
Multi-Technique
Music to Work By
Musings
Nail Art
New Work
Online Class
Other Hobbies
Other Projects
Painting
Paper Embroidery
Paper Piecing
Photo
Pretty Paper
Quilting
Random
reading
Scrap Recovery
scrapbooking
Sewing
Sketch Challenge
Some Backlog
Stamping
Stencils
Stickers
Supplies
Teabag Folding
Techniques
Testing
tips and tricks
Tutorial
Web resources
Welcome to my Blog
Work By My Friends
workflow
Writing
Blog Tools
Edit your Blog
Build a Blog
RSS Feed
View Profile
Group One
In & Out of Studio 3D
Monday, 22 September 2014
Stretch Your Stamps 2 - Day 4 - Alphabets & Sentiments (2)
Topic: Online Class

I only made cards from two of the four lessons on day 4.

This second one is only 'inspired by' the lesson but not really following through on all the instructions and methods. The instructor used many random words to create a pattern on her block so the same word-art could be stamped on a background and on a raised diecut and they would align.

I did not have a bunch of words I wanted to use together so I chose a stamp that had a single word repeated in lots of fonts. It would have been nearly impossible to align it over and over so I only attempted to align the central one where it stretches from side to side of the circle and runs off the edges. The rest of the background and the diecut are just stamped repeatedly wherever they fit. I used different inks on the two layers.

The diecut is bordered with red faux stitching and popped up on foam tape.

I aligned a diecut sentiment over a punched butterfly so the dot on the 'I' aligned with the head. A second punched butterfly was cut in half and the wing was raised off the surface.


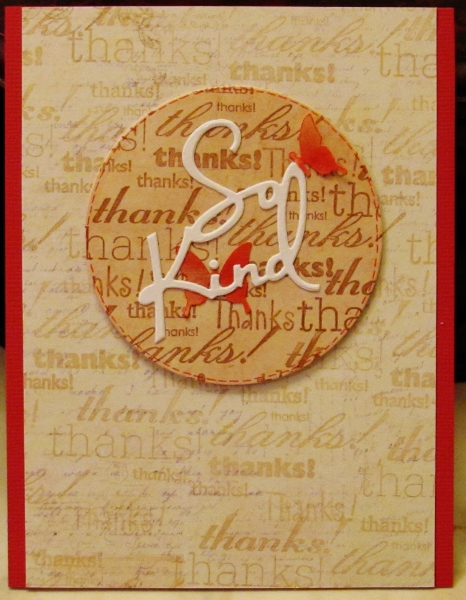
I cut the panel to allow a border of the backing red to show only on the sides.

Ddd


Posted by studio3d@ccgmail.net at 12:01 AM PDT

View Latest Entries