« April 2016 »
S M T W T F S
1 2
3 4 5 6 7 8 9
10 11 12 13 14 15 16
17 18 19 20 21 22 23
24 25 26 27 28 29 30
You are not logged in. Log in
Entries by Topic
All topics  «
3D paperwork
A - Z challenge 5
A - Z challenge 7
A - Z challenge round 4
A to Z challenge round 3
A to Z round 2
A to Z round 6
A-Z round 1
Around the House
Art Challenges
Artist Trading Cards
Backgrounds
Beads
Bible Journaling
Books
Boxes
Collage
Color Challenge
Coloring
cookbook
Die Cuts
Digital Projects
Digital Stamps
Drawing
Dry Embossing
Fabric Stuff
Fantastic Folds
Field Trip
Home Decor
How Does Your Garden Grow?
Hymnal Art
In The Kitchen
In the studio
Jewelry
Lettering
Links
Multi-Technique
Music to Work By
Musings
Nail Art
New Work
Online Class
Other Hobbies
Other Projects
Painting
Paper Embroidery
Paper Piecing
Photo
Pretty Paper
Quilting
Random
reading
Scrap Recovery
scrapbooking
Sewing
Sketch Challenge
Some Backlog
Stamping
Stencils
Stickers
Supplies
Teabag Folding
Techniques
Testing
tips and tricks
Tutorial
Web resources
Welcome to my Blog
Work By My Friends
workflow
Writing
Blog Tools
Edit your Blog
Build a Blog
RSS Feed
View Profile
Group One
In & Out of Studio 3D
Thursday, 7 April 2016
Sunset Nails
Topic: Nail Art

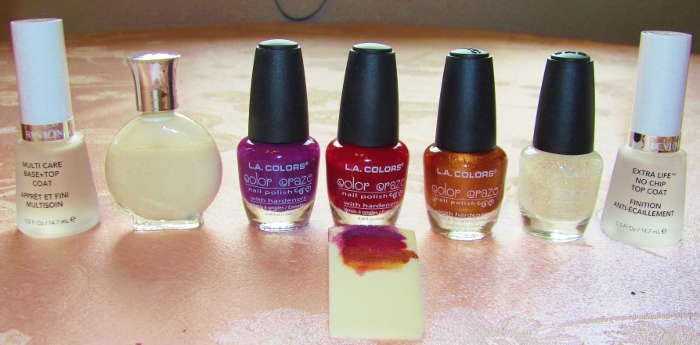
Here are the products I used to create nails with a sunset look:

From the left - base coat, two coats of sheer white, makeup sponge with stripes of purple, red and copper and used to sponge on the nails. This was done twice. The sheer with glitter went on over the top, followed with clear topcoat.

This is a messy process so it takes a lot of cotton swabs dipped in polish remover to get all the over-sponging off the cuticles and sides of the fingers.


I like the effect of a sunset sky.


As always, I'm a fan of layering glitter on my nails, so that adds to my satisfaction with this manicure.

Ddd


Posted by studio3d@ccgmail.net at 12:01 AM PDT

View Latest Entries