« May 2016 »
S M T W T F S
1 2 3 4 5 6 7
8 9 10 11 12 13 14
15 16 17 18 19 20 21
22 23 24 25 26 27 28
29 30 31
You are not logged in. Log in
Entries by Topic
All topics  «
3D paperwork
A - Z challenge 5
A - Z challenge 7
A - Z challenge round 4
A to Z challenge round 3
A to Z round 2
A to Z round 6
A-Z round 1
Around the House
Art Challenges
Artist Trading Cards
Backgrounds
Beads
Bible Journaling
Books
Boxes
Collage
Color Challenge
Coloring
cookbook
Die Cuts
Digital Projects
Digital Stamps
Drawing
Dry Embossing
Fabric Stuff
Fantastic Folds
Field Trip
Home Decor
How Does Your Garden Grow?
Hymnal Art
In The Kitchen
In the studio
Jewelry
Lettering
Links
Multi-Technique
Music to Work By
Musings
Nail Art
New Work
Online Class
Other Hobbies
Other Projects
Painting
Paper Embroidery
Paper Piecing
Photo
Pretty Paper
Quilting
Random
reading
Scrap Recovery
scrapbooking
Sewing
Sketch Challenge
Some Backlog
Stamping
Stencils
Stickers
Supplies
Teabag Folding
Techniques
Testing
tips and tricks
Tutorial
Web resources
Welcome to my Blog
Work By My Friends
workflow
Writing
Blog Tools
Edit your Blog
Build a Blog
RSS Feed
View Profile
Group One
In & Out of Studio 3D
Thursday, 12 May 2016
12 Tags of 2016 - March
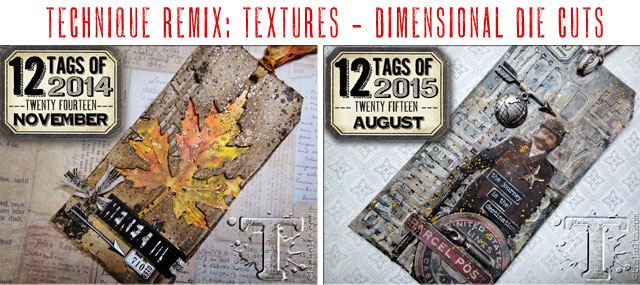
Topic: Multi-Technique

I'm kind of in 'catch-up' mode on these Tim Holtz-inspired projects. So, right on the heels of the February one, we're on to March.

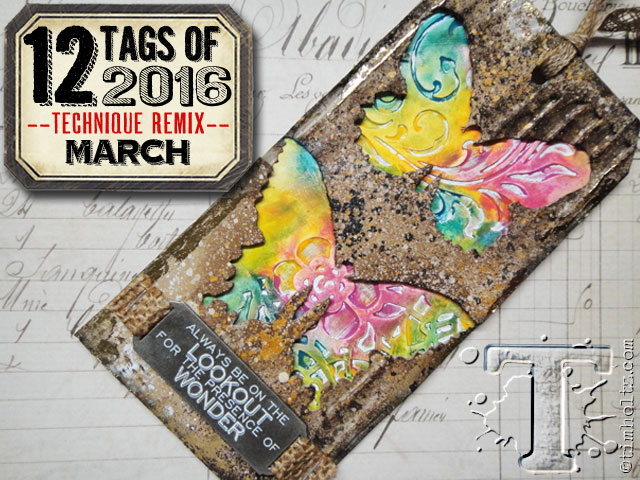
Here are the two techniques that Tim mixed:


And this is the new tag he created with the techniques:


Here are the steps I used to create my card:

- Use a shaped die to cut a void in corrugated cardstock (I used a nativity on buff)

- Add white distress stain to surface. dry

- Add distress inks to shade

- Set aside

- On non-stick craft sheet, sponge three Distress paints

- Mist with water

- Swipe cardstock through it

- Dry with heat tool

- Tap into leftover paint on the craft sheet

- Dry again

- Use glue stick or tape runner to apply random glue (not much)

- Lay foil sheet over glue and burnish. Peel up to leave foiling

- Mount diecut corrugated piece over top

- Use alcohol marker to draw in drop shadows

- Trim bottom edge at 3/4 inch

- Use letter diecuts to cut phrase from scrap of background cardstock

- Back cutout letters with cardstock to match drop shadows

- Trim to width of corrugated piece

- Lay three pieces together and tape/tack together

- Use strong adhesive to mount combined pieces to folded card base.

And here is my finished card:


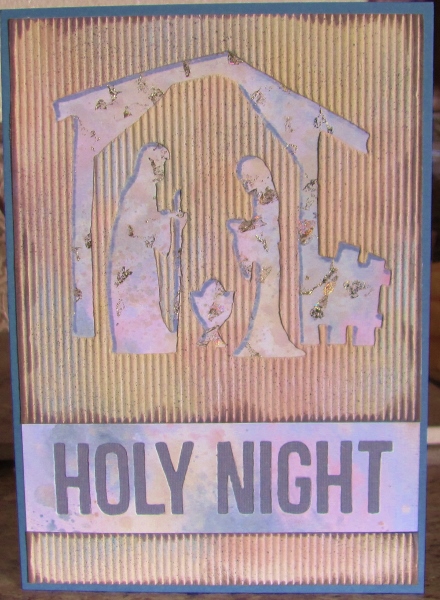
Thiis is a larger card as the size was dictated by the original diecut.

Ddd


Posted by studio3d@ccgmail.net at 12:01 AM PDT

View Latest Entries