Topic: Multi-Technique
Right on schedule, Tim posted his technique remix tag for August. And with only a little delay I created my own version.
Here are the techniques Tim combined:

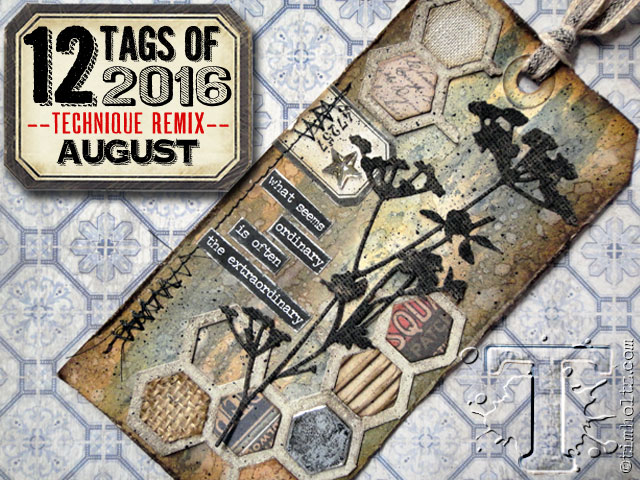
And here is the tag he created using them:

This is another of those cases where I did not have the product to do a major part of this project, so I used a work-around. More about that later.
Here are the steps I used:
- Cut piece of manila cardstock to work on (I cut mine from an old file folder)
- Put out some Distress Stain on a non-stick craft sheet (I used a blue and a green)
- Very lightly, roll a brayer through the stain to cover it with droplets of color
- Quickly and lightly roll across the 'tag' in one direction
- Spritz with water to allow stain to blend a little. Dry with heat tool
- Apply some brown Distress Ink with a blending tool
- Flick on water to create droplets. Dry with heat tool
- Use distress tool to rough up all four edges
- Apply Distress Ink to roughed edges
- Select a piece of printed cardstock for the overlay
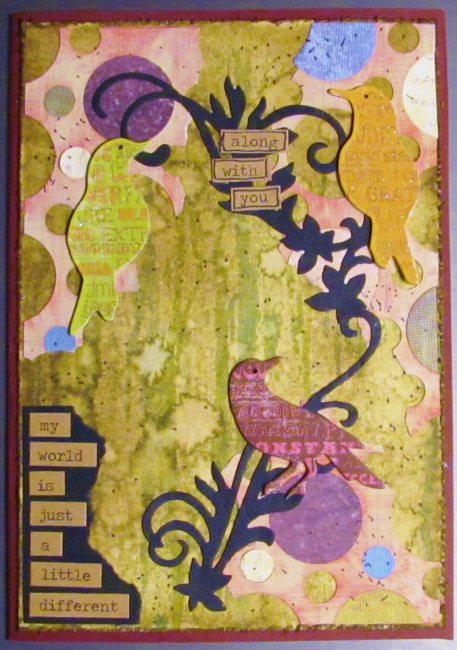
- Diecut a 'grid' (I did not have any grid dies so I used two sizes of round punches and created my own pattern of holes)
- Paint grid with light layer of Distress Paint
- Dry, sand and ink then divide into three pieces
- Adhere to three corners of the prepared 'tag'
- Use the diecut (punches in my case) to cut some other materials to inset into the holes in the grid
- Lay out and then adhere punches to some of the holes
- Diecut scrolls from black cardstock
- Adhere to tag
- Embellish design with words, stickers, labels, charms, etc. (In my case I used three chipboard bird stickers and some 'chit-chat' word stickers)
- I skipped the step of stitching along selected edges
- Spatter surface with black flecks
- Use Sharpie pen to add details (I outlined some of the chit-chat words and drew eyes on the birds)
- Cut base card and mount the decorated piece on it
Here is the card I created:

When I do these 'tags' I follow along with Tim and make step by step notes (like those above) with no sketches or photos. Then I take that cryptic list to the studio and start looking for products and supplies that I can use to get a similar effect.
After creating, I photo it and bring it back up to make these notes. That is the first time I have a side-by-side comparison of the end products.
So, there you go, another month complete.
Ddd
