| We had so much fun with serifs on the basic round print several weeks ago that I wanted to repeat those options on the basic block print. Since we are covering three books this week, we have three words on which we can get a taste of each of the three serif styles. Start by writing out the words (and numbers) in the basic block print. To the first line add triangle serifs. To the second line add basic serifs, which come in the form of blocks. When we drew the letters with lines, the serifs were lines. Now with the letters as blocks the serifs are blocks as well. On the third line of text we turn the edge of the block serifs to the ‘flying bird’ form and, voila, you get ‘western’ letters. 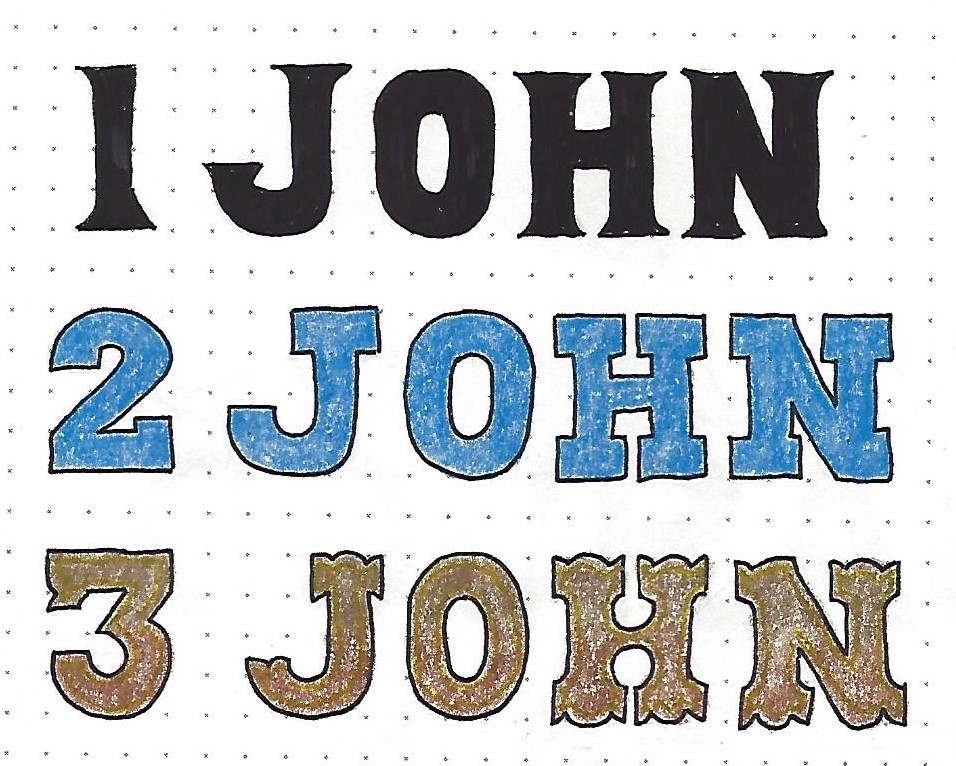
1,2,3 JOHN: Day 2 – Chisel Serif Block Print – Alphabet | To create the chisel serif block print, begin by writing out the full alphabet of the basic block print in pencil. Pencil in triangle serifs as indicated. Note that some of these are half-serifs and some are full serifs, depending where on the letter they fall (see the difference in the tops of the H and the M and in the bottoms of the E and the T as well as the two separate feet of the N.) Trace the letters along with the outline of the serifs using ink and then erase the pencil. You can decide at this stage if you want to leave the letters open or ink then in or fill them with color. I like to leave my sample alphabets open as I can then clearly see the structure of the letters. When I am using them in a project, I can finish them off in any way I choose. | 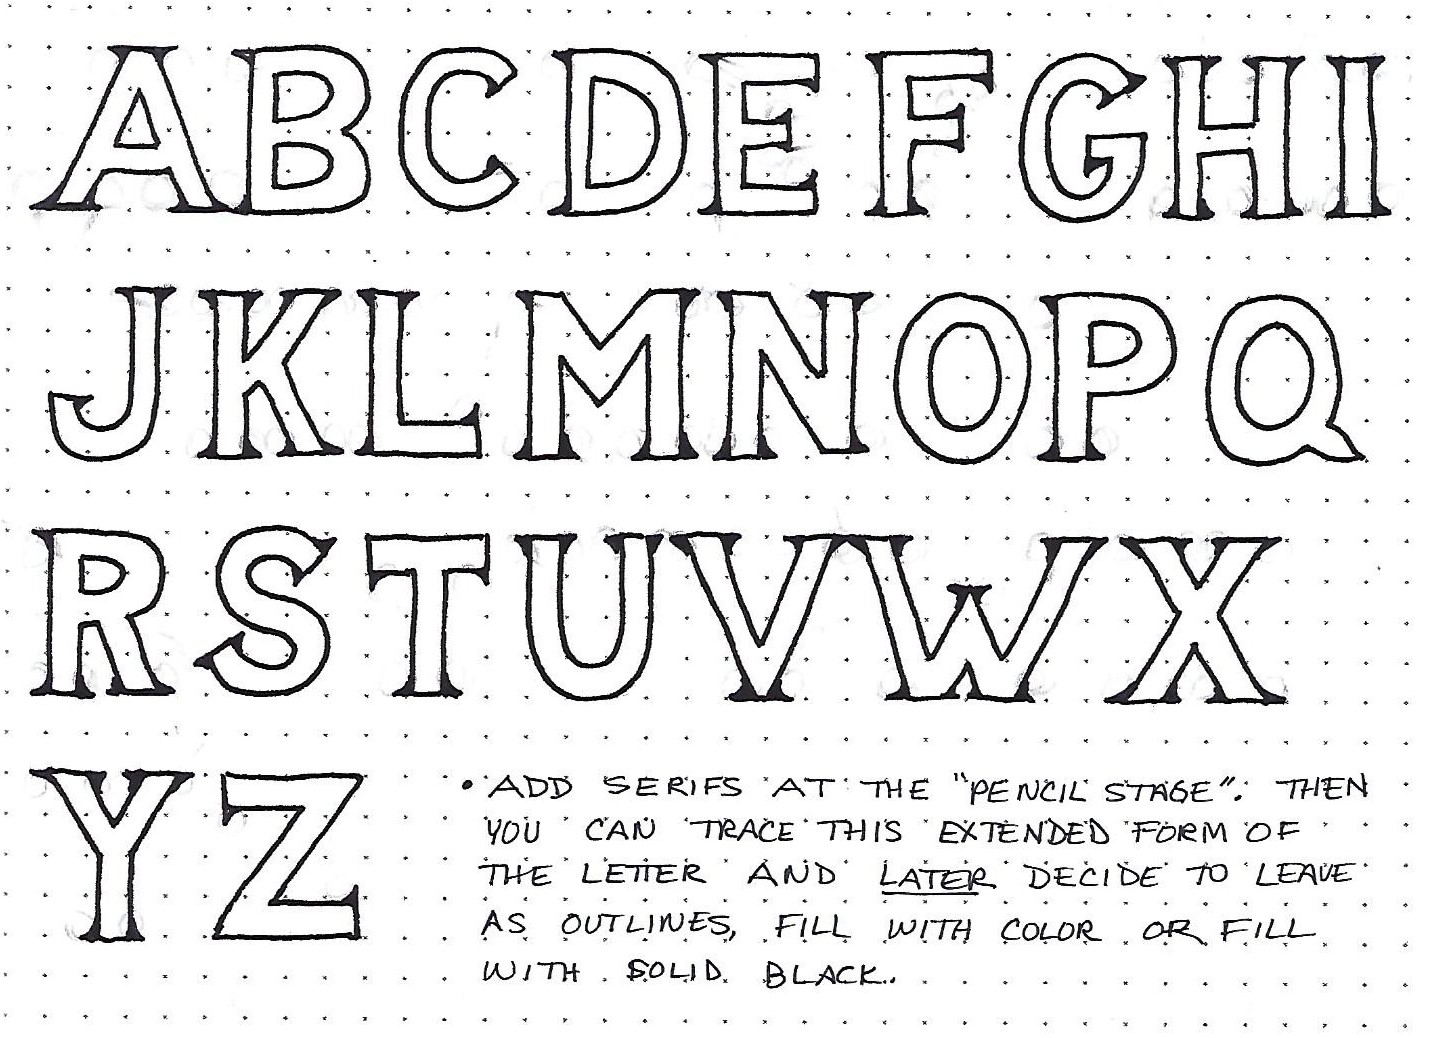
1,2,3, JOHN: Day 3 – Blocky Block Serifs – Alphabet | We discussed on day one this week the guideline for these blocky serifs – if the letter is lines then the plain serif is a line; if the letter is blocks then the serif is blocks. One thing that was not pointed out is that the blocky serifs should be the same width as the elements of the letters. You will note that this sample sheet does NOT follow that rule. I tried to create the serifs digitally in paint software and I have much less control when drawing with the mouse! This is the style of writing you will often see on athletic wear (sports jerseys). Begin by writing out the basic block alphabet in pencil. Then pencil in the block serifs (doing a much neater job than me). Ink the outline of the letter, encompassing the serif, and then erase the pencil. Again, you can choose to fill your letters like these or leave them open. Many sports letters are outlined in one color and filled with another (representing the team). 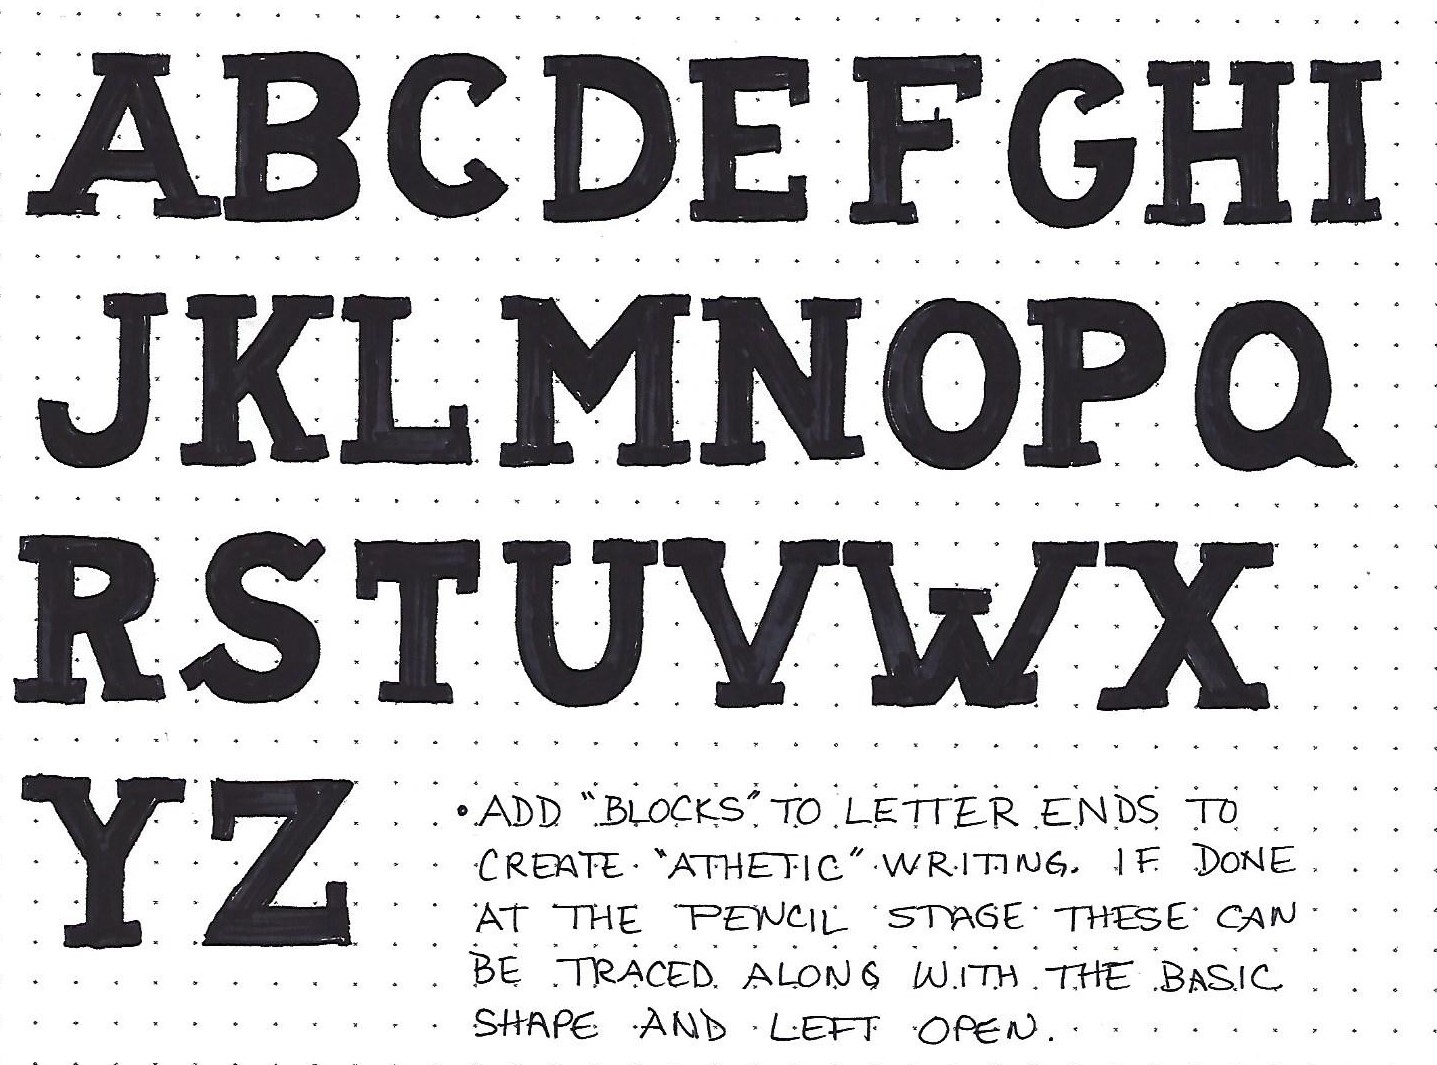
1,2,3, JOHN: Day 4 – Western Serifs – Alphabet | The western serif is an easy transition from the blocky serif, simply indent the block serifs with the flying bird shape. You will begin by drawing out the basic block letters in pencil. Then add the block serifs and, finally, add the indentations. (Again, mine were done digitally so they lack finesse. Yours will, of course, be shining examples of what I should have done.) When you have completed all your wing shapes, outline the letters in ink and erase the pencil. Then fill with ink or color. | 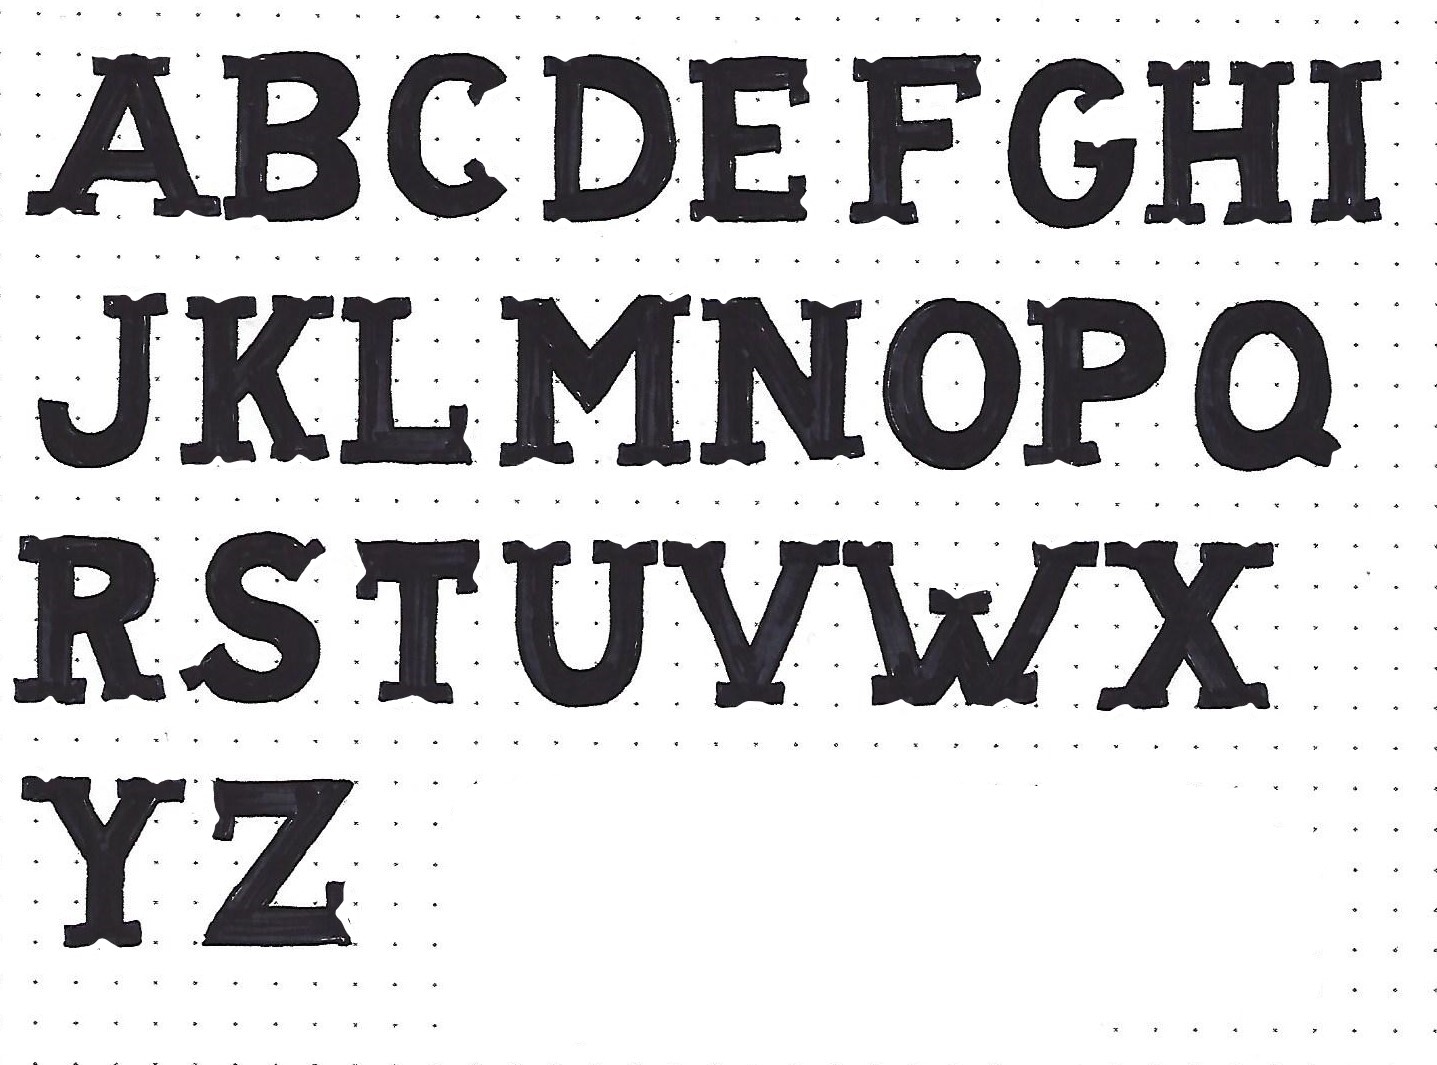
1,2,3 JOHN: Day 5 – Block Print Serifs – Bible Page | Every week we complete the lesson plan by using the new lettering style in our Bible. We have three choices this week from the various versions of serifs on block lettering. Use any of these options to write out a scripture from 1st, 2nd or 3rd John. On your page, sketch out the letters lightly in pencil, correct until they are exactly as you want them, trace over the pencil with pen and then, when the ink is dry, erase the pencil. I made my block print more casual and added the basic block serifs. After inking them in solid ink, I used a gold glitter gel pen to draw a single vertical line through each letter. This adds a further element of creativity and demonstrates how you can make this lettering your own. 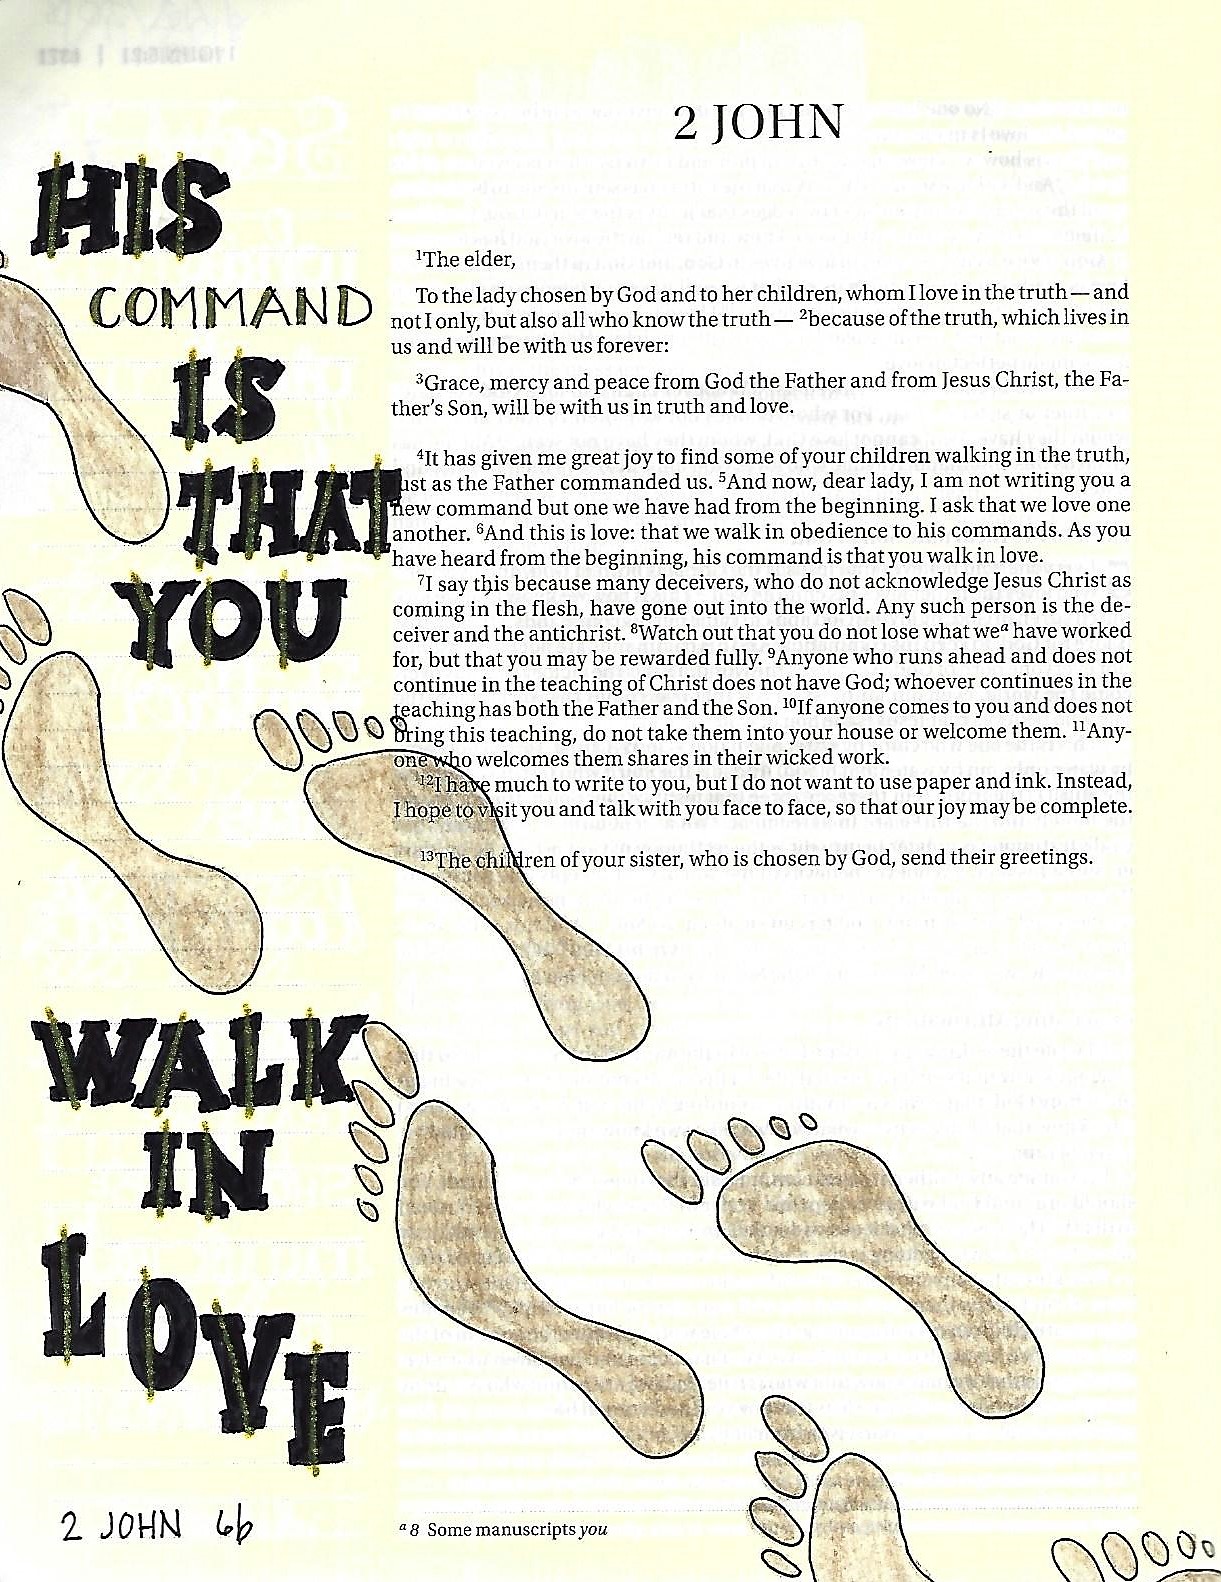
Done with another week! Ddd | | |
