Topic: Bible Journaling
Using filled double lines on letters is an entirely different animal when used on script as opposed to basic prints. This week the lessons will introduce faux-brush script.
| We are now going to move from a single-line script to what is called ‘faux-brush; script. This is because it looks like it was drawn with brush pens, but it is just added lines with the regular pens and filled in. Because it is done in simple steps, one at a time, it is an easy and elegant font to master.
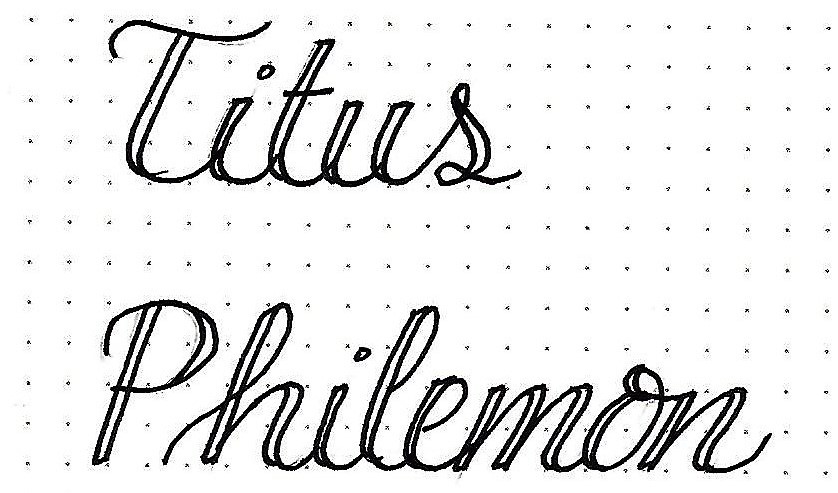
For the sample, using the two books of the Bible in the cover-to-cover plan in CBJ, I lettered in standard script leaving a little extra room between the letters. Then I added a single line to the downstrokes (more about that tomorrow).
|
Work on getting the line gap consistent and blending the lines together on the upper and lower curves so you don’t have an abrupt joining.
| We touched briefly on the term ‘downstrokes’ yesterday but didn’t really define it. When you are writing script, sometimes your pen is traveling away from you, sometimes side to side and sometimes it is being drawn toward you. When the pen is coming toward you, that is a downstroke.
|
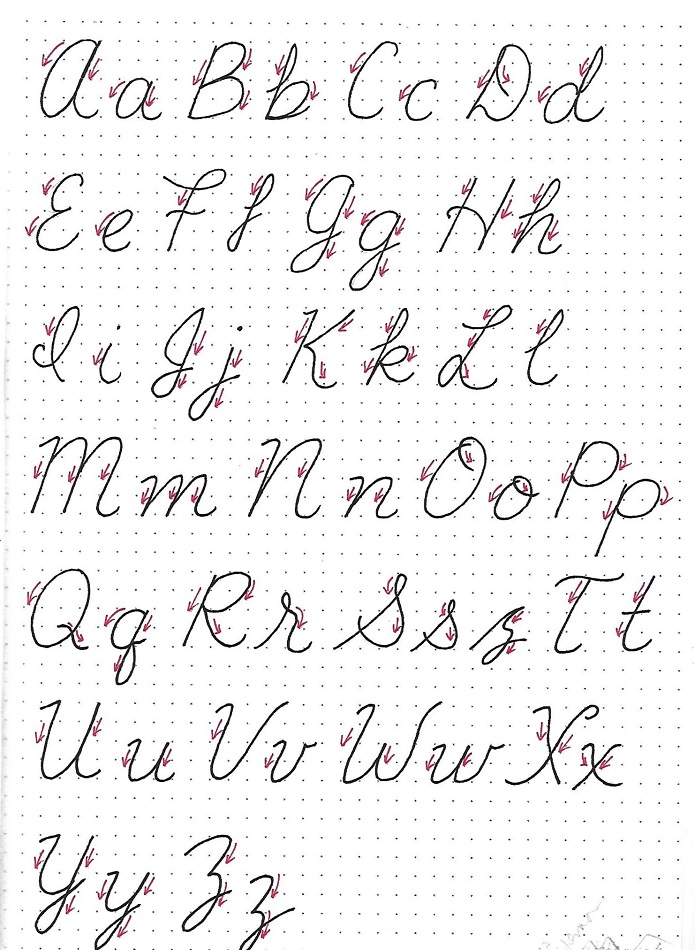
Draw out a basic script alphabet. Then with a different color of pen mark arrows ONLY along the lines that are downstrokes. If you’ve used some of the alternative letter forms, use the guidelines above to define the downstrokes in your letters.
| Draw out a full script alphabet again. Using the downstroke guide you created yesterday, add a second line to all the downstrokes. Work on keeping the line gap consistent throughout. Also, be careful to blend your dual lines together when they join at the upper or lower curve of a letter.
There are a couple of letters where ALL the lines are downstrokes (K and X). These can look heavier than the other letters so you may elect to leave the second stroke as a single line. Try it both ways and choose the one you like.
|
(Yes, on my sample, I put the double stroke on the ‘I’ on the wrong line. It doesn’t look horrible, so it stays!)
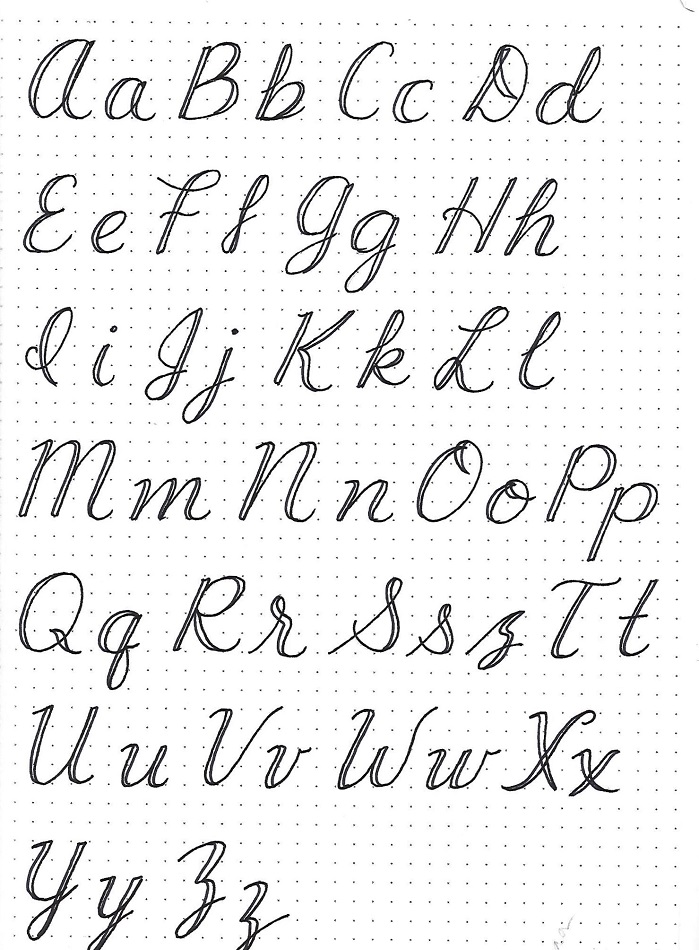
| I want you to write out the script alphabet again. I know it seems redundant, but I want you to have the complete range of steps in samples when you finish this series.
|
Again, add the double lines to the downstrokes. Then use your pen to color between the lines. You can really see the heaviness of the K and X once you get the fill done. Try it out with one of the strokes as a single line and see if you like it better that way. Mark the one you will use as your personal style.

| Select a scripture in either Titus or Philemon on which you can letter using the faux-brush script. When you are lettering small like this, you may wish to use a finer-tipped pen. Use a small caps font for some of those connecting words to save space.
Don’t forget to give some weight to your punctuation by thickening the lines on them, too.
|
This sample page also has the addition of the poppies from this week’s Drawing Room.
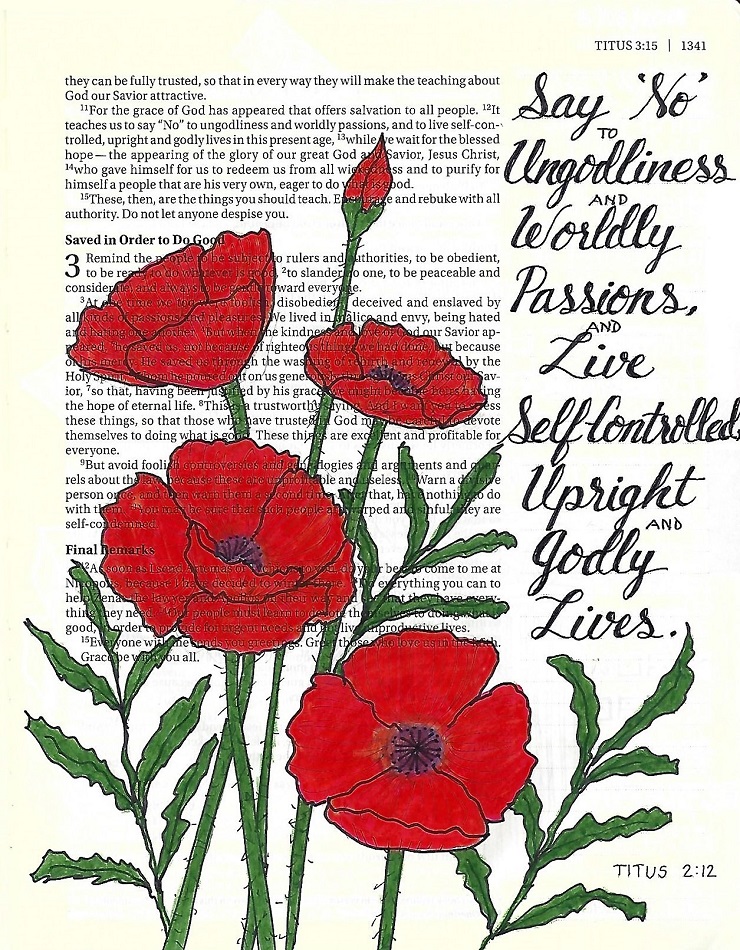
Not only did the lettering turn out great, but those poppies are really beautiful.
Ddd
