« May 2008 »
S M T W T F S
1 2 3
4 5 6 7 8 9 10
11 12 13 14 15 16 17
18 19 20 21 22 23 24
25 26 27 28 29 30 31
You are not logged in. Log in
Entries by Topic
All topics  «
3D paperwork
A - Z challenge 5
A - Z challenge 7
A - Z challenge round 4
A to Z challenge round 3
A to Z round 2
A to Z round 6
A-Z round 1
Around the House
Art Challenges
Artist Trading Cards
Backgrounds
Beads
Bible Journaling
Books
Boxes
Collage
Color Challenge
Coloring
cookbook
Die Cuts
Digital Projects
Digital Stamps
Drawing
Dry Embossing
Fabric Stuff
Fantastic Folds
Field Trip
Home Decor
How Does Your Garden Grow?
Hymnal Art
In The Kitchen
In the studio
Jewelry
Lettering
Links
Multi-Technique
Music to Work By
Musings
Nail Art
New Work
Online Class
Other Hobbies
Other Projects
Painting
Paper Embroidery
Paper Piecing
Photo
Pretty Paper
Quilting
Random
reading
Scrap Recovery
scrapbooking
Sewing
Sketch Challenge
Some Backlog
Stamping
Stencils
Stickers
Supplies
Teabag Folding
Techniques
Testing
tips and tricks
Tutorial
Web resources
Welcome to my Blog
Work By My Friends
workflow
Writing
Blog Tools
Edit your Blog
Build a Blog
RSS Feed
View Profile
Group One
In & Out of Studio 3D
Friday, 16 May 2008
G is for Grunge
Topic: A to Z round 6

This was a tough one for me because I don't lean toward grunge, worn, rough-looking art. I did have these rusty metal garden pieces given to me some years ago. This was the perfect opportunity to use them and I elected to do a distress background on a collection of tags to showcase them. A crackle-paint printed scrapbook paper serves as the background. 

Of course, I had to try to pretty it up somehow so I used metal flower brads in each of the tags' holes and added a clear rhinestone to each of them. The text is a vellum sticker. I used a moss green Sharpie marker to outline each of the tags and the text.

Ddd studio3d@ccwebster.net


Posted by studio3d@ccgmail.net at 6:00 AM PDT
Thursday, 15 May 2008
F is for Fabric
Topic: A to Z round 6

I have made octogon boxes for several years. I decided to make one for the 'Fabric' theme and show the process as well.

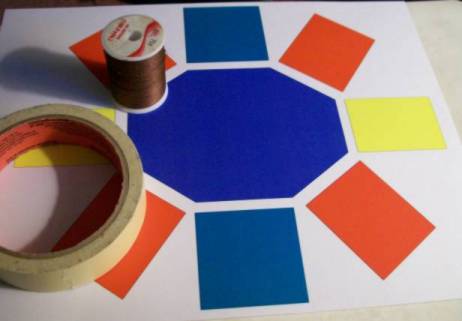
I began by creating a pattern on the computer. The key to this is that the side pieces must all be the same height and the width must match the corresponding side. Then you note on each block how many must be cut. You will cut twice as many as shown on your layout PLUS another double set of the center piece for your lid.

Other needs are thread, needle (curved would be great), and masking tape.

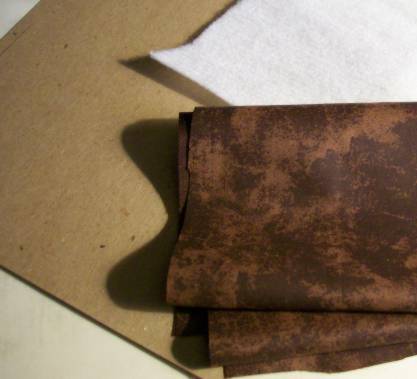
Choose your fabric (mine is a mock leather), very thin batting, and chipboard. The chipboard must be stiff enough to not bend easily but not too thick as it will make final construction difficult.

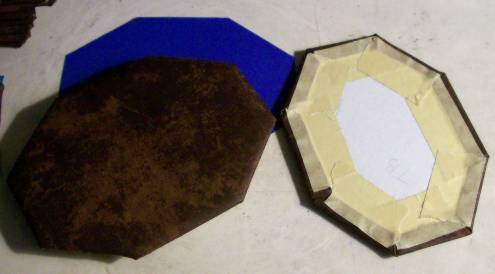
After cutting out all the pattern pieces of chipboard and batting you cut them of the fabric leaving a half inch of margin all around. You make a stack of 1) fabric face down 2) batting centered on fabric 3) chipboard on batting. Then you turn in first the corners then each side while holding down each turn with masking tape as you go. Do not pull fabric very tight as you will need it to have a bit of give for the stitching.


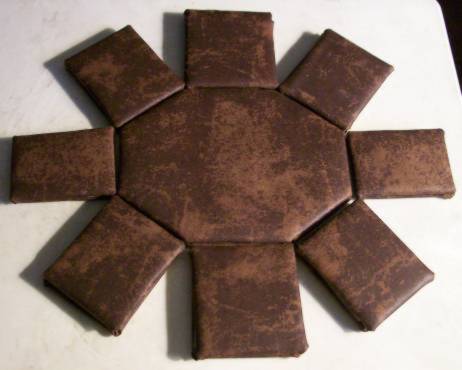
Lay a set of matching pieces with wrong sides together and blind-stitch all edges together.

The side pieces are stitched one by one around the perimeter using the blind stitch. Then they are folded up and the side seams are also stitched with blind-stitch.

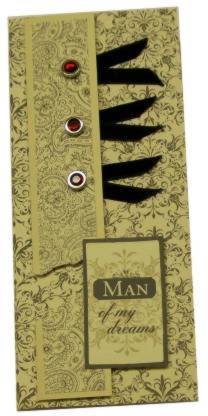
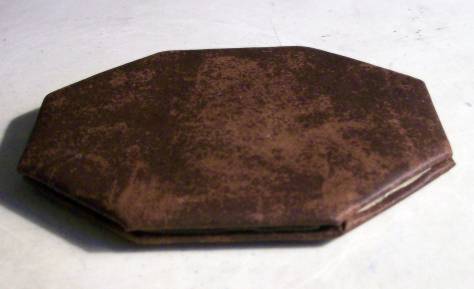
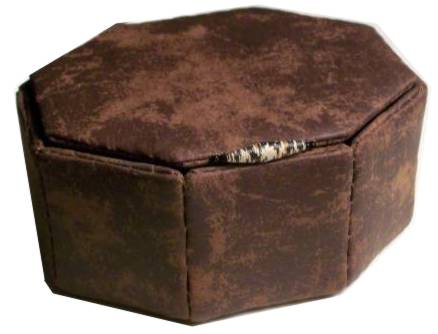
Finally, blind-stitch one long side of the lid onto the box. Attach a bead, button or other desired fob on the front edge of the lid to allow you to open the box but not allow the lid to drop down into the box.

I have sometimes added buttons as feet on these boxes, but with the distressed leather look of this one decided to skip them this time.

Ddd studio3d@ccwebster.net


Posted by studio3d@ccgmail.net at 6:00 AM PDT
Wednesday, 14 May 2008
E is for Ephemera
Topic: A to Z round 6

Lots of reproduction antique text stained with Tea Dye distressing ink to unify it... torn and layered... text stickers... swirly scrapbook paper... 

...that's how to make a Father's Day card.

 Inside, another piece of antiqued paper with a 'definition' block about fathers.

Ddd studio3d@ccwebster.net


Posted by studio3d@ccgmail.net at 6:00 AM PDT
Tuesday, 13 May 2008
D is for Die Cuts
Topic: A to Z round 6

5 die cuts, actually (cardstock, background paper, scallop, purple circle, and purple square). Add in a paper doily, ribbon, a rub-on greeting and a flower brad.

Ddd studio3d@ccwebster.net


Posted by studio3d@ccgmail.net at 6:00 AM PDT
Monday, 12 May 2008
C is for Cornucopia
Topic: A to Z round 6

I made a miniature print (7 of them actually) of a coloring page and colored each with watercolor markers. A little more was cut out of the background of successive prints. These were curled at the edges and mounted together using silicone adhesive. 

In this close-up you can see the layers.

I mounted on burgundy cardstock and framed the corners with gold peel-offs.

Ddd studio3d@ccwebster.net


Posted by studio3d@ccgmail.net at 6:00 AM PDT
Sunday, 11 May 2008
B is for Beedz
Topic: A to Z round 6

Beedz are those itty-bitty glass beads without holes. I used a print of a Japanese woodcut, applied redline tape cut to the shape of the whitecaps, and then pressed the clear Beedz on. I sprinkeld ultra-fine glitter into the crevices.

Here is a closeup


Ddd studio3d@ccwebster.net


Posted by studio3d@ccgmail.net at 6:00 AM PDT
Saturday, 10 May 2008
A is for Adventure
Topic: A to Z round 6

When you get a lot of travel brochures you have access to a lot of great images for use on cards. These explorers are a great focal piece for this adventure card.

Rubberstamped maps and compases form the background. 

Fabric stickers are used for the text.

Ddd studio3d@ccwebster.net


Posted by studio3d@ccgmail.net at 6:00 AM PDT
Friday, 9 May 2008
Z is for Zenith
Topic: A - Z challenge 5

You got it - it's a TV (Zenith brand of course.) I printed the graphic, cut out the screen and inserted some 'static' patterned paper behind. The fish jumping out of the screen is a rub-on. Text is a sticker.

Ddd studio3d@ccwebster.net


Posted by studio3d@ccgmail.net at 6:00 AM PDT
Thursday, 8 May 2008
Y is for Yankee
Topic: A - Z challenge 5

Three elements come together to make up this themed card: The song Yankee Doodle, A graphic of Yankee Noodles, and The fife and drum corp playing Yankee Doodle. 

Ddd studio3d@ccwebster.net


Posted by studio3d@ccgmail.net at 6:00 AM PDT
Wednesday, 7 May 2008
X is for Xylophone
Topic: A - Z challenge 5

Yep, it's paper! The keys are cut of cardstock, holes punched, they are rounded over a dowel, then brads inserted for decoration. I used silicone glue to align the keys on two pieces of woodgrain cardstock. Finally, the whole is mounted on card covered with patterned scrapbook paper. 

The hammers are created with bamboo skewers and buttons with the shanks clipped off, both glued with silicone.

Ddd studio3d@ccwebster.net


Posted by studio3d@ccgmail.net at 6:00 AM PDT
Tuesday, 6 May 2008
W is for Walnut Ink
Topic: A - Z challenge 5

I created this faux file folder and decorated it with office supples including a label. Then I mixed up some walnut ink and used my mug to create coffee rings.

Inside has another piece of lined paper with a paper clip on the corner and another coffee ring. When the card is to be sent I will add an appropriate message on the lined paper inside.

Ddd studio3d@ccwebster.net


Posted by studio3d@ccgmail.net at 6:00 AM PDT
Monday, 5 May 2008
V is for Versamark
Topic: A - Z challenge 5

I stamped on white cardstock with Versamark and then applied chalks a little bit at a time then burnished it in, also with my finger. 

I made two - while I had all the supplies out anyway.


Ddd studio3d@ccwebster.net


Posted by studio3d@ccgmail.net at 6:00 AM PDT
Sunday, 4 May 2008
U is for Uvula
Topic: A - Z challenge 5

OK, I admit it. This was NOT one of my ideas when brainstorming the categories for this challenge. DH always shouts out 'UVULA' when anybody asks for a word that starts with 'U'. He just thinks it sounds funny.

So this word made it to the list and I pushed it back till I couldn't avoid it any longer. LOL!

For those NOT in the know, the uvula is that little fleshy thing that hangs down in the back of your throat - and the star of this card. 

Ddd Studio3d@ccwebster.net


Posted by studio3d@ccgmail.net at 6:00 AM PDT
Saturday, 3 May 2008
T is for Tiles
Topic: A - Z challenge 5

Thanks to my mom I had these 4-inch ceramic tiles in my supply closet. I stamped with my handcarved hummingbird and added three partial impressions of a flower all in Staz-On. 

I used three shades of Sharpie for each flower and Sharpies for the bird, blending as needed to get the right coloring.

Each tile is painted gold on the sides, using a Krylon leafing pen. Then the tiles are sprayed with two coats of acrylic sealer.

The last step was to glue foam dots to the bottom so they will not scratch the furniture when they are used as coasters.

Ddd studio3d@ccwebster.net


Posted by studio3d@ccgmail.net at 6:00 AM PDT
Friday, 2 May 2008
S is for Slit
Topic: A - Z challenge 5

Slits cut in a pattern allow ribbon to be woven into a shape. It was too difficult to continue on with a whole border as planned so I cut this strip and mounted it alone with another ribbon embellishment. Coordinating cardstocks double-mount it. 

Once again, a sticker furnishes the text.

Ddd studio3d@ccwebster.net


Posted by studio3d@ccgmail.net at 6:00 AM PDT
Thursday, 1 May 2008
R is for Ribbon
Topic: A - Z challenge 5

This is made from the same kit of papers as yesterday's quilt card. I used velvet ribbon to make these little 'flags' and mounted them under a matted strip of paper. The rhinestone brads are for show as they do not actually anchor the ribbon. 

Ddd studio3d@ccwebster.net


Posted by studio3d@ccgmail.net at 6:00 AM PDT
Wednesday, 30 April 2008
Q is for Quilt
Topic: A - Z challenge 5

This type of quilt is made with paper by mounting strips behind a square aperture. It looks like a little quilt block. 

Ddd studio3d@ccwebster.net


Posted by studio3d@ccgmail.net at 6:00 AM PDT
Tuesday, 29 April 2008
P is for Papermaking
Topic: A - Z challenge 5

This piece of handmade paper was run through the Cuttlebug and the raised areas were rubbed with a distressing ink pad. The resulting colors went so well with this calendar illustration that I trimmed it up and simply added frames in complementary colors and a text sticker. 

Ddd studio3d@ccwebster.net


Posted by studio3d@ccgmail.net at 6:00 AM PDT
Monday, 28 April 2008
O is for Onyx
Topic: A - Z challenge 5

I've always thought of onyx as being a black stone but, when I researched it online, I found that it comes in many colors more commonly than black and they often are banded or resemble marble.

I followed the look of one illustration I found and duplicated the stone using alcohol inks and blending solution on a non-stick mat, smooshing glossy cardstock onto it and drying with a heat tool. 

This piece of the finished background looked like water so I added stickers and mounted it to create this underwater scene.

Ddd studio3d@ccwebster.net


Posted by studio3d@ccgmail.net at 6:00 AM PDT
Sunday, 27 April 2008
N is for Neon
Topic: A - Z challenge 5

Though not as obvious from the photo the colors in the picture I used are really eye-popping, neon, bright orange and yellow.  It was simple to trim the illustration, mount on cardstock, add some stickers and an eyelet with ribbon.

Ddd studio3d@ccwebster.net


Posted by studio3d@ccgmail.net at 6:00 AM PDT

Newer | Latest | Older