Friday, 3 October 2008
Wanna Do It Yourself?
Topic: Web resources
I found this resource for card ideas and instructions a long time ago and it is still there! That's saying something in the world of the Internet where things change all the time.
The site http://www.hgtv.com/hgtv/cr_paper_crafts_cards/0,1788,HGTV_3290,00.html will present a menu of card ideas for which instructions, tutorials, and/or video were presented on HGTV. A variety of shows are represented in the list.
Check it out. You're sure to find something interesting to watch.
Ddd
Posted by studio3d@ccgmail.net
at 6:00 AM PDT
Thursday, 2 October 2008
And AGAIN with the Orange Tulips
Topic: New Work
I've used my square punch on the orange tulips to create a grid layout. Then I edged each with black so they would blend in with the background which is black cardstock run thru the Cuttlebug offset to leave an unembossed border at right and bottom. This was all layered over orange cardstock.
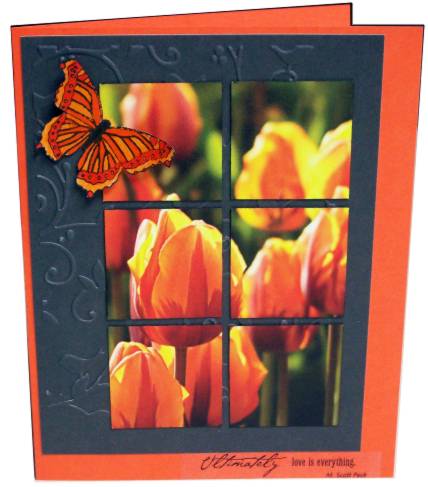
The butterfly is a handcolored rubber stamp image and the text is a clear sticker.
Ddd
Posted by studio3d@ccgmail.net
at 6:00 AM PDT
Wednesday, 1 October 2008
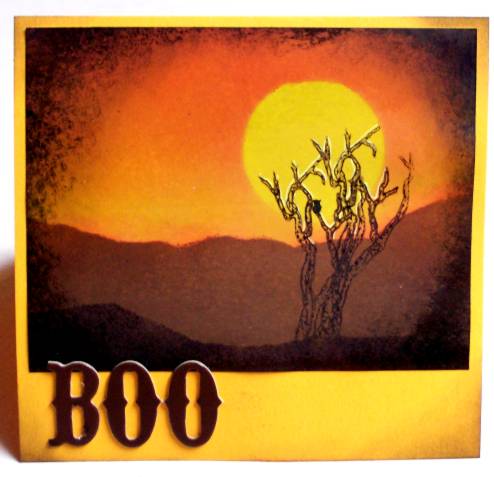
More Brayer Art
Topic: New Work
I made up this brayer card for a challenge to 'use only orange and brown'. I used masks for the moon and for the horizon and foreground. Some texture is created with sponging.
Ddd
Posted by studio3d@ccgmail.net
at 6:00 AM PDT
Tuesday, 30 September 2008
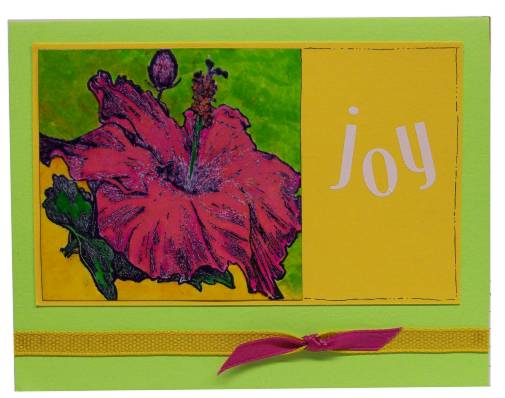
Floral Joy
Topic: New Work
The hibiscus stamp is back. This time I used watercolor markers in the pink to purple range. Greens and golds were used for the background. I banded the card with a black marker and carried the line over to grame the gold card at the right.
I added a double ribbon as a bottom border and used rub-ons to add the white text.
Ddd
Posted by studio3d@ccgmail.net
at 6:00 AM PDT
Monday, 29 September 2008
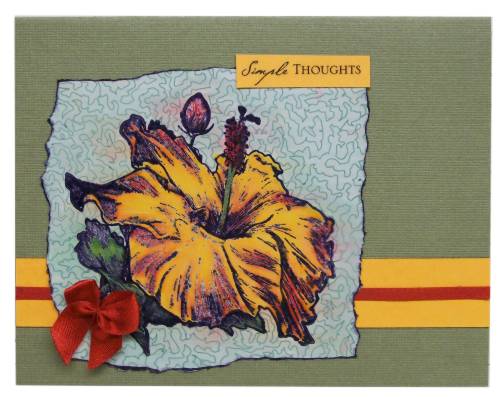
Simple
Topic: New Work
This stamped hibiscus was colored with watercolor markers and blended. I started doodling in the background with a sage green marker and kept it up until it was all filled in. I then used a very pale blue to blend the background and to pull some of the flower color out for shadowing.
After I tore the piece out I edged it with black and mounted over a strip of golden card with a fine red ribbon centered in it. The clear text sticker was applied to the same golden cardstock before placing and a single red bow finishes it off.
Ddd
Posted by studio3d@ccgmail.net
at 6:00 AM PDT
Sunday, 28 September 2008
Winter Wonderland
Topic: New Work
I chose to not color this stamped image as the white background fits with the theme and the black and white scrapbook elements. Silver peel-off stickers are used for borders as well as corners.
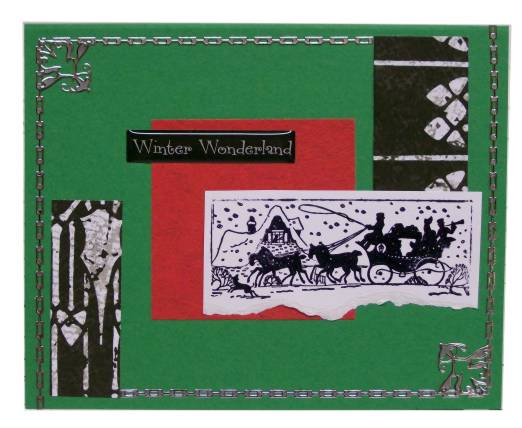
The text is a puffy acrylic sticker.
Ddd
Posted by studio3d@ccgmail.net
at 6:00 AM PDT
Saturday, 27 September 2008
Carried Away With Coloring
Topic: New Work
First I stamped and embossed the roses (hand-carved stamp). It went a little nuts from there!
I colored the roses with Sharpies and blended them, then did the same for the table. Bit by bit I kept adding to the background and ended up with this green and purple wallpaper.
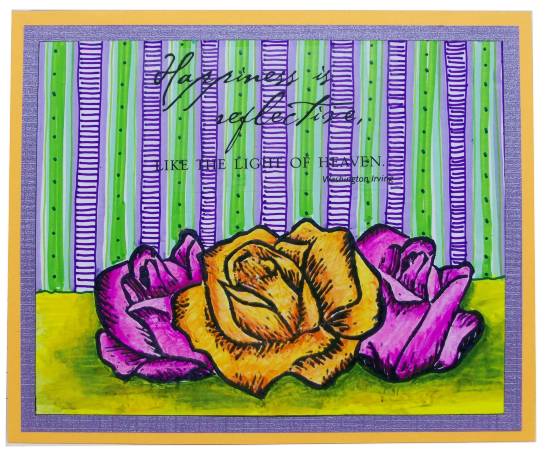
I chose a textured purple paper and a golden cardstock for mounting. The text is a clear sticker.
Ddd
Posted by studio3d@ccgmail.net
at 6:00 AM PDT
Friday, 26 September 2008
Punched Up With Red
Topic: New Work
I used another Verve sketch for this card and elements from the same scrapbook cuttings. After coloring the floral stamp with watercolor markers I chose the green background cardstock to match it. The text is a clear sticker.

Ddd
Posted by studio3d@ccgmail.net
at 6:00 AM PDT
Thursday, 25 September 2008
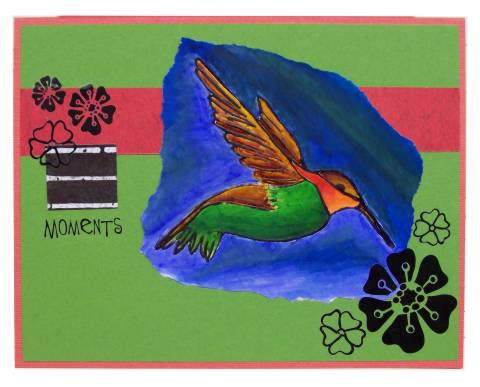
Hummingbird Moments
Topic: New Work
This is another of my hand-carved stamps colored with Sharpies. I used cardstock colors and elements to play up the features of the bird. I found these blakc-and-white rub-on flowers and scattered them around the bird. A text rub-on adds the theme.
Ddd
Posted by studio3d@ccgmail.net
at 6:00 AM PDT
Wednesday, 24 September 2008
Drama In Stamps
Topic: New Work
This is the start of a new series where I made cards which include a stamped element. The stamps were all stamped with black and embossed with clear detail powder before coloring.
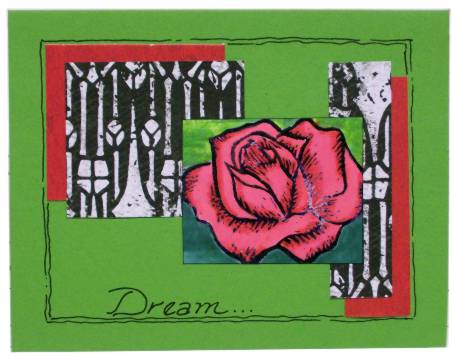
This one is one of my hand-carved stamps which has been stamped on glossy white cardstock and colored with Sharpies. I used a layout from a Verve sketch and added the elements in red and black and white as well as a double fine line and hand-written text.
Ddd
Posted by studio3d@ccgmail.net
at 6:00 AM PDT
Tuesday, 23 September 2008
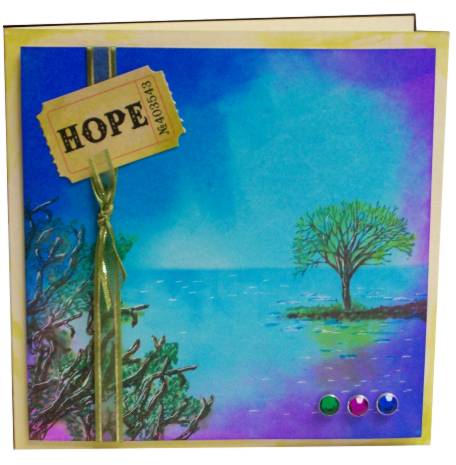
A New Hope
Topic: New Work
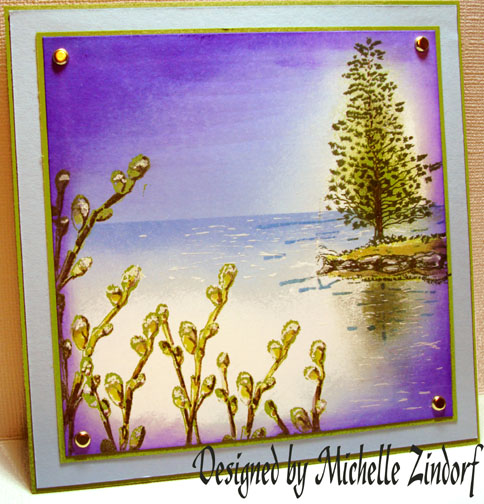
I've been following a blog by Michelle Zindorf at http://zindorf.blogs.splitcoaststampers.com/ where she presents almost daily tutorials on making cards with brayer art.
I chose a card design that I wanted to try but of course I didn't have the ink colors she used, the stamps she used, the sponge she used... What I DID have was a brayer.
So I took a whack at it and this is my creation:
This is Michelle's tutorial card:
To mine I added some ribbon, rhinestone brads, and a text ticker. The background card and ticker were watercolored lightly with some ink to bring it into the color family of the illustration.
If you'd like to see the original instructions it is tutorial #110 which may be found here: http://zindorf.blogs.splitcoaststampers.com/2008/08/28/willow-lake-tutorial-110/
Ddd
Posted by studio3d@ccgmail.net
at 6:00 AM PDT
Monday, 22 September 2008
Apple Harvest Decorations
Topic: Other Hobbies
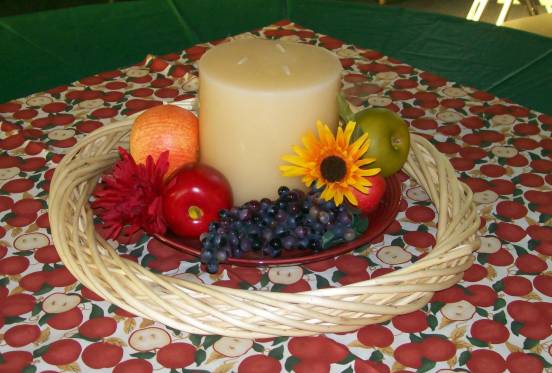
This last weekend was a ladies event at church. I was asked to do the decorations and chose to do an 'apple harvest' theme. The fabric was from JoAnn Fabrics, the candles I had left over from a previous project, and everything else (frupt, plates, wreaths) was from Dollar Tree!
This is the centerpiece used on 8 round tables:
This is the topper for the piano:
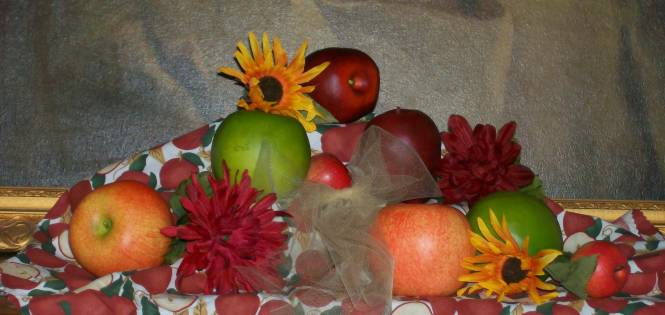
This is the backdrop for the food table:

Ddd
Posted by studio3d@ccgmail.net
at 6:00 AM PDT
Sunday, 21 September 2008
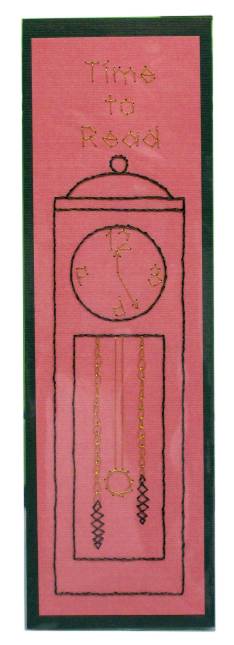
Time Running Backward
Topic: New Work
Well, here's one I will have to tear apart and re-stitch! I didn't notice until insertng it into the plastic sleeve that I had reversed the 6 and the 9 while stitching upside down! LOL!
Ddd
Posted by studio3d@ccgmail.net
at 6:00 AM PDT
Saturday, 20 September 2008
Play Ball!
Topic: New Work
I love the casualness of this pattern which is really a 3D construction. The glove is stitched on a crackle printed scrapbook paper which makes it look well-used. Then it is trimmed close and mounted with pop-dots. I used a scrapbook paper that resembles worn denim.
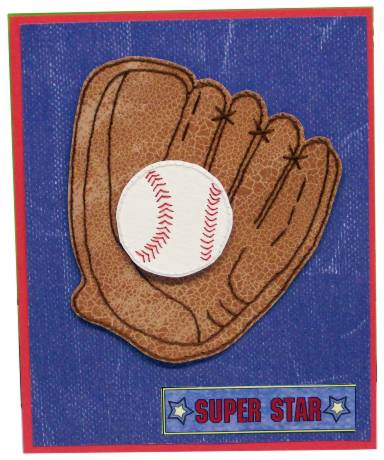
The ball is stitched on watercolor paper as it has the texture I like for the ball. Then it is trimmed close to the stitching and mounted on pop-dots as well. The banner is a sticker.
Ddd
Posted by studio3d@ccgmail.net
at 6:00 AM PDT
Friday, 19 September 2008
The Leaves are Falling
Topic: New Work
I wanted to create a 'how I create patterns' display for my stitched cards presentation. So I imported this maple leaf into my program and printed up the steps as I created this pattern.
Then I stitched it up on red cardstock in golden thread and mounted on multiple layers of fall colors and gold metallic cardstocks. On the main background I imprinted swirls with the Cuttlebug to evoke winds and falling leaves.

The greeting is a Cuttlebug greeting plate which was imprinted on gold metallic, cut out, mounted on colored cardstock and trimmed again.
Ddd
Posted by studio3d@ccgmail.net
at 6:00 AM PDT
Thursday, 18 September 2008
Antique Rose
Topic: New Work
I selected the crackle printed scrapbook paper and pricked out this pattern first. Then when I went looking for the right thread discovered every pink I had was either too orange, too blue, too wahtever. I decided on white and then brought in the cream petal edges in keeping with the antique theme.
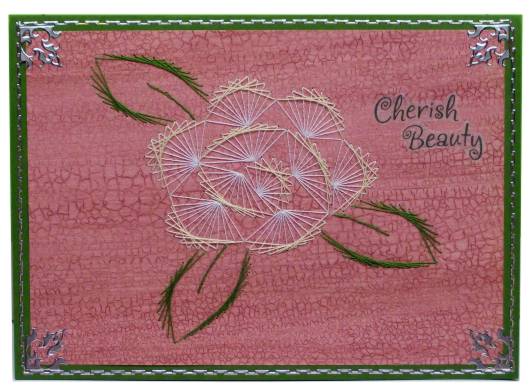
I finished with silver peeloff borders and corners and then added vellum stickers for text.
Ddd
Posted by studio3d@ccgmail.net
at 6:00 AM PDT
Wednesday, 17 September 2008
Sweet Violets
Topic: New Work
I don't do many stitching cards that are just borders but in trying to stitch up as many of my patterns as possible, this wone was fast to do! the center illustration and the greeting are a collage of vellum stickers.
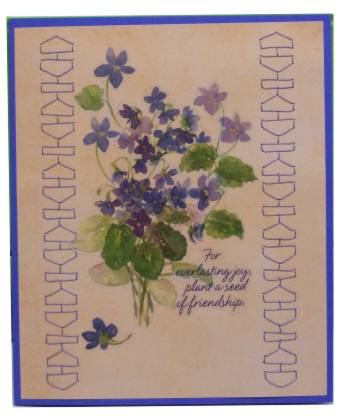
It is stitched on scrapbook paper and mounted on card to match the flowers.
Ddd
Posted by studio3d@ccgmail.net
at 6:00 AM PDT
Tuesday, 16 September 2008
Criss Cross
Topic: New Work
This is the first time stitching directly on an embossed background. This pattern of hearts was made with the Cuttlebug.
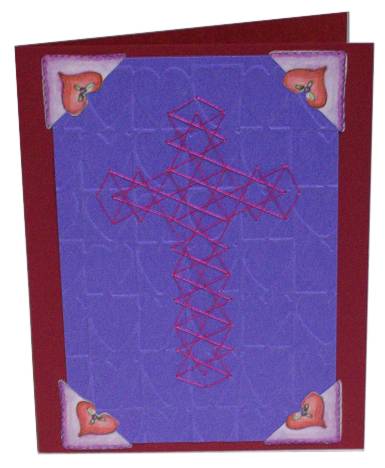
The purple and the hearts are repeated in the corner stickers.
Ddd
Posted by studio3d@ccgmail.net
at 6:00 AM PDT
Monday, 15 September 2008
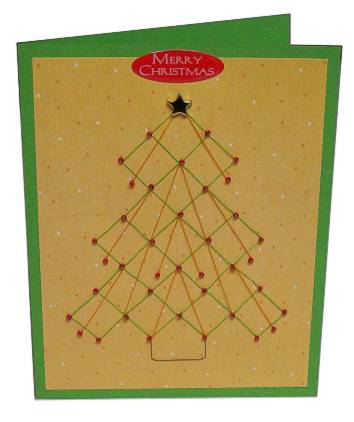
Deck the Halls
Topic: New Work
A puffy acrylic sticker, a gold star brad and red seed beads pull this card together. The threads are actually brighter green and gold than they appear here and are stitched on a spotted scrapbook paper.
Ddd
Posted by studio3d@ccgmail.net
at 6:00 AM PDT
Sunday, 14 September 2008
Wheeeeeee!
Topic: New Work
I originally designed this with red, green and bright blue colors. But when I found this great background I decided to mute the threads as well. I used a single strand of embroidery floss.
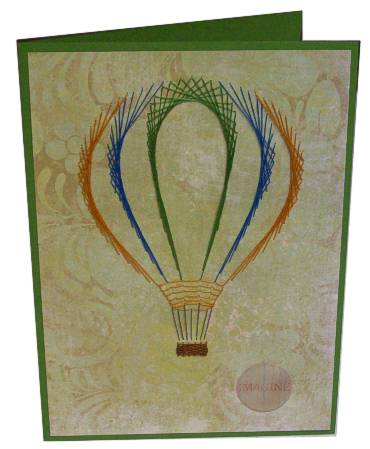
The text is a printed acrylic puffy sticker that says IMAGINE. The background of the sticker works so well with the card background.
Ddd
Posted by studio3d@ccgmail.net
at 6:00 AM PDT
Newer | Latest | Older
