« April 2009 »
S M T W T F S
1 2 3 4
5 6 7 8 9 10 11
12 13 14 15 16 17 18
19 20 21 22 23 24 25
26 27 28 29 30
You are not logged in. Log in
Entries by Topic
All topics  «
3D paperwork
A - Z challenge 5
A - Z challenge 7
A - Z challenge round 4
A to Z challenge round 3
A to Z round 2
A to Z round 6
A-Z round 1
Around the House
Art Challenges
Artist Trading Cards
Backgrounds
Beads
Bible Journaling
Books
Boxes
Collage
Color Challenge
Coloring
cookbook
Die Cuts
Digital Projects
Digital Stamps
Drawing
Dry Embossing
Fabric Stuff
Fantastic Folds
Field Trip
Home Decor
How Does Your Garden Grow?
Hymnal Art
In The Kitchen
In the studio
Jewelry
Lettering
Links
Multi-Technique
Music to Work By
Musings
Nail Art
New Work
Online Class
Other Hobbies
Other Projects
Painting
Paper Embroidery
Paper Piecing
Photo
Pretty Paper
Quilting
Random
reading
Scrap Recovery
scrapbooking
Sewing
Sketch Challenge
Some Backlog
Stamping
Stencils
Stickers
Supplies
Teabag Folding
Techniques
Testing
tips and tricks
Tutorial
Web resources
Welcome to my Blog
Work By My Friends
workflow
Writing
Blog Tools
Edit your Blog
Build a Blog
RSS Feed
View Profile
Group One
In & Out of Studio 3D
Friday, 24 April 2009
Beach Blanket
Topic: New Work

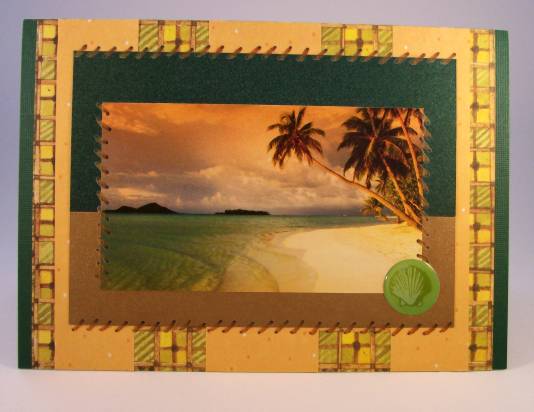
This started with an odd combination of elements but I really like how it turned out. The photo is from my page per day calendar at work. I pulled a piece of green metallic and gold metallic cardstock, butted their edges and then glued on the photo with the split right at the horizon line, in exact opposite of the colors in the photo.

Three golden spotted scrapbook paper strips were glued behind and then a green/gold basketweave print behind that. I used some rubons of stitching to anchor four edges and mounted the whole thing on green cardstock with just the edges showing. 

I added a green seashell puffy acrylic sticker to the lower right.

Ddd


Posted by studio3d@ccgmail.net at 6:00 AM PDT
Thursday, 23 April 2009
She Celebrates
Topic: New Work

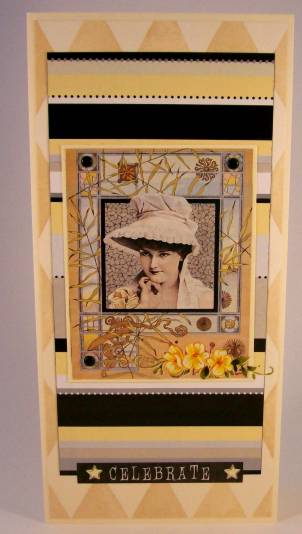
Out of a magazine or catalog some time ago I harvested this art piece. I've mounted it on cream card and then on a decorative paper from a mailing flyer. I used Sharpie on the side edges to maintain the definition between this and the diamond print scrapbook paper underneath.

The artwork actually had text in the lower right corner so I used opaque floral rub-ons to cover the words and added black mini-brads to the other three corners.


The Celebrate text is a sticker and the whole thing is mounted on cream folded cardstock.

Ddd


Posted by studio3d@ccgmail.net at 6:00 AM PDT
Wednesday, 22 April 2009
A Stitch Or Two
Topic: New Work

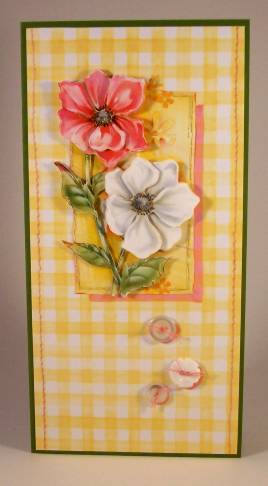
These 3D flowers came with a yellow rectangle background. I attached to yellow gingham paper and used a matching pink watercolor marker to create a drop shadow for it. Along the sides I applied rub-on stitches and then used sticky dots to attach three buttons which I had tied thread through. 

I used that pink marker again to make drop shadows for the buttons.

This is all applied to a folded green card.

Ddd


Posted by studio3d@ccgmail.net at 6:00 AM PDT
Tuesday, 21 April 2009
One Hug At a Time
Topic: New Work

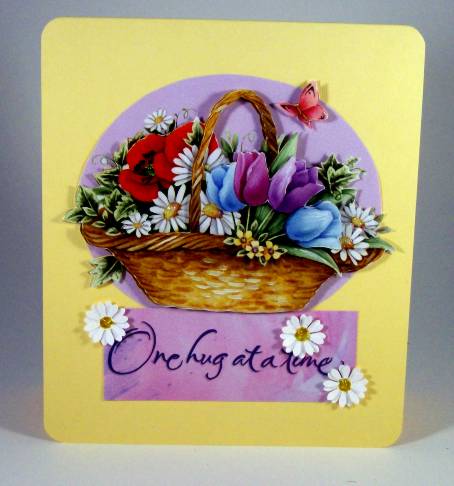
Little basket of hugs! This 3D cutting came with an oval background and I found that I had a text sticker that exactly matched it! I also had some white punched flowers that I stacked and gave them yellow centers to match those in the bouquet. I used Stickles in all of the daisy centers and all the elements are attached to a yellow card with the fold at the top.

I rounded all the corners with a punch.

Ddd


Posted by studio3d@ccgmail.net at 6:00 AM PDT
Monday, 20 April 2009
Rosy Bear
Topic: New Work

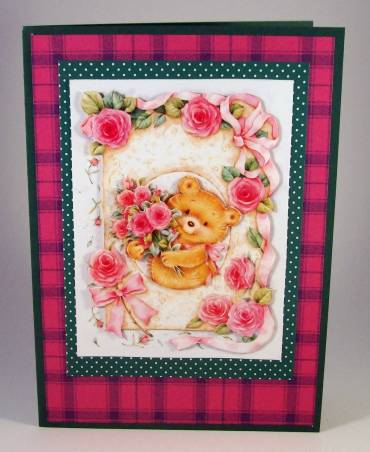
Another little bear today - 3D again. This one came with a built-in frame of florals and beautiful colors. I placed a green polkadot paper behind and then a rosy plaid over dark green folded cardstock. 

I didn't put a greeting on this as it may then be used for a variety of ocassions.

Ddd


Posted by studio3d@ccgmail.net at 6:00 AM PDT
Sunday, 19 April 2009
Polka Dot Lady
Topic: New Work

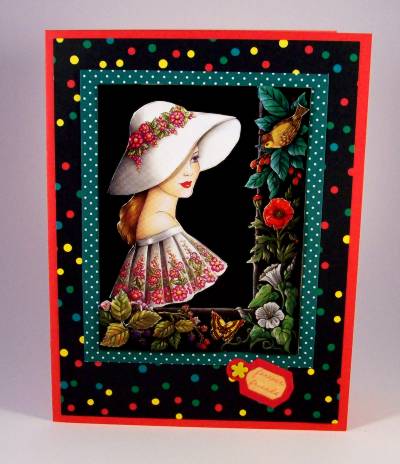
Wow, this is SO totally not my usual style, but I love it! It is another of the 3D pictures from my stash and I mounted it on green polkadots and then on black with multi-colored dots. The card base is red.

I had a little tag 'frame' and tucked a pre-printed text behind it (forever friends) and mounted with a yellow flower brad.

Ddd


Posted by studio3d@ccgmail.net at 6:00 AM PDT
Saturday, 18 April 2009
Celebration Bouquet
Topic: New Work

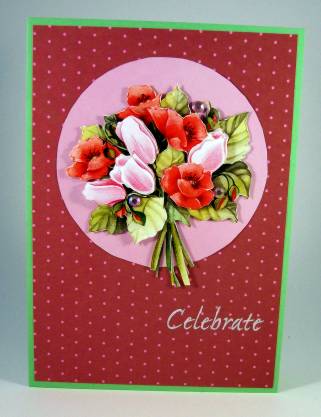
Here's the second 3D element I assembled. I like the round background that was incorporated into this one. I reinforced this with the polkadots on the paper, and they were pink dots, too! Then I added three pink rhinestones as well. 

I used a green folded card base to echo the leaves in the bouquet and applied a white rub-on text.

Ddd


Posted by studio3d@ccgmail.net at 6:00 AM PDT
Friday, 17 April 2009
Baby Bear Hugs
Topic: New Work

I dipped into my big pile of 3D images and spent an evening clipping and stacking several of them and then took them into the studio to find matching designer papers to combine with each of them.

This is the first I finished: 

I call this 'Baby Bear Hugs' as I think it looks like he is holding his blankie. I added a layer of pink but tied two ribbons in blue so it can be used for either a girl or a boy baby. The yellow plaid background is supposed to be the baby blanket.

Ddd


Posted by studio3d@ccgmail.net at 6:00 AM PDT
Thursday, 16 April 2009
Sail Away
Topic: New Work

A perfect card for a guy, this stitched sailboat is from my stash of free patterns. I went with blue thread on blue textured cardstock, mounted on red and white plaid and enhanced with three star brads . The brads were too light so I colored them with Sharpie and then added stickles to them and the flag on the boat. 

The whole thing was glued on a dark red folded card base.

Ddd


Posted by studio3d@ccgmail.net at 6:00 AM PDT
Wednesday, 15 April 2009
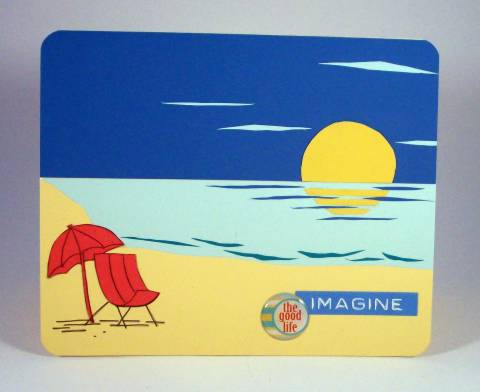
Imagine the Good Life
Topic: New Work

Today I started with some odd materials and made this card from them. What is is? Peel-and-stick paint samples! 

I started by cutting the folded cardstock and built directly on the front. First was the blue sky. I started with this so I would have a straight line for the horizon. Then I added the teal for the ocean by butting it right up against the sky. I cut a freehand water/sand line on the light yellow and stuck it down over the water.

For the sun I cut a circle and then cut a straight line across it. This was stuck down and from the remainder I cut stripes, adhering every other one over the water. From the sky color I cut some free-form strips and added them to the water/sun area. Then I cut some free-form strips from the water color and made them into streaky clouds in the sky.

I had another darker teal which I used to add some free-form 'waves' along the beach. Then I stamped the chair and umbrella directly on the sand/water at the left and stamped it again on the coral paint-chip, cut it out, and stuck it down over the original stamping.

I used a punch to round all the corners and added two text stickers I found in my stash that matched the colors precisely.

Ddd


Posted by studio3d@ccgmail.net at 6:00 AM PDT
Tuesday, 14 April 2009
Home Tweet Home
Topic: New Work

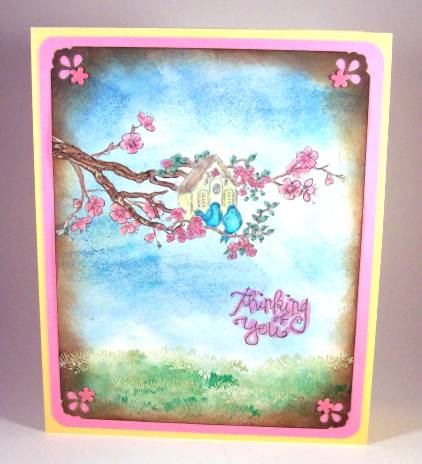
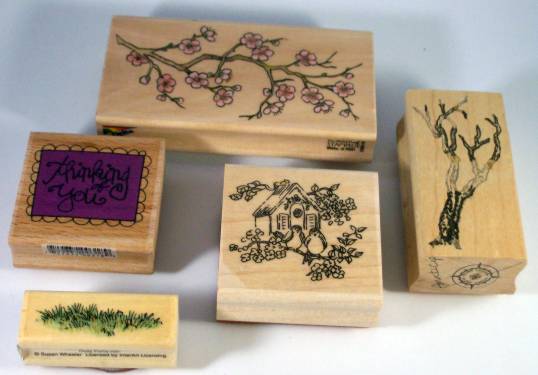
Here is a card I made today with 5 stamps and some techniques I learned from Michelle Zindorf's blog.

I used these 5 stamps

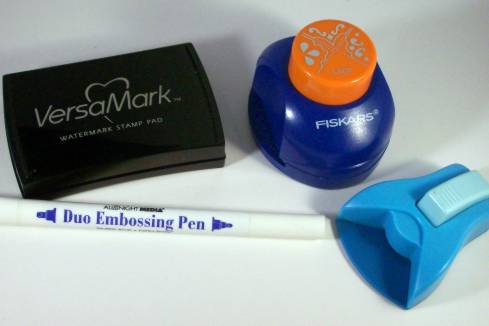
These coloring agents

And these special tools

Here's my process:

Using glossy cardstock I stamped the birdhouse in grey, colored with watercolor markers, colored over it with an embossing pen and embossed with clear detail powder.

Then I stamped the bare tree as a branch using the same grey, colored with light brown, and embossed the same as before.

Finally I stamped three different parts of the flowering branch, just flowers, with the grey ink, colored and embossed.

I dropped down to the bottom of the panel and stamped the grass several times inking up first with Versamark then green dye ink. I embossed these with clear detail powder. Then with a darker green I stamped plain color - no embossing.

I used sponges to color the grassy area background with a third green, used another sponge to color in the sky with various shades of blue and some yellow.

I used walnut ink to sponge a shading all around the edge. I used Sharpie marker to color over the birds then used a blending tool and alcohol to remove a lot of the color off them.

I used dark grey to stamp the greeting (just inking up the center, without the border of the stamp). I used a pink marker to brush over the lettering to enhance it.

I punched the corners with the decorative corner punch. I cut the pink panel and rounded the corners with a punch. The artwork was mounted to the pink panel using pink flower brads and finally, glued these to the folded yellow card base.

Here's the card again for review.

Ddd


Posted by studio3d@ccgmail.net at 6:00 AM PDT
Monday, 13 April 2009
Lip Smackin' Good!
Topic: In The Kitchen

11 for dinner… this was Easter at our house. We were fortunate to have a house full of family and here’s what we served:


Peanut-Apple Salad with dressing of balsamic vinaigrette and honey served on a bed of lettuce leaves with a sprinkling of shredded cheddar cheese.

Potato Salad

Deviled Eggs

Veggie Tray of grape tomatoes, cucumber slices, baby carrots, and radish flowers.

Rolls

Stuffed Chicken Breasts

Stuffed Mushroom Caps with minced ham and cheddar cheese, baked

Rolls

Apple Crisp with Vanilla Ice Cream


Breakfast for 4 of us was Ham and Cheese Omelets and Caramel Pecan Cinnamon Rolls.


Everything was very tasty and I thought I’d share the recipe for the Cinnamon Rolls and the Apple Crisp that I developed by combining and making changes to some others that weren’t quite what I wanted.


CARAMEL PECAN CINNAMON ROLLS


In bread maker pan add the following ingredients in the order listed – ¾ cup plus 2 tablespoons of lukewarm water, 2 tablespoons softened margarine, 2 ½ cups bread machine flour, ¼ cup granulated sugar, 1 teaspoon salt, 1 teaspoon bread machine yeast.

            Set bread maker to make dough only. While it is being processed by the bread maker stir together 6 tablespoons softened margarine, ½ teaspoon salt, ½ cup brown sugar. Spread evenly in the bottom of a buttered 9 x 9 inch square pan. Arrange 36 pecan halves in the pan. Set aside.

            When the dough is ready, turn out onto floured surface and use floured rolling pin to roll into a rectangle 13 x 17 inches. Mix together ¼ cup softened margarine, ¼ cup granulated sugar, 1 teaspoon ground cinnamon, ¼ teaspoon ground nutmeg. Blend well and spread evenly on the rolled out dough. Sprinkle with ½ cup chopped pecans.

            Roll from the narrow end up the length. Dip serrated knife in flour and cut dough into 9 even sections. Place into the 9 x 9 inch pan on top of the pecan halves. Set pan in warm place until doubled in size – roughly 1 hour.

            Bake 35 to 45 minutes in oven preheated to 350 degrees. Immediately invert pan so rolls will release and the caramel drips over them.


APPLE CRISP


            Preheat oven to 425 degrees. In small bowl combine 1 cup regular rolled oats, 2/3 cup packed brown sugar, 2 tablespoons flour, 3 tablespoons melted butter or margarine, 3 tablespoons apple juice. Mix well and set aside.

            Into a 9 x 13 inch baking dish, slice 8-10 cups of peeled apples - I use a mix of Honeycrisp, Gala, Braeburn, Fuji, or Granny Smith.

            Make a mixture of 2 tablespoons granulated sugar, 1 tablespoon cornstarch, ½ teaspoon ground cinnamon and a dash of salt. Sprinkle this over the apples. Pour 1/3 cup apple juice over both. Then sprinkle the whole with the oatmeal mixture and bake for 25 minutes or until bubbly and golden brown. Let stand for at least 15 minutes before serving.


Posted by studio3d@ccgmail.net at 6:00 AM PDT
Sunday, 12 April 2009
Thumb Puppies
Topic: New Work

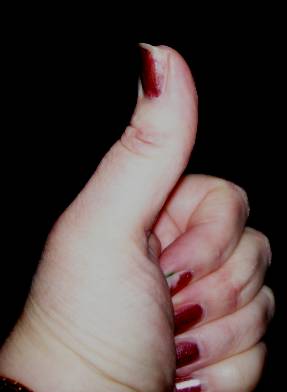
If you have one of these:

You can make a puppy card!

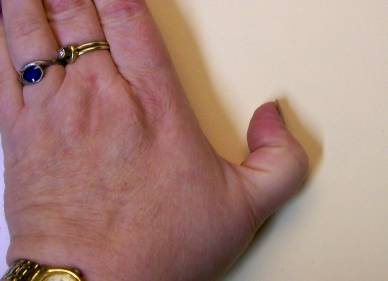
First lay your hand down on a card with you thumb crooked as far as you can.

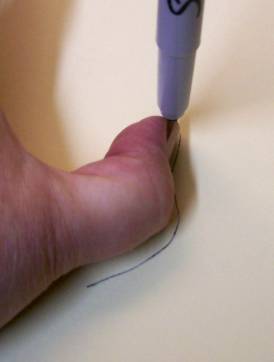
Then use a waterproof pen to trace around it.

 This is what you will have when done:

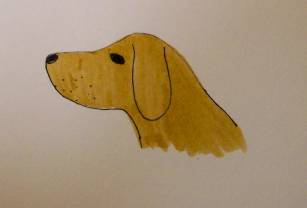
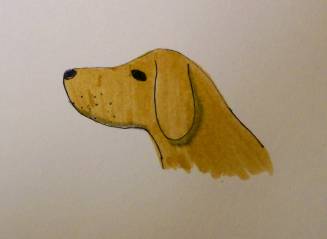
Use your marker to add a floppy ear, a nose and eye. Make a few dots for whiskers.

Use a watercolor marker to color in the whole puppy.

Use a light grey marker to make a shadow under the ear and at the bottom of the chin.

Cut around all the lines that are drawn and tear the neck area.


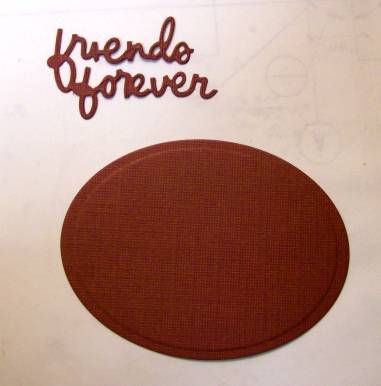
Make some elements to use on a card


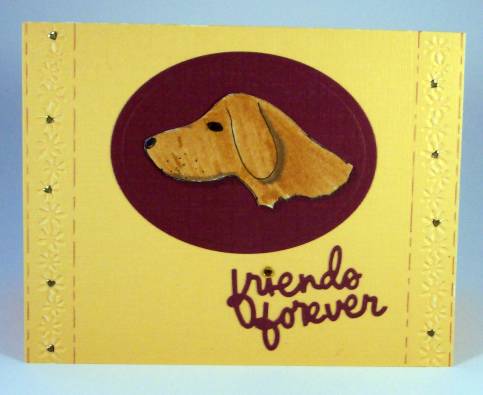
Assemble on a card base, add some embellishments, and you have a simple card with a 'thumb puppy'.

I teach kids to make these thumb puppies all the time. Everyone's puppies will look different because of the different shapes of our thumbs.

Ddd


Posted by studio3d@ccgmail.net at 6:00 AM PDT
Saturday, 11 April 2009
Little Bear's House
Topic: New Work

I have NEVER done any scenic stamping so I decided to give it a try. Two things I learned right off - Don't use a colored (gold) background cardstock as it effects all the colors you put on it and Don't use a texturized cardstock as you don't get crisp clear images.

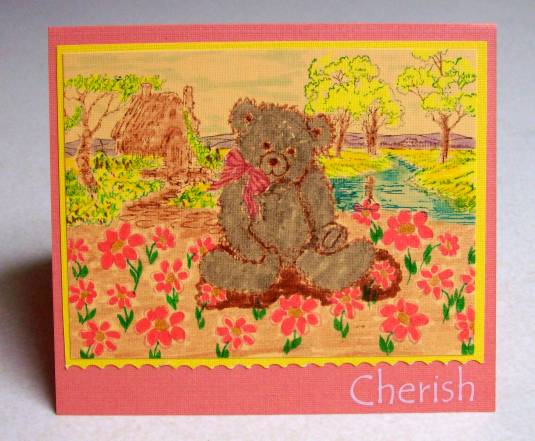
So with those lessons in mind for the FUTURE, here's what I actually did: I used watercolor markers to color just the parts of the bear I wanted to print - basically the outline and features as he is really furry all over. I used a different marker on his bow. 'Huffed' on it and stamped. Stamped again on plain paper to cut out as a mask. Covered bear with mask and stamped field of flowers (one stamp 3.5 times).

I used markers to color in parts of the cottage stamp on the left and the stream image on the right. The mask was removed and I used markers to color in all areas of the card.

The panel was trimmed and backed with a card that I had trimmed on one side with a scallop scissor. Both were placed on a folded card and the rub-on text finishes it off.

Ddd


Posted by studio3d@ccgmail.net at 6:00 AM PDT
Friday, 10 April 2009
Field of Flowers
Topic: New Work

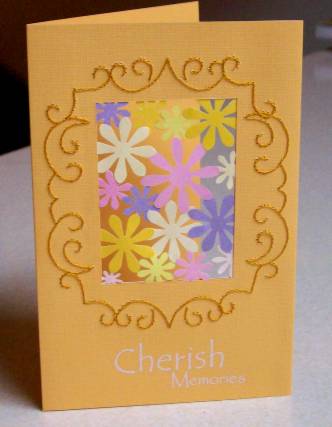
Two groups I belong to had challenges this month. One was to make a card combining paper embroidery and punched flowers. The other was to make a card incorporating flourishes. So I combined the two, meeting both challenges with one card. 

I used a three panel card and did my stitching on the center panel. The design is a combination of different elements of an oval pricking template. Then I folded the panels and cut through the front two making my aperture. After opening the panels back up the punched flowers were glued tip-to-tip to make a lacy insert and then the front panels were glued together. This leaves a finished backing on the embroidered panel.

The text is rub-on.

Ddd


Posted by studio3d@ccgmail.net at 6:00 AM PDT
Thursday, 9 April 2009
Seasonings
Topic: New Work

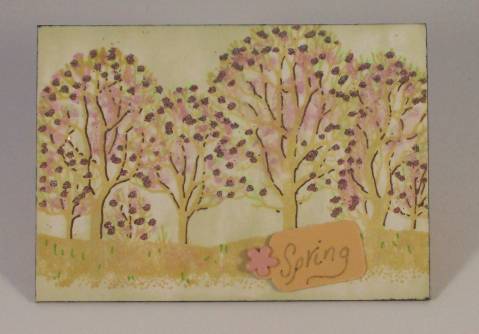
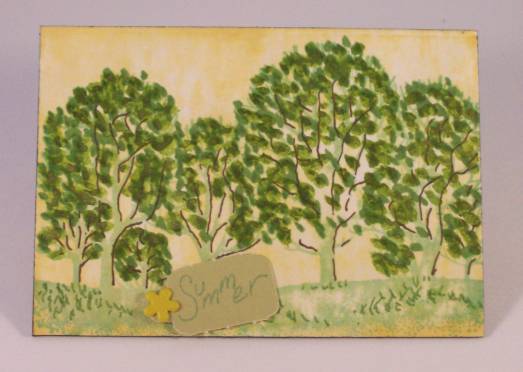
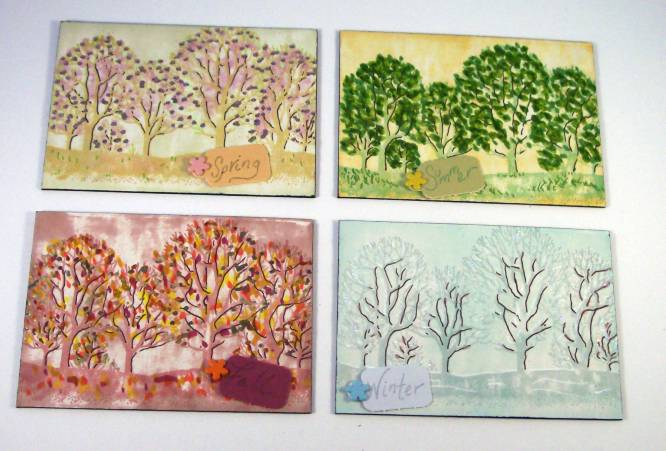
I signed up for a swap to make 4 ATCs to be sent to a single person. I chose to use a single rubber stamp in a range of colors to create the Four Seasons. Each card was toned with a very pale color and the trees stamped in a darker, but similar color. On every one, I used a brown fine-line marker to define the trunks and branches. 

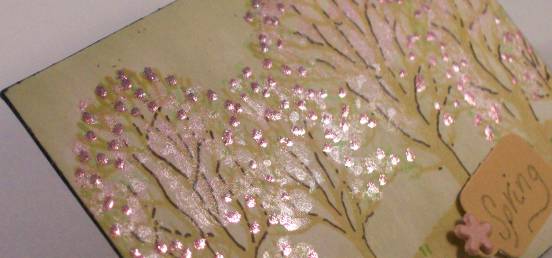
 This is the SPRING card. It uses very pale greens. I used a light green gel pen to put in some light leaves, then used two-way glue to create dots and burnished in pink ultra-fine glitter. Then I used a water-brush to apply a sheen of pink Twinkling H2O.

Here's a close-up that shows the glittery bits.

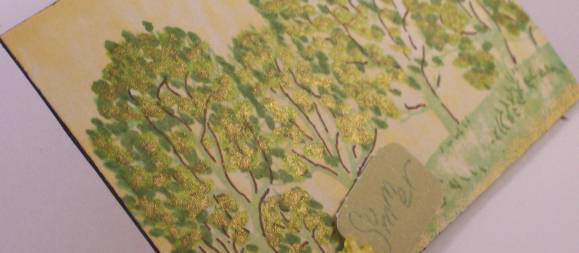
Here is the Summer card. This uses a yellow background and I used a watercolor marker to add more leaves and some grasses. Again, the Twinkling H2O were added, this time in Olive.

Here is the Summer close-up.

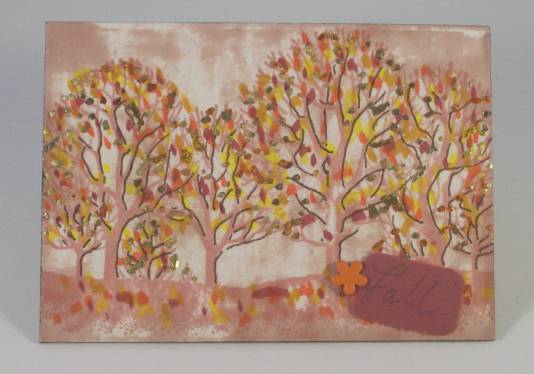
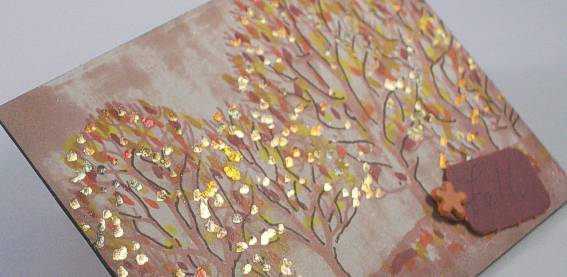
The Fall card has a brown sky and I used a variety of markers to add leaves on the trees as well as the ground. The two-way glue was applied and I burnished on a mixture of metal leafing.


Don't you love the way these leaves shine?

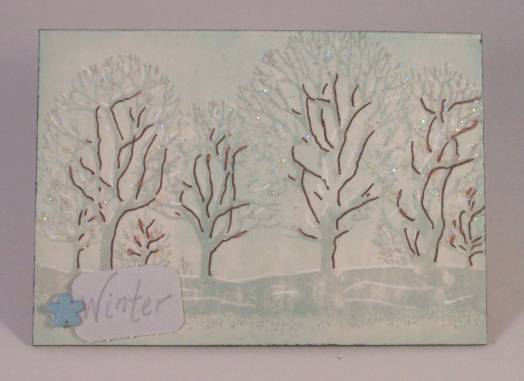
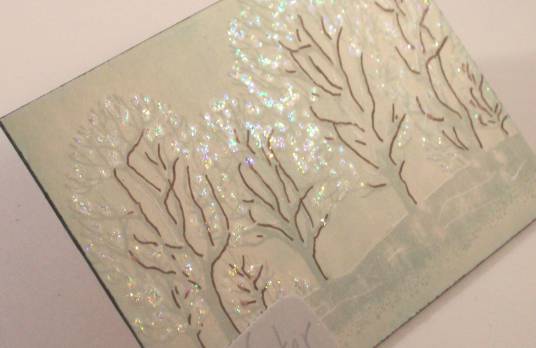
The Winter card is all done in blue tones. I love this one most. I used some white gel pen to put a little snow on the ground and on the branches and then applied Stickles for the shine.

Here is the Winter close-up.

I selected a coordinating mini-tag for each card and threaded a flower brad through the hole only. These each got text added with watercolor marker and the tags were applied with mini-glue dots.

Here is a pic of the Four Seasons all together as a set.

Ddd


Posted by studio3d@ccgmail.net at 6:00 AM PDT
Wednesday, 8 April 2009
Asian Window Panels
Topic: Other Projects

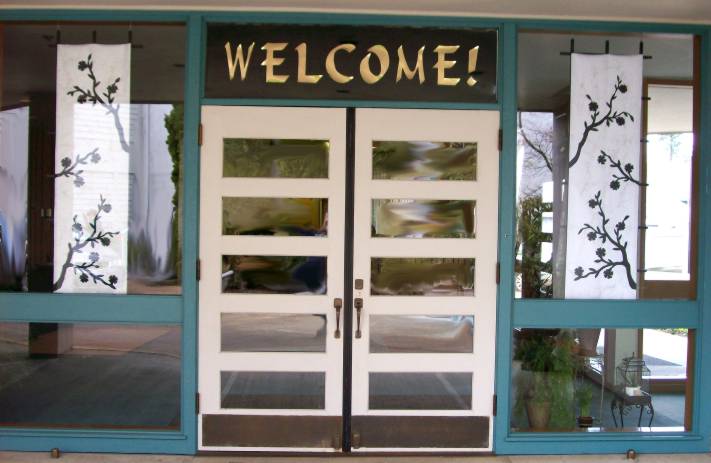
I have been helping with decorations for our "Soul Spa" ladies event at church (recent posts for soap dishes and bath tea packets relate to same event). One of the ladies had picked up some garden trellis and painted it black. Then white paper was attached to the back.

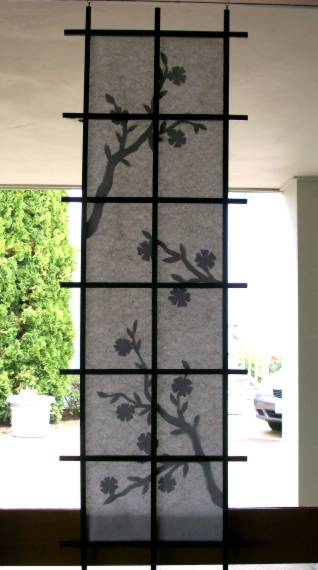
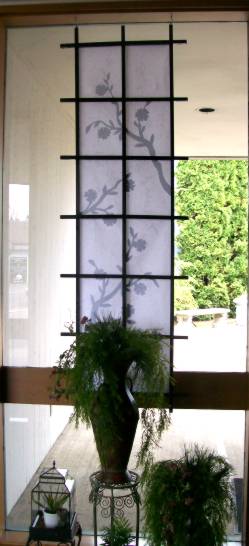
I used gold spray webbing on the back of the white paper and then cut out some blossoming branches from black paper and attached with double-stick tape to the back. These were hung in the windows on either side of one of the entrances with the black cutouts facing outside.

You can see in these two pictures the right and the left panels from the inside of the church. The black cutouts show through as silhouettes. 

Then here is the view from outside. You don't see the black gridwork but only the gold spray webbing and the black branches.


Ddd


Posted by studio3d@ccgmail.net at 6:00 AM PDT
Tuesday, 7 April 2009
With a Little Help from My Friends
Topic: Other Projects

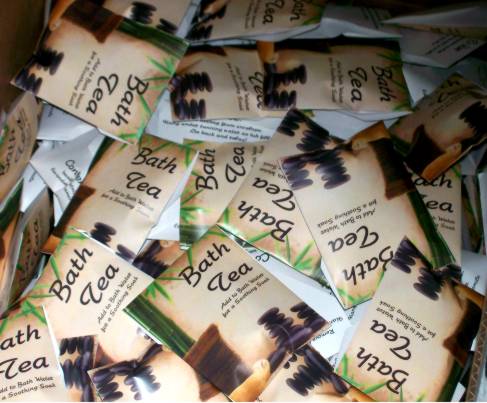
Make 175 color copies; cut 700 edges with scissors; slice 750 slits with a craft knife; make 1400 folds; cut 350 pieces of ribbon; tie 700 knots in ribbon; stir enough lavender, catnip, chamomile, and basil to make 88 cups of herb mix; spend 8 nights in front of the TV accomplishing all the above.

Then, gather together 12 friends for a couple of hours to: staple 1 ribbon end to each of 350 tabs; glue 700 seams to make envelopes; measure 1/4 cup of herb mix into 350 coffe filters; fold 350 filled filters into packets; 350 staple packets to loose end of ribbons; tuck packets into envelopes; glue 350 flaps closed.

The result is 350 Bath Tea packets to be used as table favors at an event with the theme "Soul Spa"!


Ddd


Posted by studio3d@ccgmail.net at 6:00 AM PDT
Monday, 6 April 2009
3D on 3D
Topic: Web resources

I have had some funny email requests for information on "can you give me instructions or advice on how to make a 3-dimensional xxx". I even had one who wanted to know how to paint an illustration on his son's walls so it would LOOK 3-D. I always refer them back to my home page that clearly states that the reason my site is called Studio3D is because of my initials and that I have no special knowledge of 3-dimensional construction just because my initals are DDD.

On the other hand, I do appreciate and work with illustrations that have been cut and stacked to appear 3D on cards. I have been collecting links to sites that offer free cutting sheets. Here's what I have so far:


members.home.nl/jannie57/index/knipvellen.htm


www.purple-design.nl/knipvellen1.htm


http://members.lycos.nl/tinybeijersbergen/photoalbum8.html


community.webshots.com/user/jomoud


debbycliparts.punt.nl/?gr=776854


http://home-and-garden.webshots.com/album/434924294wDpmUP


http://www.memkes-designs.nl/knip-freedownloads.htm


http://s35.photobucket.com/albums/d172/3d_Sheets/2005%20Sheets%20-%20by%20Rosemarie/


http://community.webshots.com/user/d0npen/tags/knipvellen/albums


http://www.webshots.com/search?query=knipvellen+teabag+tiles+3d+decoupage+paper+tole


http://s46.photobucket.com/albums/f148/lisab76/


http://www.3dsheets.tripod.com/


http://s36.photobucket.com/albums/e38/cathy729/


http://s34.photobucket.com/albums/d130/Craftypixiedust/


http://members.lycos.nl/tinybeijersbergen/photoalbum9.html


http://home-and-garden.webshots.com/album/551944789BnxqcZ


http://www.3dkaarten.eu/pagina8.html


http://www.basteln.machtspass.com/3d_schnittbogen.htm


http://s44.photobucket.com/albums/f3/3d_sheets2/


http://thelilacgarden.co.uk/index.html


http://s36.photobucket.com/albums/e38/cathy729/


http://members.lycos.nl/knipvellen/photoalbum.html


http://community.webshots.com/user/d0npen?start=20


http://s48.photobucket.com/albums/f216/DavidTunis/3d%20Decoupage%20Sheets/


http://s76.photobucket.com/albums/j30/helenblack/3D%20and%20Pyramid%20Sheets/


http://hobbycard.wtcsites.com/5KnipvellenTotaal.htm


http://knipvellen.come2me.nl/


http://members.lycos.nl/jessiewetzie/newpage28.html


http://members.home.nl/just.elisa/knipvellen/


http://community.webshots.com/album/469054249LZVbxy


http://www.mijnalbum.nl/Album=ANZLEWUZ


http://s70.photobucket.com/albums/i85/Mowbray-Bear/3D%20Decoupage/


http://community.webshots.com/user/nmcglynn123


http://photobucket.com/images/search/3d%20sheets/


http://s35.photobucket.com/albums/d182/3dsheets/


http://s108.photobucket.com/albums/n16/shamps30/


http://members.lycos.nl/sonjasknipvellen/


http://s58.photobucket.com/albums/g266/wimmeke001/?start=40&mediafilter=images&paginator=top


http://s10.photobucket.com/albums/a139/worm_goddess/


http://members.lycos.nl/yvonnetimmermans/Vellen%20Step%20by%20step/Step%20by%20step.htm


http://photobucket.com/images/3d%2520sheets/


http://photobucket.com/images/knipvellen/


http://photobucket.com/images/decoupage/?page=2


I have no affiliation with any of these sites and caution you to watch for any restrictions or copyrights that the artists may have posted.

Ddd


Posted by studio3d@ccgmail.net at 6:00 AM PDT
Sunday, 5 April 2009
Handy List of Lists of Lists
Topic: Web resources

Of all the blogs I read regularly, the one that references the most other sites in handy groupings is Mel Stampz. She gathers a list of 100+ ways to use one tool or another or 50+ ways to use a technique and keeps updating the entries as she gathers more links. How cool is that!

This is a list of her lists that I have found to be particularly handy and I go back to items in these lists again and again for techniques and inspiration:

“I’ve been bitten!!!…. (161things you can do with your Cuttlebug…)”

http://melstampz.blogspot.com/2008/03/ive-been-bitten.html


“Purse templates galore (154 and counting…)”

http://melstampz.blogspot.com/2008/03/purse-templates-galore-little-handbag.html


“Techniques at a glance”

http://melstampz.blogspot.com/2008/05/techniques-at-glance.html


“Templates for 3D projects at a glance”

http://melstampz.blogspot.com/2008/05/templates-3d-projects-at-glance.html


“Crafty Flowers templates and tutorials”

http://melstampz.blogspot.com/2008/05/hot-crafty-flowers-40-and-counting.html


“100+ Envelope Templates/Links”

http://melstampz.blogspot.com/2008/07/5-12-inch-square-envelope-template-lots.html


“Over 100 Things You Can Do With Your Score-Pal”

http://melstampz.blogspot.com/2008/08/scor-pal-things-you-can-do-with-your.html


“Wee Houses Templates and Tutorials”

http://melstampz.blogspot.com/2008/09/wee-houses-35-templates-tutorials.html


“Box Templates and Tutorials”

http://melstampz.blogspot.com/2008/10/box-templates-tutorials-giftcardtreat.html


“Alcohol Inks A to Z Links”

http://melstampz.blogspot.com/2009/02/alcohol-inks-to-z-links-plain-ol.html


“Vellum Links in Volume (over 100)”

http://melstampz.blogspot.com/2009/01/vellum-links-in-volume-100-vellum.html


“50+ Gift Bag Templates”

http://melstampz.blogspot.com/2008/11/50-gift-bag-templates.html


Wander around in these blog entries and get some inspiration for yourself.

Ddd


Posted by studio3d@ccgmail.net at 6:00 AM PDT

Newer | Latest | Older