« May 2009 »
S M T W T F S
1 2
3 4 5 6 7 8 9
10 11 12 13 14 15 16
17 18 19 20 21 22 23
24 25 26 27 28 29 30
31
You are not logged in. Log in
Entries by Topic
All topics  «
3D paperwork
A - Z challenge 5
A - Z challenge 7
A - Z challenge round 4
A to Z challenge round 3
A to Z round 2
A to Z round 6
A-Z round 1
Around the House
Art Challenges
Artist Trading Cards
Backgrounds
Beads
Bible Journaling
Books
Boxes
Collage
Color Challenge
Coloring
cookbook
Die Cuts
Digital Projects
Digital Stamps
Drawing
Dry Embossing
Fabric Stuff
Fantastic Folds
Field Trip
Home Decor
How Does Your Garden Grow?
Hymnal Art
In The Kitchen
In the studio
Jewelry
Lettering
Links
Multi-Technique
Music to Work By
Musings
Nail Art
New Work
Online Class
Other Hobbies
Other Projects
Painting
Paper Embroidery
Paper Piecing
Photo
Pretty Paper
Quilting
Random
reading
Scrap Recovery
scrapbooking
Sewing
Sketch Challenge
Some Backlog
Stamping
Stencils
Stickers
Supplies
Teabag Folding
Techniques
Testing
tips and tricks
Tutorial
Web resources
Welcome to my Blog
Work By My Friends
workflow
Writing
Blog Tools
Edit your Blog
Build a Blog
RSS Feed
View Profile
Group One
In & Out of Studio 3D
Monday, 11 May 2009
Pot 'O Gold
Topic: New Work

More tiles from the catalog and, again, I creased at the grout lines.

I chose papers for this card that looked more masculine and distressed all with 'tea-dye' ink to tone down and unify the palette. 

The square brads are brushed brass and add to the masculine feel.

Ddd


Posted by studio3d@ccgmail.net at 6:00 AM PDT
Sunday, 10 May 2009
Tutti-Fruity
Topic: New Work

Sometimes the hardest part is thinking up a title!

This panel is from a Harry and David catalog. I backed it with a little bit of purple, then a green print, a printed cardstock and tied a burgundy ribbon around them. These are mounted on a burgundy card base.

I picked out colors from the fruit panel and echoed them in rhinestones.

Ddd


Posted by studio3d@ccgmail.net at 6:00 AM PDT
Saturday, 9 May 2009
Blue Tile Vase
Topic: New Work

From a home improvement catalog I gleaned this tile grouping. I used the Scor-It to trace the tile grout lines and backed it with a piece of cardstock I stamped with bleach to lighten and blue ink . This is over a printed cardstock and then on pink folded cardstock base. 

A ribbon is tied around the front panel by running through a slit in the spine. Blue rhinestones anchor the corners.

Ddd


Posted by studio3d@ccgmail.net at 6:00 AM PDT
Friday, 8 May 2009
Walking On Water
Topic: New Work

These beach scenes my take over from birds as my favorite theme! After mounting this one on two scrapbook papers with rounded corners I used a round punch to cut out the little tiki hut. I glued it to the lower right corner and then threaded a ribbon behind the opening and around the front panel of a green folded cardstock. I tied the bow through the hole and  continued the line of the ribbon with a series of matching rhinestones. 

Ddd


Posted by studio3d@ccgmail.net at 6:00 AM PDT
Thursday, 7 May 2009
Flower Round-up
Topic: New Work

I found an old greeting card covered with butterflies and blooms and punched them out with a round punch. A scrapbook paper with swirls makes the sky and one with leaves and stems makes up the ground.

I tied a pink ribbon at the fold of the cardstock and drew in flight trails and stems with watercolor markers. 

I used Stickles to trace the stems, flight trails, and the butterfly antennae.

Ddd


Posted by studio3d@ccgmail.net at 6:00 AM PDT
Wednesday, 6 May 2009
She Sleeps By the Seashore
Topic: New Work

Ah, yes - that's the proper place for a nap! This is another page from the calendar, backed with green cardstock and a water-print scrapbook paper. 

I added a gold cardstock strip and blue star brads to which I added stickles for a bit of zip. All backed with a white cardstock base.

Ddd


Posted by studio3d@ccgmail.net at 6:00 AM PDT
Tuesday, 5 May 2009
Apples, Crisp
Topic: New Work

From a cooking magazine I cut out these apples. They were actually two different illustrations - the cut and the un-cut - and I had to color over the peels of the cut apples with yellow marker to bring their tones to the same as the whole apple.

There are two scrapbook papers set to represent the counter and the wall and I've run a ribbon with bow to cover the seam.

A grey watercolor marker was used to make shaddows for the fruit, the bow, and under each of the rhinestones.

Ddd


Posted by studio3d@ccgmail.net at 6:00 AM PDT
Monday, 4 May 2009
Beach Walk
Topic: New Work

Oh how I want to be the one in this picture! This is one of the picutes off my page-a-day calendar. I paired it up with two scrapbook papers, both having tile prints that echo the colors. Both have been distressed with a blue distressing pad to take some of the brightness down. 

I used the quote from the same calendar page and cut slits to thread two ribbons through. I rounded corners, mounted to a shimmery blue cardstock base and popped on a couple of sea blue rhinestones.

Ddd


Posted by studio3d@ccgmail.net at 6:00 AM PDT
Sunday, 3 May 2009
Blooms For You
Topic: New Work

These florals are from the front of a greeting card. By punching them out with a square punch I was able to mat each of them and make them look like three separate bouquets.

Several coordinating layers are added beneath and a green narrow ribbon wrapped top to bottom. Then I tied three shorter lengths of ribbon along the length and held the flat spaces in place with copper mini-brads. 

The text block is an engraved copper sheet that reads "blooms for you" and it is placed at an angle mirroring the center floral block for continuity.

Ddd


Posted by studio3d@ccgmail.net at 6:00 AM PDT
Saturday, 2 May 2009
Coffee Break
Topic: New Work

This illustration started out as another greeting card and was originally about 1/3 of a horazontal picture. I really liked the bright colors so I went simple on the background and framed out the picture with the same bright orange as the card base.

The satin ribbon goes all the way around the front cover of the card by being threaded through a slit in the spine. 

I happened to find the perfect text sticker in exactly the right colors.

Ddd


Posted by studio3d@ccgmail.net at 6:00 AM PDT
Friday, 1 May 2009
Come Near to God
Topic: New Work

I found this beautiful flower painting in my stash of magazine clippings and cut it with a large square punch. Then I gathered all sorts of papers from my scrap bins and rounded the corners of them before layering with varying margins to add interest. A satin bow was tied around the panel before mounting on the green card base. 

The text block is a sticker that I used the corner rounder on. Because of the small size of it, the second cut with the punch made a funky little curl at each end. I liked it so I kept it!

Ddd


Posted by studio3d@ccgmail.net at 6:00 AM PDT
Thursday, 30 April 2009
Cherish the Children
Topic: New Work

I needed to make a card for a swap that featured children so I turned to my stash of salvaged illustrations and found this from a quilt calendar. It is trimmed down quite a bit from the original, backed with a harlequin print scrapbook paper followed by a purple toned paper and finally green cardstock base. 

Before mounting the panels to the card, I tied an organza ribbon in light purple. The final touch is a thick acrylic text block that was the perfect shade of green. I filled the holes with Stickles.

Ddd


Posted by studio3d@ccgmail.net at 6:00 AM PDT
Wednesday, 29 April 2009
Swirly Birds
Topic: New Work

Will I NEVER run out of calendar bird illustrations? Hopefully not!

I cut these with a Nestabilities die in my Cuttlebug and then used the die to emboss the scalloped edge. The background is a printed scrapbook paper run through the Cuttlebug with a folder, twice. I used a distress ink pad to color just the raised portions and then cut the four edges with fancy scissors. The same distress pad was used to color the cut edges. 

The folded cardstock is a blue/gray parchment pattern and I used distress ink in Weathered Wood to tone the edges. Before the pieces were glued together I placed three graduated sized square rhinestone brads and a greeting cut with a Cuttlebug die. I had a rhinestone the same color as the brads so I glued that on to dot the I.

Ddd


Posted by studio3d@ccgmail.net at 6:00 AM PDT
Tuesday, 28 April 2009
Bouquet of One
Topic: New Work

Top down:

Ribbon tied around stem of image; Image stamped with black ink, colored with watercolor pencils, washed with waterbrush, torn; Mulbury paper stamped with Versamark, embossed with clear powder; Yellow handmade paper, torn; Purple textured irridescent paper, glued to folded white cardstock.

Ddd


Posted by studio3d@ccgmail.net at 6:00 AM PDT
Monday, 27 April 2009
Savory Fruit
Topic: New Work

These three fruit tile panels are from a catalog. I pulled colors from them for the backing papers. The cardstock was a scrap that had a perforation through it so I enhanced it with fake stitching (with a pen).

I used distressing ink pad (old paper) on the brick cardstock and (aged mahogany) the dotted paper.

The 'savor' title is a sticker from my stash.

Ddd


Posted by studio3d@ccgmail.net at 6:00 AM PDT
Sunday, 26 April 2009
Asian Wisdom
Topic: New Work

Two pre-printed elements were combined for this card. I had three of the purple floral panels and the one with the kanji. Since both had a purple tones I added some purple mulbury paper. Then I brought in green mulbury paper and green corrugated card. I embossed the white panel with the Cuttlebug and trimmed it all up with silver peel-offs. 

My goal was to bring together a variety of asian-feel elements to complement the kanji panel.

Ddd


Posted by studio3d@ccgmail.net at 6:00 AM PDT
Saturday, 25 April 2009
Hello Bloomers
Topic: New Work

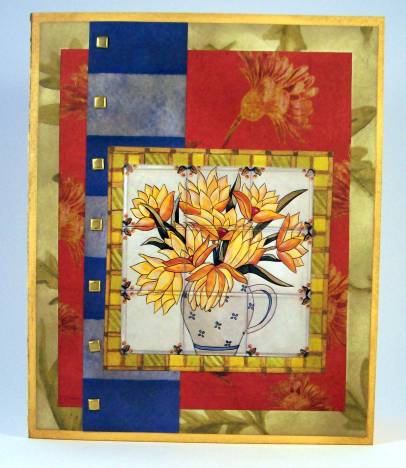
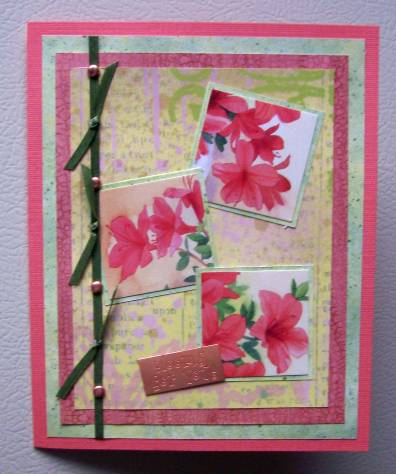
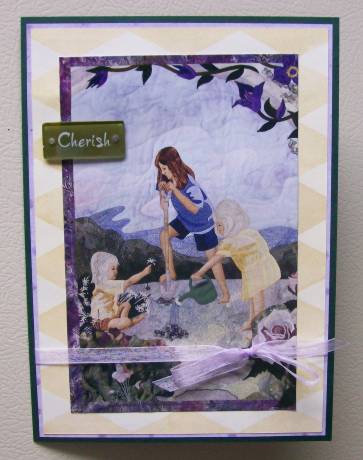
When Spring is slow in coming - make your own!

I stamped the flowering branch on glossy cardstock with light brown ink and colored it all with watercolor markers. Then I pulled out a variety of papers with pinks, yellows, and pastel purple found a sketch I had drawn last year. The sketch was for a vertical focal piece so I made some adjustments and started cutting and layering.

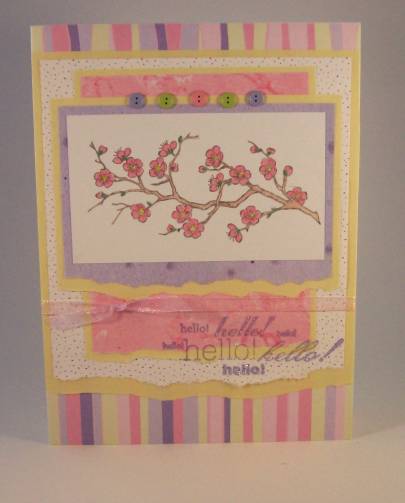
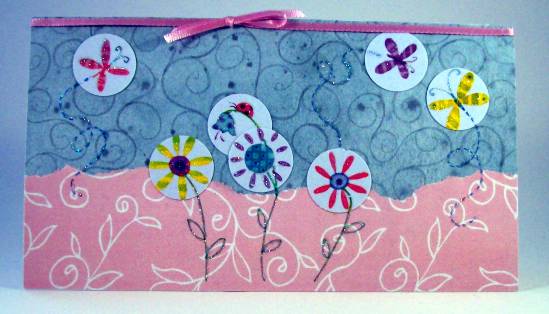
The sketch actually did have the ribbon and a greeting right where these are but I added the button brads at the top. I used a range of colors to add interest.

Since I stamped the greeting directly onto the papers it looked rather flat, so I added Stickles to three of the words and then to the flower centers in the stamping.

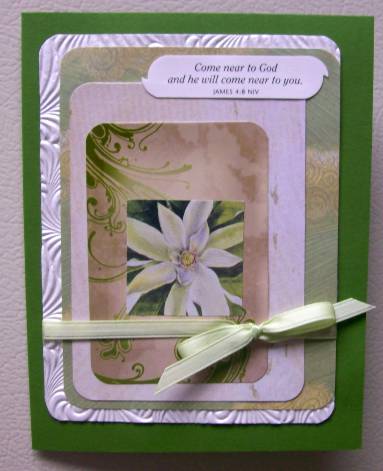
Here you can see the glitter of the Stickles I added:


Ddd


Posted by studio3d@ccgmail.net at 6:00 AM PDT
Friday, 24 April 2009
Beach Blanket
Topic: New Work

This started with an odd combination of elements but I really like how it turned out. The photo is from my page per day calendar at work. I pulled a piece of green metallic and gold metallic cardstock, butted their edges and then glued on the photo with the split right at the horizon line, in exact opposite of the colors in the photo.

Three golden spotted scrapbook paper strips were glued behind and then a green/gold basketweave print behind that. I used some rubons of stitching to anchor four edges and mounted the whole thing on green cardstock with just the edges showing. 

I added a green seashell puffy acrylic sticker to the lower right.

Ddd


Posted by studio3d@ccgmail.net at 6:00 AM PDT
Thursday, 23 April 2009
She Celebrates
Topic: New Work

Out of a magazine or catalog some time ago I harvested this art piece. I've mounted it on cream card and then on a decorative paper from a mailing flyer. I used Sharpie on the side edges to maintain the definition between this and the diamond print scrapbook paper underneath.

The artwork actually had text in the lower right corner so I used opaque floral rub-ons to cover the words and added black mini-brads to the other three corners.


The Celebrate text is a sticker and the whole thing is mounted on cream folded cardstock.

Ddd


Posted by studio3d@ccgmail.net at 6:00 AM PDT
Wednesday, 22 April 2009
A Stitch Or Two
Topic: New Work

These 3D flowers came with a yellow rectangle background. I attached to yellow gingham paper and used a matching pink watercolor marker to create a drop shadow for it. Along the sides I applied rub-on stitches and then used sticky dots to attach three buttons which I had tied thread through. 

I used that pink marker again to make drop shadows for the buttons.

This is all applied to a folded green card.

Ddd


Posted by studio3d@ccgmail.net at 6:00 AM PDT

Newer | Latest | Older