« July 2009 »
S M T W T F S
1 2 3 4
5 6 7 8 9 10 11
12 13 14 15 16 17 18
19 20 21 22 23 24 25
26 27 28 29 30 31
You are not logged in. Log in
Entries by Topic
All topics  «
3D paperwork
A - Z challenge 5
A - Z challenge 7
A - Z challenge round 4
A to Z challenge round 3
A to Z round 2
A to Z round 6
A-Z round 1
Around the House
Art Challenges
Artist Trading Cards
Backgrounds
Beads
Bible Journaling
Books
Boxes
Collage
Color Challenge
Coloring
cookbook
Die Cuts
Digital Projects
Digital Stamps
Drawing
Dry Embossing
Fabric Stuff
Fantastic Folds
Field Trip
Home Decor
How Does Your Garden Grow?
Hymnal Art
In The Kitchen
In the studio
Jewelry
Lettering
Links
Multi-Technique
Music to Work By
Musings
Nail Art
New Work
Online Class
Other Hobbies
Other Projects
Painting
Paper Embroidery
Paper Piecing
Photo
Pretty Paper
Quilting
Random
reading
Scrap Recovery
scrapbooking
Sewing
Sketch Challenge
Some Backlog
Stamping
Stencils
Stickers
Supplies
Teabag Folding
Techniques
Testing
tips and tricks
Tutorial
Web resources
Welcome to my Blog
Work By My Friends
workflow
Writing
Blog Tools
Edit your Blog
Build a Blog
RSS Feed
View Profile
Group One
In & Out of Studio 3D
Friday, 31 July 2009
Noel Nativity
Topic: New Work

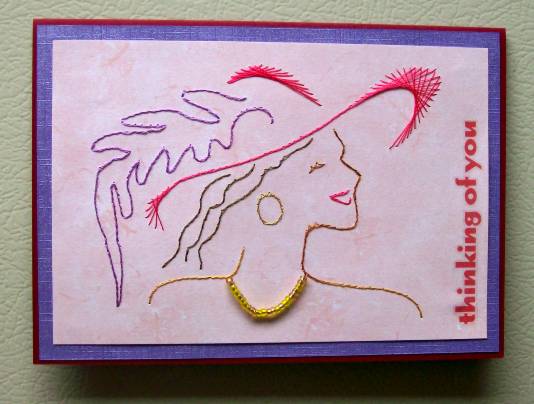
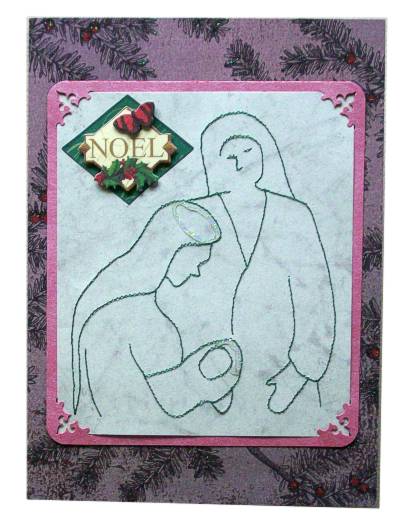
I stitched up my pattern with metallic green Sulke thread and added Stickled halos to both mother and child. I cut shimmery red cardstock and punched the corners to tuck the stitching into.

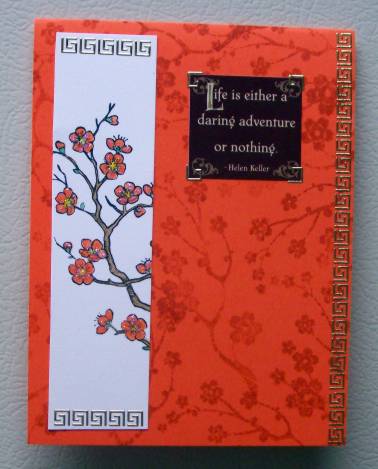
This printed cardstock has ultrafile glitter on the berries and parts of the branches so it fit well with the parts I had already put together. I just folded it, cut to fit, added the art, and then finished with a 3D sticker. 

Ddd


Posted by studio3d@ccgmail.net at 6:00 AM PDT
Thursday, 30 July 2009
Bachelor Buttons
Topic: New Work

This card was planned almost to the last detail before I ever stamped the flowers! That NEVER happens! I usually just 'go with the flow' and I'm as surprised as anyone else how things turn out.

But when I picked up this stamp I visualized it stamped as a bouquet and with buttons for the centers. I 'scribbled' colored pencils loosely following the lines of the stamp and brushed over them with a water brush. The panel was trimmed and mounted on cardstock with a top fold.

I found three buttons of the same style and color but of different sizes. I decided to do the size variation to keep with the casual feel. Then I tied ribbon through the holes and applied them with sticky dots. 

Clear corner stickers echo the colors and the greeting is a clear puffy acrylic sticker.

A 'dream' come true!

Ddd


Posted by studio3d@ccgmail.net at 6:00 AM PDT
Wednesday, 29 July 2009
Row Upon Row Border Punch
Topic: New Work

Well, I really 'went to town' with the frills for this card. The back layer was border punched, then a liner which was inset from the back, then the front which was inset from that. When it is closed it forms three layers of border in contrastinc colors.

Then I layered the focal piece on the same paper as the card liner and rounded the corners. 

I added clear floral corner stickers to frame up the image. There was not enough contrast between the image and its backing paper so I ran a line of colored pencil around it and then wet it to blend.

Here in the closeup you can see that border better as well as how the punched edges line up when the card is closed.

I added the greeting with small gold peel-off stickers.

Ddd


Posted by studio3d@ccgmail.net at 6:00 AM PDT
Tuesday, 28 July 2009
I Know What She's Thinking
Topic: New Work

...she's thinking of you!

Just a few thread color changes and new necklace beads make this stitching different from the one a few days ago. I decided to make this less casual than the last so gave it a fancy purple backing paper over a very dark pink cardstock. 

I added a rub-on greeting up the side.

Ddd


Posted by studio3d@ccgmail.net at 6:00 AM PDT
Monday, 27 July 2009
Branching Out in Orange
Topic: New Work

When I cropped a stamped image from a previous project it left behind this portion of a blooming branch. I used colored pencils and water to color it  and then covered all the blooms with Stickles.

I found a piece of orange cardstock to fold for a base and used a different flowering branch (solid image) and stamped it repeatedly with 'terra cotta' ink to make a background. 

I added a text sticker and then trimmed with abandon using sticker waste from some asian borders.

Ddd


Posted by studio3d@ccgmail.net at 6:00 AM PDT
Sunday, 26 July 2009
Serving Up Leftovers
Topic: New Work

Recent previous projects used scallops and I ended up with these two 'frames' hanging out on the work table. I layered them to surround this floral image colored up with pencils and water brush.

The mounting is simple - round the corners and use pop-dots over a folded irridescent purple cardstock.

The text is peel-offs - silver colored with a light purple Sharpie marker. I stuck it on with a bit of a flourish to keep it casual.

Ddd


Posted by studio3d@ccgmail.net at 6:00 AM PDT
Saturday, 25 July 2009
Fractured Fruit
Topic: New Work

After coloring up this image I cut it into random strips and assembled them by offsetting the vertical alignment. I trimmed the resulting block evenly at the top and bottom. Then I created a background for it using strips of green cardstock. But for this I left the uneven top and bottom edges.

I found a text sticker and mounted it on green to match the ragged one above it. All was then attached to folded burgundy cardstock.

Ddd


Posted by studio3d@ccgmail.net at 6:00 AM PDT
Friday, 24 July 2009
Ribbon Rose
Topic: New Work

This collage stamp was colored with the colored pencils and water brush technique. It only goes as far out as the double border in white. The blue behind that is scrapbook paper and the outside yellow border is the folded cardstock base. 

The stamp actually has a text block under the rose. I cut two slits and threaded a riboon through to create a fake bow. Then the two side ribbons were adhered under the ends to wrap around to the back.

Ddd


Posted by studio3d@ccgmail.net at 6:00 AM PDT
Thursday, 23 July 2009
Angled Poppy
Topic: New Work

Another colored stamp. For this one I used a sketch I had done up last year and never used. This follows that sketch exactly with only two differences; the elements have a colored border around them and the brads are ON the tags instead of being used as 'bullet points' off to the left of them.

I pulled out some bubble printed background paper from long ago and an orange folded card base.  

The text is a clear sticker that I cut into pieces to place on the individual tags. I added stickles to the brads and to the center of the flower.

Ddd


Posted by studio3d@ccgmail.net at 6:00 AM PDT
Wednesday, 22 July 2009
Lady With Stripes
Topic: New Work

One of my long-neglected stitching patterns. It is usually done up with a red hat and purple feather. This time I went with a general color theme and backed it with a striped mat with mitred corners.

I used some brads to anchor the corners and added a rubon greeting. A blue folded card base pulls it all together.

Ddd


Posted by studio3d@ccgmail.net at 6:00 AM PDT
Tuesday, 21 July 2009
Hope Lily
Topic: New Work

Hand-colored lilies with watercolor pencils. Cut into a simple panel and mounted offset on a kraft cardstock. Trimmed with a satin ribbon. Texted with an acrylic sticker.

Mounted on a folded blue cardstock.

Ddd


Posted by studio3d@ccgmail.net at 6:00 AM PDT
Monday, 20 July 2009
Yellow Ruffled Flower
Topic: New Work

I used that technique again of embossing only with the Nestabilities die. Then the illustration was cut and embossed with the next smaller size.

I used borders of clear stickers and found a good us for 4 rhinestone dragonflies. 

Ddd


Posted by studio3d@ccgmail.net at 6:00 AM PDT
Sunday, 19 July 2009
Swirly Pear
Topic: New Work

This was one of those stamps that was on sale so cheap I couldn't leave it in the store. That was three years ago and I am just now giving it some ink!

Colored pencils again, each leaf with two tones to add some shading. This is a little bright for my taste, but I don't send cards to myself! LOL!

I had some pre-printed tags so rimmed them with orange to match the other mat and added yellow brads and green ribbons to pull more colors from the pear. 

The swirls on the side and tip are from a sheet of rub-ons.

Ddd


Posted by studio3d@ccgmail.net at 6:00 AM PDT
Saturday, 18 July 2009
Flower in a Field
Topic: New Work

What a simple little stamp - just a few lines. I kept the coloring simple, too, in keeping with the stamp. Because of the free-form nature of the illustration I used a blade to cut a casual edge along the right of it and the underlying coral cardstock.

The text is a rub-on. 

I used a button brad as the center of the flower and then placed it all on a scrapbook paper with a photo of grass.

Ddd


Posted by studio3d@ccgmail.net at 6:00 AM PDT
Friday, 17 July 2009
Purple Daisy with Bow
Topic: New Work

Back to the watercolor pencil coloring.  I kept this one pretty simple, just layering with echoing colors. I did add a ribbon to the bottom and when I got ready to add the text sticker greeting I offset it to the right to balance the bow. 

I used brads at the 4 corners of the illustrated panel and did a lot of corner rounding.

Ddd


Posted by studio3d@ccgmail.net at 6:00 AM PDT
Thursday, 16 July 2009
Contrasts
Topic: New Work

This is the first time I have used my Nestabilities to emboss only. I created a frame with it for the cut scalloped focal image.

Because the colors are so bright I tried to keep the layout simple. I used a corner embossing punch to add some interest and them threaded a green ribbon through the slits and tied a bow. 

This is them mounted to the orange folded cardstock with foam tape to add height. The corners of the orange were rounded and then I added gold peel-off corners under the fancy cut corners.

The greeting is a gold peel-off.

Ddd


Posted by studio3d@ccgmail.net at 6:00 AM PDT
Wednesday, 15 July 2009
3-Color Wonder
Topic: New Work

I recently found these great packs of paper on sale at "M" and bought them in all 4 colors. Unfortunately, one of the colors was NOT orange, but I used watercolor markers on some of the elements on the black and white version and 'voila'!

I used a 'color blocking' layout and used three bands of ribbon to hide the seams. I added a black border behind the main image and dropped on a text sticker. 

Ddd


Posted by studio3d@ccgmail.net at 6:00 AM PDT
Tuesday, 14 July 2009
Simple Faith
Topic: New Work

What an odd combination of colors! I started by using extremely thin mats of orange around the feature and the larger purple piece. But at the last minute decided it wasn't enough and wrapped a double knotted orange ribbon around the base. 

The addition of a matching text sticker still leaves this very simple.

Ddd


Posted by studio3d@ccgmail.net at 6:00 AM PDT
Monday, 13 July 2009
Create Your Future
Topic: New Work

The colored pear stamp was trimmed close around and backed with two torn strips of scrapbook paper. I used a grey marker to create a drop shadow under each strip and the pear and then around a text sticker that I applied on an opposing angle. 

I colored three silk flowers with markers and stamped text on them with a brown ink pad. Each has a matching rhinestone in its center.

Ddd


Posted by studio3d@ccgmail.net at 6:00 AM PDT
Sunday, 12 July 2009
Ask Seek Knock
Topic: New Work

This colored pencil and water wash illustration is set off by successive layers of irridescent cardstock. 

Before attaching the main unit on the base card I punched two holes on each side wiht an 1/8" punch and cut between them to create a slot. These have decorative satin ribbon looped through and held in place with pear-centered brads. 

The text and the upper-left swirl are clear stickers.

Ddd


Posted by studio3d@ccgmail.net at 6:00 AM PDT

Newer | Latest | Older