Monday, 21 September 2009
Postcard Card
Topic: Stamping
Upper-right corner has a stamped stamp! I carved this with PoStUdIo at the bottom and 3d at the top. It has been stamped in black ink and colored with watercolor markers. I added a travel sticker in the lower left and the greeting in the upper left. The flowers in the greeting matched some others on the sticker sheet so I placed these as a bottom border.
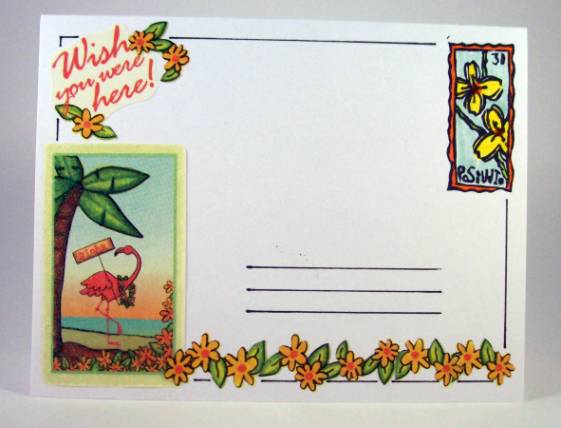
I pulled the colors from these elements to color in the stamp. A fine-line pen was used to add borders and the address lines.
Since this is a card rather than a real postcard, the address is left blank and any further greetings will be placed on the inside.
Ddd
Posted by studio3d@ccgmail.net
at 6:00 AM PDT
Sunday, 20 September 2009
Classy Card
Topic: Stamping
This fish in the seaweed was inked up with markers and stamped three times across the bottom of folded white cardstock. I also colored in the fish and the background with markers, as well.
The border was created with stickers and some doodling was added to connect them to each other and to the card.
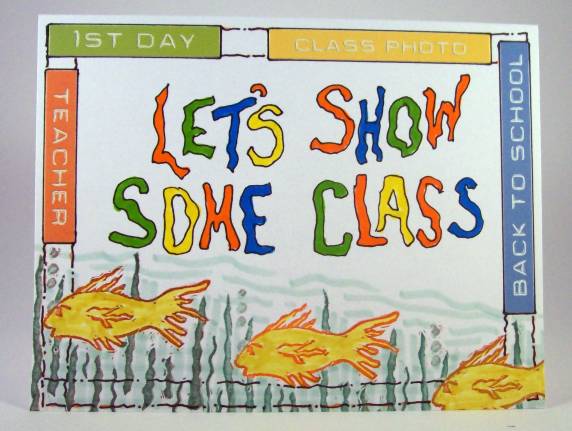
The lettering was hand drawn and colored with markers.
Ddd
Posted by studio3d@ccgmail.net
at 6:00 AM PDT
Saturday, 19 September 2009
Light and Salvation
Topic: Stamping
Even I didn't realize how many hand-carved stamps I had made until I started this project!
Today's entry is a lighthouse colored with watercolor markers. I extended the rocks beyond the bounds of the stamp with color and then drew in some black hashing over it.
The yellow cardstock got an aperture cut with a Labels Nestability and then the top was embossed with dots to mimit a night sky and the bottom with swirls to represent waves.
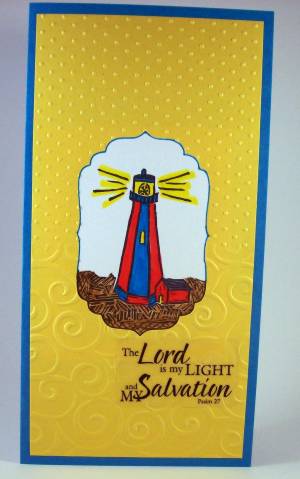
I used marker to draw around the aperture and placed the panel on folded blue cardstock. The text is a clear sticker.
Ddd
Posted by studio3d@ccgmail.net
at 6:00 AM PDT
Friday, 18 September 2009
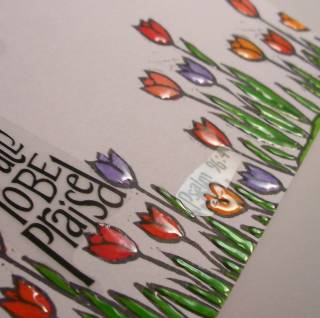
Tulip Garden
Topic: Stamping
I carved a little grouping of three tulips for this stamp. I stamped a repeating border on a folded white card base and colored with watercolor markers. I added a few additional leaves with black Sharpie so the border would not be so predictable.
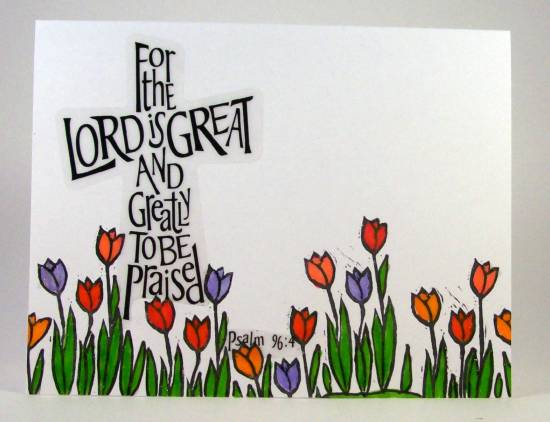
After adding the clear cross scripture sticker, I added Glossy Accents to all the flowers and leaves. Here you can see the effect this has on the card's wow-factor.
Ddd
Posted by studio3d@ccgmail.net
at 6:00 AM PDT
Thursday, 17 September 2009
Moon Man
Topic: Stamping
This is the only stamp I have carved using a rotary tool. I did the basic cutting around the image with the carving set and then reamed out the background with the rotary. Sure was faster than hackng away with the tools.
I stamped this guy on white cardstock and colored with watercolor marker and cut it out. He is raised with pop-dots on a labels Nestability panel with embossed and color-distressed edges.
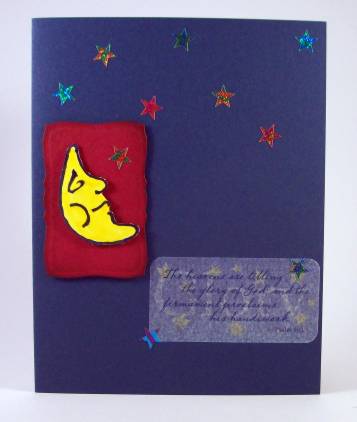
The label is also raised on pop-dots on a folded blue card base. Shimmery star stickers enhance the background and also set off two corners of a vellum scripture sticker.
Ddd
Posted by studio3d@ccgmail.net
at 6:00 AM PDT
Wednesday, 16 September 2009
A Man's Man Card
Topic: Stamping
I have never make anything with this fingerprint stamp since I carved it. I could never think of anything that suited! So for this I just stamped it all over the front of a white folded cardstock and THEN thought about it!
I started by coloring them in with grey marker and then drew in a black border on the card. Still no inspiration... So I started looking through my sticker collection and came up wth this tag sticker from my 'things that go' folder. Perfect!
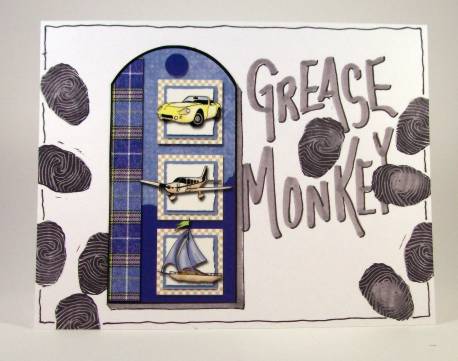
I used grey marker to add the caption and a drop-shadow on the tag. I went back to the black fine-line to define the grey marker.
Ddd
Posted by studio3d@ccgmail.net
at 6:00 AM PDT
Tuesday, 15 September 2009
Little Fisherman
Topic: Stamping
Though I stamped this raccoon on white cardstock, I colored over him with grey marker and a little tan for better realism. We see these little fellas (actually, mostly gals and their little families) almost every night at our place.
I placed patterned scrapbook papers on the top and bottom and then tore out a plain green for the embankment. The raccoon is placed with pop-dots and I created a shadow under him and the bank with grey marker.

I added some grasses with green marker and then dropped in a little dinner for him to fish for. A grey fine-tip marker was used to draw in some ripples under the paw.
The corners were rounded on the decorated panel as well as the folded grey background card. Then is wished him good luck with peel-off stickers.
Ddd
Posted by studio3d@ccgmail.net
at 6:00 AM PDT
Monday, 14 September 2009
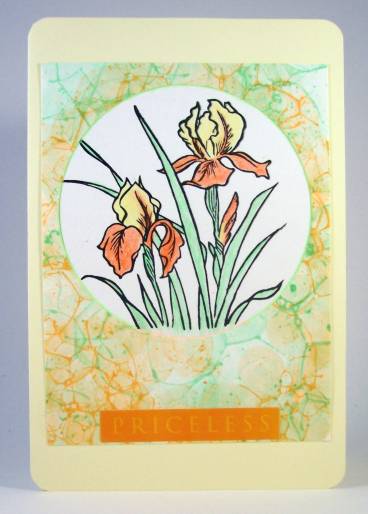
Line-Up of Iris
Topic: Stamping
The carved stamp on this card is a single simple iris. I colored the parts with markers, huffed on it, and stamped it. I changed colors between stampings and varied the height slightly as well.
I used a fine-tipped pen to outline each part for after placing the clear text sticker. It just needed more black.
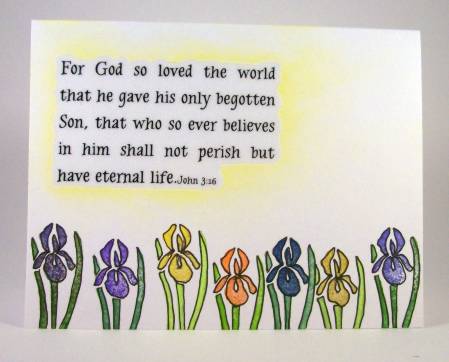
I applied yellow chalk around the sticker to add a little 'sunshine' to this little garden.
Ddd
Posted by studio3d@ccgmail.net
at 6:00 AM PDT
Sunday, 13 September 2009
Enchanted Lamp
Topic: Stamping
This little Aladdin's Lamp was carved as a tutorial using a pink eraser. I didn't want to overwhelm it with detail so worked in a very simple manner.
I inked up the stamp with a Whispers ink pad and stamped directly on the white folded card base.
I cut two graduated openings with one of the Labels Nestabilities and used the nesties to emboss the edges as well. These were stacked and attached as a frame to the card front.
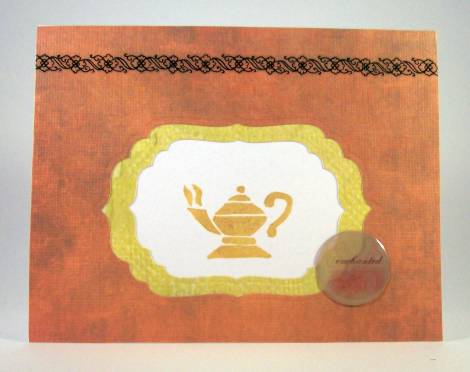
I attached only two simple trimmings - a bubble sticker 'enchanted' and a black rub-on border.
Ddd
Posted by studio3d@ccgmail.net
at 6:00 AM PDT
Saturday, 12 September 2009
Hat in the Rings
Topic: Stamping
Up today is my carved stamp of a summer hat. I colored it up with watercolor pencils and a waterbrush, as usual. After cutting it out I placed it face down on a rubber mat and did some shaping with a ball burnishing tool.
I attached with glue dots on a Cuttlebug background and placed on a grey folded card base.
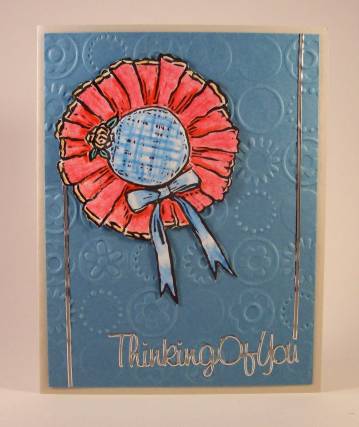
Silber stickers and borders were added in completion
Ddd
Posted by studio3d@ccgmail.net
at 6:00 AM PDT
Friday, 11 September 2009
A Sip of Silk
Topic: Stamping
Next up in the lineup of hand carved stamps is my favoriet - the hummingbird. I colored him with watercolor pencils and a water brush and cut him out. The background was made by a friend years ago and sent to me in a swap. I mounted three silk flowers with matching rhinestone brads and ribbon stems.
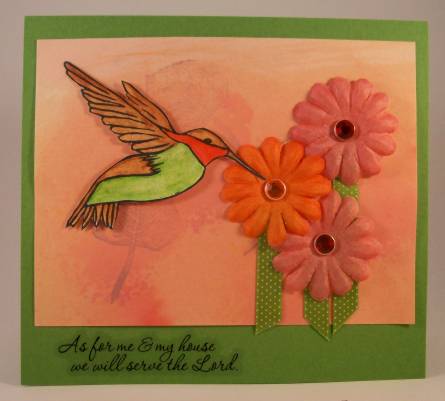
I popped the bird up on foam dots and placed the panel on green folded cardstock. The text is a clear sticker.
Ddd
Posted by studio3d@ccgmail.net
at 6:00 AM PDT
Thursday, 10 September 2009
Sympathy on Wings
Topic: Stamping
Today is the start of a new series. I wanted to make a card using each of the rubber stamps I hand carved over the years. I had a couple on hand already (penguin and feathers) so ended up with 21 to make.
For this I used a pale pad from the Whispers ink line to stamp the dragonfly repeatedly on white cardstock. I cut the panel down to fit on the burgundy folded card base and rounded the corners.
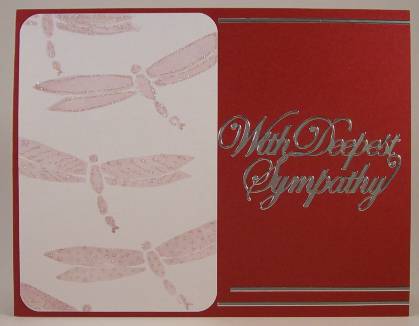
I used Stickles on each of the bugs in a different pattern for some variety. Here you can see the effects.
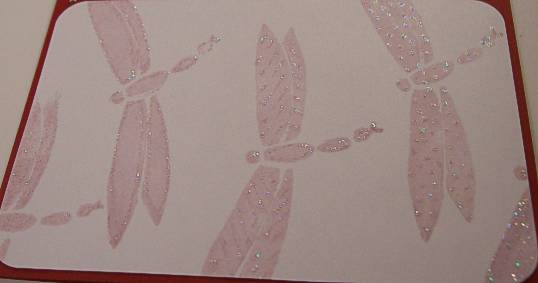
The card is finished with silver stickers for the greeting and some graphic borders.
Ddd
Posted by studio3d@ccgmail.net
at 6:00 AM PDT
Wednesday, 9 September 2009
Butterfly Nest
Topic: Stamping
This sketch stamp was one I bought in Nebraska last month. Like the hummingbird stamp I found that using second-generation stamping was the best way to the the greyed sketched look I wanted. This was colored with watercolor markers (scribbled on acrylic and used like watercolors)
I made the purple elements with a Spellbinders die that cuts and embossed all three parts at the same time. I used Concord Grape distressing ink pad to color the raised areas and applied to the borders of the white stamped panel.
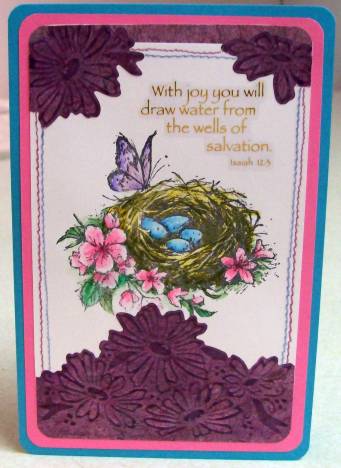
The 'stitched lines' on the sides and top are actually rub-ons! Then I rounded the corners and cut a pink bordering piece and a blue folded card base. Both got corner rounding before the front panel was glued on.
The text is a clear/gold sticker.
Ddd
Posted by studio3d@ccgmail.net
at 6:00 AM PDT
Tuesday, 8 September 2009
Hope Pray Dream
Topic: Stamping
This is the lovely sketch stamp again, this time without using second-generation stamping. It was too big for the card I was stamping on so I left off the hummingbird. This allowed me to color the flowers as morning glories.
I cut out the image and, after mounting it to card, I used a grey Sharpie marker to add a drop-shadow.
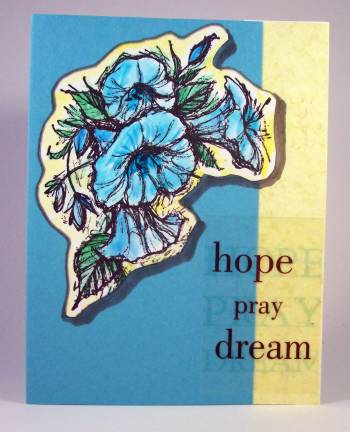
The text is a clear sticker. I love how the words are added in shadow.
Ddd
Posted by studio3d@ccgmail.net
at 6:00 AM PDT
Monday, 7 September 2009
Butterfly on a Box
Topic: Work By My Friends
These favor boxes were made by my S-I-L for her sister's wedding. The butterfly is stamped using my handcarved rubber stamp. She added embossing and glitter, pearls and rhinestones to make these just beautiful.
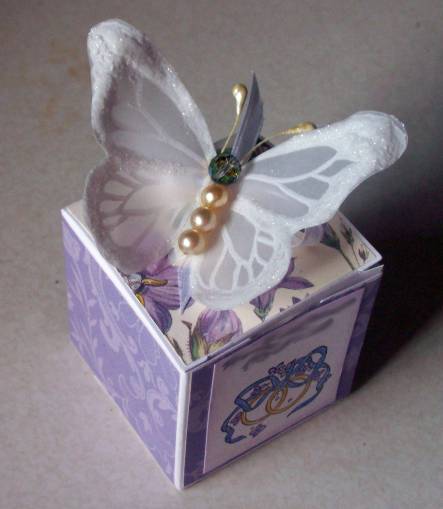
The butterfly rests on a bow on the box top.
Ddd
Posted by studio3d@ccgmail.net
at 6:00 AM PDT
Sunday, 6 September 2009
Live Like You Mean It
Topic: Stamping
Well, THIS is a weird one!
I cut the image with alternating rings of Nestabilities and then cut the background with their opposites. They are then layered in order of size.

I added cardstock stickers for text.
Weird for sure!
Ddd
Posted by studio3d@ccgmail.net
at 6:00 AM PDT
Saturday, 5 September 2009
My Sympathies
Topic: Stamping
So sad. I made this sympathy card and the very next day had occasion to send it out.
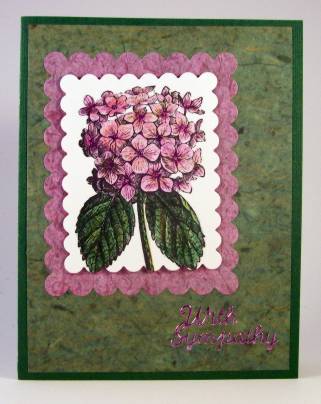
The image was cut out with a scalloped rectangle Nestability and I used the next larger size to cut a backing for it. The top image is raised on pop-dots.
The background is scrapbook paper over a green folded card base.
I colored the silver sticker with Sharpie marker before attaching to the card.
Ddd
Posted by studio3d@ccgmail.net
at 6:00 AM PDT
Two-Toned Iris
Topic: Stamping
I had this left over piece of bubble background in my scraps. The color match was perfect for the iris I had colored. I used Nestabilities to cut the aperture and added to a cream card base.
The text is a cardstock sticker.
Ddd
Posted by studio3d@ccgmail.net
at 6:00 AM PDT
Thursday, 3 September 2009
Circle Birds
Topic: Stamping
I used more of the green 'marbled' paper to frame up this stamping of two love birds. Layers of pink echo the bird colors and a green bow mimics the frame.
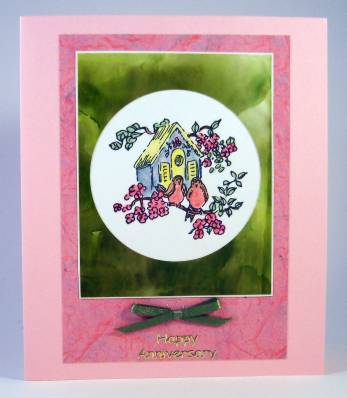
The gold stickers read "Happy Anniversary"
Ddd
Posted by studio3d@ccgmail.net
at 6:00 AM PDT
Wednesday, 2 September 2009
Glass Scalloped Hummer
Topic: Stamping
I used the distressed stripes Cutlebug folder on the front of the folded cardstock base, selected to match the color of the stamped image. I pulled out the pink from the image with scrapbook paper, cutting a scalloped oval with Nestabilities.
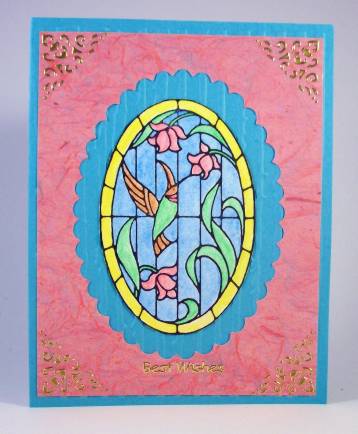
The corners are enhanced with sticker waste from filigree corner stickers. Then I added the Best Wishes greeting in gold peel-off stickers.
Ddd
Posted by studio3d@ccgmail.net
at 6:00 AM PDT
Newer | Latest | Older
