Topic: Fantastic Folds
Are you excited that tomorrow you will get to see something different? LOL!
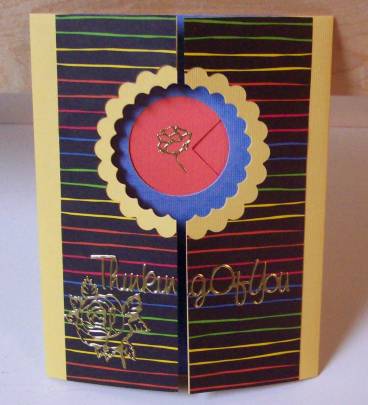
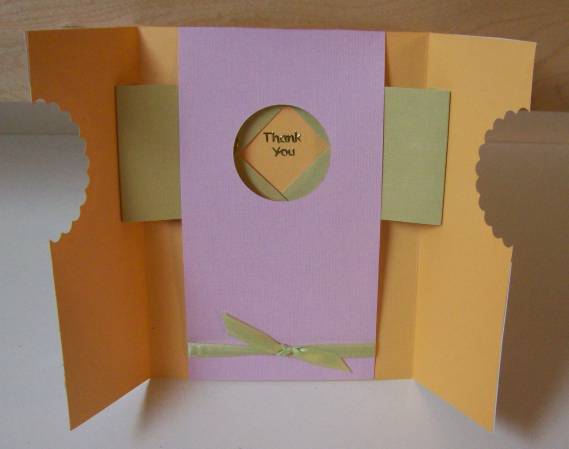
This is the last of the marquee cards and I have made this one into a sympathy card.
Ddd
Posted by studio3d@ccgmail.net
at 6:00 AM PST
| « | February 2010 | » | ||||
| S | M | T | W | T | F | S |
| 1 | 2 | 3 | 4 | 5 | 6 | |
| 7 | 8 | 9 | 10 | 11 | 12 | 13 |
| 14 | 15 | 16 | 17 | 18 | 19 | 20 |
| 21 | 22 | 23 | 24 | 25 | 26 | 27 |
| 28 | ||||||
Are you excited that tomorrow you will get to see something different? LOL!
This is the last of the marquee cards and I have made this one into a sympathy card.
Ddd
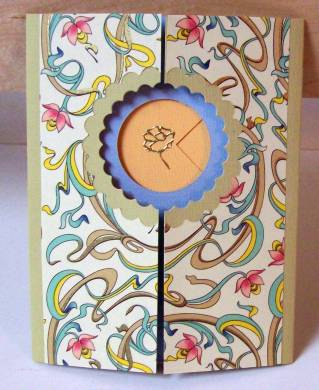
Oooooh, this is a beautiful paper! I have been saving it for years for just the right project. Tah Dah!
Ddd
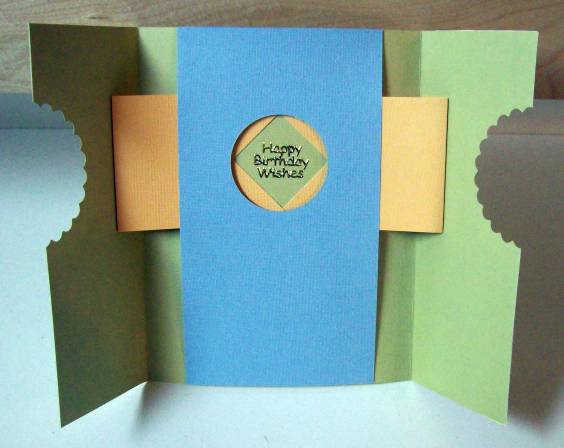
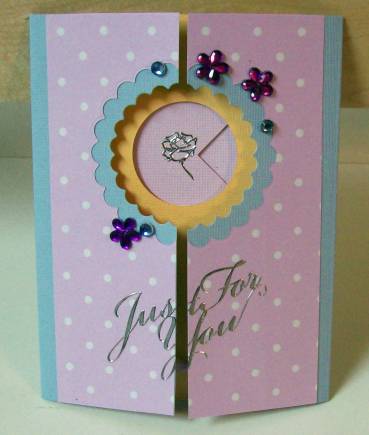
I love how changing up the colors really makes the cards look different. I particularly like this combination.

Ddd
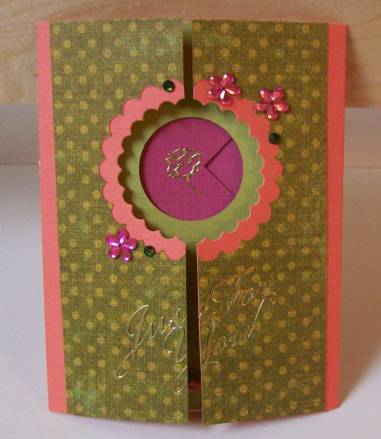
More than halfway there!
You may recognize this green dot paper from projects past. I still love it and this is almost the last piece of it. This makes me sad... where will I ever find more of it?

Ddd
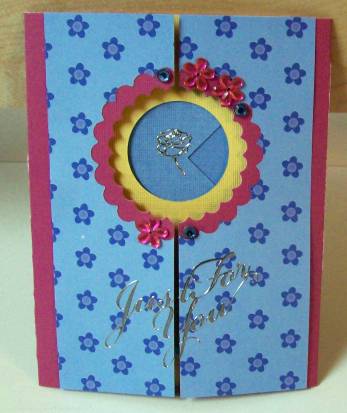
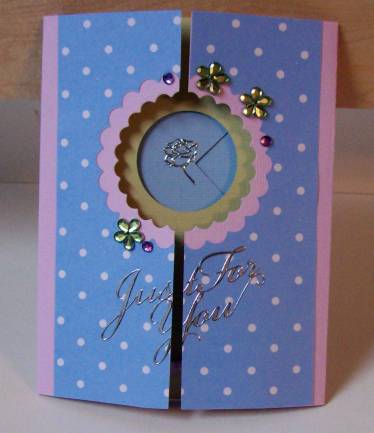
Little blue flowers + silver sentiments = one cute thank you card.
Ddd
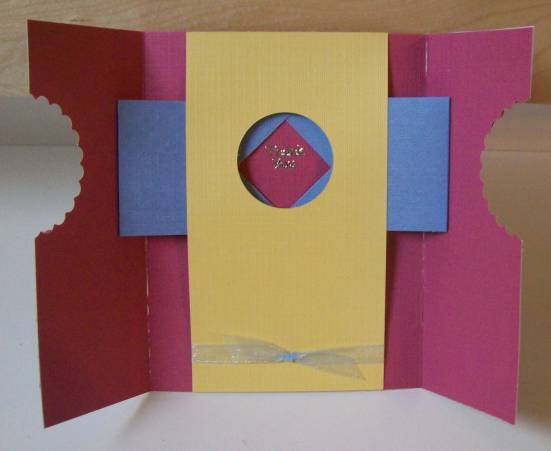
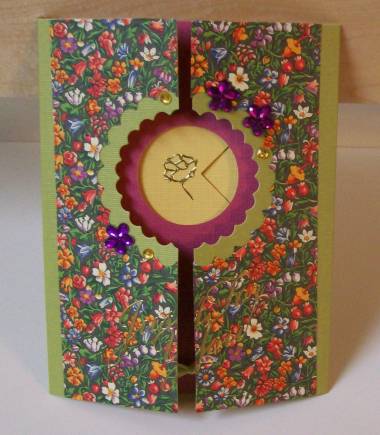
Now THIS is different, don't you agree?
Same concept but, oh that paper! What can I say, the colors were right.
Ddd
These cards with the simple dot paper really look so cute, I think. It lets the focus remain on the mechanics of the card rather then so much of the decorative elements.
Ddd
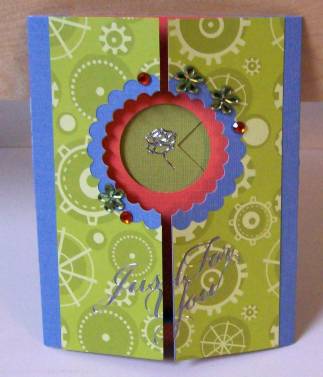
The construction of this card is exactly the same as yesterday's but it looks so different because of the selection of paper for the front. I also changed from silver to gold details.
Ddd
One of the blogs I read regularly had a fantastic video tutorial back in August for a card with mechanics. It is called a marquee card. I have been meaning to get around to trying since I first saw it.
Since I was asked to provide some "thank you" cards for an upcoming event, I decided today was the day! I cut all the parts for 9 cards and put them together assembly line style. This is my way of getting around my aversion to doing the same thing over and over. I just do step one on all of them, then step 2 on all of them, and so on until I'm done. It is easier for me than doing one all the way through and then thinking to myself "One down, only 8 more to go". That is so depressing.
And, here is the result of card 1 (yes you are going to get them one-per-day until they are all shown.
The card, when closed, shows a scalloped window with a cutout circle behind it. I decorated the front with scrapbook paper, a peel-off greeting and some stick-on rhinestones.
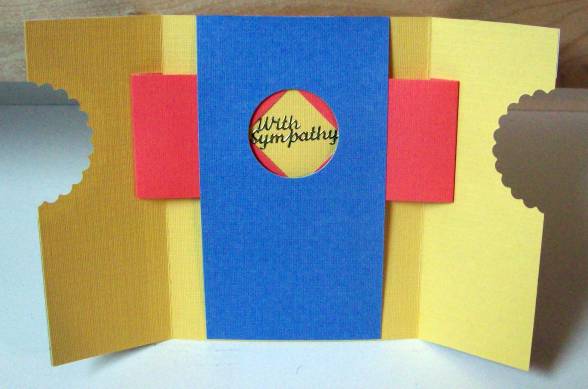
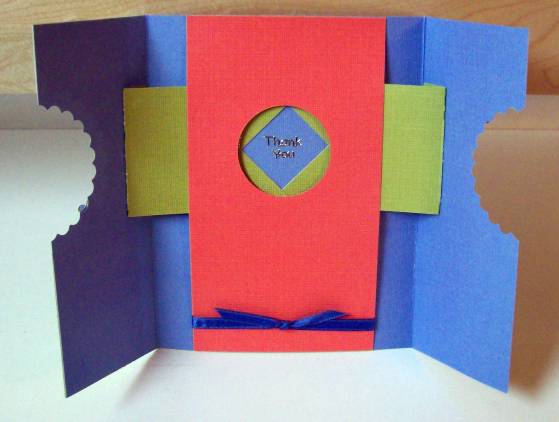
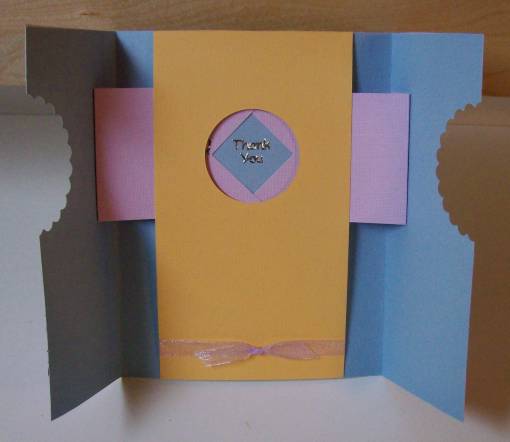
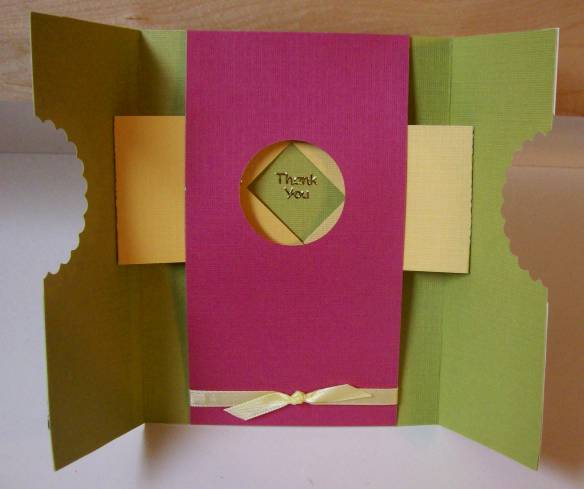
As the front panels are opened, the pieces behind the cutout circle slide left and right to reveal a greeting in the back.
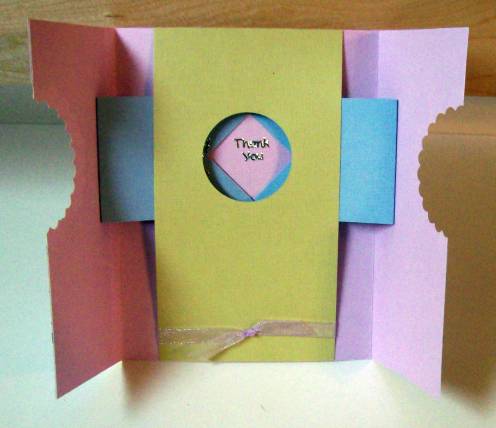
I also added a ribbon knotted around the inside panel.
Isn't this a clever structure? You can watch the video on construction here: http://stampspaperscissors.typepad.com/stamps_paper_scissors/2009/08/the-marvelous-magical-marqee-card-video-tutorial.html
Ddd
I started a new category in the topic headings: Scrap Recovery. This I will use for those projects I make by recycling old calendars, junk mail, magazines, paint chips, and other stuff.
Today, I am opening the category with these birds from last year's calendar. I used a Nestability die to cut them out and then found this pleasing arrangement quite by accident. I cut the brown cardstock corner brackets with a Cuttlebug die and colored in the inner elements with a gold marker.
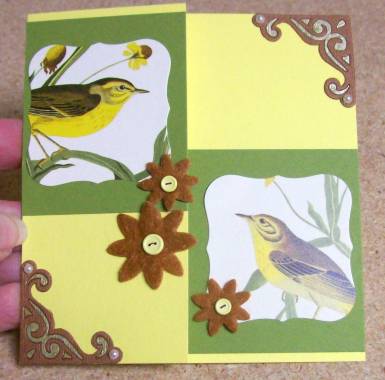
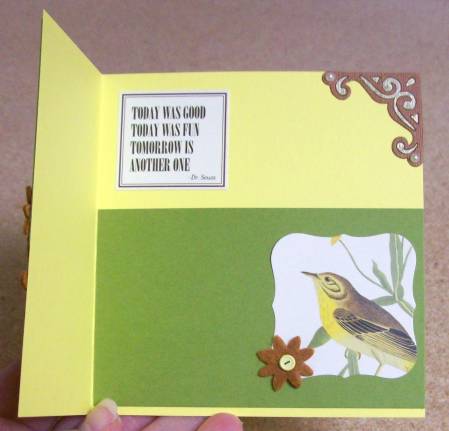
Last step was to place a cardstock sticker inside for the text.
Ddd
Here are the other two cards I made from the criss cross stock I cut the other day. The same basic supplies were used, just bits and pieces changed.
After stitching this panel on a lovely cardstock I used marker to color in the hands and the fabric. I had the Lord's Prayer on clear sticker but it was a block. I cut into strips so I could arrange as a border.
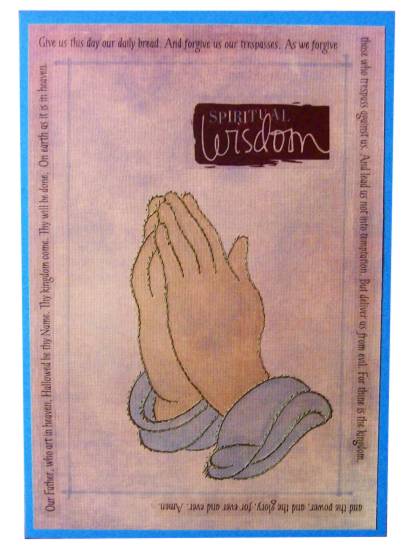
A marker and ruler formed the border and a clear sticker provides the focal text. The brown panel is mounted on a blue folded cardstock base.
Ddd
Another year over means I have calendar pictures to play with again! This white tail deer was one of a pair on November's page. I die cut with a Nestability and then layered over a brown and a cream of the same size but stacked with pop-dots for dimension. The cream is completely hidden in the straight-on view.
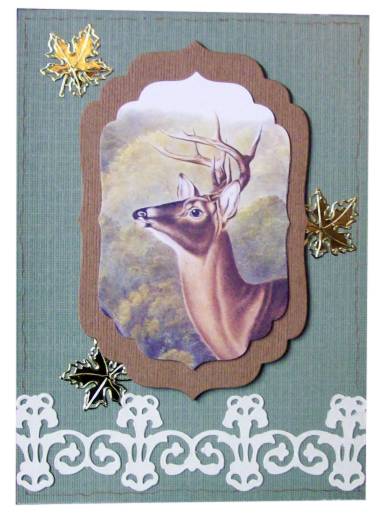
I used the Cuttlebug cutting die 'ornamental ironwork' for the bottom border, cut from cram cardstock.
The leaves are stacked gold stickers and I drew in a faint border with marker.
Ddd
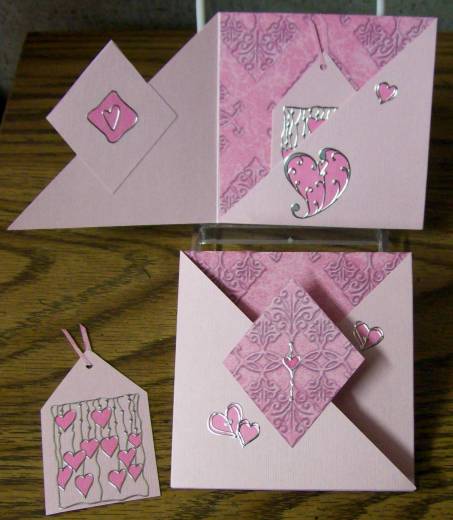
Another challenge - make a criss-cross card. We were given a loink to instructions and this is how I made mine (not exactly by the instructions - but when do I ever) .
With a single 12 x 12 sheet of cardstock I was able to make three of these. I cut three 12 x 4 strips and scored them into 4 x 4 sections. Each outer section is cut at a 45 degree angle from the fold to the point. Then the center is lined with scrapbook paper.
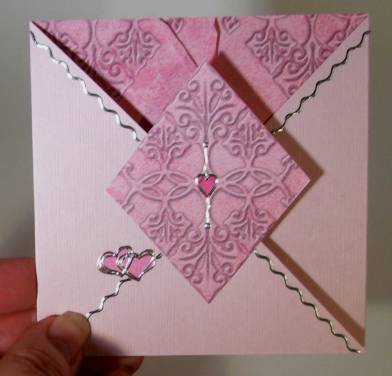
The right panel is folded in and glued at the fold and at the bottom. On the left front I glued a motif from the inner paper and attached it exactly over it. I attached a matching piece in the inside of the panel as well.
Silver stickers (hearts and borders) were applied and Sharpie marker used to color in the hearts.
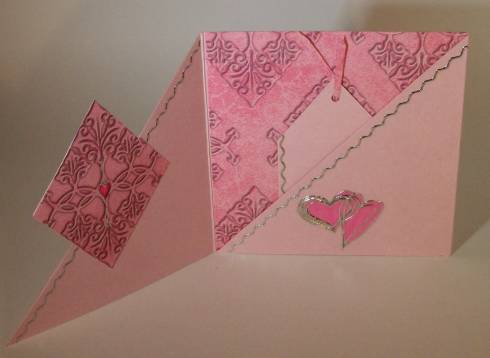
I made a matching tag for the inner pocket and decorated it with the same silver stickers. Matching scrapbook paper was used for the tag 'ribbon'.

Ddd
Several times I've come across this product called the bow-easy. If you find it hard to tie a bow and make it even, straight and laying neatly, then this product might be for you, too.
Here is a tutorial on how to use it. http://jerrikay.blogs.splitcoaststampers.com/2009/05/08/woo-hoo-i-did-it/
I recently found another tutorial on how to make your own templates out of chipboard - and if I can ever find it again I will post it, too.
Ddd
Here's a digital project I created for an event to be held at work. We are having a 'community read' and the book selection had food as it's major theme. I was given the title and this is what I designed for the logo to be used on the posters and the book labels.

Ddd
I loved this project the minute I saw it and had to run right down to the studio and try it out. A video tutorial is here: www.amazingpapergrace.com/video-tutorial-twist-top-box/
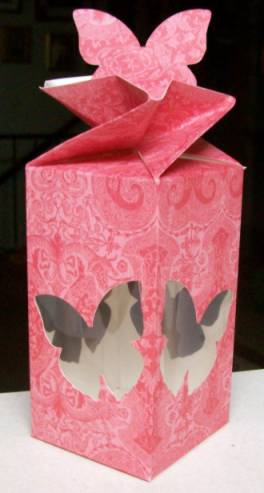
Hers used more decorative elements on the sides but I liked mine more simple because of the elaborate pattern on the cardstock. I lined mine with a folded clear transparency.
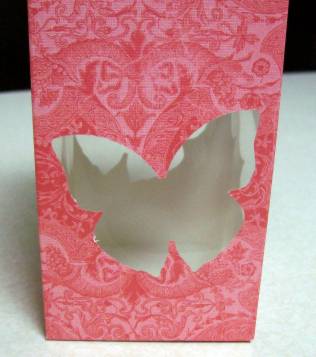
Here you can see what the twist top looks like. Because it was a little plain, I put the butterfly cutouts on top of a wire and poked it through the top. Once I fill it with candies it will hold it in place solidly.
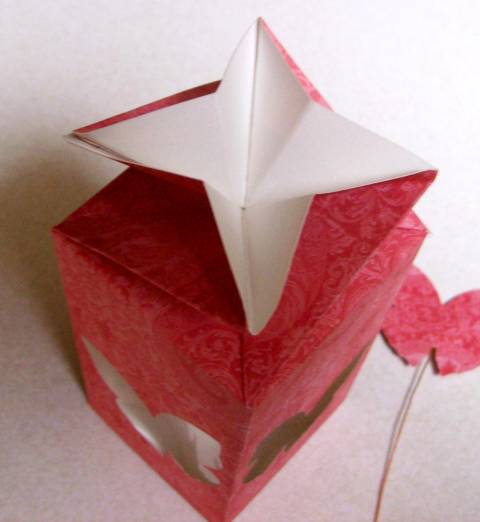
Isn't this fun?
Ddd
After all the work stitching this card I dropped the stamp on it after making the greeting. Rats! So I used a waterbrush and wet just the secondary ink to create a shaddow behind the main text. Nice save, huh?
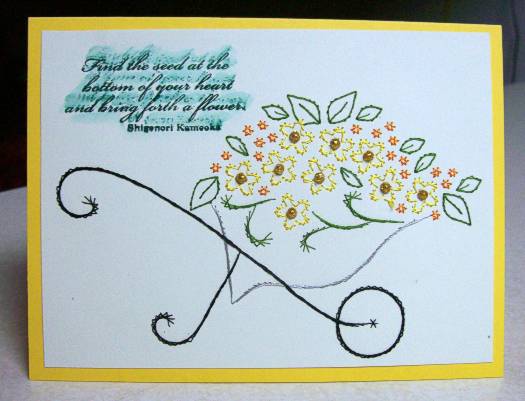
The centers of these flowers are sticky backed glitter domes and I mounted on folded yellow cardstock.
Ddd
The last one I showed of this stitching was distressed and organic looking. I decided to go with a 'fresh' look for this onewith bright pink flowers. The centers of these flowers are sticky backed half-pearls.
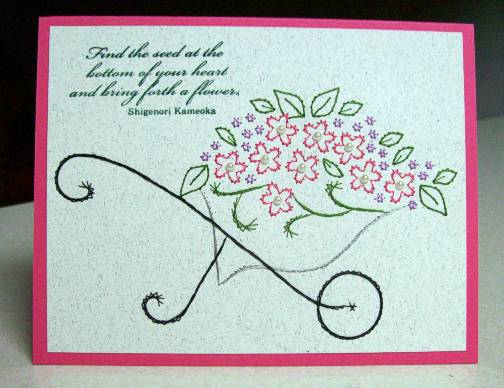
I stamped the greeting with Adriondak 'bottle' ink and mounted the panel on folded pink cardstock.
Ddd
It's been quite a while since I shared some of my favorite recipes. So here are a few for you to try out.
½ onion chopped 1 t. minced garlic 1/8 c. each margarine and olive oil | 4 chicken breast, cubed 2 cans water chestnuts, cut match stick style 1 can bamboo shoots 1 can whole cashews | to taste: Mongolian fire oil, ginger, Yoshida’s gourmet sauce, soy sauce, Worcestershire, teriyaki sauce |
Sauté onion and garlic in margarine and oil. Add chicken and cook till done. Add water chestnuts, bamboo shoots and cashews. Make sauce over all adjusting as you go. Cook 5 minutes to blend flavors.
4 cups water 2 cubes chicken bouillon ¼ t. curry powder 1 t. garlic powder | 2 T. onion flakes 2 t. tarragon 2 t. basil 1 T. sugar | 1 t. cinnamon whole chicken breast 2 cups dried noodles 1 cup whole almonds |
Make stock of all liquid and spices. Bring to boil. Drop in finely cut pieces of chicken. Cook 2-3 minutes. Drop in noodles and almonds. Simmer till noodles are done. Drain. Toss with ¼ cup olive oil to coat. Serve.
TERIAKI SAUCE
Makes 1 gallon
1 quart vegetable oil ½ gallon soy sauce | 3 cups brown sugar 3 Tbsp garlic powder | 3 Tbsp ginger powder 2/3 cup fruit juice |
Stir well into 1 gallon container. Keeps months in fridge. Stir before each use.
Enjoy!
Ddd
