« June 2010 »
S M T W T F S
1 2 3 4 5
6 7 8 9 10 11 12
13 14 15 16 17 18 19
20 21 22 23 24 25 26
27 28 29 30
You are not logged in. Log in
Entries by Topic
All topics  «
3D paperwork
A - Z challenge 5
A - Z challenge 7
A - Z challenge round 4
A to Z challenge round 3
A to Z round 2
A to Z round 6
A-Z round 1
Around the House
Art Challenges
Artist Trading Cards
Backgrounds
Beads
Bible Journaling
Books
Boxes
Collage
Color Challenge
Coloring
cookbook
Die Cuts
Digital Projects
Digital Stamps
Drawing
Dry Embossing
Fabric Stuff
Fantastic Folds
Field Trip
Home Decor
How Does Your Garden Grow?
Hymnal Art
In The Kitchen
In the studio
Jewelry
Lettering
Links
Multi-Technique
Music to Work By
Musings
Nail Art
New Work
Online Class
Other Hobbies
Other Projects
Painting
Paper Embroidery
Paper Piecing
Photo
Pretty Paper
Quilting
Random
reading
Scrap Recovery
scrapbooking
Sewing
Sketch Challenge
Some Backlog
Stamping
Stencils
Stickers
Supplies
Teabag Folding
Techniques
Testing
tips and tricks
Tutorial
Web resources
Welcome to my Blog
Work By My Friends
workflow
Writing
Blog Tools
Edit your Blog
Build a Blog
RSS Feed
View Profile
Group One
In & Out of Studio 3D
Tuesday, 22 June 2010
'Til the Cows Come Home
Topic: Photo

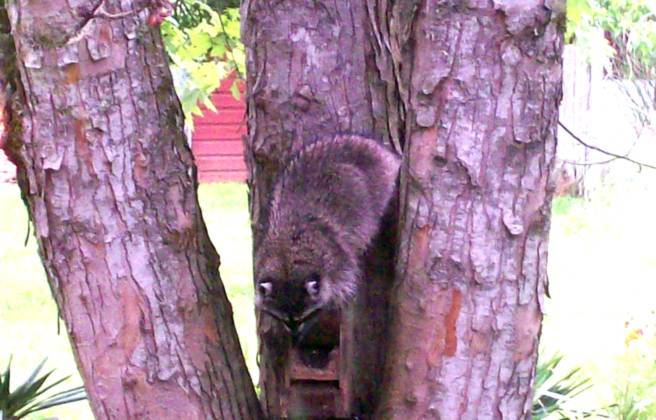
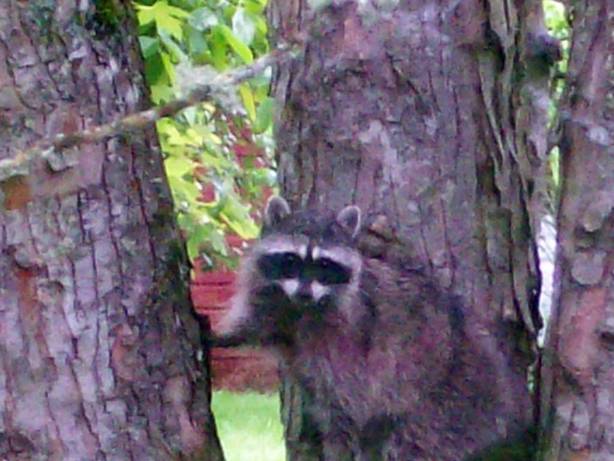
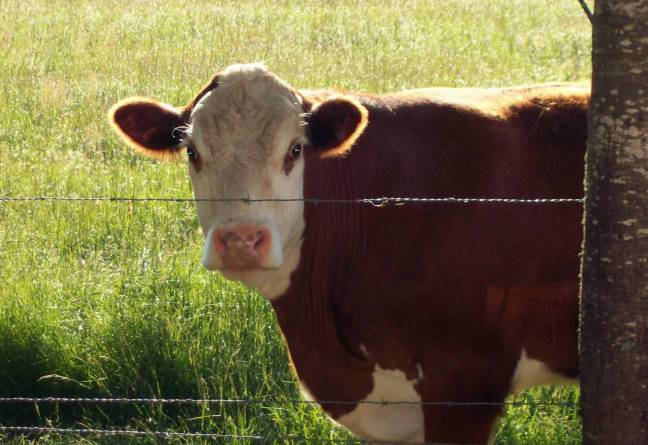
We have no animals on our farm, yet, but I woke up this morning and found this neighbor trying to peek in the windows of the camper! I'm calling him Tom, now.

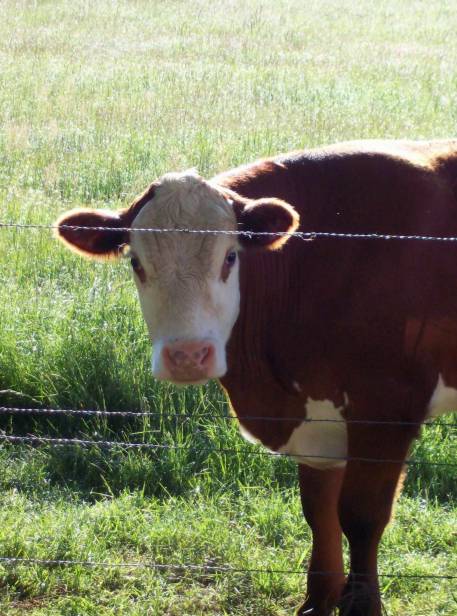
There are actually a pair of these beefers who ALWAYS are together so you'd think they were conjoined! They are SO curious and follow us around the fence line watching to make sure we know what we're doing.

They won't be petted but if you are patient they will come and touch their noses to your hand briefly. THEY have to be the one doing the touching.

Here's another shot of Tom, peeping at me. Love the colors created by the backlighting of the sunrise.

Ddd


Posted by studio3d@ccgmail.net at 6:00 AM PDT
Monday, 21 June 2010
Busted!
Topic: Around the House

A glance out the front window the other day and I spied this bandit raiding the squirrel feeder. THAT'S not a squirrel!

When one shot caused the flash on the camera to go off she suddenly realized she was BUSTED!

Uh-oh! She watched me for a few minutes and then quietly walked down the back of the tree and waddled off around to the back of the house where she lives.

We'll se her again - as soon as somebody steps out on the deck and hollers, "Racoon buddies, I've got marshmallows!" Then she'll come running up to the bottom of the deck stairs to beg for treats.

Ddd


Posted by studio3d@ccgmail.net at 6:00 AM PDT
Sunday, 20 June 2010
Shell Sparkle
Topic: Stamping

Another new stamp (they were having a 40% off sale). This is one of the style I especially like that looks like it is sketched. I stamp these once on scrap paper then on the panel to look more like pencil drawing. I colored with watercolor pencils and blended with aquabrush. 

I used a Cuttlebug frame folder to impress right over the stamped image and then traced over all the raised portions with Stickles. Sticky-back pearls are added at the frame corners.

I rounded the corners of the embossed panel, the designer paper and the folded base card before adhering all together.

Ddd


Posted by studio3d@ccgmail.net at 6:00 AM PDT
Saturday, 19 June 2010
This Is My Country
Topic: Dry Embossing

Assignment: Create a card for swap that tells about your country. So I created this little history lesson!

The stars are a Cuttlebug folded on which I applied Adriondack 'denim' directly on the folder before impressing. The same is true of the stripes using Adriondack 'cranberry' ink. I tore both and glued together.

I used a Marvy marker to hand write in the patriotic phrases and used the denim ink to stamp the image at the lower right.

After mounting on white then cranberry cardstock I added a gold star to the stamped image and a border of gold stars to represent the flagpole.

Ddd


Posted by studio3d@ccgmail.net at 6:00 AM PDT
Friday, 18 June 2010
Oh Happy Day
Topic: Stamping

This is another of the stamps from the new set I got. See how the words are all embedded in the flowers? This is the commonality in them. The text at the bottom of the card, though, is a rub-on but I thought the style really fit.

I added Stickles to all the 'daisies' including the one at the bottom. The ribbon is tied around the front panel which has been rounded at the upper left and lower right.

Ddd


Posted by studio3d@ccgmail.net at 6:00 AM PDT
Thursday, 17 June 2010
Destination
Topic: Stamping

Sometimes I get a ways into a card, don't like the way it is going, but just keep adding stuff trying to 'rescue' it. Can't seem to just let it go.

This is just such a card...

The lower image is stamped. The rest is designer papers and stickers.

So there you go. It is what it is and it is done!

Ddd


Posted by studio3d@ccgmail.net at 6:00 AM PDT
Wednesday, 16 June 2010
Wheel On In
Topic: Stamping

What a cheery card! Maybe it will finally usher in some sunshine at my house!

I used the Cuttlebug to cie-cut the wheelbarrow image and the designer paper behind it. Then prepared the yellow backing card with Cuttlebug embossing. The swirls at the corner were scraps I had from way back and I added sticky-back pearls around the image.

The image panel and the silk flower are mounted 3D. I used Sharpie marker to color the center of the flower to match the stamped image and also colored it's leaves.

Ddd


Posted by studio3d@ccgmail.net at 6:00 AM PDT
Tuesday, 15 June 2010
A Little Swagger
Topic: Paper Embroidery

More combining stamping with stitching... This stamp is from a new set for me. After coloring, I pricked out the pattern at the bottom and used colors to match the focal image. I added a Cuttlebug embossed border at the top and then added sticky-back pearls to all the flower centers throughout.

I backed with pink and green to match the flowers, leaves and swags.

Ddd


Posted by studio3d@ccgmail.net at 6:00 AM PDT
Monday, 14 June 2010
Pink and Blue
Topic: Stamping

Same stamped image as yesterday with a little twist on the colors. I went more pastel with this card. I used an embossing folder on the pinc card front and Nestabilities dies to cut the image and a blue backing. The two panels are mounted 3D.

I added Stickles to all the flowers and a text sticker.

Ddd


Posted by studio3d@ccgmail.net at 6:00 AM PDT
Sunday, 13 June 2010
Coral Stitching
Topic: Paper Embroidery

This card could really have TWO headers: Paper Embroidery OR Rubber Stamping! I did a bunch of stamping and coloring and finally sat down to start putting them together. For this one I obviously added a corner stitching element to match the color of the roses. Then I found some related colors in patterned paper and ribbon.

The text is a sticker and I added rhinestones to the stitching.

Ddd


Posted by studio3d@ccgmail.net at 6:00 AM PDT
Saturday, 12 June 2010
What a Challenge
Topic: Paper Embroidery

Group leader sent us a pattern to use as a challenge. No instructions or sample so we each just did it as we wanted. This is my result.

I stitched with butter yellow, goldenrod, and rust and added a button brad to the center. The borders on either end are Cuttlebug and I framed it out in goldenrod and rust.

Ddd


Posted by studio3d@ccgmail.net at 6:00 AM PDT
Friday, 11 June 2010
It's About Time
Topic: Paper Embroidery

Every other time I have made this pattern I have turned it into a bookmark. But the assignment was to make a 'card' with the theme 'time'. So I mounted on floral paper with a couple of border pieces and found sticker border with strings of 'time' phrases to finish it off.

One more 'time flies' oval sticker was added along with clear bubble stickers over the top knob and the pendulum.

Ddd


Posted by studio3d@ccgmail.net at 6:00 AM PDT
Thursday, 10 June 2010
Tea Party
Topic: Fantastic Folds

LOTS of teapots! I made many more so they could be used as centerpieces at an upcoming event. They will actually be used as floral containers with the lids set aside and a glass inserted to hold the flowers in water. Here are all 7 of them:

And here they all are individually:


That's it!

Ddd


Posted by studio3d@ccgmail.net at 6:00 AM PDT
Wednesday, 9 June 2010
Mail Train
Topic: Some Backlog

Now THIS is really backlog! I made this train mailbox about 25 years ago as a gift for my parents. They no longer have a place to use it so I've got it back - decorating my front porch.

I designed this around an actual mailbox and added the coupula and cow catcher using sheet metal (a friend with a riveter helped with assembly). The funnel is actually a funnel from the hardware store and is screwed on. The bracket for the bell is a curtain rod bracket and it is supposed to have a little bell tied on that is the kind you buy for your birdcage (for the bird to play with). It also used to have a little convex mirror on the handle to represent the headlight.

I used large spaghetti sauce cans for the back wheels and tuna cans for the front. Then I masked off the flag and spray painted it with glossy black paint.

She's all pretty tired looking now after many years in the weather, but I kinda like that look with the wrought iron railings of the porch.

Ddd


Posted by studio3d@ccgmail.net at 6:00 AM PDT
Tuesday, 8 June 2010
Purple Haze
Topic: Backgrounds

Practising the brayer techniques I learned last month, I chose pinks and purples from my set of Whispers die ink pads. This uses some brayering, some sponging and a little bit of stamping (the tree and distant brush. I drew in the birds with Sharpie marker and the water lines with white gel pen.

The sentiment is white rub-ons.

Ddd


Posted by studio3d@ccgmail.net at 6:00 AM PDT
Monday, 7 June 2010
Take to the Air
Topic: Stamping

 More of the same from yesterday! The reverse of my sample brayer cardstock was green and there was enough left over from yesterday's project to mount a different butterfly. I used the same techniques - including the same Stickles. The green backfround picks up more of the gold tones of the glitter, though.

The cardstock for this one is a green metallic textured stock. It looks SO nice with the glittery butterfly! I used the same faux text stamp but changed out the greeting for the bottom.

Ddd


Posted by studio3d@ccgmail.net at 6:00 AM PDT
Sunday, 6 June 2010
If I Could Fly
Topic: Stamping

Where it all started... I had a sample card that I practiced brayering techniques on. I laid on the gold outline butterfly and then trimmed around. Then I colored the body black. I applied 'diamond' Stickles to all the open areas and clear Glossy Accents to the body.

So, what to do with it???

I saw this structure on Gina K's blog StampTV ( http://stamptv.ning.com/video/reverse-nestabilities ). And knew the butterfly would look great this way. The area behind the large cutout is stamped with a faux script and a greeting stamp was placed behind the smaller coutout. Both of the cutouts are done with the Nextabilities Labels 11 dies.

The 'frame' is mounted with foam dots to provide dimension and the same is done with the butterfly. The wings of the butterfly turned up on their own as the Stickles dried. Cool!

Ddd


Posted by studio3d@ccgmail.net at 6:00 AM PDT
Saturday, 5 June 2010
Here Is My Handle, Here Is My Spout
Topic: Fantastic Folds

A reprise of the teapot adventure. I couldn't resist making another one and this time I did it without the directions! They each take about an hour to make.

The cardstock I chose for this one has a sheen to it that makes it look more like porcelain.

Ddd


Posted by studio3d@ccgmail.net at 6:00 AM PDT
Friday, 4 June 2010
I'm a Little Teapot...
Topic: Fantastic Folds

Back when I was in school we always had these tests with multiple choice questions. One of my favorite was when they would show an object and you had to choose the flat pattern that would make it or, conversly, a pattern was shown and you had to choose which of four objects would be created when it was folded. I was always very good at that.

So, when I decided I wanted to create a paper teapot, I designed it all on the computer in a flat pattern first. To do this I had to 'assemble' it in my head as I went and then design the next fold or measurement to fit with what I already had. When I used the directions I had written to make the actual object I had to change only ONE thing (the order of assembly of the bottom which would be attached later to the base.

So, are you ready to see it? This is the side view:

Of course you can't actually USE it for tea, the bags are just laying there for scale. This is the top view:

You can see that the handle and the spout are not 3-dimensional, but you can't have everything! Here is a view showing the lid removed:

You could actually use it to store teabags if you wanted to! It is ov a size that would make a good centerpiece, too.

This project uses three pieces of printed cardstock 12 x 6 inches and a large decorative brad.

Ddd


Posted by studio3d@ccgmail.net at 6:00 AM PDT
Thursday, 3 June 2010
Sunset on the Lake
Topic: Stamping

This was the last card done at Michelle's brayer workshop.

We masked the sun, brayered multiple shades at the top and bottom, masked the horizon line and brayered again. Masked the lower left and stamped the tree and bushes. Then we sponged in both islands and the green in the foliage.  Highlights on the foliage and the lines in the water are done with gel pen. Finally, the sun was sponged and the little cloud added.

The layering with background cards is color echoed in the corner brackets with brads.

Ddd


Posted by studio3d@ccgmail.net at 6:00 AM PDT

Newer | Latest | Older