« October 2010 »
S M T W T F S
1 2
3 4 5 6 7 8 9
10 11 12 13 14 15 16
17 18 19 20 21 22 23
24 25 26 27 28 29 30
31
You are not logged in. Log in
Entries by Topic
All topics  «
3D paperwork
A - Z challenge 5
A - Z challenge 7
A - Z challenge round 4
A to Z challenge round 3
A to Z round 2
A to Z round 6
A-Z round 1
Around the House
Art Challenges
Artist Trading Cards
Backgrounds
Beads
Bible Journaling
Books
Boxes
Collage
Color Challenge
Coloring
cookbook
Die Cuts
Digital Projects
Digital Stamps
Drawing
Dry Embossing
Fabric Stuff
Fantastic Folds
Field Trip
Home Decor
How Does Your Garden Grow?
Hymnal Art
In The Kitchen
In the studio
Jewelry
Lettering
Links
Multi-Technique
Music to Work By
Musings
Nail Art
New Work
Online Class
Other Hobbies
Other Projects
Painting
Paper Embroidery
Paper Piecing
Photo
Pretty Paper
Quilting
Random
reading
Scrap Recovery
scrapbooking
Sewing
Sketch Challenge
Some Backlog
Stamping
Stencils
Stickers
Supplies
Teabag Folding
Techniques
Testing
tips and tricks
Tutorial
Web resources
Welcome to my Blog
Work By My Friends
workflow
Writing
Blog Tools
Edit your Blog
Build a Blog
RSS Feed
View Profile
Group One
In & Out of Studio 3D
Saturday, 2 October 2010
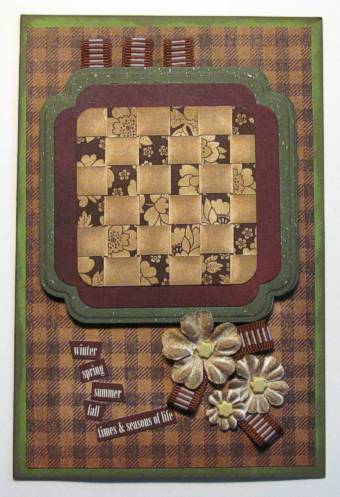
Seasons of Life
Topic: Techniques

I had one scrap of paper weaving left from recent projects and put this together from it. The two label layers were from the leftovers pile as well. All these as well as the flowers, the checked paper and the green folded cardstock base were sponged with distress ink to equalize the tones.

The flowers were mounted with brads and folded loops of ribbons were added to the top and also as 'leaves' for the flowers.

The text is cut snippets of cardstock stickers.

Ddd


Posted by studio3d@ccgmail.net at 6:00 AM PDT
Friday, 1 October 2010
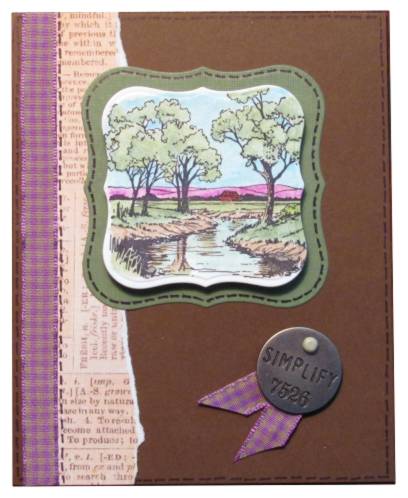
Farming Simplified
Topic: Stamping

Stamped and colored this image months ago and lost it in the pile! Looking for something else and there it was. So I used it!

Nestabilities used to cut the stamped panel and a larger green one to go underneath. A torn strip of text printed paper and a couple of pieces of ribbon - to pick up the color of the distant hills.

I did pen 'stitching' around several elements and added the metal tag with a brad thru the hole.

Ddd


Posted by studio3d@ccgmail.net at 6:00 AM PDT
Thursday, 30 September 2010
Early Christmas
Topic: Scrap Recovery

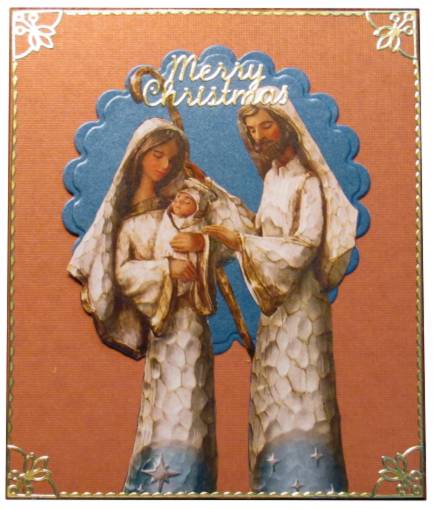
In the Sunday paper was an ad for Christmas figurines (buy this figure and we'll send you more on a regular basis and you'll never get off our list). I cut out the figures from the ad and did a simple mount over a scalloped edged blue cardstock to pick up the blue in the robes. Gold peel-off stickers were used for the text as well as the borders and corners.

Simple and elegant.

Ddd


Posted by studio3d@ccgmail.net at 6:00 AM PDT
Wednesday, 29 September 2010
Friends Love Hydrangeas
Topic: Stamping

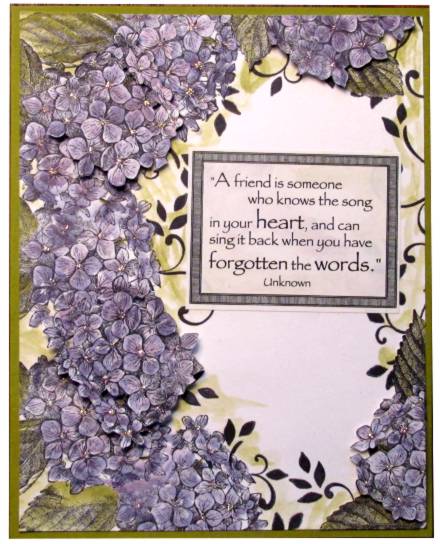
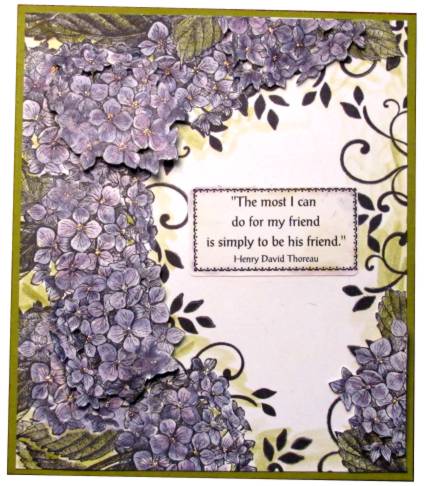
I saw this beautiful layout on this blog (http://inkstainswithroni.blogspot.com/2010/08/dimensional-watercolor-hydrangea-card.html), took diligent notes on how it was done, and produced these two cards with the supplies that I had on hand.

The hydrangea was stamped three times along the left side and once running off the edges at the top and the bottom. I masked the blooms and stamped scrolls along the edges. Then on a separate piece I stamped three more blooms and all of them were colored with an aquabrush and ink including the green around the scrolls.

The extra blooms were cut out and mounted with 3D glue dots filling in the spaces. One of the blooms was cut in half and placed along the top and right edges.

I used a folded green cardstock base and then added golden Stickles to the centers of each florette. The text is a printed sticker which has some colors staining to coordinate with the rest of the card.

I made two of these and, since they are so similar, I am posting both today.


Ddd


Posted by studio3d@ccgmail.net at 6:00 AM PDT
Updated: Friday, 3 September 2010 4:58 PM PDT
Tuesday, 28 September 2010
Toast, Chocolate, Caramel and Coffee
Topic: Stamping

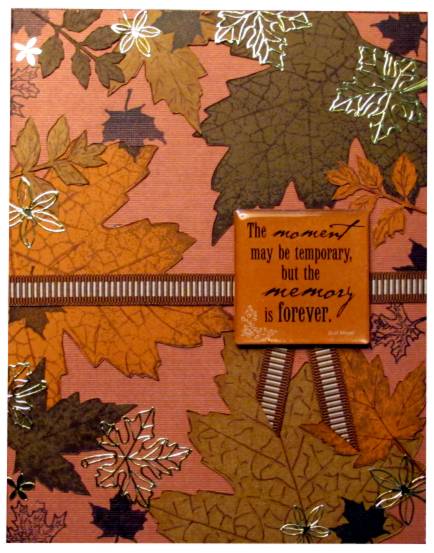
Yummy shades of brown! Three colors of distress ink (plus black), four shades of brown cardstock, five rubber stamps of leaves. The brown leaves were all stamped and cut out for layering. Then the black leaves were stamped to fill in. More leaves in gold peel-off frame out the card.

I added a band of grosgrain ribbon and two 'flags' hanging down. Over these I placed a thick acrylic clear text sticker mounted on cardstock that matches the background. It is mounted on foam dots.

Ddd


Posted by studio3d@ccgmail.net at 6:00 AM PDT
Monday, 27 September 2010
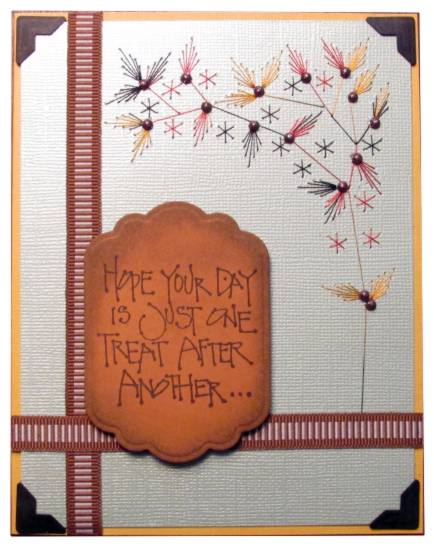
One Treat After Another
Topic: Paper Embroidery

I used verigated thread to stitch up this branch on textured metallic cardstock.  At the base of each leaf I added a sticky-backed glitter dot. Two strips of grosgrain ribbon frames the stamped text which was cut out with a nestabilities die and distressed with ink. I popped it up on foam dots.

Photo corners were used to attach the panel to golden folded card base.

Ddd


Posted by studio3d@ccgmail.net at 6:00 AM PDT
Sunday, 26 September 2010
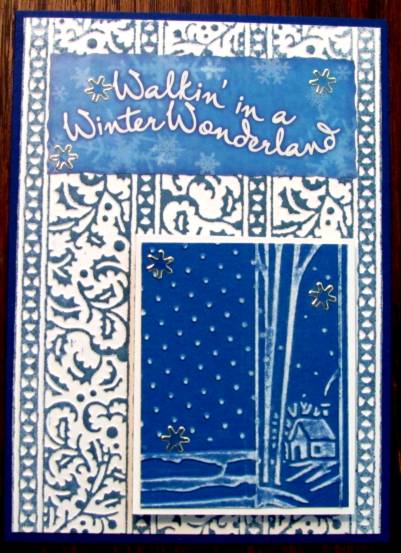
Winter Blues
Topic: Dry Embossing

Can you find FOUR embossing plates used on this card?

1) Obviously, the background. This is a large-sized folder which was impressed onto white cardstock and colored using a 'denim' distress ink pad and a brayer to color the raised portions.

2) Little house and trees are a winter border.

3) Dotted swiss folder was impressed in the left upper portion.

4) Distressed stripes folder was used in a very small portion to carry the 'ground' area across from the house scene.

Folders 2-4 are used on a white-core blue cardstock and then the surface was sanded to expose the white. This panel was bordered with white cardstock and then mounted with foam dots for lift. 

I added a blue text sticker at the top and then places 5 clear snowflake stickers across the text and scene.

Ddd


Posted by studio3d@ccgmail.net at 6:00 AM PDT
Saturday, 25 September 2010
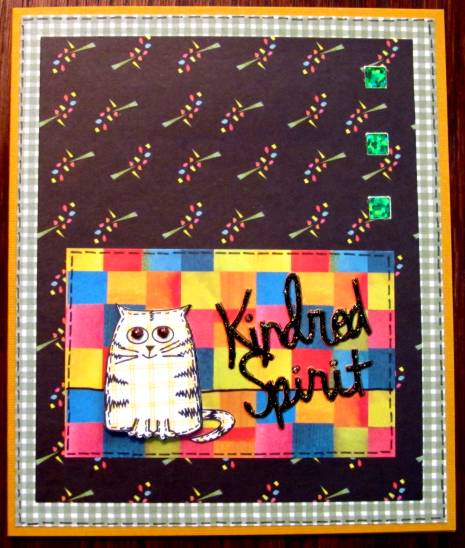
Kindred Kat
Topic: Stamping

Ha! Still using up these cats I stamped on yellow plaid paper. I stamped quite a few not knowing what I would be doing with them. In this case I cut one in full and one without the tail. When popped up on 3D glue dots it makes him stand away from the card surface. I also gave him glittery eyes and drew new whiskers as the originals are outside the face area and get cut away.

Three backing papers are scraps from an old scrapbook page-a-day calendar. I went a little crazy with the faux stitching: around the green checked paper, around the colorful patchwork, and around the cat! I added three holographic green sticker squares at the upper right as a space filler that would carry on the green and the square elements.

The text is a Cuttlebug die cut that started out orange. It didn't have enough contrast with the background so I did some faux stitching on it... wrong! So I colored it black with markers... looked flat and blah. So I traced it out with Stickles... YES!

A golden folded cardstock base echoes color from the patchwork layer.

Ddd


Posted by studio3d@ccgmail.net at 6:00 AM PDT
Friday, 24 September 2010
On The Surface
Topic: Books

Today I am presenting an unsolicited book review. I picked up this book at Barnes and Noble last month and I am enthralled with it:

Paper Transformed: A Handbook of Surface-Design Recipes and Creative Paper Projects by Julia Andrus, published by Quarry Books, 2007 (ISBN 1-59253-370-1).

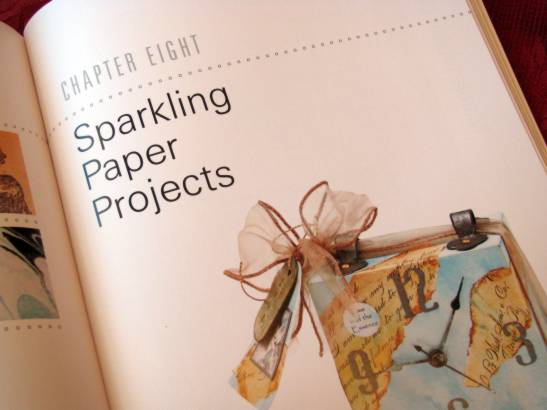
Beautiful photographs abound, beginning with the title page:

Chapters 1-7 are all about methods for getting color, texture and pattern onto your papers. These include products as well as techniques, and include step-by-step instructions using lots of photos. Each is demonstrated on a tag as a common frame of reference. This keeps the focus on learning the process rather than working toward a specific finished product:

Many of these processes have additional tips so that one may make educated choices in varying the technique for a different result:

After teaching these techniques for transforming your papers, Chapter 8 presents twenty-four fabulous projects constructed from these papers, including full directions. These include game boards, journals, cards, containers, home decor, and more:
If you have any desire to take your papercrafts beyond cutting up and gluing together commercial designer papers, then this book is for you.

Highly recommended.

Ddd


Posted by studio3d@ccgmail.net at 6:00 AM PDT
Thursday, 23 September 2010
Dragonfly in Amber
Topic: Other Projects

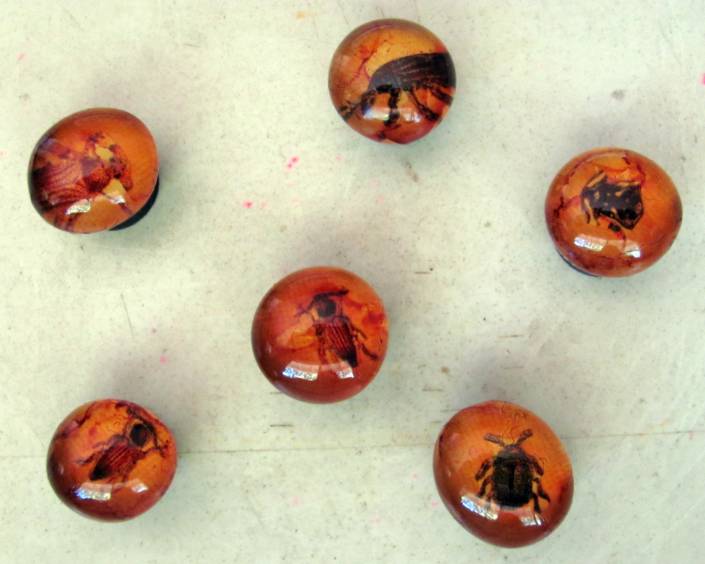
Following up on yesterday's project, I had another idea - to make faux amber with embedded bugs.

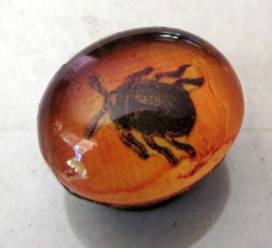
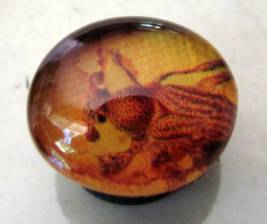
For these I applied bug stickers to butterscotch colored cardstock and attached the flat-backed marbles with clear glue. After drying I cut around the base of the marbles and used 'butterscotch' and 'caramel' alcohol inks to color the marbles, allowing it to drip down and color the backing as well. Continuing to tap the glass with the ink on a felt pad makes lines that look like 'faults' in the amber. These were then mounted on round magnets using glue dots.

Here is the full set:


And the 6 individual magnets:


I will likely decorate a tin to enclose these so they can become a gift set.

Ddd


Posted by studio3d@ccgmail.net at 6:00 AM PDT
Wednesday, 22 September 2010
Gumballs on the Fridge
Topic: Other Projects

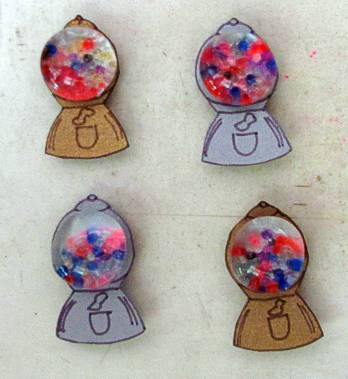
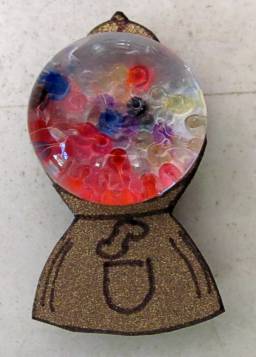
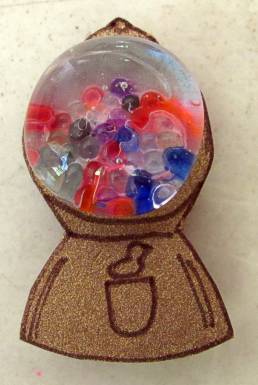
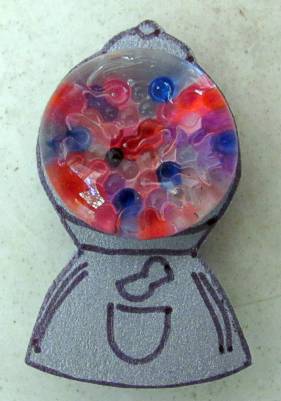
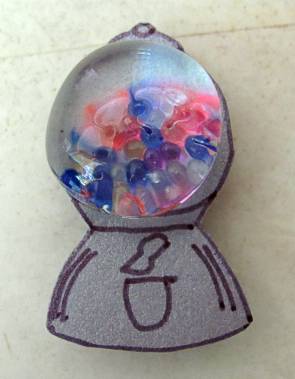
A little brainstorm I had to try out... I started with flat-backed marbles and applied clear glue and added a mixture of Beedz (hole-less beads - very small). Then mounted with more clear glue on white cardstock and dried. After this I cut around the marble and mounted with glue dot to little gumball machines I had drawn and cut out of metallic cardstock. More glue dots hold them to magnets so they can tack notes to the refrigerator.

Here is the whole set of 4:

These are the two gold ones:

And the two silver ones:


The group of 4 is the closest to actual size.

Ddd

Posted by studio3d@ccgmail.net at 6:00 AM PDT
Tuesday, 21 September 2010
Views From A Winery
Topic: Photo

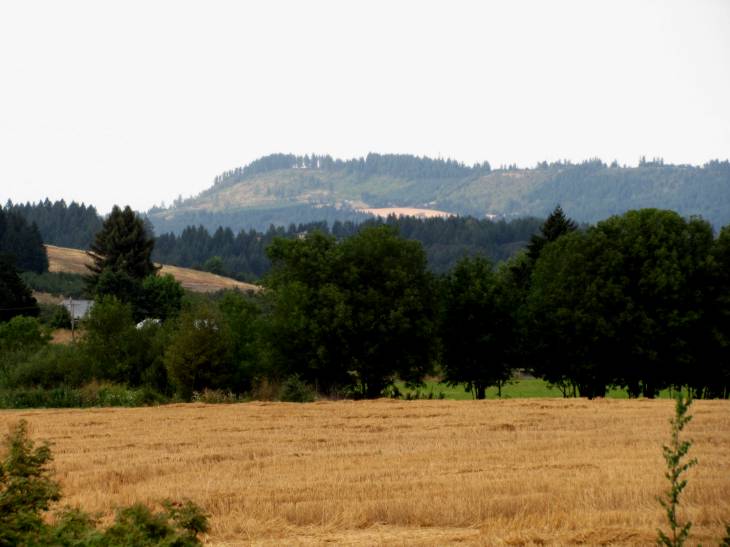
A little outing the other day to attend a concert at a winery. What a beautiful setting it was.

This was the view from the tasting room:


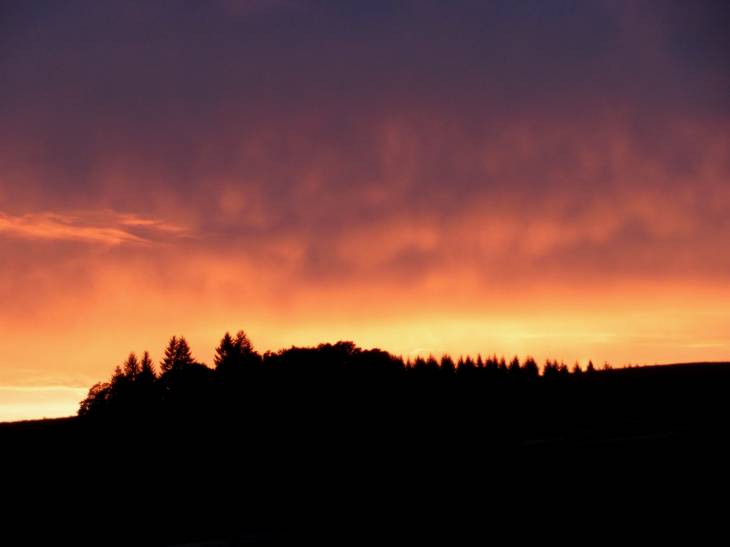
Then we had a stunning sunset right behind the performers:

Loved the cloud formations:

Ddd

Posted by studio3d@ccgmail.net at 6:00 AM PDT
Monday, 20 September 2010
The House Frog
Topic: Photo

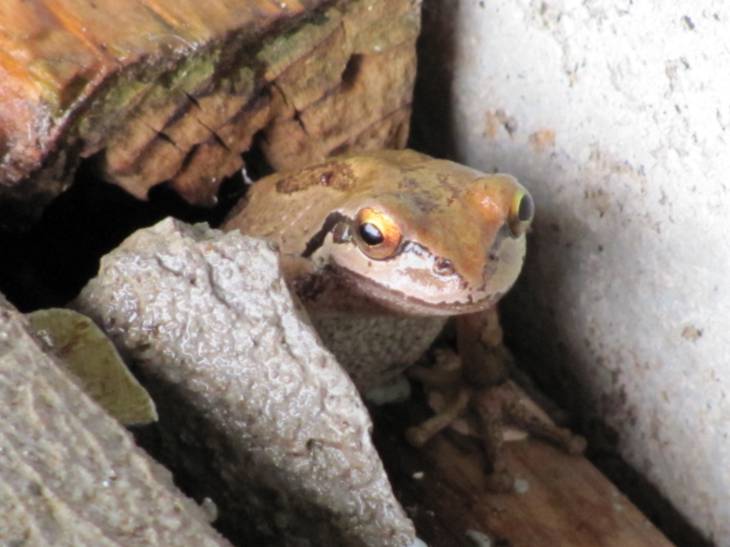
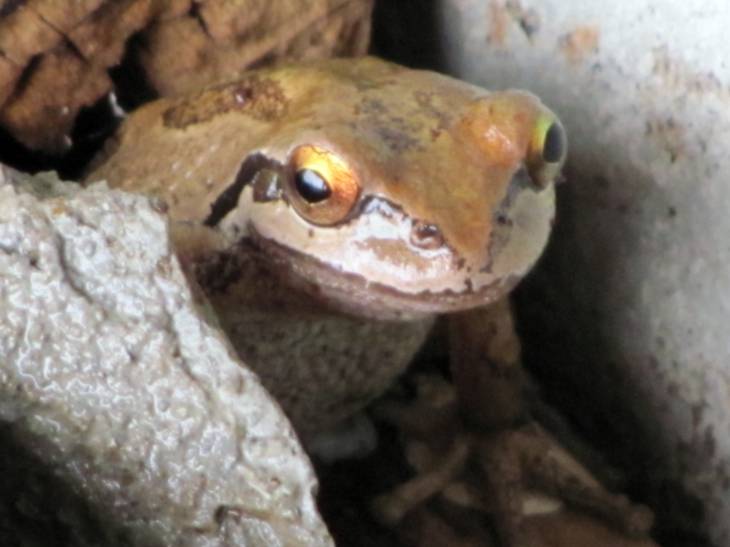
Kermit has a neighbor. This little brown frog lives down by the hose bib pipe where I water the garden. There is an expansion board between the concrete foundation and the concrete patio. He has made a little house for himself where they have opened apart.


Surprisingly, he stays under the board as long as it is dry. If the board gets wet he comes out. Frogs who don't like to be wet?!?!?! 


Strange.

Ddd


Posted by studio3d@ccgmail.net at 6:00 AM PDT
Sunday, 19 September 2010
Colorful Song
Topic: Photo

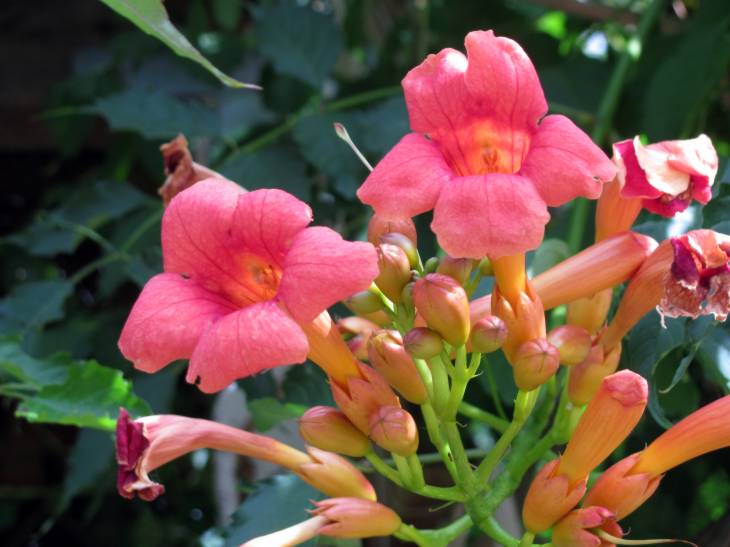
(because it's a 'trumpet flower')

This is a vine in our back yard, which climbs 10 feet tall up the end of the deck on lattice. The hummingbirds LOVE it, but I got tired of waiting for one to come along to photograph.

Ddd

Posted by studio3d@ccgmail.net at 6:00 AM PDT
Saturday, 18 September 2010
Test
Now Playing: Test

Posted by studio3d@ccgmail.net at 8:57 AM PDT
Flowers From Michael
Topic: Supplies

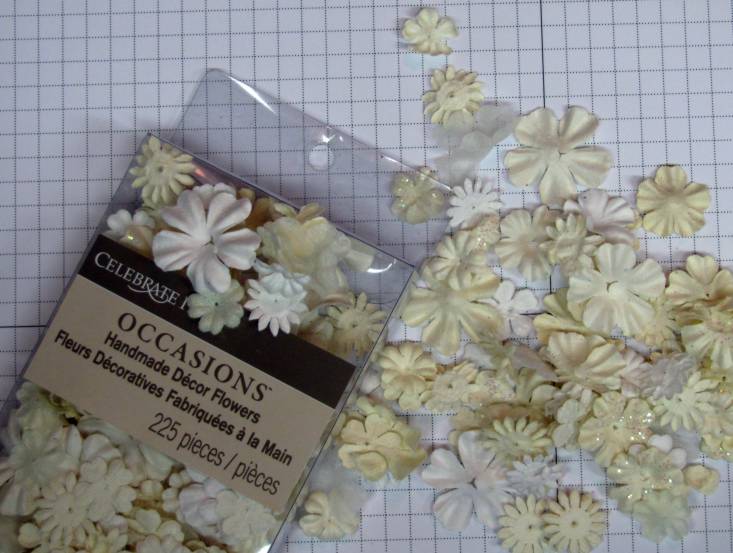
I've used flowers quite a bit on projects lately and wanted to share the source. I went to the wedding section at Michaels and found this package. I mixes white and cream, fabric and paper, plain and glittered, multiple styles and sizes.

I have colored these with alcohol ink, watercolor pencils, markers and plan to try out some air-brushing on them. I have stacked them, put in rhinestone centers, attached with brads and glue dots.

Cost for 225 pieces? $4.99. REALLY! And they are so versatile that this is a super bargain.

Ddd


Posted by studio3d@ccgmail.net at 6:00 AM PDT
Updated: Saturday, 28 August 2010 11:59 PM PDT
Friday, 17 September 2010
September Girl
Topic: Fantastic Folds

Another challenge: make a folded paper frame and use it on a card, box, etc. I chose to use mine on a card. I already had the image stamped and circle-cut and had the scalloped circle to borker it already selected.

So I made the frame and mounted this on two patterned cardstocks. I added corner stickers, a ribbon bow, and a tag upon which I used a burgundy rub-on, hand lettering, and a brad.

I chose the folded cardstock base using a light peach from the pink pattened card.

Ddd


Posted by studio3d@ccgmail.net at 6:00 AM PDT
Thursday, 16 September 2010
Hello, Punkin'
Topic: Stamping

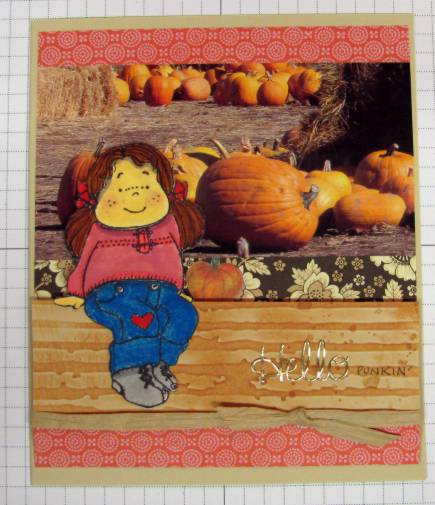
I colored up this little girl stamped image and combined her with table scraps to create this fall card. The background is more of the calendar photo, the wall is some Cuttlebugged and distressed cardstock, and there are three strips of designer paper scraps.

I used a piece of raffia to tie the bow, added a gold peel-off sticker and hand lettered the remainder of the greeting. The pumpkin beside her is a clear sticker.

Ddd


Posted by studio3d@ccgmail.net at 6:00 AM PDT
Wednesday, 15 September 2010
Burst of Color
Topic: Techniques

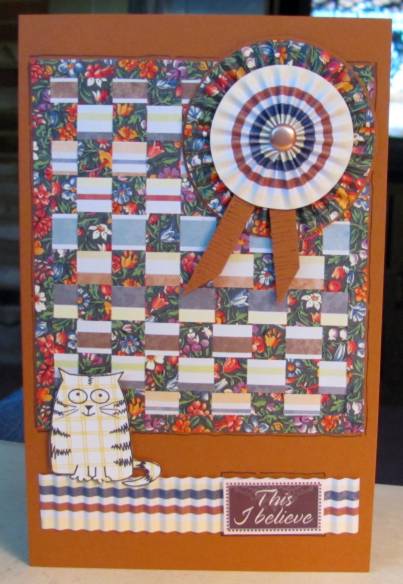
I've been seeing handmade flowers everywhere on the net and some of them look like a rosette. I had a brilliant notion to try using the paper crimper on strips of paper to see if I could replicate some. This is what I came up with.

I think it went pretty well. I did find that you have to go back over the entire strip and sharpen the creases do it will flatten into a medallion. But using the crimper to set those creases to begin with is a giant head start.

I used scraps from the paper weaving projects and then combined them to make a card.

I think I will change out the text sticker to something else as this doesn't seem to resonate with these images.

Ddd


Posted by studio3d@ccgmail.net at 6:00 AM PDT
Tuesday, 14 September 2010
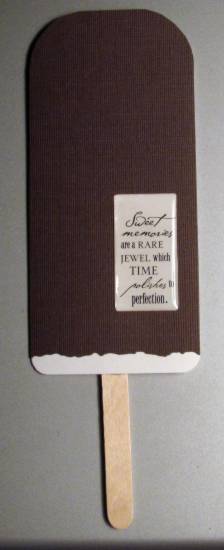
Sweet Memories
Topic: Fantastic Folds

This card is under the heading 'fantastic folds' but it really is simply a tri-fold card.

The top layer (chocolate+ice cream) swings open on a left hinge and the craft stick is encased in the ice cream of the right side and the back. These two layers do not open.

The chocolate layer is textured cardstock which I cut with a deckle nestabilities die on one edge. I folded and cut the rounded corners on the ice cream layers and then glued on the chocolate and trimmed to match on all sides.

The text is a clear thick acrylic sticker that I mounted on matching white cardstock and trimmed around.

Ddd


Posted by studio3d@ccgmail.net at 6:00 AM PDT

Newer | Latest | Older