« November 2010 »
S M T W T F S
1 2 3 4 5 6
7 8 9 10 11 12 13
14 15 16 17 18 19 20
21 22 23 24 25 26 27
28 29 30
You are not logged in. Log in
Entries by Topic
All topics  «
3D paperwork
A - Z challenge 5
A - Z challenge 7
A - Z challenge round 4
A to Z challenge round 3
A to Z round 2
A to Z round 6
A-Z round 1
Around the House
Art Challenges
Artist Trading Cards
Backgrounds
Beads
Bible Journaling
Books
Boxes
Collage
Color Challenge
Coloring
cookbook
Die Cuts
Digital Projects
Digital Stamps
Drawing
Dry Embossing
Fabric Stuff
Fantastic Folds
Field Trip
Home Decor
How Does Your Garden Grow?
Hymnal Art
In The Kitchen
In the studio
Jewelry
Lettering
Links
Multi-Technique
Music to Work By
Musings
Nail Art
New Work
Online Class
Other Hobbies
Other Projects
Painting
Paper Embroidery
Paper Piecing
Photo
Pretty Paper
Quilting
Random
reading
Scrap Recovery
scrapbooking
Sewing
Sketch Challenge
Some Backlog
Stamping
Stencils
Stickers
Supplies
Teabag Folding
Techniques
Testing
tips and tricks
Tutorial
Web resources
Welcome to my Blog
Work By My Friends
workflow
Writing
Blog Tools
Edit your Blog
Build a Blog
RSS Feed
View Profile
Group One
In & Out of Studio 3D
Sunday, 14 November 2010
Ding Dong Bells
Topic: Die Cuts

A few years back someone sent to me a big stack of 'victorian' illustrations that are framed in either green or red and cut out save for little bridge pieces that connect the picture to the frame.

For these I used a nestability die to create an aperture for it in a bronze toned cardstock, rounded the corners, and raised it up on foam dots over cream cardstock. This background lets the bridges blend in.

The text is gold peel-off stickers.

Ddd


Posted by studio3d@ccgmail.net at 6:00 AM PST
Saturday, 13 November 2010
Flashy Poinsettia
Topic: Collage

This image is one of the prints out of the catalog I picked up at Goodwill. I colored with Copic markers and added diamond Stickles to the evergreens and to the center of the blossom.

The background paper is some gold on gold text cardstock that I picked up on sale last year. It came in 12 x 12 sheets so I can get quite a few cards out of each one.

What I can't  do is make metallics like this look good in a photograph.

Ddd


Posted by studio3d@ccgmail.net at 6:00 AM PST
Friday, 12 November 2010
Forest For The Trees
Topic: Scrap Recovery

Yep, I'm still making Christmas cards out of last year's received cards. This one had such a nice illustration on it so I didn't adorn it too much.

The gold tree is a sticker on which the rhinestones were already included. I did add diamond Stickles to the gold balls on the sticker tree and stamped a portion of a stamp for the text.

Ddd


Posted by studio3d@ccgmail.net at 6:00 AM PST
Thursday, 11 November 2010
Sparkle Santa
Topic: Stamping

Colored up with Copic markers and cut with nestability dies, this Santa also features Star Dust Stickles on all of the fur trim. It's a jolly little fellow and I raised him up on foam dots over forest green folded cardstock as a base.


Ddd

Posted by studio3d@ccgmail.net at 6:00 AM PST
Wednesday, 10 November 2010
The Great Wall
Topic: Around the House

Another household project completed... I did NONE of this, though. Hubby has worked on this wall for about three years, a block here and a block there. It all went uphill and had to be leveled at the ground level. This summer, as he got to the final upper curve he had a pro come in to lay the last 20 base blocks. Then he hauled and set the rest of the blocks, hauled and filled all of the dirt, and last week our neighbors told us they were changing their landscaping and asked if we wanted the 5 shrubs.

It's a very shady spot and we're hoping these shrubs will survive there. Next spring we'll do some fill in with ground cover or flowering plants that are shade-loving.

Ddd


Posted by studio3d@ccgmail.net at 6:00 AM PST
Tuesday, 9 November 2010
Purple Ladder Card
Topic: Fantastic Folds

Are these forget-me-nots or violets? Maybe they are neither? Maybe some are one and some another? So, we'll call them little purple flowers.

The main image on the left is a 3D foil element. The rest of the flowers are rub-ons (mostly) I had three little pieces of the 3D I left off and scattered them around. Can you find them?

A stamped text and a silver peel-off text sticker finish this off.

Ddd


Posted by studio3d@ccgmail.net at 6:00 AM PST
Monday, 8 November 2010
Yellow Rose Ladder Card
Topic: Fantastic Folds

I liked the scalloped die cuts so much that I did it again for this card. However, I did add more of the gold peel-offs in the form of borders and an outline rose to counterbalance the main element.

Sorry that so much metallic and foil is a hard read for the camera. These look awesome in person.

Ddd


Posted by studio3d@ccgmail.net at 6:00 AM PST
Sunday, 7 November 2010
Pansy Ladder Card
Topic: Fantastic Folds

Hey! It's a flower I know the name of!

The flowers and borders for this card are from a foil 3D sheet. I used scalloped nestability die cuts to create some framing and added stamping and a silver peel-off sticker for text.

All of the 3D sheets I've been showing on these cards are from some new realeases over at Paper Wishes. They do NOT require hours of tedious citting as they are all die cut and just punch out! Awesome!

Ddd


Posted by studio3d@ccgmail.net at 7:00 AM PDT
Saturday, 6 November 2010
Lady Slipper Ladder Card
Topic: Fantastic Folds

Another unidentified flower that I'm calling Lady Slippers - even if they are not!

This is another 3D element that I took the extra parts to create a separate arrangement with. I've had these checkered borders in my sticker stash forever and this seemed like the right place for them. The butterflies were on this same sticker sheet and I mounted them like yesterday's - stuck in the center, raised wings. Then I outlined the butterflies and decorated the flowers with gold Stickles.

The same stamp and gold peel-off were used for the text.

Ddd


Posted by studio3d@ccgmail.net at 6:00 AM PDT
Friday, 5 November 2010
Bluebell Ladder Card
Topic: Fantastic Folds

I have no idea if these are really bluebells but I'm calling them by that name anyway.

For the construction of this card I skewed the ladder to one side as I liked the balance better. Also, instead of making up the 3D as designed I took all the parts and constructed a second flower grouping for the background. Stickles used liberally on the flowers, again.

The three butterflies were on the 3D sheet but I overlaid each with a silver peel-off butterfly and mounted all of them with the body stuck down and the wings raised.

I added black card on the first step to make the peel-off easier to see and added an organza tie. The text on the front panel is stamped.

Ddd


Posted by studio3d@ccgmail.net at 6:00 AM PDT
Thursday, 4 November 2010
Daisy Thank You
Topic: Fantastic Folds

One of my groups had a challenge to create a 'step ladder card' - so I created 6. I needed some appreciation cards for a pastor appreciation Sunday and these seemed to be special enough to suit.

The first is made with some new 3D sheets I just got. This sheet had three sizes of the daisy bouquet - the smallest one is cut out but not 3D. I chose cardstock that matched the main flowers and ribbon that matched the background flowers.

The daisies all have gold Stickles in the centers and the purple flowers are covered in silvery Stickles. The text in the scalloped nestability die cut is stamped. The 'thank you' text is a gold peel-off sticker.

Ddd


Posted by studio3d@ccgmail.net at 6:00 AM PDT
Wednesday, 3 November 2010
Let's Ride
Topic: Multi-Technique

I had to add a new Topic category for cards like this one. It uses dry embossing in 2 areas, 3D elements, a constructed piece with die-cut parts, and stickers.

I started with the 3D element from a sheet given me years ago. Then I had a sketch challenge on one of my groups and set about trying to put them together. The circle was a part of the sketch and I had an inspiration to use a nestabilities die set and some spirelli with silver cord to make a motorcycle tire. Cool, huh?

I next recalled that I had the Cuttlebug folder for diamond plate and used that on some silver cardstock. The red checked paper fit the colors in the illustration. I pulled out a sheet of cardstock stickers with a sports theme to make the top and bottom borders and added a Cuttlebug border of 'wheels' along the bottom.

The base cardstock is a gray distressed surface and the final touch was the thick silver metal stickers 'RIDE'.

This is going to a friend who will soon be setting out on a 2 month motorcycle ride.

Ddd


Posted by studio3d@ccgmail.net at 6:00 AM PDT
Tuesday, 2 November 2010
Wishing Santa
Topic: Scrap Recovery

Simple.

Die-cut image - glued to patterend cardstock - glued to folded card base - stamped with greeting.

Done.

Ddd


Posted by studio3d@ccgmail.net at 6:00 AM PDT
Monday, 1 November 2010
Sparkling Flakes
Topic: Scrap Recovery

Oooh la-la! Somebody must have paid a lot of money for their Christmas cards last year - this one was covered with holographic foil flakes. I took the only one that was not layered under another one and cut it with the circle die. Then I found another that was 'almost' all there and punched it out with my big Martha Stewart punch. I layered these with foam tape and added a blue rhinestone to the center.

To continue the glitzy theme I used some of the embossed embossed background I created a while back (dry embossed with Cuttlebug folder then heat embossed with Versamark clear and Icy Sparkle embossing powder.)

The backing paper is silver metallic over white folded cardstock.

Ddd


Posted by studio3d@ccgmail.net at 6:00 AM PDT
Sunday, 31 October 2010
Cops & Robbers
Topic: Dry Embossing

Ooooh, Lookie! A BONUS POSTING!

I wanted to share our Halloween 'costumes' for a party. We went as 'cops and robbers' and the scary thing is that we dressed 90% from things around the house and our own wardrobe! I did buy my shirt from Goodwill, bought hubby's ski mask for 40% off, I made his swag-bag and my badge:

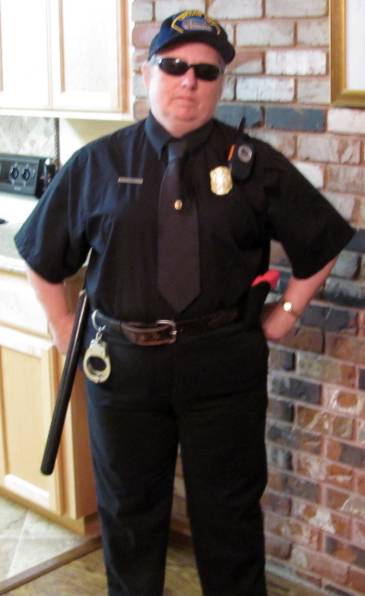
I just noticed he forgot to put on his black gloves for the picture: 

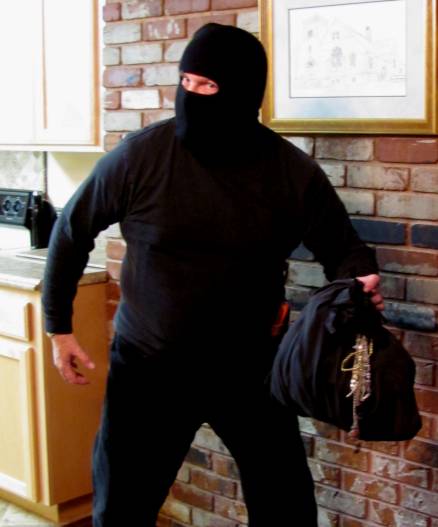
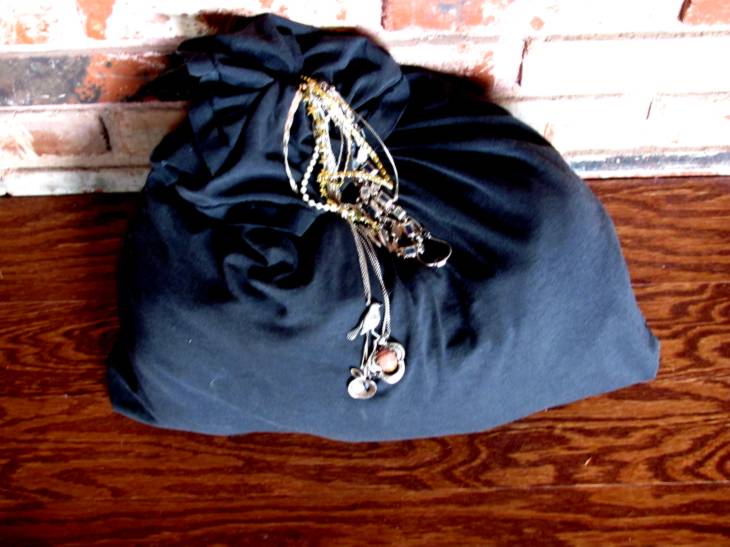
For his bag, I used an old T-shirt turned upside down, stitched and cut off the collar and sleeves. It is stuffed with poly-fill and I hung jewelery coming out of the center.

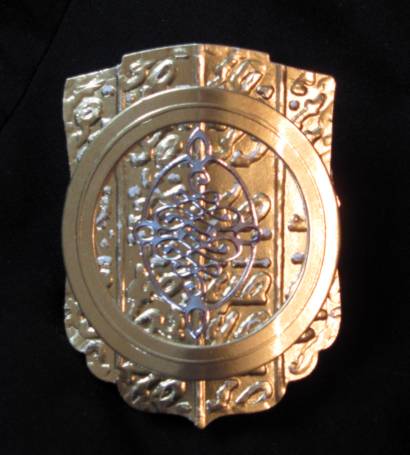
For my badge I used gold foil cardstock, cut with a nestability die, placed another nestability die and re-cut the top, ran it through a Tim Holtz Texture Fades embossing folder, cut a ring of more gold cardstock. placed a silver Dazzles sticker in the center, creased on the embossed lines, attached 'stacked' craft foam to the back to hold the shape, and attached a pin back.

Here is the front:

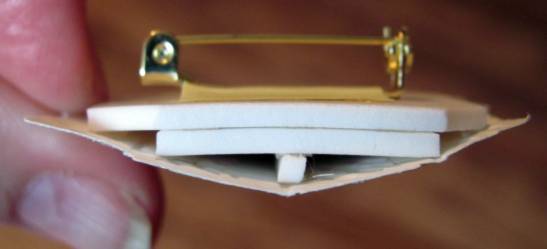
the stacked foam support shown from the top end
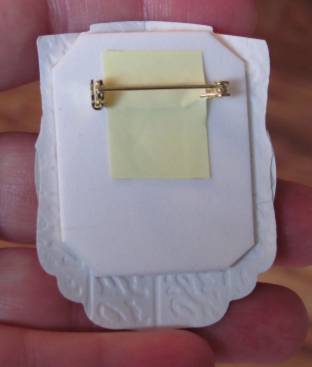
and the back

We both had little squirt guns in holsters but never had occasion to use them!

HAPPY HALLOWEEN!

Ddd


Posted by studio3d@ccgmail.net at 11:13 PM PDT
Group Glowing
Topic: Scrap Recovery

I fussy-cut this image from it's card because portions of it extended beyond the border. Then I mounted it on a rectangle of cardstock to make the focal image. One would not normally pick this green cardstock as a Christmas paper but I think it works with the right illustration (and it was scrap, so I used it).

The greeting was stamped and everything got added to a red folded card base. Then I was having a withdrawal from Stickles so I got out some gold to add to the candle flames.

Ddd


Posted by studio3d@ccgmail.net at 6:00 AM PDT
Saturday, 30 October 2010
Double Tree
Topic: Scrap Recovery

Similar, but different, these tree images were cut from a card that originally had three of them.

I started with the same red folded card bases but them gave the trees different background srom my pad of 12 x 12 Christmas cardstock.

The trees were already glittered so I just added some 'ornaments' ov glitter dots and called it done.

Ddd


Posted by studio3d@ccgmail.net at 6:00 AM PDT
Friday, 29 October 2010
Blue Christmas
Topic: Stamping

I liked that teal snowflake background so much I made more of it! It exactly matches this snowman, too. Yay for that!

I treated the corners with a snowflake corner punch andlayered over silver paper. Then I filled in the snowman and the corner snowflakes with Stickles.


The greeting was stamped and the results were layered on glossy white folded cardstock.

Ddd


Posted by studio3d@ccgmail.net at 6:00 AM PDT
Thursday, 28 October 2010
Flashy Poinsettia
Topic: Collage

In a complete reversal from yesterday's understated offering, today's card is all about the glitz!

I had these foil leaves from my days as a cake decorator and thought they would make a great poinsettia (I was right). For contrast I placed copper skeleton leaves under the flower. Then I mounted the whole thing with foam tape over silver cardstock that had been run through a Cuttlebug folder and placed a metallic copper cardstock as the base.

Still not flashy enough! So I put Stickles in all the holes of the background paper. Not done! I applied a line of gold Stickles down the vein of each gold leaf. Not quite there. Red rhinestones in all the solid dots of the background. A final touch... Thick acrylic cardinal sticker for the flower center.

Badda-bing!

Ddd


Posted by studio3d@ccgmail.net at 6:00 AM PDT
Wednesday, 27 October 2010
Candle Stand
Topic: Stamping

The image for today's card comes from a book I bought at a sale for $1.00 just so I could cut it all to pieces! This simple candle called for some simple treatment - a brown oval, shimmery green cardstock, plain brown brads and a creamy card base.

The only fancy thing is the script greeting which I think adds a bit of style. It is an acrylic stamp.

Ddd


Posted by studio3d@ccgmail.net at 6:00 AM PDT

Newer | Latest | Older