« February 2011 »
S M T W T F S
1 2 3 4 5
6 7 8 9 10 11 12
13 14 15 16 17 18 19
20 21 22 23 24 25 26
27 28
You are not logged in. Log in
Entries by Topic
All topics  «
3D paperwork
A - Z challenge 5
A - Z challenge 7
A - Z challenge round 4
A to Z challenge round 3
A to Z round 2
A to Z round 6
A-Z round 1
Around the House
Art Challenges
Artist Trading Cards
Backgrounds
Beads
Bible Journaling
Books
Boxes
Collage
Color Challenge
Coloring
cookbook
Die Cuts
Digital Projects
Digital Stamps
Drawing
Dry Embossing
Fabric Stuff
Fantastic Folds
Field Trip
Home Decor
How Does Your Garden Grow?
Hymnal Art
In The Kitchen
In the studio
Jewelry
Lettering
Links
Multi-Technique
Music to Work By
Musings
Nail Art
New Work
Online Class
Other Hobbies
Other Projects
Painting
Paper Embroidery
Paper Piecing
Photo
Pretty Paper
Quilting
Random
reading
Scrap Recovery
scrapbooking
Sewing
Sketch Challenge
Some Backlog
Stamping
Stencils
Stickers
Supplies
Teabag Folding
Techniques
Testing
tips and tricks
Tutorial
Web resources
Welcome to my Blog
Work By My Friends
workflow
Writing
Blog Tools
Edit your Blog
Build a Blog
RSS Feed
View Profile
Group One
In & Out of Studio 3D
Tuesday, 8 February 2011
Moon Shine Fairy
Topic: Paper Embroidery

This was a pattern challenge. The pattern is from Ann's Paper Art and one of the groups challenged us all to use the same one to see what we came up with. I had already planned on doing it up and had pricked it out on this nice purple cardstock. I chose to stitch in bright yellow and followed the pattern instructions (1-4 for the facial features, 1-7 for everything else).

I remembered these cute fairy stickers in my stash and this one had the best coloring for the card. It is a sticker of two layers so the body sticks and the wings and feet remain free. Another clear sticker set in two layers creates the flight trail.

I layered a clear thick text sticker on bright yellow card and trimed it out for the bottom of the card. Then I rounded all four corners and added a yellow folded card base.

Ddd


Posted by studio3d@ccgmail.net at 6:00 AM PST
Monday, 7 February 2011
Butterfly Rainbow
Topic: Paper Embroidery

When I first stitched this pattern back in June I pricked out 4 cards at one time. I had an assignment (butterflies) coming up for a swap so I pulled this out to stitch again. I used brighter colors than last time and accented with a black border and a clear text sticker.

I pulled out some background paper with a softer blend of rainbow colors and some light text. This over folded brown cardstock finishes off the card.

Ddd


Posted by studio3d@ccgmail.net at 6:00 AM PST
Sunday, 6 February 2011
A is For Alphabet
Topic: Paper Embroidery

I've had this pattern hanging around for quite awhile (it is from Darsie Bruno's free patterns) but it seemed like SO many holes! In reality it stitches up pretty quickly.

I backed it with a plaid scrapbook paper and black folded cardstock. I finished it off with faux stitches with a white gel pen.

Ddd


Posted by studio3d@ccgmail.net at 6:00 AM PST
Saturday, 5 February 2011
For Space Cadets
Topic: Paper Embroidery

Assignment: Make a paper embroidery card with a 'space' theme.

I chose a shimmery blue background and randomly pricked out circles of 5 holes to stitch stars of varying sizes. I used bright yellow thread for them. Afterward, I used two hole punches to punch stars and mounted it on yellow folded card so it would show through the punches. The top corners were rounded on both layers.

The colors were chosen to feature the tag that I wanted to use for the centerpiece. I mounted it on yellow and cut a thin border around. Then I pricked the stars and stitched them. Where the tag 'hole' would have been, I punched a star and then mounted the tag with 3D glue dots.

I used three sizes of red rhinestones to fill the punched stars. This would make a great card for a boy if it weren't already going to be a swap card.

Ddd


Posted by studio3d@ccgmail.net at 6:00 AM PST
Friday, 4 February 2011
Take Flight
Topic: Paper Embroidery

Assignment: Make a card with paper embroidery and butterflies. I chose some stitching stickers. I got these cheap since the manufacturer printed them on gold sticker stock instead of clear. Hey, I don't mind - in fact, I like them this way.

The background cardstock is really a very nice shimmery violet color and the thread is dark purple. I stitched in the antenna and the clear flowers with metallic gold thread and then went back and added beads to the butterflies.

The folded card base is metallic gold.

Ddd


Posted by studio3d@ccgmail.net at 6:00 AM PST
Thursday, 3 February 2011
You Made My Day
Topic: Stamping

Assignment: Make a 'thank you' card with a different fold. I chose to do a gate fold. I already had a basic stamped and colored image so I cut it in two along the edges of the illustration for a curved breakpoint and mounted half on each side of the gate. This is what it looks like closed:

I used chalk ink to match the flowers and stamped a multiple text greeting stamp repeatedly over the background. Then I used black ink to stamp the text in the upper right and colored around it with a matching colored pencil to highlight it.

Here you can see how the card opens:

A lot of detail going on here - with just three stamps!

Ddd


Posted by studio3d@ccgmail.net at 6:00 AM PST
Wednesday, 2 February 2011
Forest Floor
Topic: Photo

As my family can attest, I usually walk around looking at the ground (my mother probably told me too many times to 'watch where you're going.) But, over the years this habit has come in handy many times - finding money, searching for agates on the beach, and spying great shots like this:

If you are walking through the forest looking at the leaves in the trees you will not see these little bits of nature.

Just wanted you to see what you were missing.

Ddd


Posted by studio3d@ccgmail.net at 6:00 AM PST
Tuesday, 1 February 2011
Drying Out
Topic: In the studio

I thought I'd share today how I use a drying rack in my studio. It is really a wire CD holder that I picked up at Goodwill.

I sue it mainly when I've used Stickles on card fronts as I can dry 10 at once without covering my work surface or having them stick to each other. It works best when I put the fold of the card OVER a divider and let the card open into the two neighboring slots.

So what am I drying? 10 thank-you cards for the people who took part in the Christmas program I told you about yesterday. 

These are napkin fronts that have been stuck down to a cardstock piece that has gone thru the Xyron for dry adhesive. I trimmed them down to cut off the top and bottom red border but include a portion of the borders on the right and left. Then I mounted on folded cream cardstock and traced out scrolls and dots on the ornaments and one ribbon with gold Stickles. I placed a gold peel off "Thank You" sticker and traced it out with gold stickles as well... Times ten and into the drying rack.

Ddd


Posted by studio3d@ccgmail.net at 6:00 AM PST
Monday, 31 January 2011
Christmas Program
Topic: Writing

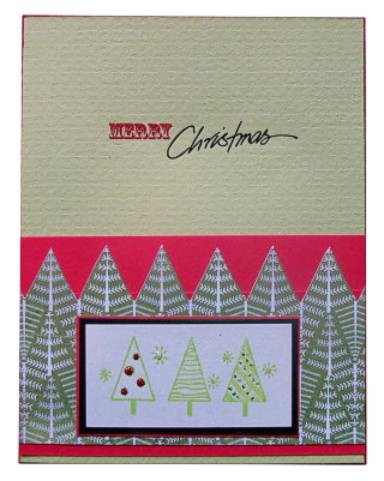
Today's entry encompasses a wide range of things that I did for our Women's Ministries Christmas Dessert the first week of December. I was the chair of the program committee, suggested the theme, drew the logo, wrote the program, arranged for the people who would perform the program, designed the nametags, suggested the service project, designed wall decorations, and directed the napkin folding. These are all things I would like to share with you. If you would like to present this program with your group, there is no copyright to my script and I welcome you to use it. The logo is also available for your use.

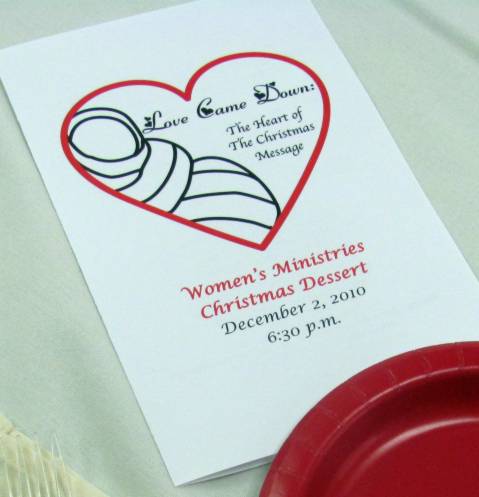
The theme suggested was "Love Came Down: The Heart of the Christmas Message". This is the logo I drew:


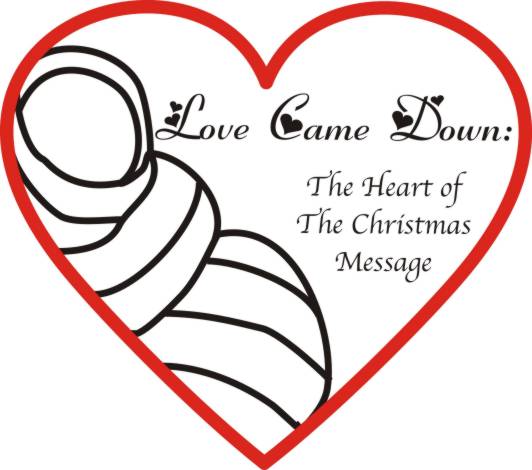
These were used on the advertising, the tickets, the programs and were enlarged to hang from fishing line from the ceilings in the hall.

The program was written to present the plan of salvation through the Chtistmas story. Here is the program:

LOVE CAME DOWN: The Heart of the Christmas Message

Accompaniment: keyboard or piano

Narrator: “God loves every one of us and wants us to love Him in return so he can share his many blessings with us.  But we cannot enter heaven on our own merits or even have a peaceful life on earth through our own efforts.  Why? Because we are all sinful.  And because of our sins we are separated from God. So, He made a way for us.  He sent His son to earth in the form of a baby who would ultimately take the punishment for our sins. “

Group Singing:  What Child is This?

What child is this, who, laid to rest
On Mary's lap, is sleeping?
Whom angels greet with anthems sweet,
While shepherds watch are keeping?
This, this is Christ the King,
Whom shepherds guard and angels sing:
Haste, haste to bring him laud,
The Babe, the Son of Mary!

So bring Him incense, gold, and myrrh,
Come peasant king to own Him,
The King of kings, salvation brings,
Let loving hearts enthrone Him.
Raise, raise the song on high,
The Virgin sings her lullaby:
Joy, joy, for Christ is born,
The Babe, the Son of Mary!

Narrator: “Christmas is special because the birth of Jesus shows us how much God loves us. When God came to earth as a baby, hope of heaven became a reality for us.  Christmas is about God’s love, hope, and the peace that comes from knowing Jesus. Christmas is when love came down.”

Soloist or Duet sings:  Love Came Down at Christmas

Love Came Down at Christmas,
Love all lovely, love divine;
Love was born at Christmas,
Star and angels gave the sign.

Worship we the Godhead,
Love incarnate, love divine;
Worship we our Jesus:
Here He is, our sacred sign.

Love shall be our token,
Love be yours and love be mine,
Love to God and all men,
Love for plea and gift and sign.

Narrator: “Within just a few month’s time Mary had several awesome encounters: an angel appeared to her foretelling the birth of her baby, telling her he would be called the Son of the Most High, have the throne of David and that his kingdom would never end. She met with Elizabeth who was filled with the Holy Spirit and called Mary’s baby ‘My Lord’. Elizabeth’s husband Zechariah testified that his son John would be a prophet of the Most High, preparing the way of the Lord. Then the baby was born to Mary, a virgin, just as foretold. Shepherds came to the manger, having been visited by angels, and immediately went out to tell everyone about the child. Pretty unusual stuff! Luke 2:19 tells us ‘Mary treasured up all these things and pondered them in her heart’.“

Soloist sings: Mary Did You Know?

Mary, did you know
that your Baby Boy would one day walk on water?
Mary, did you know
that your Baby Boy would save our sons and daughters?
Did you know
that your Baby Boy has come to make you new?
This Child that you delivered will soon deliver you.

Mary, did you know
that your Baby Boy will give sight to a blind man?
Mary, did you know
that your Baby Boy will calm the storm with His hand?
Did you know
that your Baby Boy has walked where angels trod?
When you kiss your little Baby you kissed the face of God?

Mary did you know…

The blind will see.
The deaf will hear.
The dead will live again.
The lame will leap.
The dumb will speak
The praises of The Lamb.

Mary, did you know
that your Baby Boy is Lord of all creation?
Mary, did you know
that your Baby Boy would one day rule the nations?
Did you know
that your Baby Boy is heaven's perfect Lamb?
The sleeping Child you're holding is the Great, I Am.

Narrator: “Here he is. The very Son of God, come as a newborn baby, surrounded by an earthly mother and father and laid in a lowly manger.”

Group sings: Away in a Manger

Away in a manger,
No crib for His bed
The little Lord Jesus
Laid down His sweet head

The stars in the sky
Looked down where He lay
The little Lord Jesus
Asleep on the hay

Narrator: “But what was the purpose? Jesus was born to ultimately serve as a sacrifice for us. He himself said, “I am the way and the truth and the life. No one comes to the Father except through me.” (John 14:6). God’s love came down so that we might be lifted up.”

Ladies trio sings a capella: God So Loved the World

God so loved the world,
That He gave His only begotten Son,
That whoso believeth, believeth in Him
Should not perish, should not perish
But have everlasting life.

For God sent not His Son into the world
To condemn the world,
God sent not His Son into the world
To condemn the world:
But that the world through Him might be saved.

God so loved the world,
God so loved the world.

Narrator: “John 3:16 is the source of the words we’ve just heard. Look at your nametag where we asked you to write your first and last name in the space provided. We did this to make this personal! Mine reads, “For God so loved NARRATOR’S NAME that he gave his one and only Son, that if she believes in him she shall not perish but have eternal life.” That is powerful, isn’t it? God loves each person personally and Jesus came to earth to save every one of us – not ‘the world’, or ‘the earth’, or ‘mankind’ – but individuals, including you and me. This requires a response from us, for a gift must be received as well as given. The response God wants is for us to receive the gift of his son, Jesus, into our hearts.”

Child sings: Jesus Loves Me

Jesus loves me! This I know,
For the Bible tells me so.
Little ones to Him belong;
they are weak but He is strong.

Yes, Jesus loves me!
The Bible tells me so.

Child sings: Into My Heart

Into my heart,

Into my heart,

Come into my heart, Lord Jesus.

Come in today.

Come in to stay.

Come into my heart, Lord Jesus.

Child sings: Jesus Loves Me (variant)

I love Jesus, does He know?
Have I ever told Him so?
Jesus likes to hear me say,
That I love Him every day!

Yes, I love Jesus!
Yes, I love Jesus!
Yes, I love Jesus!
In prayer I tell Him so.

Narrator: “But we can’t keep this good news to ourselves. Love came down for everyone! Mark 16:15 reads, “And he (Jesus) said unto them, Go ye into all the world, and preach the gospel to every creature. Let’s celebrate the Christmas season by telling everyone we know: ‘It’s not about Santa. It’s not about presents. It’s not about cards and letters. It’s not about trips to Gramma’s house. It’s not about decorated trees and fancy baked goodies. It is about the day that Love Came Down’.”

Trio sings: Go tell it on the mountain

Go tell it on the mountain,
Over the hills and everywhere,
Go tell it on the mountain,
That Jesus Christ was born.

Down in a lowly manger
The humble Christ was born
And God sent us salvation
That blessèd Christmas morn

Go, tell it on the mountain
Over the hills and everywhere
Go, tell it on the mountain
That Jesus Christ was born.

Narrator: Lead in prayer –

Thank God for reminding us of his love and for providing a way for us.

Ask for tender hearts to receive him.

Ask for courage to share the good news as we go into the Christmas season.

Pray God’s blessing and peace on each person in attendance.

Invite the group to join in singing one final Christmas carol

Group sings: Joy to the World

Joy to the world

the Lord has come.

Let earth receive her King.

Let every heart

prepare Him room,

and heaven and nature sing,

and heaven and nature sing,

and heaven and heaven and nature sing.

M.C.: Thanks those who presented the program and offers a closing prayer.

(sorry fror the formatting problems of my blog editor)You can see in the narration that the name tags read. “For God so loved  NAME that he gave his one and only Son, that if she believes in him she shall not perish but have eternal life.” We left a space for them to write in their own name and these were slipped into pin-on holders. After the program the ladies could slip out their name tag for use as a bookmark reminder.

We had a service project of 'representing the hands and feet of Jesus by bringing a gift of socks or gloves for the Clothesline Ministry'. We set up a table with baskets to collect them as people signed their name tags:

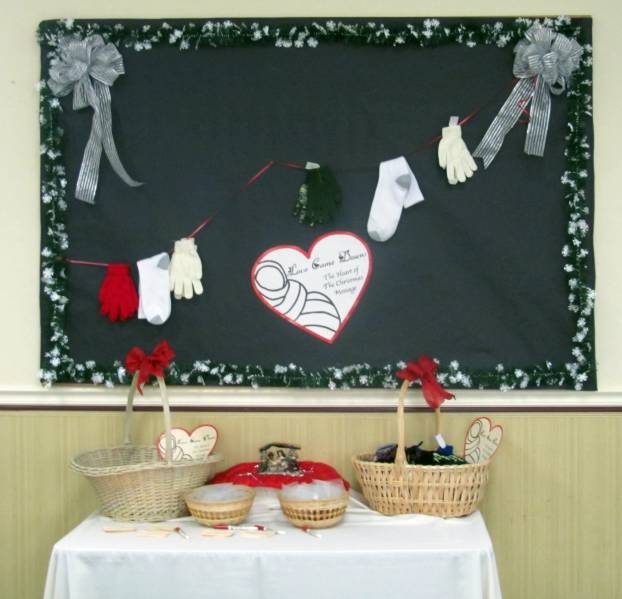
Because we were focusing on the nativity several people brought theirs for table centerpieces. I designed huge silhouettes using black roll paper. I drew them, other ladies cut them out, and groups of us hung them on the walls. We used the area above the chair rail so people in the room would not block the view of them. The palm trees are 7 foot tall. These are stuck up with blue painters tape rolled up on the back.

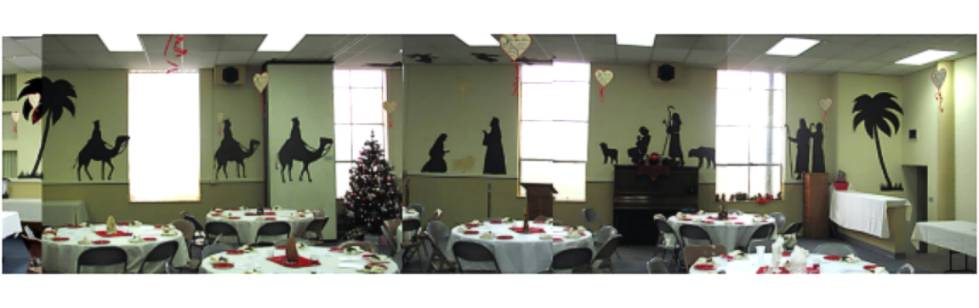
If you look closely you will see that the baby in the manger and the star are made from white posterboard that has been spray painted gold. Also, look up! There are four angels mounted on the ceiling over the nativity.

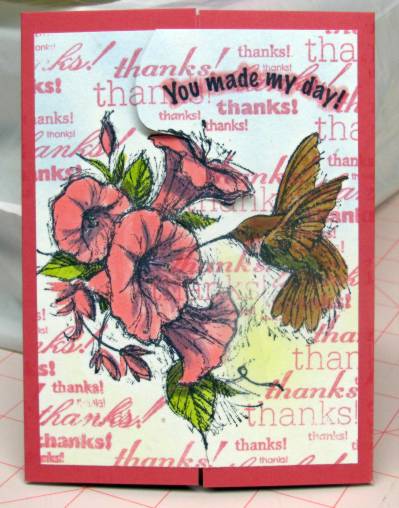
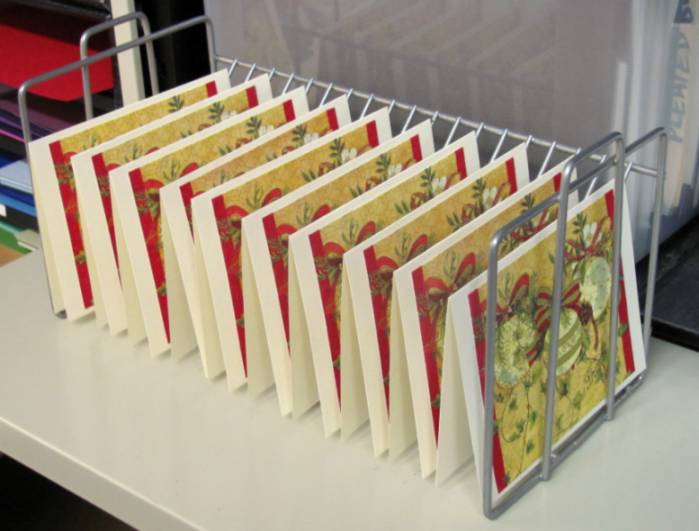
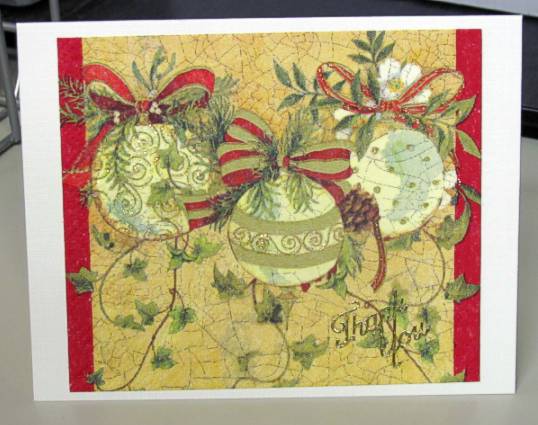
I designed and typed up the program. Here is the front:

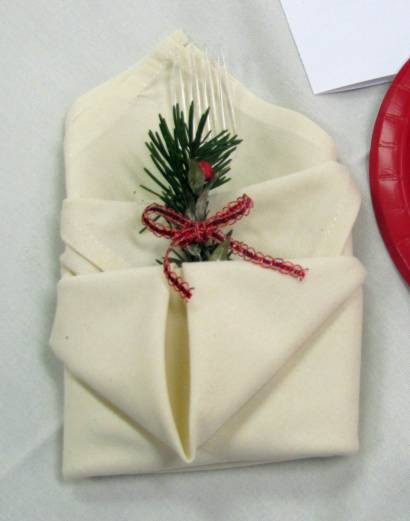
Then on the day we decorated I directed napkin folding to contain the forks and a sprig of greenery tied with a red ribbon.


So that's the whole of it. As I said, you are welcome to use any of these ideas for your own event. If you can use the artwork and want it in a format you can use, please email me and include your own email address (I cannot reply to you if you use the 'comments' for your request.

Ddd


Posted by studio3d@ccgmail.net at 6:00 AM PST
Sunday, 30 January 2011
Gone in a Flash
Topic: 3D paperwork

Christmas is OVER? Very well. This is the last Christmas card I shall show until I start making them for next December.

We'll finifh with a flashy one, one of my favorites. The poinsettia foil 3D got an elegant floral backround and I tied silver cording at the bottom to pick up the foil color.

No greeting needed - the card says it all. The folded card base is really tan rather than the gray it appears to be.

Well, that was certainly more than 12 days of Christmas!

Ddd


Posted by studio3d@ccgmail.net at 6:00 AM PST
Saturday, 29 January 2011
May the Blessed Light Be On You
Topic: Scrap Recovery

I had one of these pierced paper circles, cut with the Cuttlebug, laying in the table scraps so I cut into several pieces for use here. A blue panel on butterscotch cardstock sets the base and I made ink doodles around the edge. Then I backed the parts of the scalloped circle with blue where it did not lay on the rectangle and glued them all in place. Next came the feature image and finally the clear text sticker.

The text in the image reads, " May the blessed light be on you, light without & light within. May the blessed sunlight shine on you & warm your heart until it glows like a great fire, so that a stranger may come & warm himslef at it & also a friend. May God always bless you, love you & keep you."

Ddd


Posted by studio3d@ccgmail.net at 6:00 AM PST
Friday, 28 January 2011
Making a List
Topic: Scrap Recovery

This Santa had better be making a list for NEXT Christmas as it is a little late for 2010! He is cut from the Engelbreit book and combined with table scraps and a black card base.

The message on the inside either has to be written in white gel pen or printed up on paper and glued in. The text on the front, however, is a clear sticker.

Ddd


Posted by studio3d@ccgmail.net at 6:00 AM PST
Thursday, 27 January 2011
Christmas Cheer
Topic: Scrap Recovery

The illustration for this is a portion of a pre-colored example in a book on painting country-style Christmas pictures. I cut away all her background with a craft knife and mounted her on a scalloped black circle diecut left laying on my table. I popped he rup over snowy swirls scrapbook paper and made more layers to pull out colors from the angel.

The text, including the brackets, is a clear sticker.

Ddd


Posted by studio3d@ccgmail.net at 6:00 AM PST
Wednesday, 26 January 2011
Release Peace
Topic: Scrap Recovery

Open your gift and find that you've released the dove of peace? What a nice present! This image from the Engelbreit book had to be cut wide to contain all the stars extending beyond the border. I backed it with a shimmery golden panel and popped both up on foam dots.

The Christmas tree background paper pulls together all the colors, including the yellow folded cardstock base. The greeting is a clear sticker.

Ddd


Posted by studio3d@ccgmail.net at 6:00 AM PST
Tuesday, 25 January 2011
HO HO HO, ho ho ho
Topic: Scrap Recovery

Poor Santa! Scraming babies and kids pulling his beard... he doesn't look all that cheerful, does he?

I sat his throne in the midst of a forest of Chtistmas trees and he seems like he's right at the shopping mall. Teal border and panel under the clear text sticker are used. Then a yellow cardstock base pulls out the color from the image border.

Ddd


Posted by studio3d@ccgmail.net at 6:00 AM PST
Monday, 24 January 2011
Wishes
Topic: Scrap Recovery

Layers and layers of table scraps form the background for this illustration from the Engelbreit book.

I added a clear sticker greeting at the bottom.

Ddd


Posted by studio3d@ccgmail.net at 6:00 AM PST
Sunday, 23 January 2011
Christmas Dove of Peace
Topic: Scrap Recovery

Another image from the stamp catalof, colored with Copic markers. I was experimenting to make the dove seem dimensional without making it look anything but white. Three cool gray tones were blended for this. Then I used tone on tone for the image background and greeting.

I had these two strips of frosty glitter cardstock that were cut from an old card. The cinnamon layer is the backing sheet out of a sticker package. The folded green cardstock base is the only part of this card that is not scraps.

Ddd


Posted by studio3d@ccgmail.net at 6:00 AM PST
Saturday, 22 January 2011
Attention!
Topic: Stickers

Nothing really fits the category of this like 'stickers'. I started with striped and script background to make the card look like a room. Then I used three vinyl tree stickers to create a layered Christmas tree and decorated it liberally with star stickers.

The image is from the stamp catalog, colored with Copic markers, and the text is a rub-on. I haven't decided if this image is supposed to be the 'steadfast tin soldier' or a 'nutcracker', though.

Ddd


Posted by studio3d@ccgmail.net at 6:00 AM PST
Friday, 21 January 2011
Granny Smith Green
Topic: Scrap Recovery

Among the colors my camera refuses to process is this cardstock in granny smith apple green. This card is made of table scraps and turned out with a retro feeling to it. The greeting is a combination of two rub-ons. And red cardstock layer is topped with a scrap of fussy-cut tree paper.

The stamped trees on the image are closest to the real color of the cardstock. They are glittered and mounted first on black and then on red. These, along with their mounting panels, were a gift tag from a few years back that I saved for re-use.

Ddd


Posted by studio3d@ccgmail.net at 6:00 AM PST
Thursday, 20 January 2011
Shopping Days
Topic: Scrap Recovery

I thought the greetings used together on this card really suited. The scrap recovery image says, "you'd better not pout," and the clear sticker reads, "be merry."

Both are mounted on shimmery green cardstock and popped up on foam dots over the teal printed background on the teal folded card base.

Ddd


Posted by studio3d@ccgmail.net at 6:00 AM PST

Newer | Latest | Older