« December 2011 »
S M T W T F S
1 2 3
4 5 6 7 8 9 10
11 12 13 14 15 16 17
18 19 20 21 22 23 24
25 26 27 28 29 30 31
You are not logged in. Log in
Entries by Topic
All topics  «
3D paperwork
A - Z challenge 5
A - Z challenge 7
A - Z challenge round 4
A to Z challenge round 3
A to Z round 2
A to Z round 6
A-Z round 1
Around the House
Art Challenges
Artist Trading Cards
Backgrounds
Beads
Bible Journaling
Books
Boxes
Collage
Color Challenge
Coloring
cookbook
Die Cuts
Digital Projects
Digital Stamps
Drawing
Dry Embossing
Fabric Stuff
Fantastic Folds
Field Trip
Home Decor
How Does Your Garden Grow?
Hymnal Art
In The Kitchen
In the studio
Jewelry
Lettering
Links
Multi-Technique
Music to Work By
Musings
Nail Art
New Work
Online Class
Other Hobbies
Other Projects
Painting
Paper Embroidery
Paper Piecing
Photo
Pretty Paper
Quilting
Random
reading
Scrap Recovery
scrapbooking
Sewing
Sketch Challenge
Some Backlog
Stamping
Stencils
Stickers
Supplies
Teabag Folding
Techniques
Testing
tips and tricks
Tutorial
Web resources
Welcome to my Blog
Work By My Friends
workflow
Writing
Blog Tools
Edit your Blog
Build a Blog
RSS Feed
View Profile
Group One
In & Out of Studio 3D
Saturday, 10 December 2011
CHRISTMAS CARDS - Good Old Santa
Topic: Scrap Recovery

The Santa and Reindeer strip came from an old Christmas card. I backed it with panels of printed cardstock that bring out various colors from the illustration.

I bordered the top and bottom of the illustration with gold peel-off borders.

Ddd


Posted by studio3d@ccgmail.net at 6:00 AM PST
Friday, 9 December 2011
CHRISTMAS CARDS - Poinsettias
Topic: Scrap Recovery

These white poinsettias are from a print-it-yourself scrapbook paper and the red one is from an old Christmas card. I mounted on a red card base and added a strip of the gold text cardstock.

Ddd


Posted by studio3d@ccgmail.net at 6:00 AM PST
Thursday, 8 December 2011
CHRISTMAS CARDS - Pretty in Pink
Topic: Scrap Recovery

I had more of the tone on tone gold metallic and added a strip to this pinkish grid card. Several months back I picked up a book at the used book store to tear apart. It was all these country painted panels with patterns for them. I cut a part of one of the illustrations and bordered it with some of the darker print.


Ddd


Posted by studio3d@ccgmail.net at 6:00 AM PST
Wednesday, 7 December 2011
CHRISTMAS CARDS - Elegant Greetings
Topic: Scrap Recovery

These scrapbook papers were from a pad I used last year. I used a black card base so it would match the greeting panel which is cut from the same card as those tree groupings I recently showed.

The 3D ornament sticker was salvaged from an old card.

Ddd


Posted by studio3d@ccgmail.net at 6:00 AM PST
Tuesday, 6 December 2011
GrandDaughter's Bling
Topic: Quilting

At long last I get to share the last grand-child's quilt! I finished this up the first week of August so I could enter it in the County Fair but had to wait for the little miss'es birthday before posting for the whole world to see (Including her).

This is all constructed of one line of fabric called 'Fairy Frost' and has the most wonderful glimmery over-printing to it. She really likes 'bling' so I selected a pattern that works up looking like faceted stones. I used 'triangulations' software and paper to construct the triangle pieces which made them go together smoothly and accurately. The main body is quilted with stitch in the ditch but I designed my own free-motion design for the outer border and stitched through thin paper which was then torn away. Those swirls were used as a guide to applying heat-set rhinestones which really brings the bling.

Here is the wide view:


And a close view of the fabrics:


And a view of the border with the bling:


As are the rest of the quilts, I'm sure this will be a big hit.

Ddd


Posted by studio3d@ccgmail.net at 6:00 AM PST
Monday, 5 December 2011
CHRISTMAS CARDS - Border Prints
Topic: Scrap Recovery

From a single sheet of scrapbook paper I was able to get 6 cards with border prints. Because of the busyness of the print not much embellishment was needed.

For this grouping I used 3D wreath stickers.


The two square elements on these cards are cut from a page-a-day calendar. I bordered one with gold peel-off borders and popped both up on foam tape. On the other card I added a strip of music-printed tissue tape, bordered it with gold peel-off borders and then created a little element by cutting a card front with a tag punch. I colored the top gold, punched a snowflake and popped it up on foam. At the last I added a gold peel-off border as a hanging string for the ornament.


Ddd


Posted by studio3d@ccgmail.net at 6:00 AM PST
Sunday, 4 December 2011
CHRISTMAS CARDS - Black and Gold
Topic: Scrap Recovery

From a sample Christmas card I harvested two groupings of trees. The first I mounted on a tone on tone gold printed cardstock. This is on a black folded card base making a really elegant card.


For the other one I cut a frame from a printed cardstock and mounted these over a dark green card base.


Ddd


Posted by studio3d@ccgmail.net at 6:00 AM PST
Saturday, 3 December 2011
CHRISTMAS CARDS - Toys
Topic: Scrap Recovery

I had a single sheet of this scrapbook paper printed with toys, gifts and other holiday symbols. I used a dark card base for contrast and found two different elements to place on them.

On the first I used a piece I trimmed off the front of one of last year's cards. I trimmed around it with gold peel-off borders and popped it up on foam tape.

On the second one I cut a stocking from another scrapbook paper and glued it on. Then I drew faux stitching around it and found there was not enough contrast. So I added a yellow border and then applied the clear text sticker.

Ddd

Posted by studio3d@ccgmail.net at 6:00 AM PST
Friday, 2 December 2011
CHRISTMAS CARDS - From Letterhead
Topic: Scrap Recovery

I got a sample pack of papers from a company years ago and recently pulled out some to use. I found they had included two sheets of a Christmas letterhead and I simply cut the upper left corner to fit on a cream folded card base. This left a blank space below the scroll so I added a rub-on greeting.


I think it looks like it was hand written on like one would sign their Christmas letter.

Ddd


Posted by studio3d@ccgmail.net at 6:00 AM PST
Thursday, 1 December 2011
CHRISTMAS CARDS - Blue and White
Topic: Scrap Recovery

Four color blocks on blue cardstock are printed with swirling snowflakes. I added a punched snowflake to one covered with a clear text sticker. For the other I attached a piece of printed wire-edge ribbon.

Ddd


Posted by studio3d@ccgmail.net at 6:00 AM PST
Wednesday, 30 November 2011
CHRISTMAS CARDS - Seeing Red
Topic: Multi-Technique

These cards all use two of three coordinating papers. I had some large bells with glitter, some overall jingle bell print, and snowflakes with glitter.

This first set uses both bell prints. I stamped an old car image from a Tim Holtz set onto cream colored print paper and rounded two corners. Then I plopped a clear tree sticker on the roof and drew in a trunk on each tree.

Three more using both bell prints got stamped vellum greetings trimmed out with gold peel-off stickers of bells and holly.

The last two with both bell prints got a sash of gold-on-gold text print and a mini-tag sticker with a tiny snippet of ribbon. I gave the tags a clear sticker greeting.

Then I switched to a combination of the large bell print and the snowflakes. These two cards use a larger tag sticker with a folded ribbon snippet and a clear sticker greeting.

And finally, two more with the large bells and showflake papers. I only had one each of these embellishments to the cards are handled entirely differently.  I did start with a vertical band of green cardstock for both. On the left is a panel with rounded corners cut from an old card. It is popped up on foam tape. For the carousel horse sticker I first border-punched the green strip and added a clear sticker greeting.

Ddd

Posted by studio3d@ccgmail.net at 6:00 AM PST
Tuesday, 29 November 2011
CHRISTMAS CARDS - Pinecone Paper
Topic: Multi-Technique

Four cards with the same two printed cardstocks and folded bases are all decorated differently.

These two use stickers of trees that are inhanced with gold glitter. The dark trees are clear stickers with glitter orbs. The white trees are glossy stickers with Stickles on the dots. The rhinestones came on the top of these trees.

The next card is decorated with a stained glass window cut from an old card. There was a smaller version as well so I added that on top. The greeting is a clear sticker. For the 4th card I used some vellum stickers of holly and pinecones.

I added a clear sticker greeting after the photo was taken.

Ddd


Posted by studio3d@ccgmail.net at 6:00 AM PST
Monday, 28 November 2011
CHRISTMAS CARDS - In the Pink
Topic: Multi-Technique

I had several papers that were predominantly pink and combined them in a variety of configurations while keeping the folded base cards all pink.

These first three all use a holly print and a village and I added a strip of multi-patterned stripe crosswise. On the first card I cut a night sky scene from an old card to place Santa above the village. This is popped up on foam tape and I added a clear sticker greeting.

On the next one I added a piece of the musical tissue tape and a color clip-art of Santa with kids. The lower greeting is a clear sticker. Then for the last one I added two strips of tissue tape and a 3D sticker wreath. There is a clear sticker greeting to the right of the wreath.

With a different paper combination (kept the holly and added a dark swirl paper) I cut out an image from the page-a-day calendar and backed it with a shimmery paper matching the blue in thepapers. This was popped up on foam tape and a clear sticker greeting was added. Then for the second card I cut an image from an old card, popped it up on foam tape and added Stickles glitter to the wings and tail fo the dove. The greeting on the lower right is a clear sticker.

For the next set I kept the dark swirl paper and added an ornament print. The ornament on the first card is from the page-a-day calendar and is mounted on foam tape over the backing square. I used a thin gold border sticker to create a hanging thread. The other card has two irridescent angel stickers and a clear sticker greeting.

Lastly I went back to the holly paper and added some winter children. I border punched a strip of matching turquoise and applied foil print clear stickers of ornaments down the length. I drew in strings for them with a fine-line marker. The second card is made up of snippets of three of the patterned papers. They were offset on a green dotted background paper and separated by strips of gold border sticker. I embellished it with a 3D wreath sticker to which I added red Stickles.

Ddd

Posted by studio3d@ccgmail.net at 6:00 AM PST
Sunday, 27 November 2011
CHRISTMAS CARDS - Swirling Trees
Topic: Scrap Recovery

The swirling dots pattern and the tree print are actually reverse sides of the same piece of cardstock. Certainly ensures that the colors will match!

The first is embellished with an image cut from an old card with a Nestability die. I added a stripe of burgundy cardstock behind it for contrast. The second uses an image from the page-a-day calendar, bordered with a green paper and popped up on foam tape.

These both gor green card bases to echo some of the tree colors.

Ddd


Posted by studio3d@ccgmail.net at 6:00 AM PST
Saturday, 26 November 2011
CHRISTMAS CARDS - Reindeer Wreaths
Topic: Stickers

The hardest thing in using a multi-directional print is deciding which image you want to feature! That is surely the case with the deer print. On the other hand, they all have bows or wreaths around their necks so it was easy to decide on the embellishment!

For these two I used 3D wreath stickers and nothing else. The gold printed paper creates the message.

Choosing to feature the images in burgundy, I used that color of print for the alternate blocks. I chose the wreath from a clear sticker sheet and found that the round printed greeting from the same sheet was a perfect counterbalance.

Ddd


Posted by studio3d@ccgmail.net at 6:00 AM PST
Friday, 25 November 2011
CHRISTMAS CARDS - Hexagon Blues
Topic: Stickers

Combining some paper from the poinsettia print with these hexagon snowflakes was a matter of color choice. Even the dotted paper carries that same teal which I also echoed in the choice of card base.

The large image is a vellum sticker and ther greeting is a clear sticker.


Unusual?

Ddd


Posted by studio3d@ccgmail.net at 6:00 AM PST
Thursday, 24 November 2011
CHRISTMAS CARDS - Poinsettia Patch
Topic: Stickers

Did you notice? This isn't scrap recovery! I actually used all new product for these (OK, most of them).

These cards are a mixture of layouts and some of the papers are different. The common element is they are using the light version, the green version, or the black version of a poinsettia print. (well, something has to tie them together).

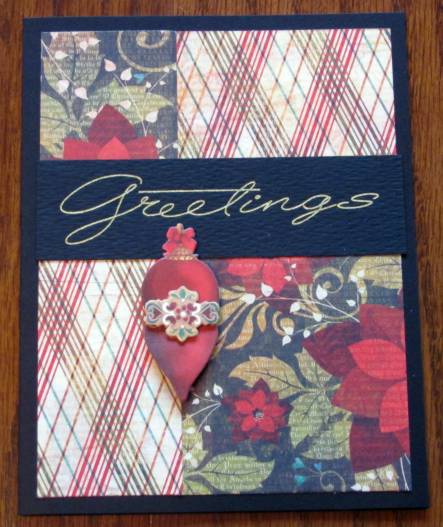
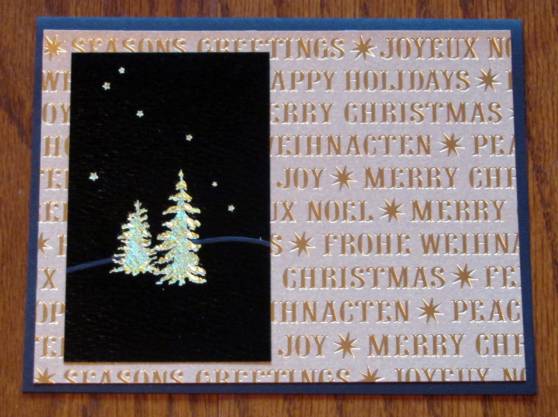
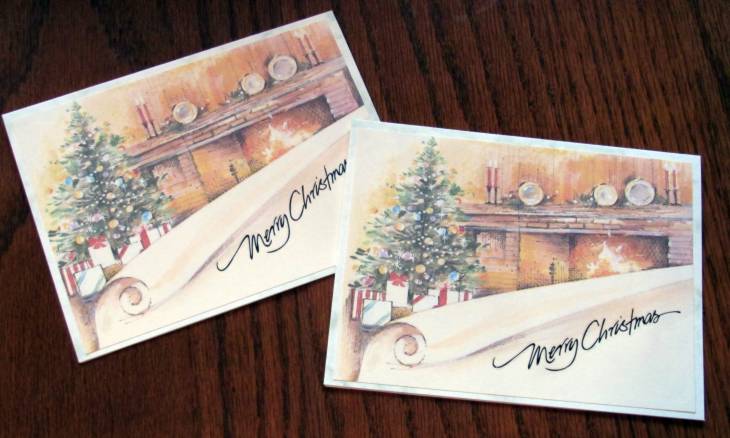
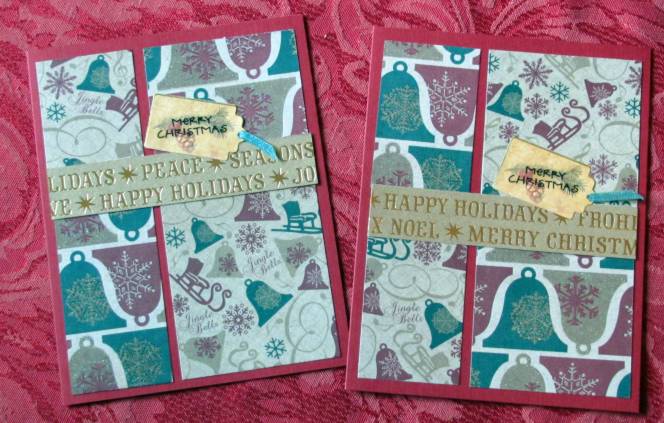
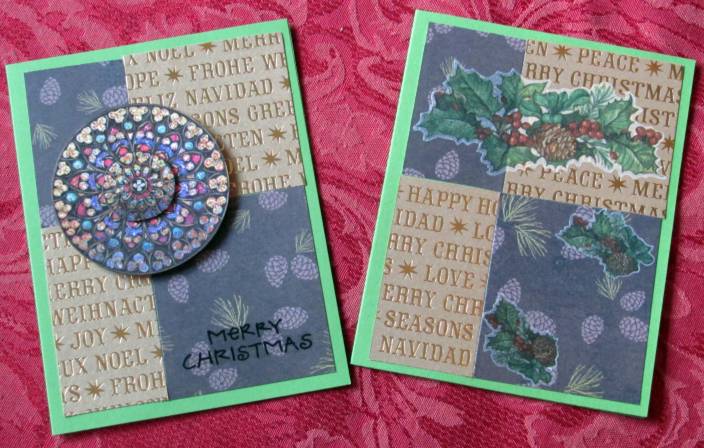
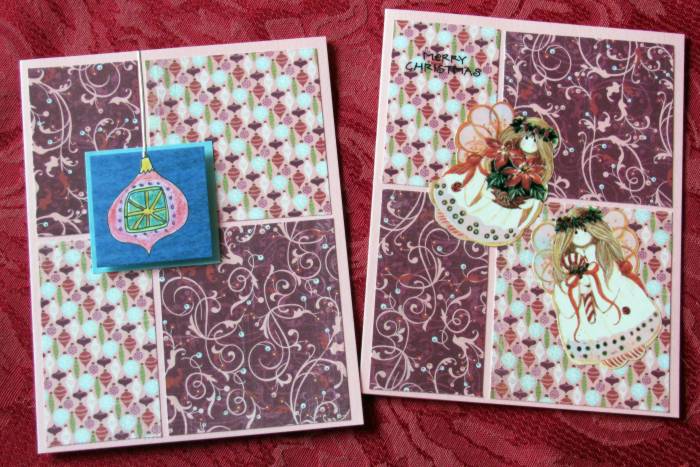
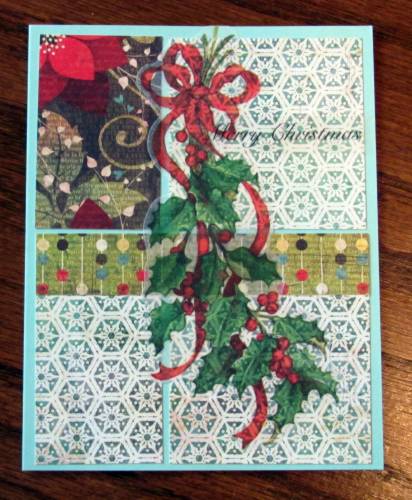
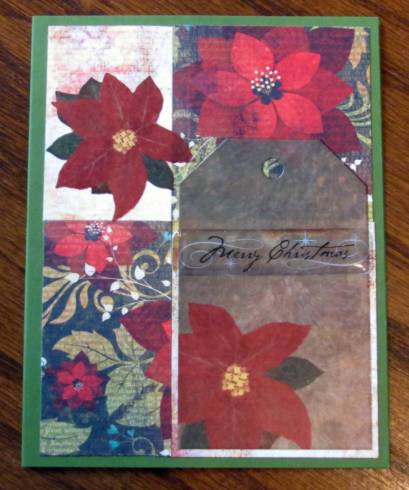
This one uses the black version of the paper along with a diamond plaid and a strip of a light text print. I added a cardstock sticker tag and trimmed it with a fold of green ribbon and a thick acrylic text greeting.

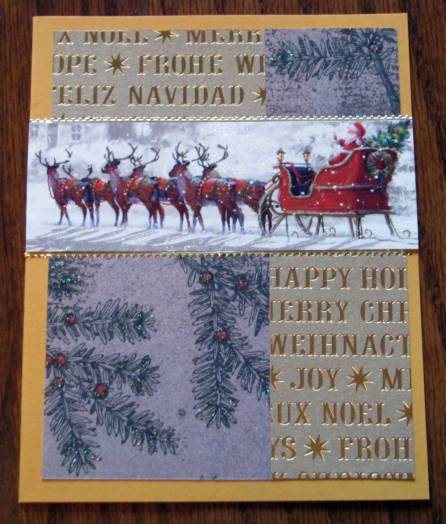
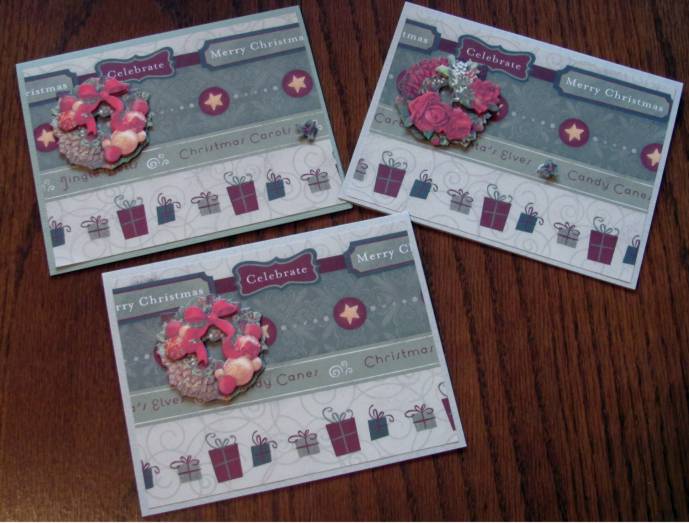
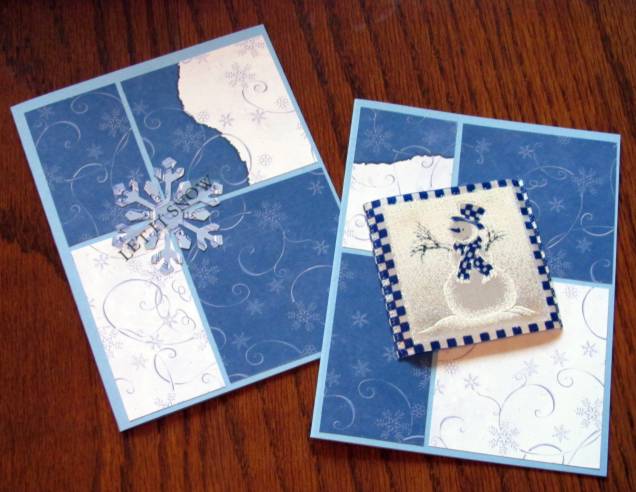
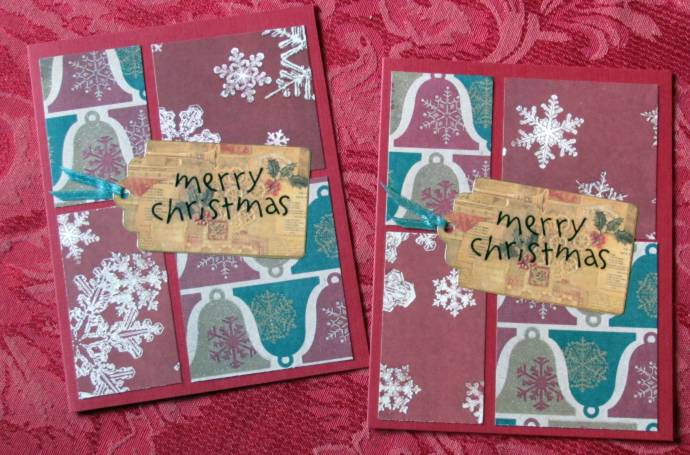
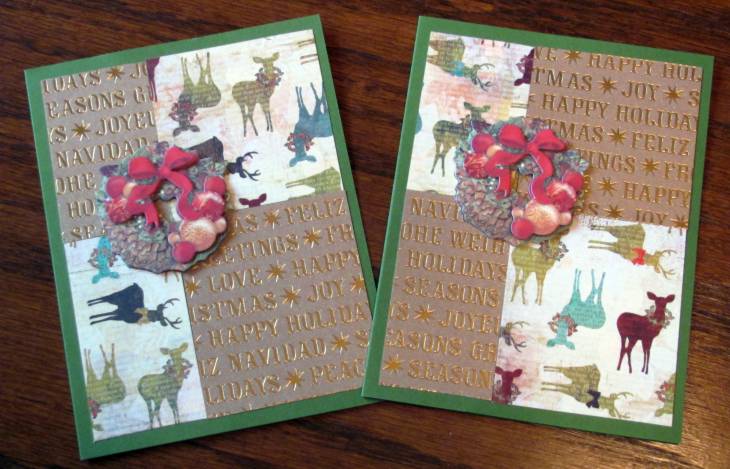
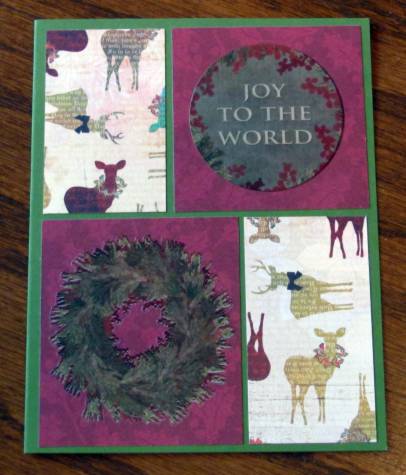
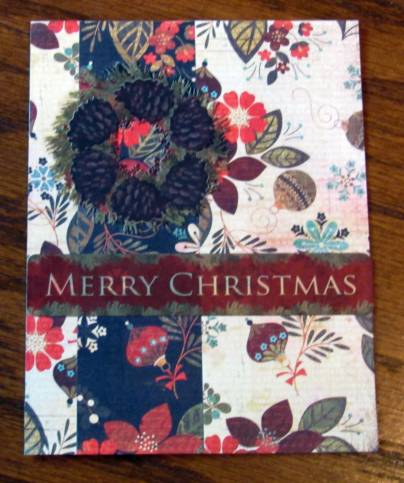
This one uses stripes of the black and the light versions of the paper that were scrap after cutting other parts out. I layered some clear stickers to create the pinecone wreath and added a greeting sticker from the same set.

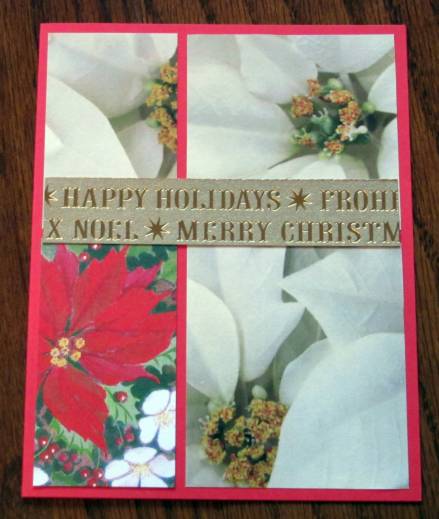
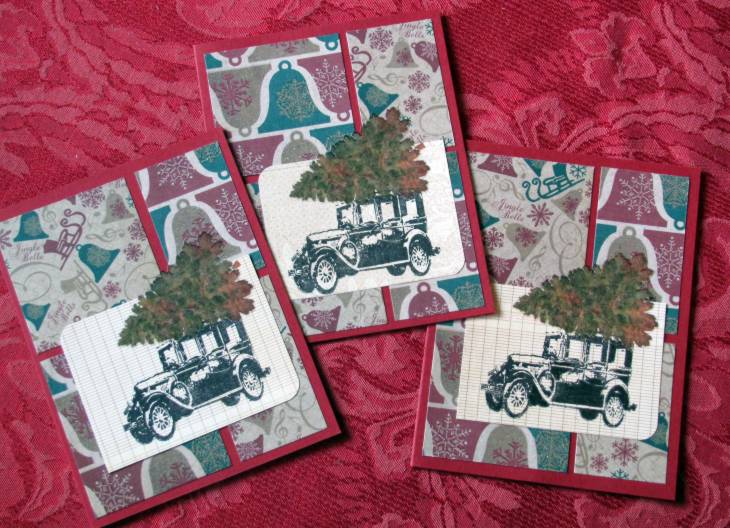
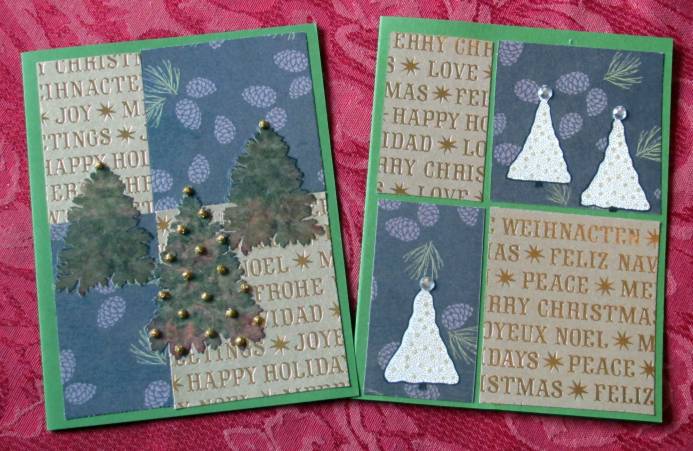
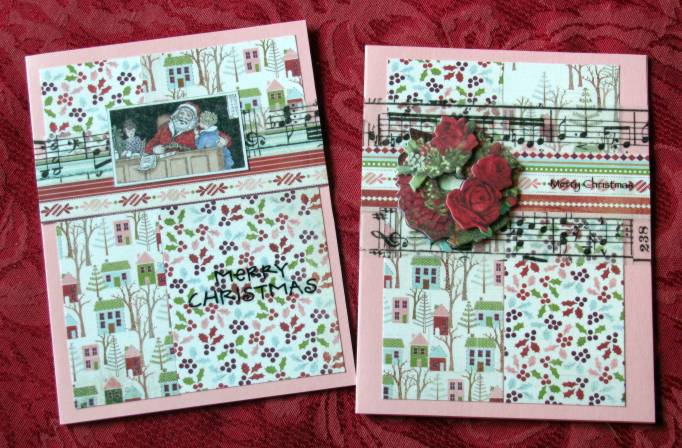
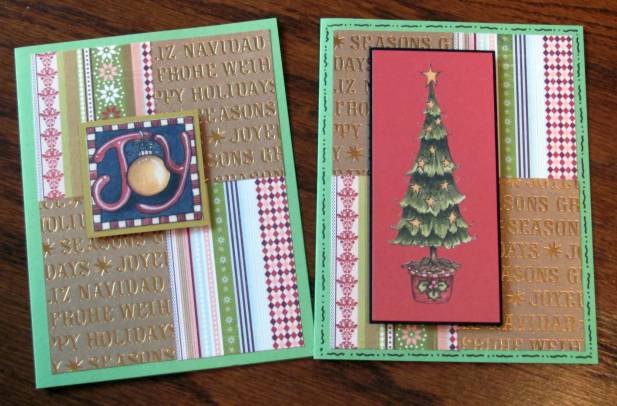
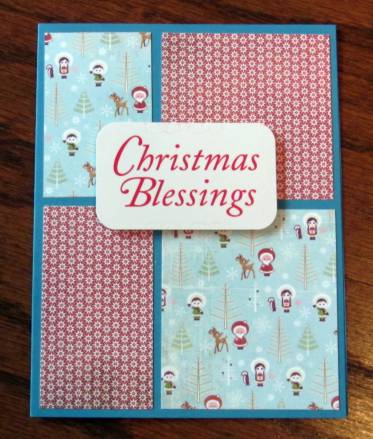
This card uses the green version of the poinsettia print and is combined with a light text print. From that same sticker sheet I used a tag with a poinsettia on it and then added another poinsettia sticker to the upper left. I gave it a thick acrylic greeting sticker.

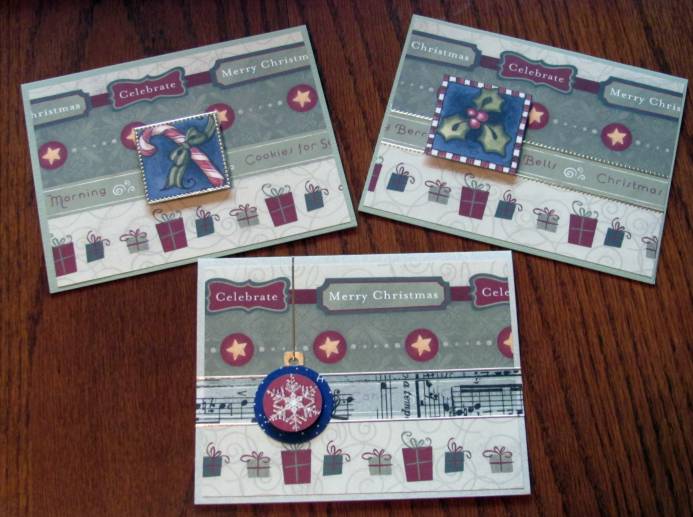
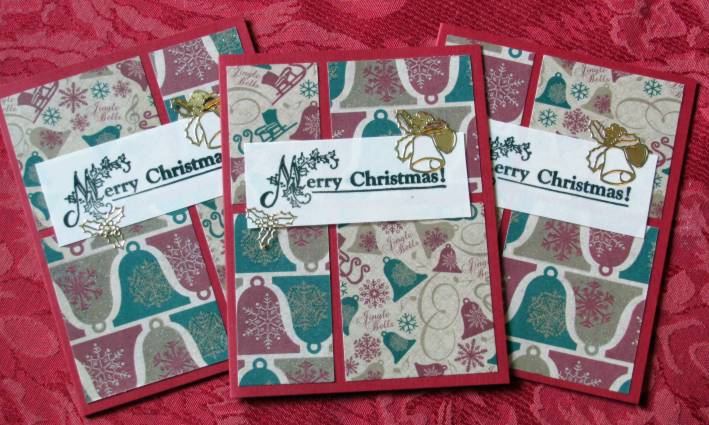
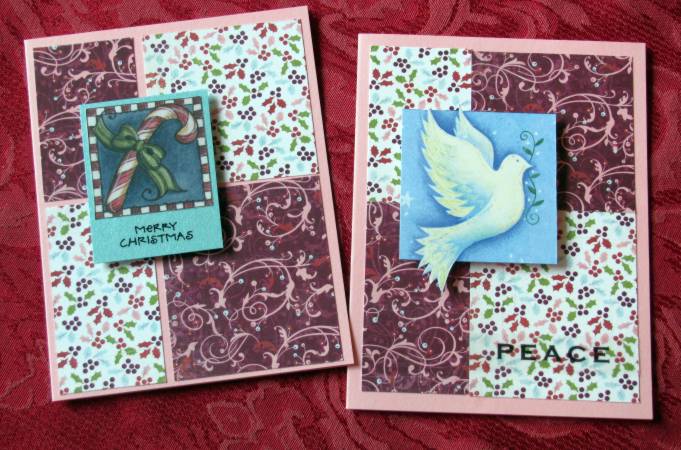
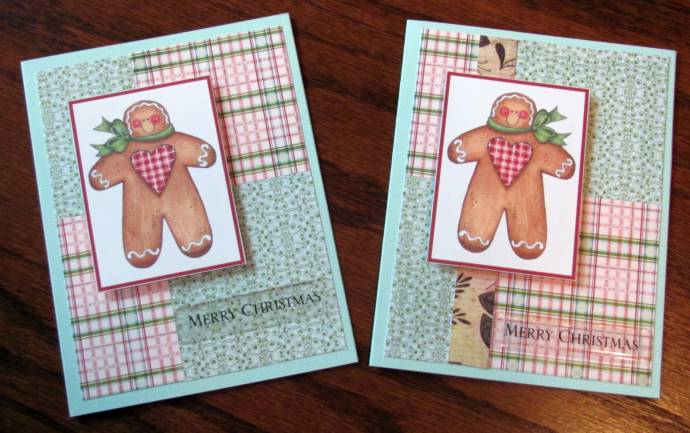
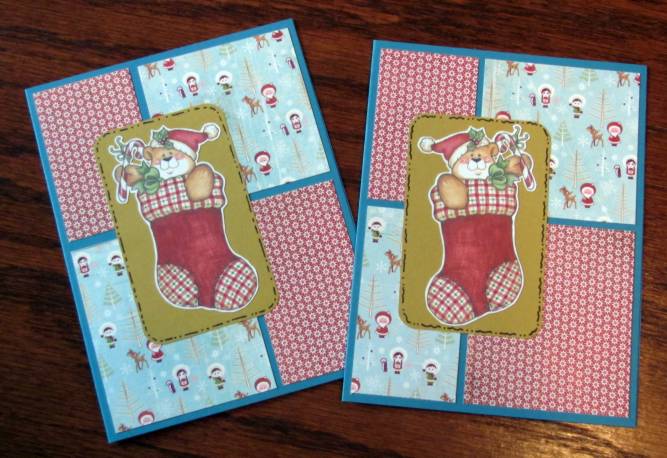
Both of these use the black and light versions of the paper and also both use the same stickers. The tag, the extra poinsettia on the tag and the greeting at the upper left are all from the same clear sticker sheet. I used a black folded card base on both of these so they will require a liner to write the inside message on.

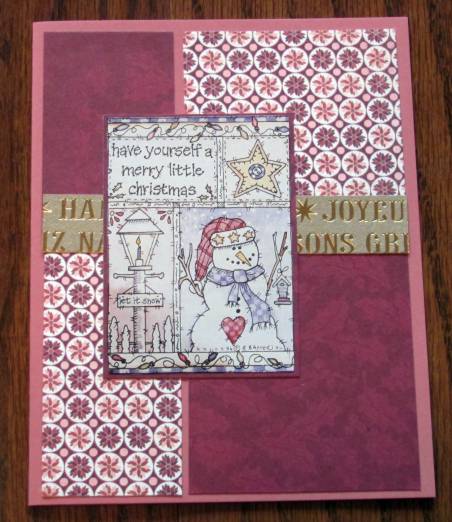
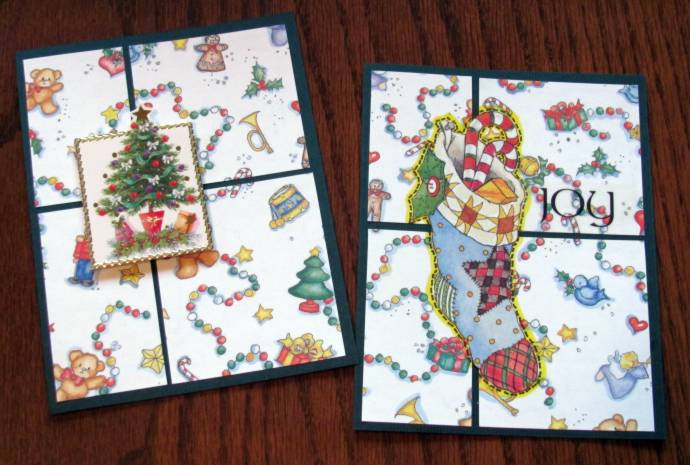
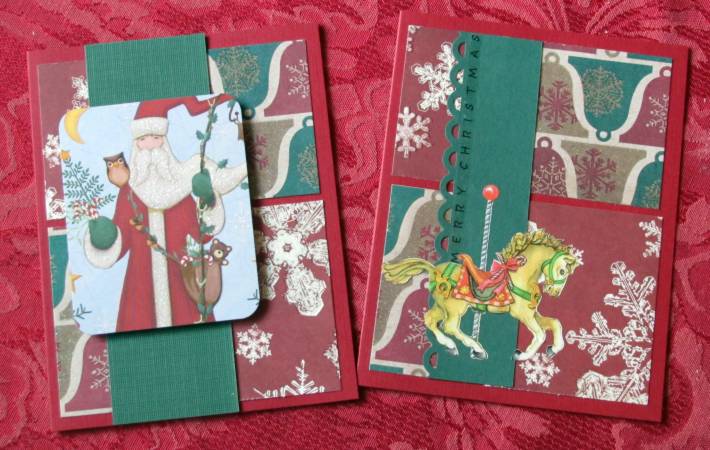
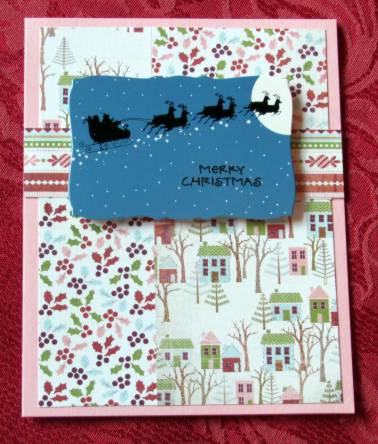
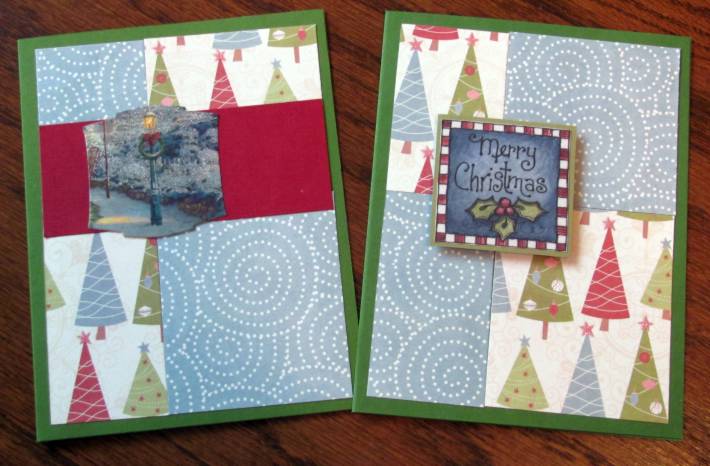
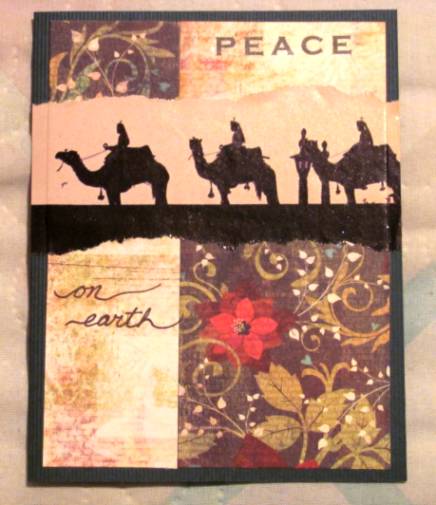
This is the one card I used a recovered scrap on. I used the green background and some of the light text print. I tore a silhouette photo from a magazine, added a clear text sticker to the upper right and wrote script text on the lower left.


Ddd


Posted by studio3d@ccgmail.net at 6:00 AM PST
Updated: Thursday, 1 September 2011 7:16 PM PDT
Wednesday, 23 November 2011
CHRISTMAS CARDS - Gingerbread
Topic: Scrap Recovery

The patterns and colors on these papers are SO not Christmas-y so I selected a blatantly holiday image to get them in the spirit!

These gingerbread men are from the page-a-day calendar and were cut out to include their printed borders. I mounted them up on foam tape.

In case there was any confusion as to the intent, I added thick acrylic greeting sticker on the lower right block.

Ddd


Posted by studio3d@ccgmail.net at 6:00 AM PST
Tuesday, 22 November 2011
CHRISTMAS CARDS - Yipes Stripes
Topic: Scrap Recovery

Some patterned paper packs contain a sheet or two that combine all the papers in a stripe. I cut these up in an even grid and mounted them abutted together with some of the gold-on-gold text.

That made a pretty lively background so I kept the embellishment simple. Each of these has an image from the page-a-day calendar which I bordered with colored paper. All except the triple ornaments are popped up on foam tape.


I also added a doodle line to the tree to coordinate with the black border on the image.

Ddd


Posted by studio3d@ccgmail.net at 6:00 AM PST
Monday, 21 November 2011
CHRISTMAS CARDS - Bitty Red Snowflakes
Topic: Scrap Recovery

OK, technically the paper is red and the bitty snowflakes are white... I combined this paper with a vintage-look paper of kids playing in the snow.

From a page-a-day scrapbooking calendar I got these cute stocking images. There were two of them so I made use of both. They are trimmed close with a craft knife and mounted to a rectangle of golden-tone paper. I rounded the corners and drew doodle lines around the edge before mounting.

Since I had no more of the stockings I cut this greeting block from the front of an old card, rounded the corners and mounted it up on foam tape.

Ddd


Posted by studio3d@ccgmail.net at 6:00 AM PST

Newer | Latest | Older