« December 2011 »
S M T W T F S
1 2 3
4 5 6 7 8 9 10
11 12 13 14 15 16 17
18 19 20 21 22 23 24
25 26 27 28 29 30 31
You are not logged in. Log in
Entries by Topic
All topics  «
3D paperwork
A - Z challenge 5
A - Z challenge 7
A - Z challenge round 4
A to Z challenge round 3
A to Z round 2
A to Z round 6
A-Z round 1
Around the House
Art Challenges
Artist Trading Cards
Backgrounds
Beads
Bible Journaling
Books
Boxes
Collage
Color Challenge
Coloring
cookbook
Die Cuts
Digital Projects
Digital Stamps
Drawing
Dry Embossing
Fabric Stuff
Fantastic Folds
Field Trip
Home Decor
How Does Your Garden Grow?
Hymnal Art
In The Kitchen
In the studio
Jewelry
Lettering
Links
Multi-Technique
Music to Work By
Musings
Nail Art
New Work
Online Class
Other Hobbies
Other Projects
Painting
Paper Embroidery
Paper Piecing
Photo
Pretty Paper
Quilting
Random
reading
Scrap Recovery
scrapbooking
Sewing
Sketch Challenge
Some Backlog
Stamping
Stencils
Stickers
Supplies
Teabag Folding
Techniques
Testing
tips and tricks
Tutorial
Web resources
Welcome to my Blog
Work By My Friends
workflow
Writing
Blog Tools
Edit your Blog
Build a Blog
RSS Feed
View Profile
Group One
In & Out of Studio 3D
Tuesday, 27 December 2011
Mundane to Marvelous
Topic: Beads

Mundane: A medic alert bracelet with a plain, industrial chain

Marveous: Beads on stretchy string with clasps on each end to clip onto the medic alert bracelet

Project: Make a 'wardrobe' of these from donated beads and beads from my stash


Oooo, aaaaah! The lady who requested these was very pleased with the result. She had purchased one and wanted more to go with her wardrobe. Yes, one is still chain but it has a twist in it and is much nicer quality than the one that comes standard on the bracelet.

Ddd


Posted by studio3d@ccgmail.net at 6:00 AM PST
Monday, 26 December 2011
Christmas Creations
Topic: Other Hobbies

Just ONE (OK, technically 4) more Christmas project to share.

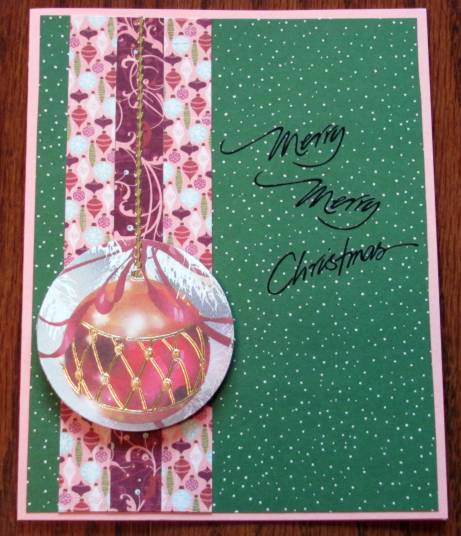
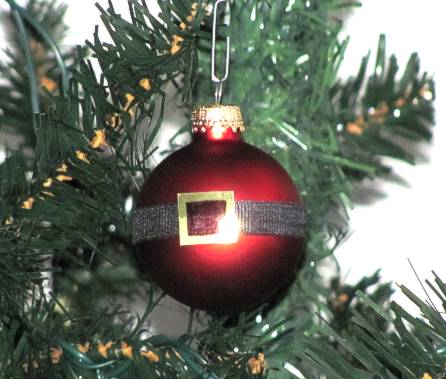
First up is the set of ornaments I made. I got the idea for these from one of the blogs I follow and actually bought the balls to make them with. I started with 6 red satin-glass balls, used glue dots to adhere a grosgrain ribbon around and attached a square of gold metallic cardstock to cover the seam. The center of the buckle is colored in with Sharpie marker. I did not have any black ribbon so I colored some cream ribbon with black alcohol ink.

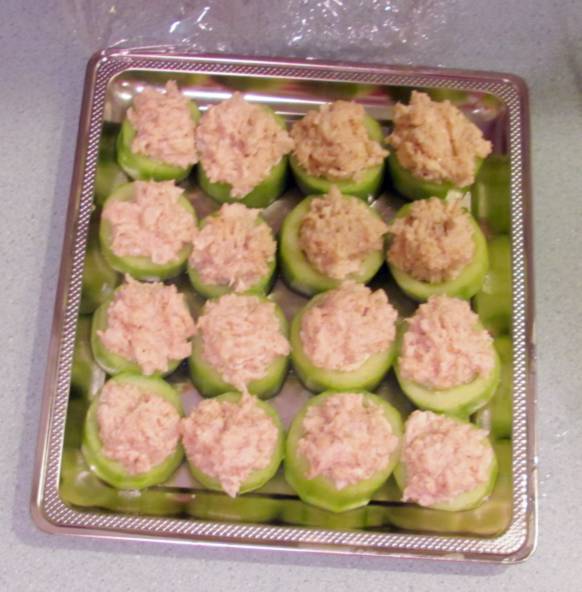
The rest of the projects involve food - for the Christmas brunch we went to. I got the idea to make cucumber cups from a magazine but changed it up by peeling mine and making a filling of spicy crab salad for the filling. The centers are scooped out to make the cups.


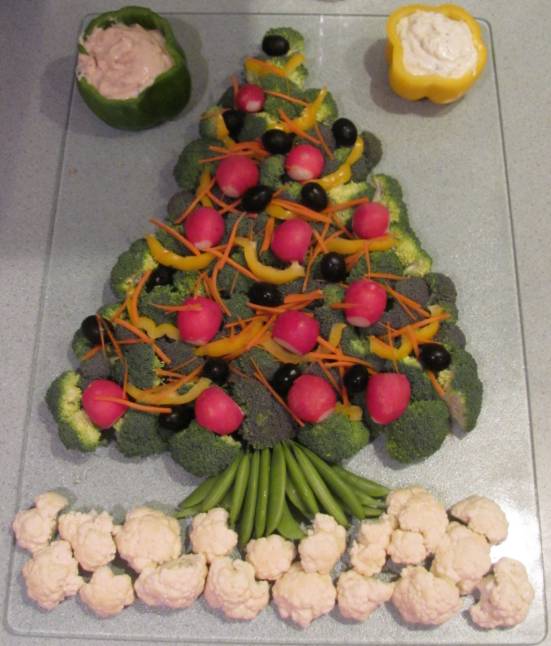
Then from Google Images I got the idea to arrange the veggie tray as a Christmas tree. I used cauliflower for the snow, snap peas for the trunk, broccoli for the tree and decorated with yellow bell pepper strips, radishes and black olives. I shaved carrot over the top for color and served two kinds of dip in hollowed out bell peppers.


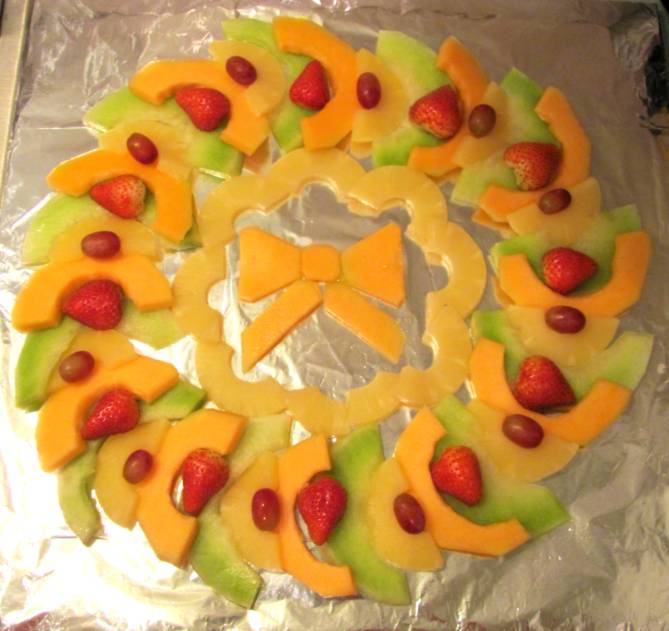
I made a wreath for the fruit tray using cantaloupe, honeydew, and pineapple rings (cut in half). The pineapple centers each got a grape and the spaces between these got half of a strawberry. I cut slices of the cantapoupe and carved them to make a bow for the center.


Still eating leftovers...

Ddd


Posted by studio3d@ccgmail.net at 6:00 AM PST
Alpha-broidery
Topic: Paper Embroidery

Winding down on the embroidered alphabet!

First up today we've got W is for Wreath. I grabbed a piece of striped glossy cardstock gleaned from the back of an old thank you card I had received. I changed up the stitching for this the way I always do as the original design is very pedestrian. I stitched using a variety of colors to make a very spring look. I added it to a lavender card base and used lavender Liquid Pearls to the center of each flower. It is finished off with a silver peel-off greeting.


Then I went on to X is for X-stitch (X is a hard letter to illustrate!). I chose a printed paper that looks like aida cloth and selected green and red threads to stitch with. The Tilda image was received in a stamped image swap and I colored her with Copic markers to match the stitching. I trimmed her out with a craft knife and colored a little shadow for her stool. I created a text block with a stamp.


Finally, we have Z is for Zig-zag. I chose this pattern of zig-zag trees and a background of burlap printed paper. I would choose a darker color for the stars next time but I am basically satisfied with this. I used a frame of green like the trees and a yellow card base to bring out the stars. This is a very easy pattern to stitch up and I taught my grand-daughters (12 and 10) to do paper embroidery with this as the beginning design.


What's left? Just the letter Y and this series will be finished.

Ddd


Posted by studio3d@ccgmail.net at 6:00 AM PST
Sunday, 25 December 2011
CHRISTMAS CARDS - Angels We Have Heard
Topic: Scrap Recovery

MERRY CHRISTMAS! I am finishing the display of all my handmade Christmas cards right on time. Something new tomorrow...

For both of these cards I started with a combination of papers that looked good on a pink folded card base. These were the leftovers from all the other paper cutting I had done for this project and I was fortunate that they combined so well. 

For the one on the left I cut an image from an old card, rounded the corners and mounted it on a shimmery blue paper to pick up the blue in the papers. This got its corners rounded as well. The greeting is a combination of two clear stickers. Card two is also embellished with an image from an old card but this time I trimmed right around the angel with a craft knife. I gave her wings a dusting of Stickles and then applied a thick acrylic greeting sticker. I sprinkled the solid color blocks with silver snowflake stickers.

I hope you have been blessed by the collection of cards I have shown.

Ddd


Posted by studio3d@ccgmail.net at 6:00 AM PST
Saturday, 24 December 2011
CHRISTMAS CARDS - Floral and Text
Topic: Stickers

So much the same - so much different!

These have a soft green print imprinted with text that creates an area for decoration. The decor chosen, though, totally changes the feel of these cards.

The one on the left was decorated with gold peel-off stickers of candles and holly. I colored in all the open parts with different colors of Stickles glitter glue using red, yellow, green, gold, and copper. For the card on the right I used thick acrylic stickers and a clear sticker.

Happy Christmas Eve!

Ddd


Posted by studio3d@ccgmail.net at 6:00 AM PST
Friday, 23 December 2011
CHRISTMAS CARDS - Sporting Stripes
Topic: Stickers

Cutting up all the color blocks for these cards left me with a lot of little strips left over. I combined these in various configurations to create new layouts for some cards.

These started with the same layout but I rotated one when I set to embellish it. First, though is a simple striped version decorated with a couple of puffy acrylic stickers. I made faux stitching around the edge of the card for more interest. Then, on the rotated version I added a large cardstock tag and a thick acrylic sticker greeting.

For the left card I used skinny strips and added a big blue circle to match the blue in the ornament print. I added a green punched circle popped up on foam tape and then placed a thick acrylic sticker with a similar printed background. The card on the right goes back to the thicker strips and I rotated it. I added a striped paper along the top to cut out some of the blank pink and used another of the big blue circles as a background for the penguin sticker. I added the text with a clear sticker.

These chunky stripes were offset to break the formality and I added a clear text sticker that is an appropriately sized stripe extending all the way across. Two holly sprig stickers from the same sheet decorate the top and bottom.

This one uses quite a mix of paper scraps arranged in stripes. To keep from conpeting with the pattern too much I used a clear wreath sticker and decorated it with a bow, some gold peel-off stickers and some 3D holly stickers.

Ddd

Posted by studio3d@ccgmail.net at 6:00 AM PST
Thursday, 22 December 2011
CHRISTMAS CARDS - Bringing Home the Tree
Topic: Multi-Technique

Two layouts with the same papers - one plain and one with an over-all jingle bell pattern. I decided to treat them all the same and combined a rub-on greeting, a stamped image and a clear sticker.

The stamp is from a Tim Holtz set, stamped on a cream cardstock and rounded on two corners. This was one of those 'middle of the night visions'.

Ddd


Posted by studio3d@ccgmail.net at 6:00 AM PST
Wednesday, 21 December 2011
CHRISTMAS CARDS - Really Flakey
Topic: Stickers

WAY overpoweringly busy background! So what could I do but go very simple on the embellishments? All I added was a greeting and two holly sprigs in clear stickers.

Ddd

Posted by studio3d@ccgmail.net at 6:00 AM PST
Tuesday, 20 December 2011
CHRISTMAS CARDS - Carousel Bear
Topic: Stickers

This very busy print looked a little less so when turned on its side. It also made the perfect line to set the post for this Christmas carousel animal sticker. I gave him a strip of musical tissue tape to stand upon and added ribbon, star and jingle bell stickers from the same sheet as the bear.

Too little contrast between the sticker and background so I used a Sharpie marker to draw around it, and then to enhance the sticker details.

Ddd


Posted by studio3d@ccgmail.net at 6:00 AM PST
Monday, 19 December 2011
CHRISTMAS CARDS - Street Scene
Topic: Scrap Recovery

Little bits of the printed cardstock are glittered making a perfect setting for the street scene cut from the front of an old card. I mounted the scene on a shimmer golden paper and popped it up on foam tape.

The yellow-gold folded card base makes the windows seem to glow.

Ddd


Posted by studio3d@ccgmail.net at 6:00 AM PST
Sunday, 18 December 2011
CHRISTMAS CARDS - Pinecones and Gold
Topic: Stickers

The print used today is actually a scrapbook paper rather than a cardstock. It started out as a 12 x 12 also, where most of them have been from 6 x 6 pads.

These card bases are forest green! I have no idea how the camera can change the color of those and leave the matching images in the paper alone.... In any case, For these two I used some of the clear stickers. On the left one I used the greeting sticker and three trees. To the center tree I added tiny self-adhesive rhinestones as lights. The card on the left got a layered wreath with pinecones added.

These both got cardstock sticker tags and I added snippets of ribbon. On the left I used a rub-on greeting and on the right I added a thick acrylic sticker.

Ddd


Posted by studio3d@ccgmail.net at 6:00 AM PST
Saturday, 17 December 2011
CHRISTMAS CARDS - Simply Snowflakes
Topic: Scrap Recovery

Oh so simple. I had this stamped snowflake panel left over from last year. It has been mounted to a teal folded card base. The bottom panel is from an old card. I rounded the top corners, popped up the upper edge on foam and stuck the lower edge with glue dots.

You can't see it in the photo but the blue stars are covered in Stickles, creating sparkle and shine.

Ddd


Posted by studio3d@ccgmail.net at 6:00 AM PST
Friday, 16 December 2011
CHRISTMAS CARDS - Cover Story
Topic: Scrap Recovery

The covers of scrapbook paper pads can provide useable card elements. That is the case with these blocks of print I cut from one such cover. I added some of the gold tone-on-tone metallic to break it up a little. The angel scene is cut from the scrapbook paper that yielded the stockings. I popped it up on foam and I got the star from an old card.


Ddd


Posted by studio3d@ccgmail.net at 6:00 AM PST
Thursday, 15 December 2011
CHRISTMAS CARDS - Stocking on the Wall
Topic: Scrap Recovery

A printed paper provided the brick wall and made me think of the fireplace mantle. So I cut a stocking from another scrapbook paper and attached it to the wall. I used fine black marker to add faux stitching creating another level of detail.

The text is a puffy acrylic sticker.

Ddd


Posted by studio3d@ccgmail.net at 6:00 AM PST
Wednesday, 14 December 2011
CHRISTMAS CARDS - Pines
Topic: Scrap Recovery

Odd colors on this printed cardstock made it hard to find elements to use. I went with a black folded card base and then chose to use a bit of contrast with the fine green and brown stripe.


The text is provided with a clear acrylic sticker.

Ddd


Posted by studio3d@ccgmail.net at 6:00 AM PST
Tuesday, 13 December 2011
CHRISTMAS CARDS - Holiday Lane
Topic: Scrap Recovery

I have had the sticker frame on this card for years. Then I ran across this illustration of decorated trees and it was perfect. I cut it down considerably so it would fit in the frame. I added Stickles to the trees in the border and to the ornaments in the trees.


The text is a clear acrylic sticker.

Ddd


Posted by studio3d@ccgmail.net at 6:00 AM PST
Monday, 12 December 2011
CHRISTMAS CARDS - Ornamental Stripes
Topic: Scrap Recovery

1/2-inch stripes cut from a scrapbook pad create a background on green scrapbook paper. Over this I placed an ornament cut from an old card, popped up on foam. I attached a hanging string made with gold peel-off border.


I cut apart multiple rub-on greeting to create the text for this card.

Ddd


Posted by studio3d@ccgmail.net at 6:00 AM PST
Sunday, 11 December 2011
CHRISTMAS CARDS - Santa's List
Topic: Scrap Recovery

Glittery printed heavy-duty cardstock sets a swirling backdrop for Santa, trying to figure out his 'naughty and nice' list. This is a Rockwell illustration clipped from an old advertising flyer. I popped it up on foam tape for dimension.


Ddd


Posted by studio3d@ccgmail.net at 6:00 AM PST
Saturday, 10 December 2011
CHRISTMAS CARDS - Good Old Santa
Topic: Scrap Recovery

The Santa and Reindeer strip came from an old Christmas card. I backed it with panels of printed cardstock that bring out various colors from the illustration.

I bordered the top and bottom of the illustration with gold peel-off borders.

Ddd


Posted by studio3d@ccgmail.net at 6:00 AM PST
Friday, 9 December 2011
CHRISTMAS CARDS - Poinsettias
Topic: Scrap Recovery

These white poinsettias are from a print-it-yourself scrapbook paper and the red one is from an old Christmas card. I mounted on a red card base and added a strip of the gold text cardstock.

Ddd


Posted by studio3d@ccgmail.net at 6:00 AM PST

Newer | Latest | Older