« September 2012 »
S M T W T F S
1
2 3 4 5 6 7 8
9 10 11 12 13 14 15
16 17 18 19 20 21 22
23 24 25 26 27 28 29
30
You are not logged in. Log in
Entries by Topic
All topics  «
3D paperwork
A - Z challenge 5
A - Z challenge 7
A - Z challenge round 4
A to Z challenge round 3
A to Z round 2
A to Z round 6
A-Z round 1
Around the House
Art Challenges
Artist Trading Cards
Backgrounds
Beads
Bible Journaling
Books
Boxes
Collage
Color Challenge
Coloring
cookbook
Die Cuts
Digital Projects
Digital Stamps
Drawing
Dry Embossing
Fabric Stuff
Fantastic Folds
Field Trip
Home Decor
How Does Your Garden Grow?
Hymnal Art
In The Kitchen
In the studio
Jewelry
Lettering
Links
Multi-Technique
Music to Work By
Musings
Nail Art
New Work
Online Class
Other Hobbies
Other Projects
Painting
Paper Embroidery
Paper Piecing
Photo
Pretty Paper
Quilting
Random
reading
Scrap Recovery
scrapbooking
Sewing
Sketch Challenge
Some Backlog
Stamping
Stencils
Stickers
Supplies
Teabag Folding
Techniques
Testing
tips and tricks
Tutorial
Web resources
Welcome to my Blog
Work By My Friends
workflow
Writing
Blog Tools
Edit your Blog
Build a Blog
RSS Feed
View Profile
Group One
In & Out of Studio 3D
Monday, 17 September 2012
What a Cutup!
Topic: Supplies

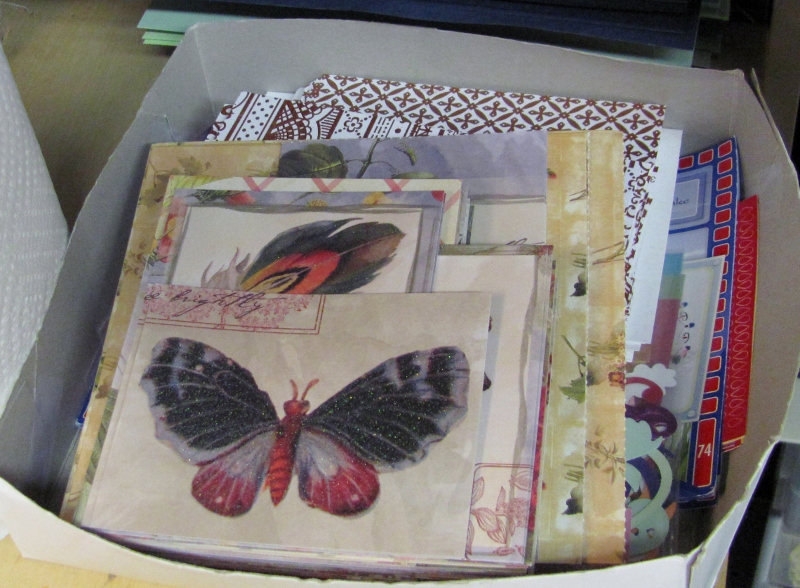
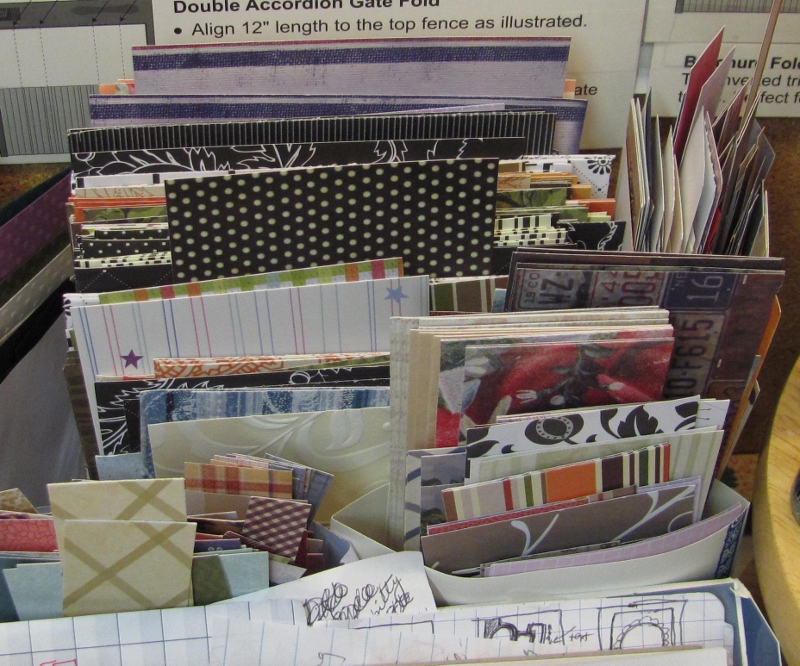
I've bought several 12 x 12 pads of printed cardstock over time andhave been storing them separately from the card-sized stuff. So today I decided that, since I really use it all for cards, I would cut it down to suit that.

Depending on the pattern I cut some to 6 x 6, some to 5.25 x 4, and some I cut to feature items on the cardstock. The 'backgrounds' stuff in 6 x 6 all went into the box with the stuff from 6 x 6 pads


The feature items got set aside in another box so they are ready to pull out for card fronts


Then all the smaller bits got sorted in with the table scraps for use as 'whatever'

Now I'm all stocked and ready to make a bunch more cards.

Ddd


Posted by studio3d@ccgmail.net at 12:01 AM PDT
Sunday, 16 September 2012
As Seen On TV
Topic: In the studio

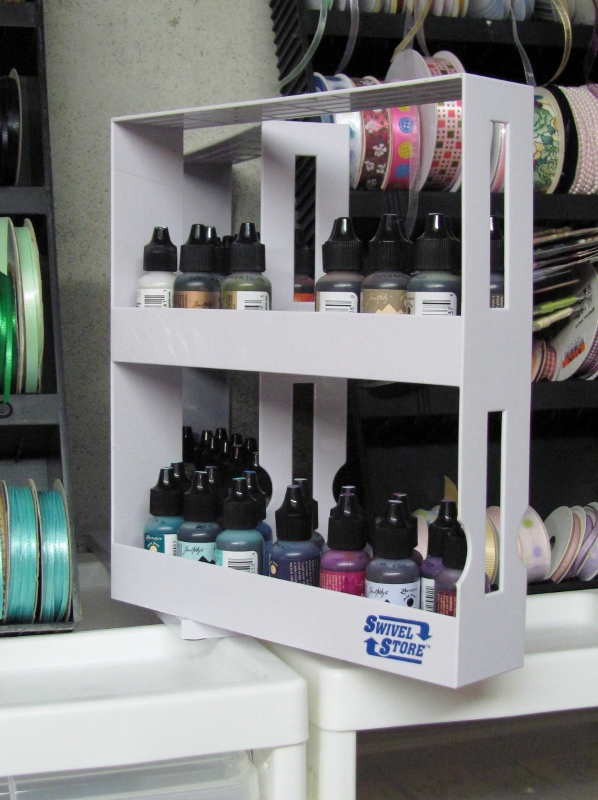
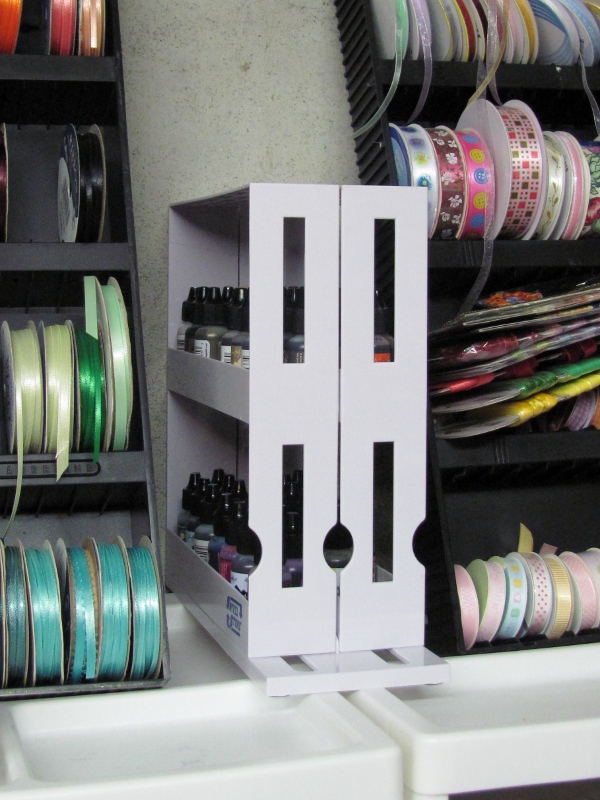
I have been moving my alcohol inks from place to place and from one kind of rack/box/shelf to another. Then I was walking through the store the other day and came to the section for 'as seen on TV' products. There I found a spice storage rack that has two sections that slide out and rotate to make the items accessible.

Well, I thought that looked like just the thing for the alcohol inks, and for $10 I brought it home.

I used the inks to color up 1/4" dots for the tops of the lids and divided them up into color groups.

Here is the unit closed:


When I want a bottle I just slide one of the sides forward and rotate it to make it fully accessible.


I just want to label the fronts of the units to indicate the color groups that are on each shelf so I open the right side the first time.

Ddd


Posted by studio3d@ccgmail.net at 12:01 AM PDT
Saturday, 15 September 2012
Garden Update
Topic: Other Hobbies

Wow! The whole summer flew by and I forgot to show the progress of the garden. Surprised

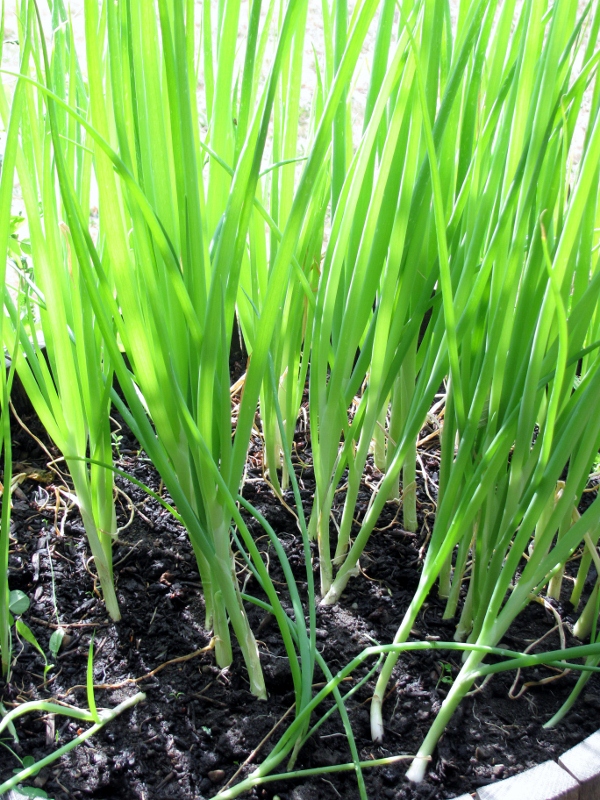
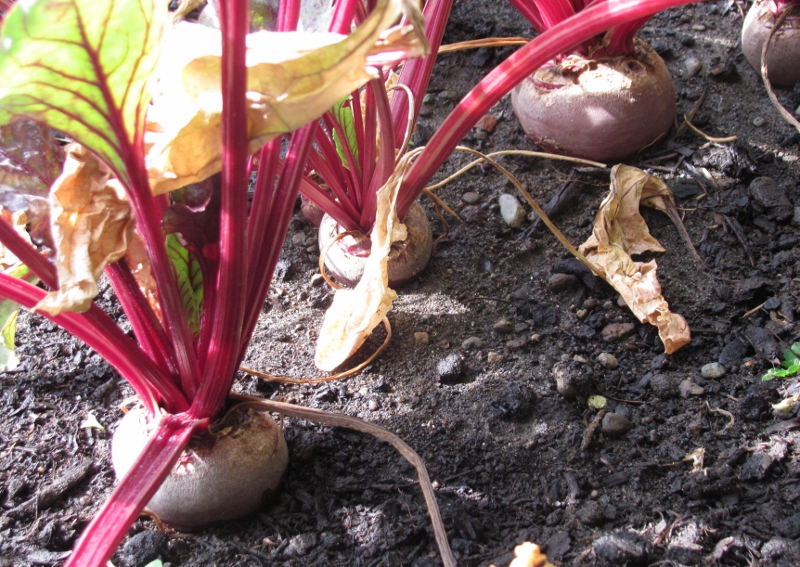
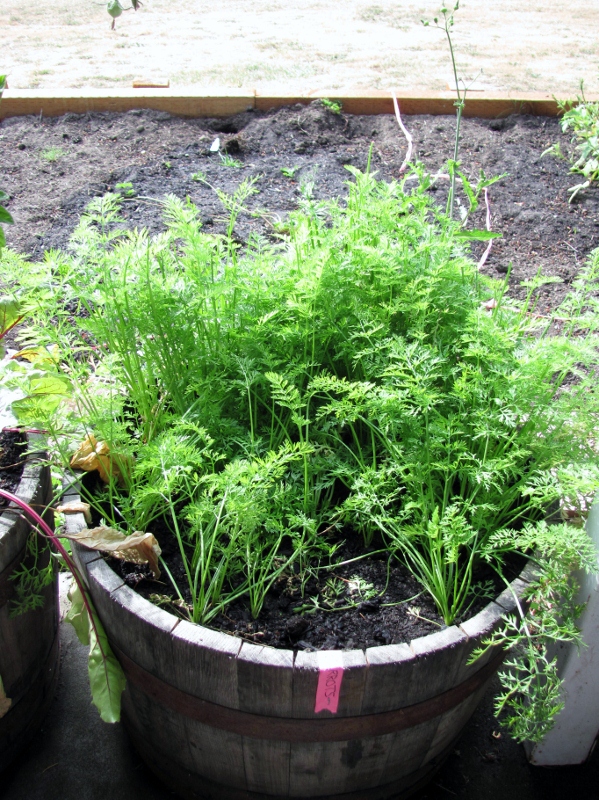
So much of the produce has come and gone that there is not much to show at this point but we are still eating from it and a few things are just coming into their own. Tonight we had spinach, beets, cherry tomatoes, cucumbers, green onions and potatoes from the garden for dinner. I have white onions in the crisper, too.

The deer ate the strawberries right down to the stems and the blueberries produced two berries this year. No raspberries at all. None of the garlic came up. Lettuce did well but the deer snacked on that, too. Radishes did like every year - about half a dozen created radishes and the rest went right to seed. A re-planting did even worse with no radishes produced at all. Green beans did good, peas did fair and sugar snap peas did dismally.

Successes are green onions:


Beets:


Carrots:


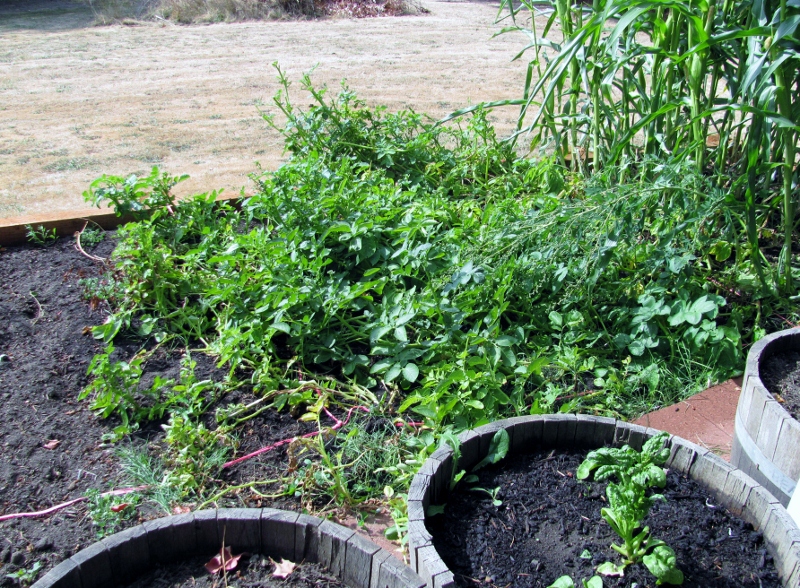
Potatoes - this is the first time I have grown potatoes and I planted three kinds: purple, Yukon gold, russet:


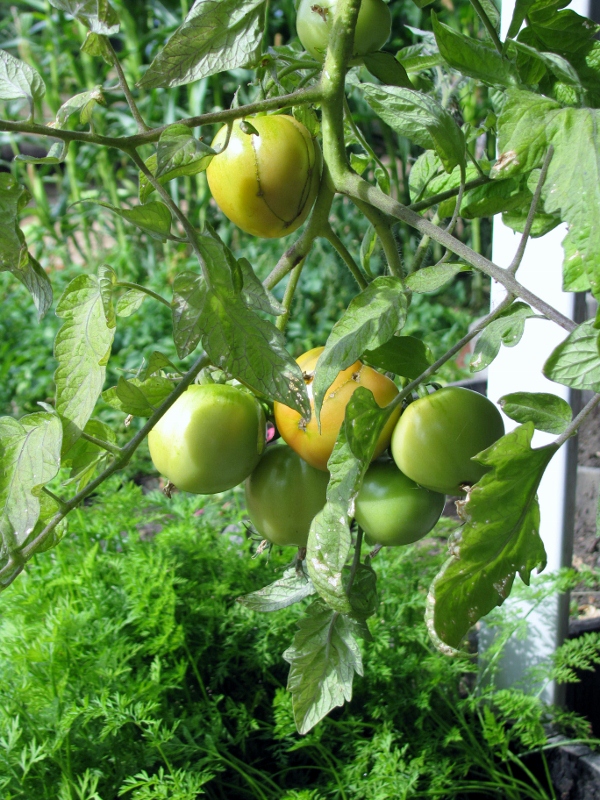
Tomatoes - I planted two regular and one cherry tomato plants. They are not loaded but all have a few fruit and they are just starting to ripen:


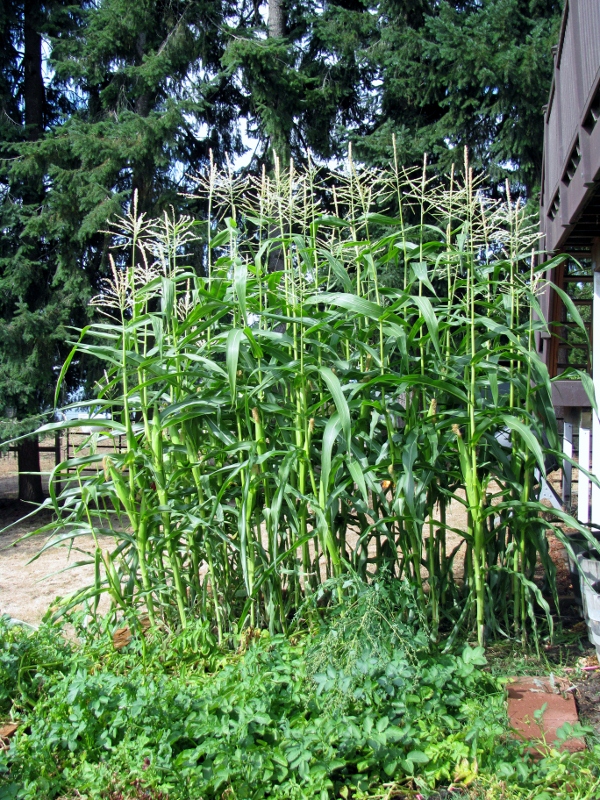
and, finally, sweet corn - this is the first time I have grown corn, too. It is doing GREAT!


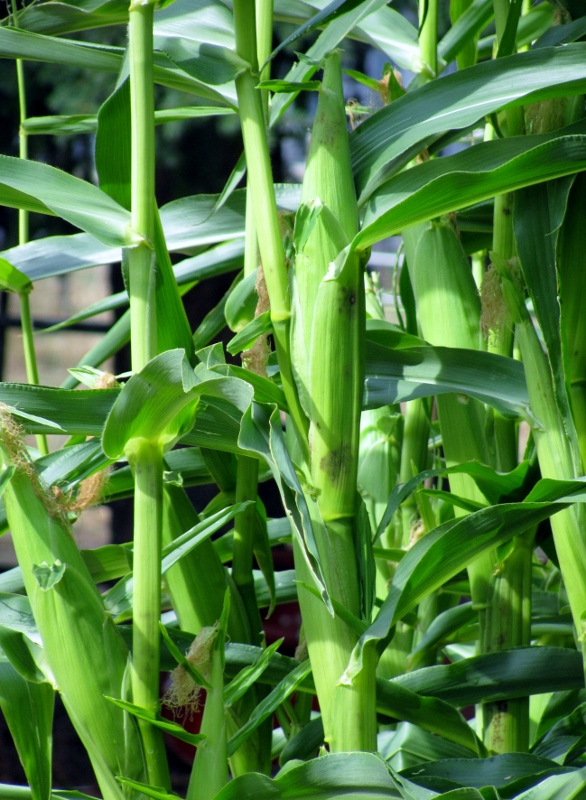
Look at these cobs!!!


We'll be eating on this garden for quite a while yet.

Ddd


Posted by studio3d@ccgmail.net at 12:01 AM PDT
Friday, 14 September 2012
Sitting Pretty
Topic: Paper Embroidery

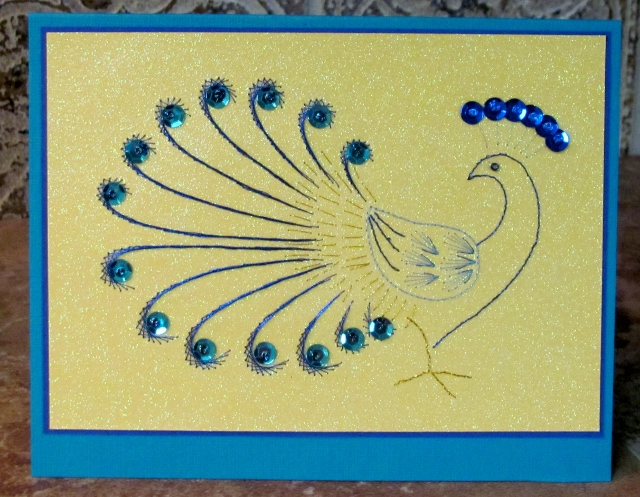
For a challenge to stitch yellow and blue I chose a glittery yellow cardstock and stitched up this peacock in two shades of blue and some gold - all metallic threads. The sequins (two blues) are stitched on with beads (two blues).


Then I bordered in dark blue and mounted on a teal blue card base.

Ddd


Posted by studio3d@ccgmail.net at 12:01 AM PDT
Thursday, 13 September 2012
October's Real Holiday
Topic: Paper Embroidery

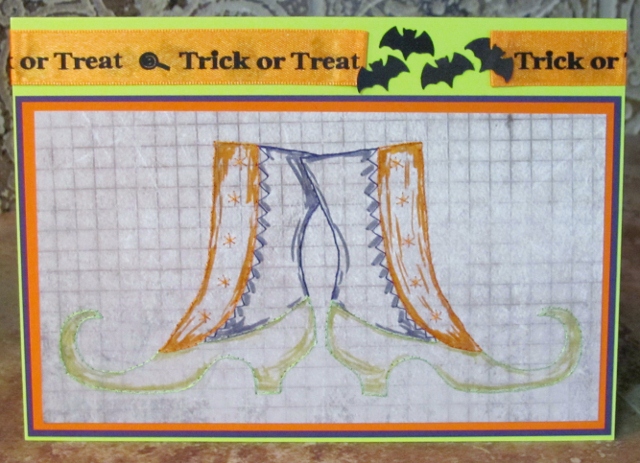
For a challenge to stitch a Halloween card I chose a witch's shoes. The pattern has only one so I flipped it to make the second and overlapped them a bit for effect. I added some matching shading with Distress markers and bordered with the same three colors.


The text at the top is some printed satin ribbon. I wrapped it from the inside to the front and folded back the raw edges of the ends. then I used glue dots to adhere four punched-out bats

Ddd


Posted by studio3d@ccgmail.net at 12:01 AM PDT
Wednesday, 12 September 2012
Creature From the Sea
Topic: Paper Embroidery

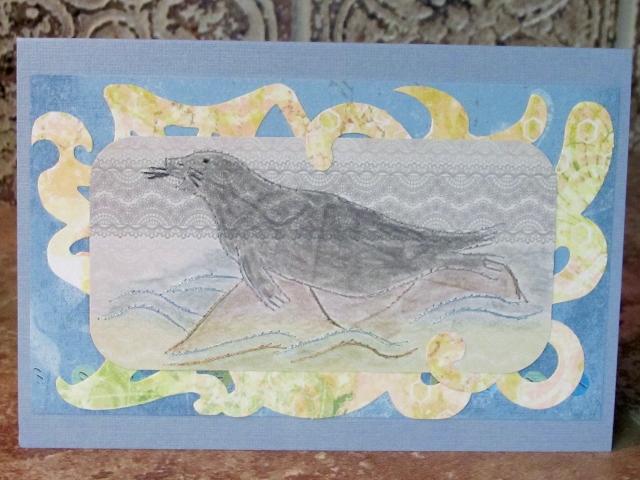
An online challenge was to stitch a 'water animal'. This is the only pattern I had that fit the bill (other than frogs and fish). I stitched him on a paper with a lacey pattern and afterwards founf the thread blended in too much. So I did some coloring with colored pencils. I was disappointed that the threads on the back made the colors lay down strangely on the front (like doing a rubbing)

I rounded the corners and used the last corner of a diecut swirl cardstock in my scraps. There is a blue paper with a subtle print behind that and a plain blue card base.


I do love seals. They always look so friendly, like a big puppy.

Ddd


Posted by studio3d@ccgmail.net at 12:01 AM PDT
Updated: Wednesday, 12 September 2012 7:40 AM PDT
Tuesday, 11 September 2012
October Holiday
Topic: Paper Embroidery

I'm not talkin' about Halloween, here. I'm just working ahead on my Christmas cards again and these are the two that I completed for October's 'two Christmas cards per month' stitching challenge.

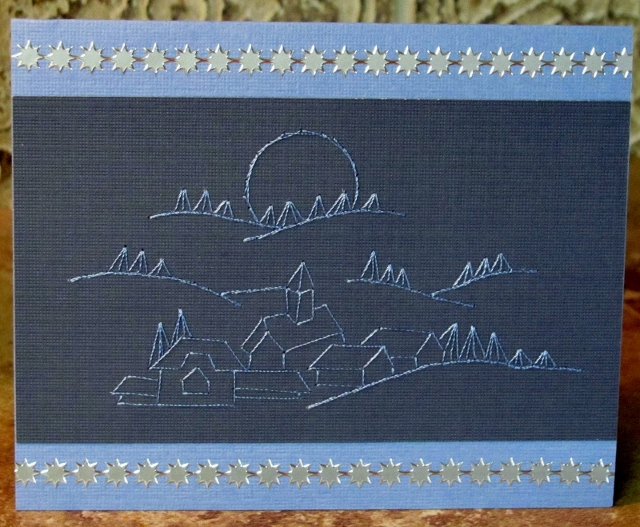
First up is a winter scene that I've done several times before. I usually do it on blue with white thread so it looks like a snow scene. This time I decided on dark blue background and light blue thread so it looks like a night scene. I mounted it on a medium blue and gave it a couple of lines of peel-off sticker border in silver.


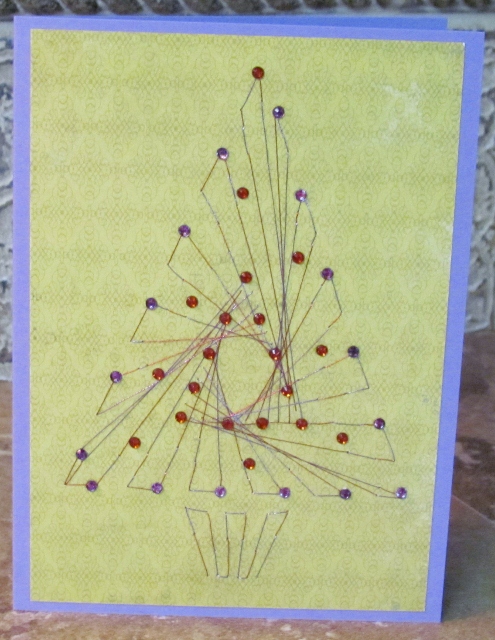
This tree is supposed to be stitched with round and bugle beads but I was in an airport when I stitched it and had no beads with me. So I just used purple and red metallic threads and stitched in a broken line method to make color changes. It was incomplete looking so I added the broken outline as well. When I got home I mounted it on purple cardstock and then wanted to add red and purple rhinestone stickers. Since I had none I colored clear rhinestones with Copic markers and let them dry before sticking.


Aren't all patterns only a 'suggestion'?

Ddd


Posted by studio3d@ccgmail.net at 12:01 AM PDT
Updated: Wednesday, 12 September 2012 7:39 AM PDT
Monday, 10 September 2012
A New Passage
Topic: Quilting

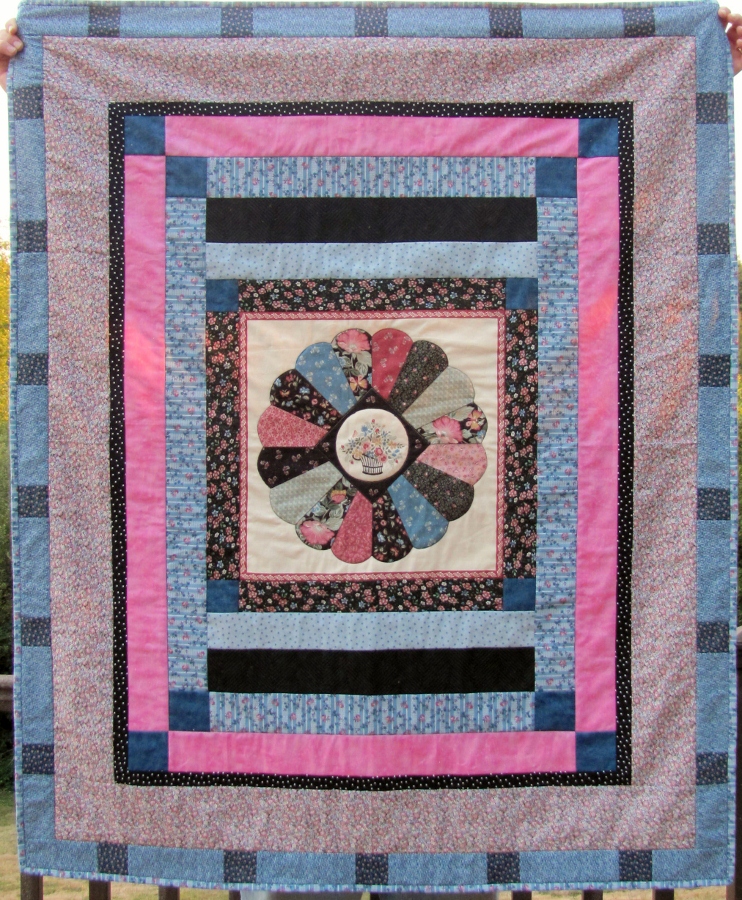
I gathered up more fabric scraps and put together another lap quilt for the hospital's Passages program. I was inspired by the center medallion which is a pre-printed panel and I added strips round and round until it got to be the size I wanted.

You know, I always want to try something new on every quilt I make. This time it was machine-stitched binding. I attached on the front as usual and wrapped to the back, where I pinned it in place and overlapped the seamline. Then I stitched from the front in the ditch. This caught about 1/8 inch of the binding on the back side.

All but the pink and the thin black (dotted) fabrics were in the scraps from out quilting group. Those two fabrics were from my stash.

We've moved out quilting group and, beginning next weekend, will be meeting two Saturdays per month. More room and better tables to work at. Excited to start up again for the Fall.

Ddd


Posted by studio3d@ccgmail.net at 12:01 AM PDT
Sunday, 9 September 2012
First an Artist, Now an Artisan
Topic: In The Kitchen

Every time I visit at my son's house I come back inspired (challenged) by my multi-talented daughter-in-law. This time I was inspired to try making no-knead artisan bread. Awesome stuff to eat - easy to make.

I followed the master recipe in the book Artisan bread in five minutes a day : the discovery that revolutionizes home baking by Jeff Hertzberg

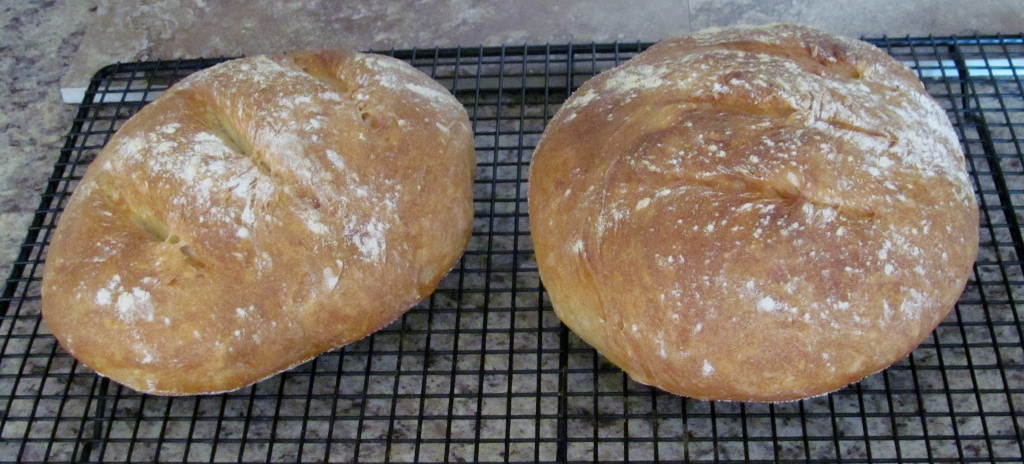
It is a wet dough that keeps in the fridge for up to a week while you take off portions to bake up fresh. I baked two loaves right away and kept two in the fridge to bake in the next few days. I will defininately be making more of this!

Here are my first two BEAUTIFUL loaves:


YUMMO!

Ddd


Posted by studio3d@ccgmail.net at 12:01 AM PDT
Saturday, 8 September 2012
A Dazzling Fall
Topic: Stickers

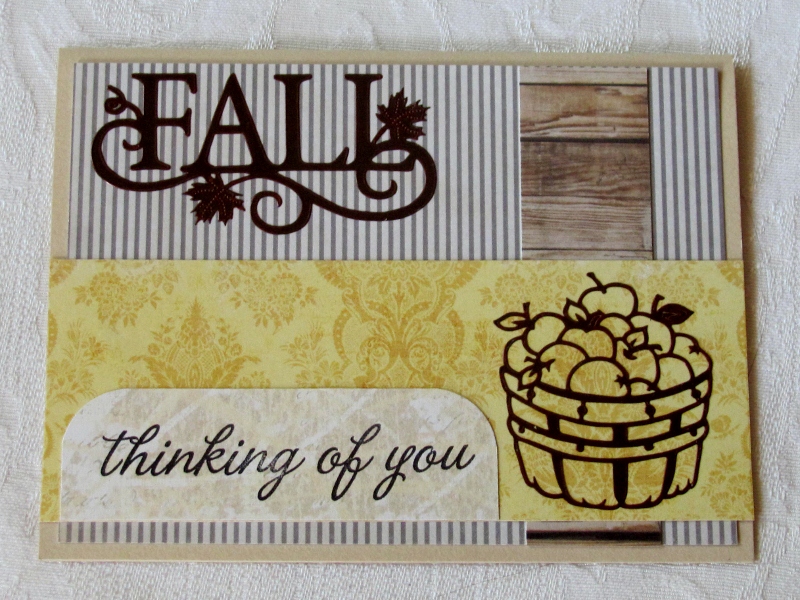
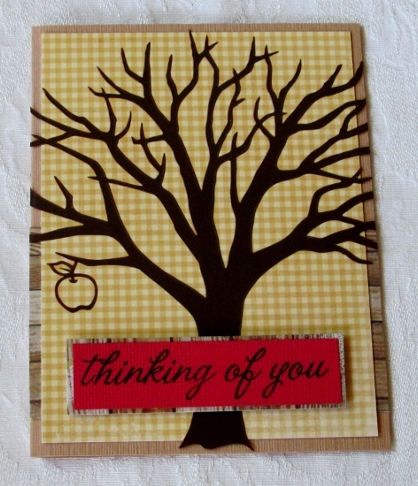
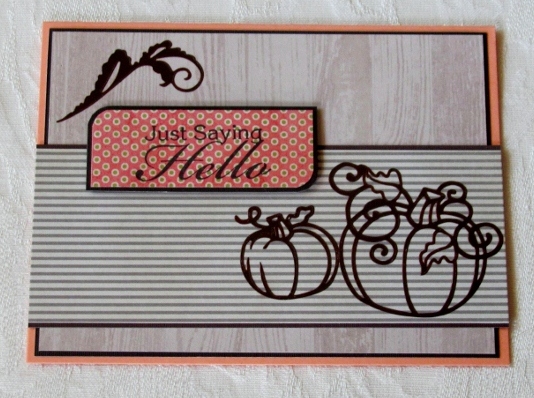
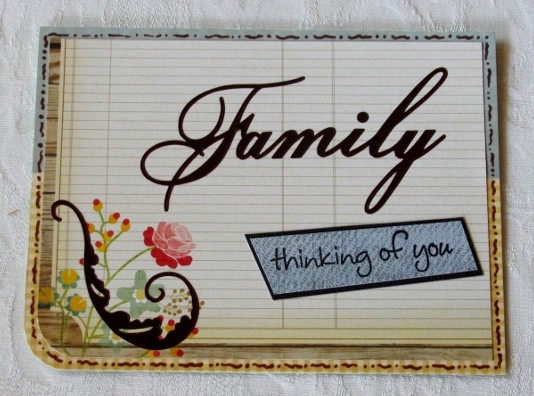
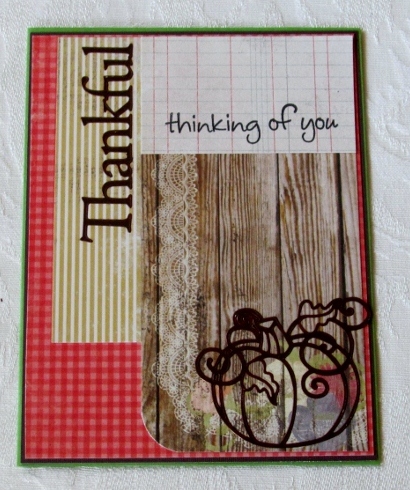
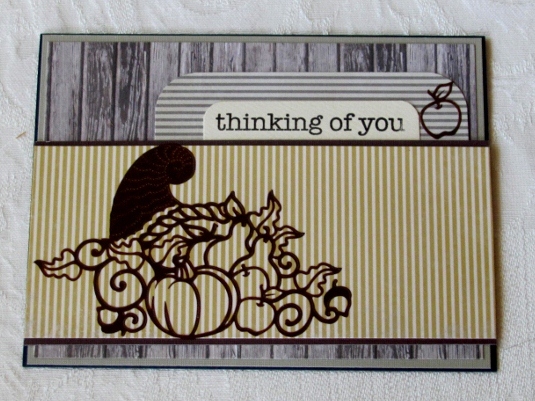
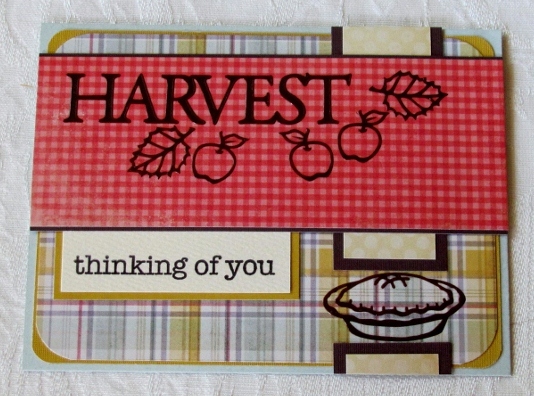
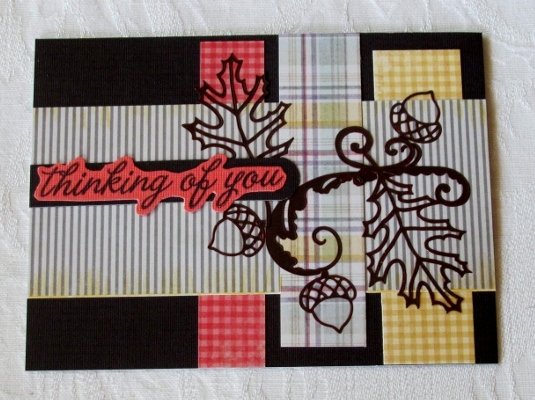
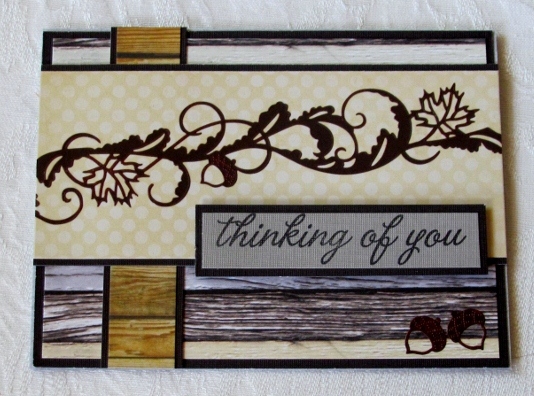
Time to break out a new 6x6 paper pad and a set of fall peel-off stickers. This company calls their stickers 'Dazzles'. The set I am using comes on three large sheets and they are in a luscious dark bronze color. I cut up the papers from the 6x6 pad (with lots of woodgrains, checks, and a nice fall palette) into smaller strips and shapes and combined them in pleasing groups. Then I selected a base card and some bordering papers. A pre-stamped sentiment was also selected for each.

Then I set to work making 10 cards in this session:


Love all the acorns, apples and leaves.

Ddd


Posted by studio3d@ccgmail.net at 12:01 AM PDT
Friday, 7 September 2012
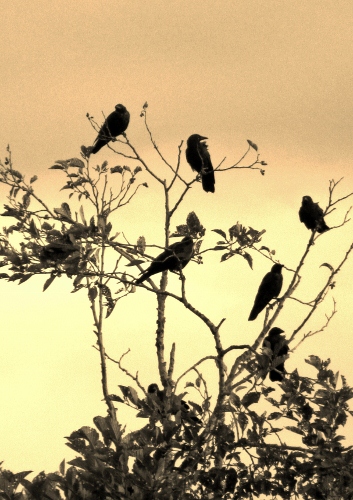
Creepy Birds
Topic: Photo

I looked out the window at dusk the other day and spied this tree full of creepy birds. I wish the tree had more bare branches as it would make a great Halloween picture. I did play with the color and contrast in my photo editing software, too.


Creepy, huh?

Ddd


Posted by studio3d@ccgmail.net at 12:01 AM PDT
Thursday, 6 September 2012
Two for Christmas
Topic: Paper Embroidery

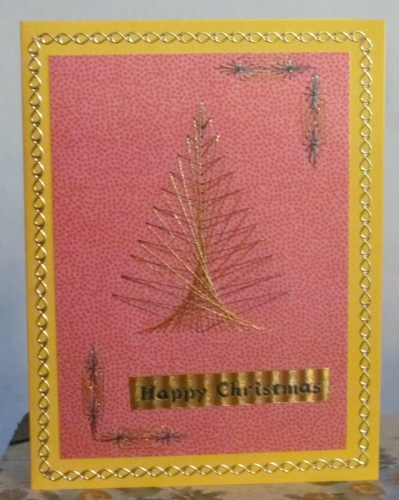
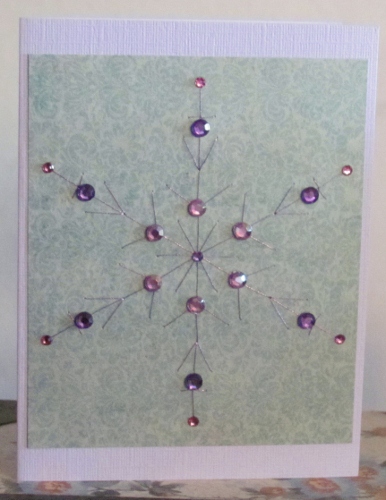
Another two paper embroidery cards for Christmas!

This time I used some metallic threads to stitch up a new-to-me tree pattern. I left off the outer border and trimmed fairly close to the stitching. This gave me extra room around the edge to add some gold sticker trim. Then I added a gold and green metallic text sticker.


My second card is snowflake redux. This is my own pattern that I have done a zillion times. I stitched it with metallic purple thread over a light teal paper and backed it with a lavender card base. The different treatment this time is using rhinestone stickers for decoration.


Anybody keeping track of how many Christmas cards I have done already? Me neither!

Ddd


Posted by studio3d@ccgmail.net at 12:01 AM PDT
Wednesday, 5 September 2012
Scrappy Flags
Topic: Scrap Recovery

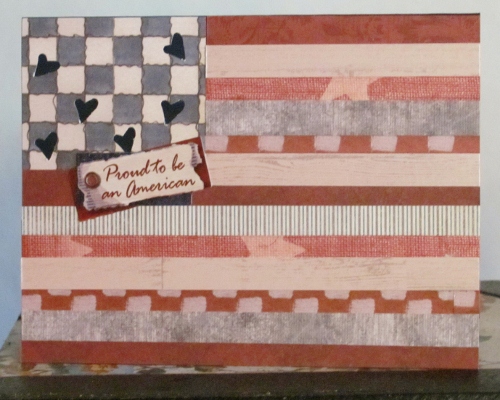
In the kits I made up some time ago I had two that had patriotic cardstock stickers; the last leftovers from a large sheet. One of them had a blue card base and one a red card base - both in muted tones. I had also dropped in these kits lots of red, glue and neutral scraps.

So I treated both in a similar manner by making scrappy flags. For the first I used a single block of blue checked paper for the upper left corner. I used a heart punch on it so the card base shows through. Then I l alternated printed paper strips in reds and neutrals. Then i placed the cardstock sticker under the blue field.

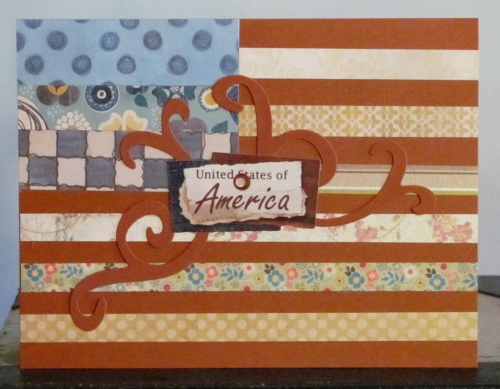
For the second I used slightly brighter colors. I started with a block of three blue patterned papers. Then I used cream and yellow strips on the field while letting the red background show between them. I placed two diecut swirls on top and then placed the cardstock sticker in the center.


I like how these came out - scrappy but still recognizable.

Ddd


Posted by studio3d@ccgmail.net at 12:01 AM PDT
Tuesday, 4 September 2012
Shiny Wafers
Topic: Supplies

A quick stop by the craft store the other day had me scanning the shelves for things marked for clearance. I happened upon a package of round and oval stickers that are acrylic domes but still very low profile. These are perfect for cards.

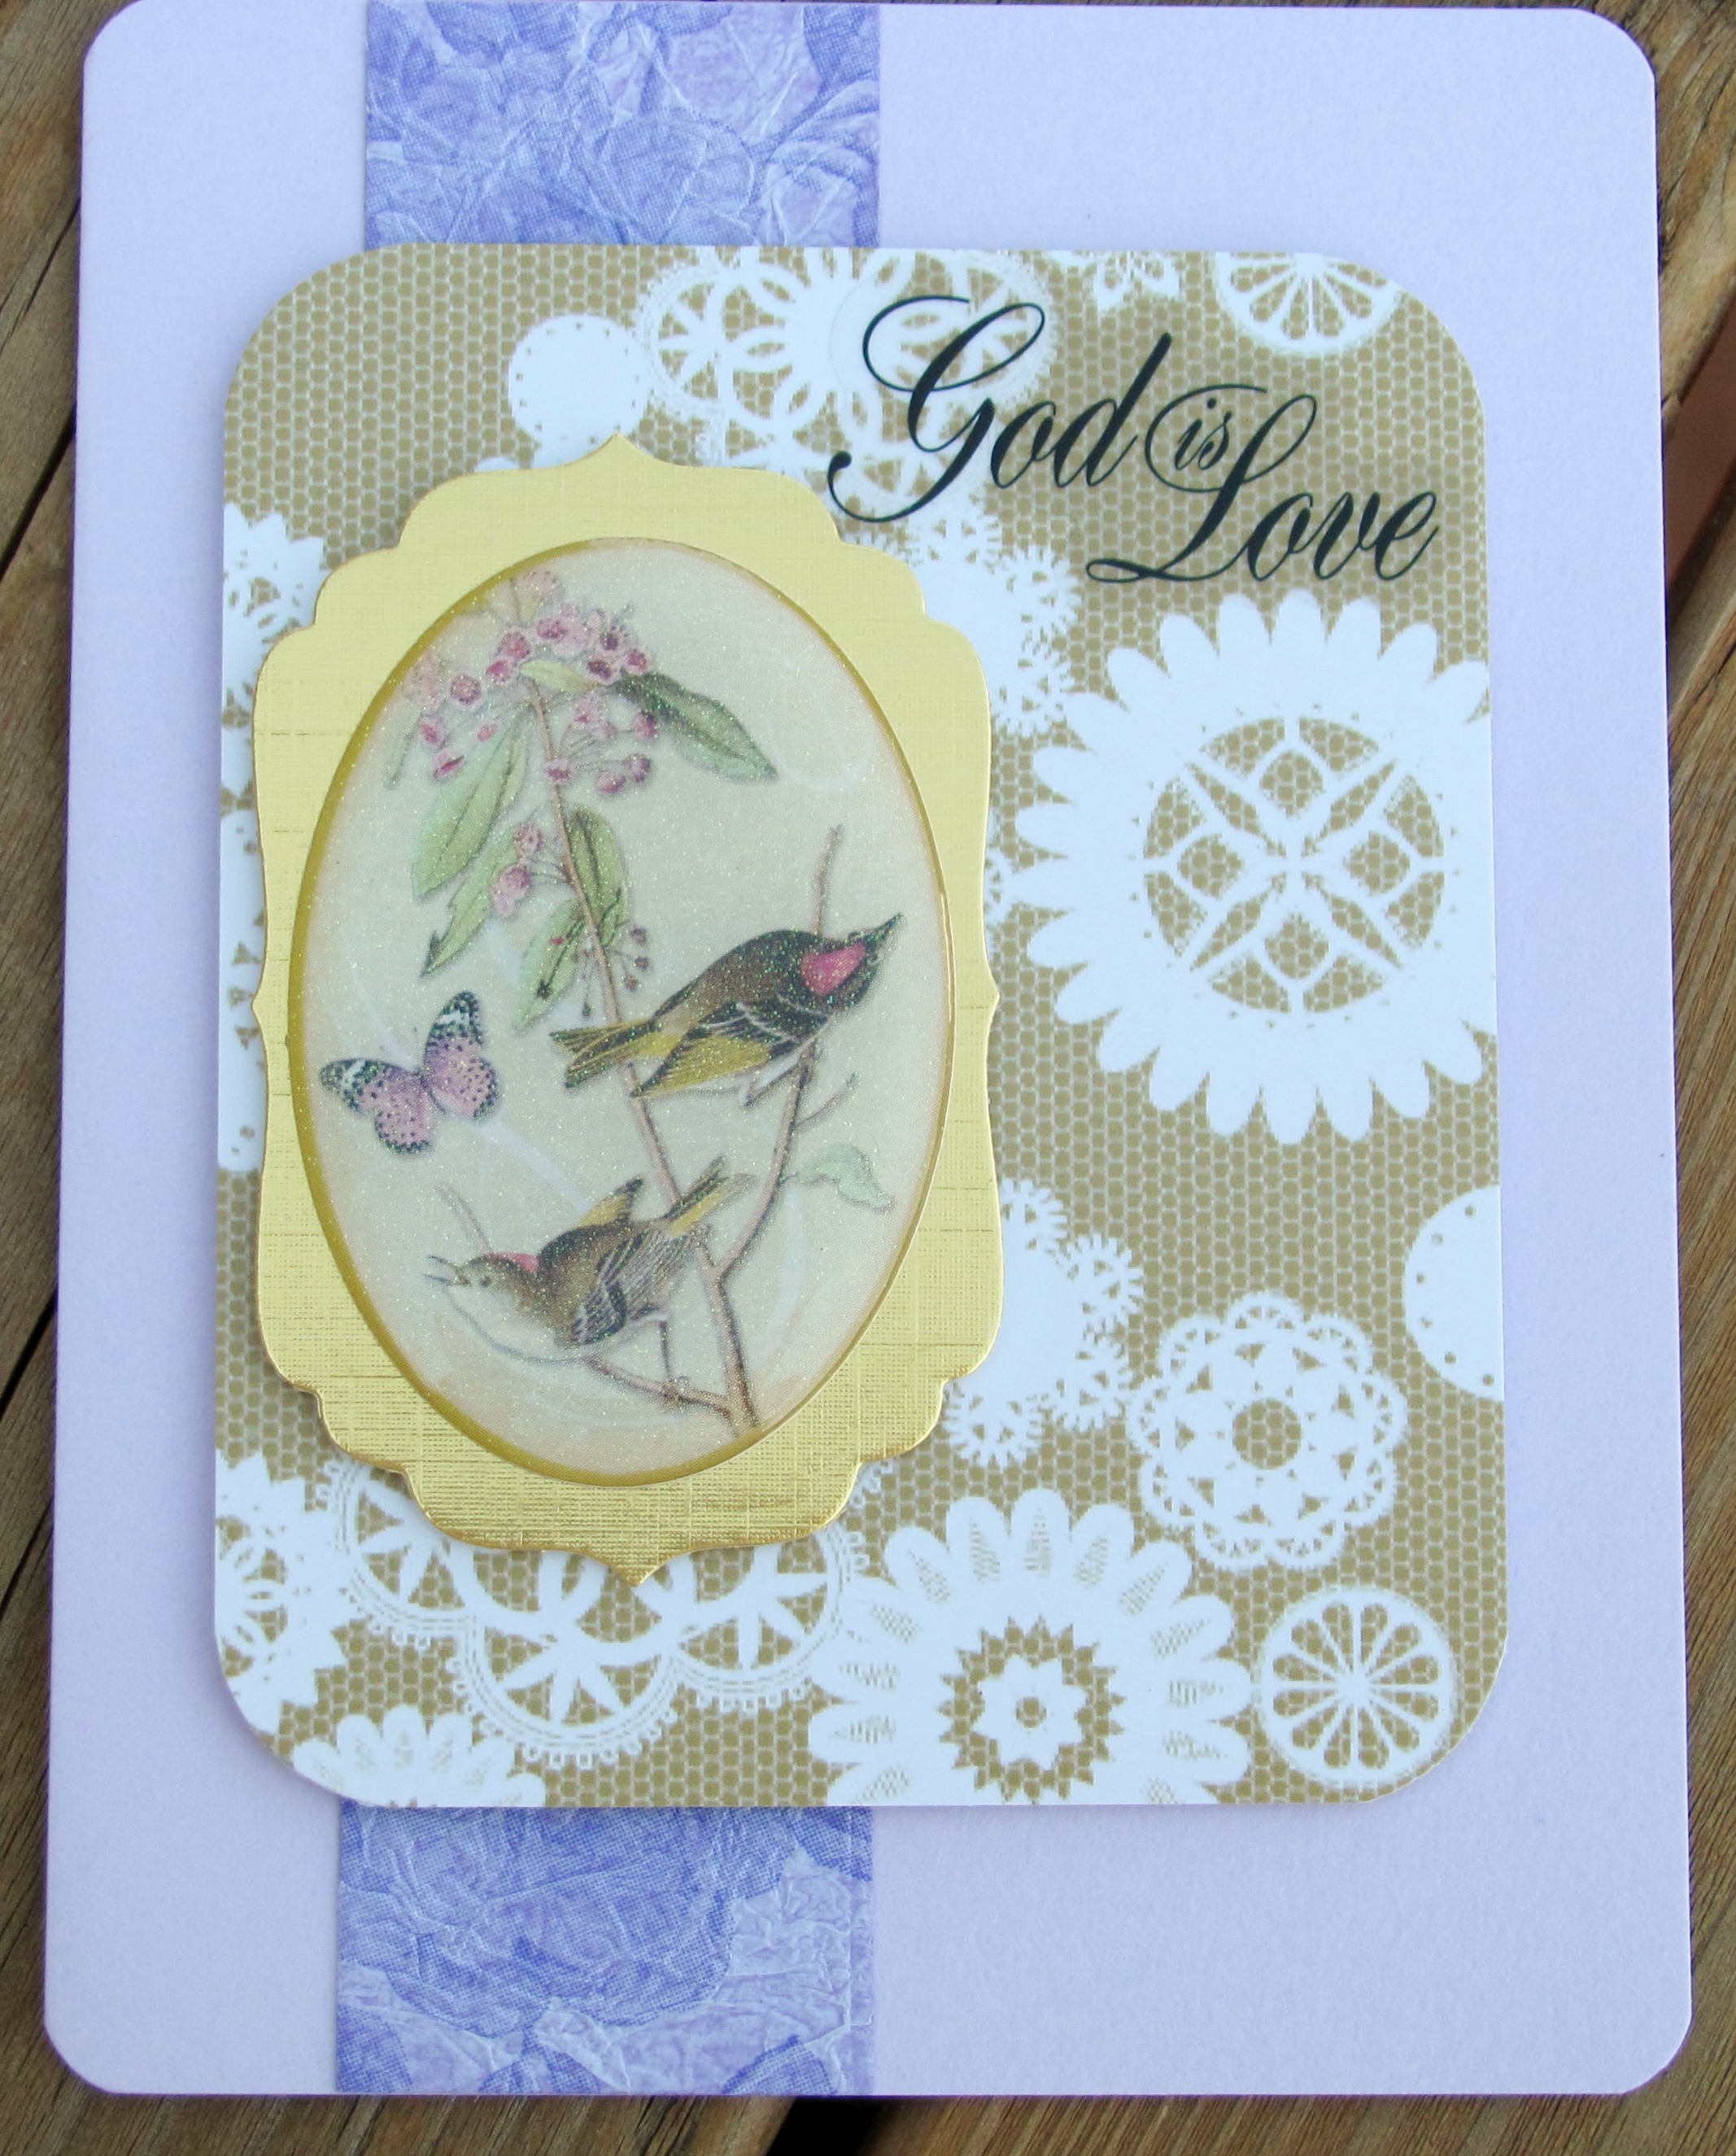
I grabbed up some of the kits I had made up and took out the old 'feature items' and replaced with these new disks. First up is one using some crushed tissue paper over cardstock (the background purple strip) and a 'sample' of cardstock off the cover of a pad (the netting and lace circle page) as well as a gold metallic diecut (the shaped item) and a clear greeting sticker.


Next I used three pieces of printed cardstock (left, center, right) and a clear plastic greeting bar. It had to be mounted over white cardstock and trimmed out as the colors showing through made the text unreadable.


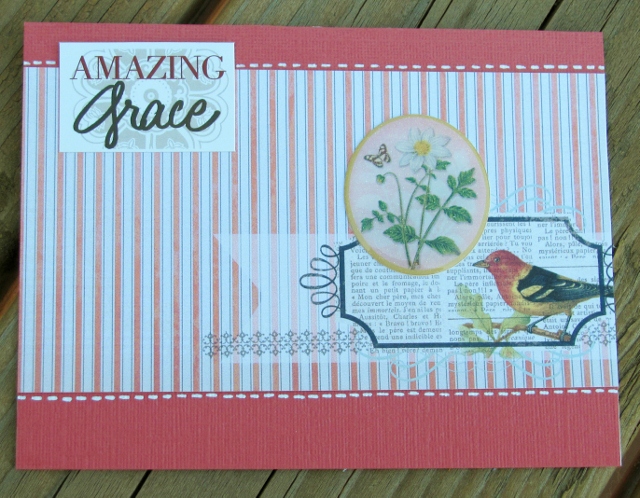
This one is simply a strip of striped paper and a cardstock text block. The bird, label and scrollwork are all printed on the striped paper. I just had to place the circle sticker carefully to cover up the printed sentiment.


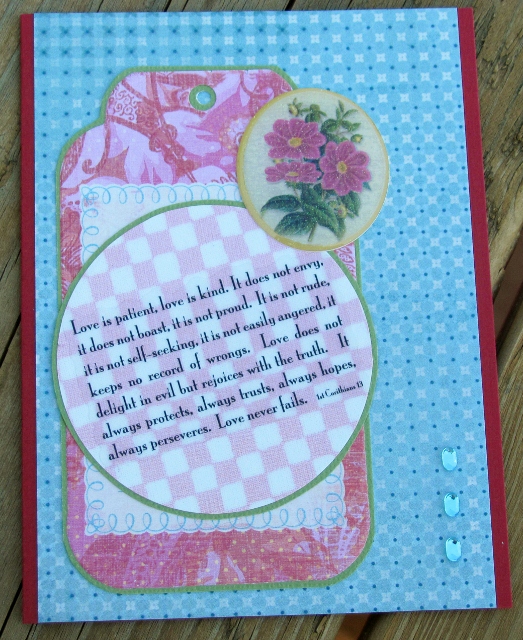
This has a green card base, pink colored panel and a floral stripe panel with rounded corners. The flowers on the striped panel are glittered. I added a clear scripture at the top.

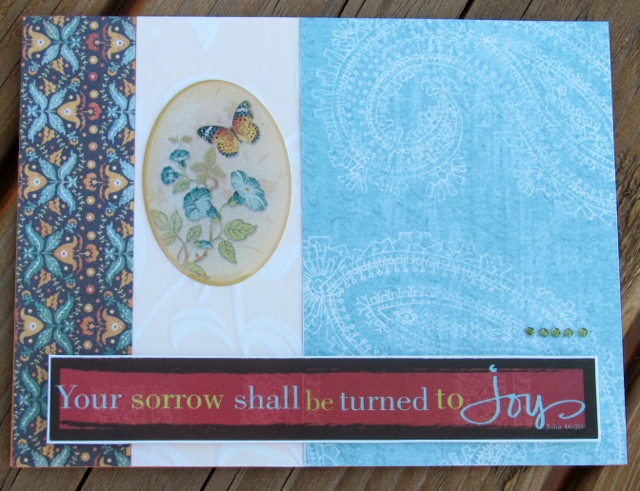
A blue patterned paper, a tag backed with green and a diecut circle backed with green. A clear scripture sticker covers the circle. Three losenge-shaped gemstones are pn the right.

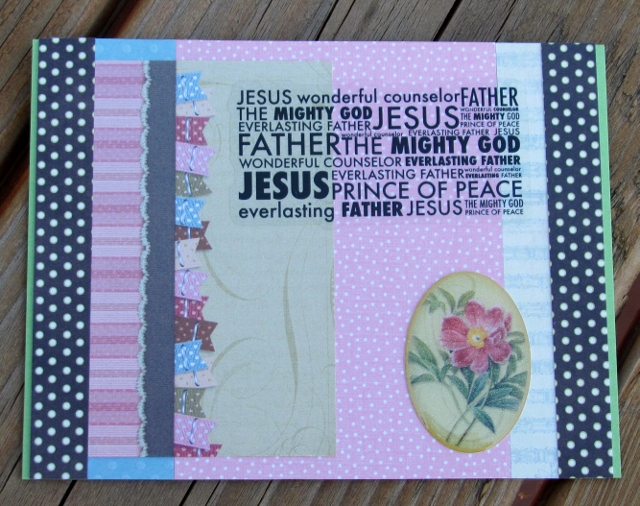
I used a couple of table scraps for background and added dotted stripes to each side. Then I placed a block cut from a printed tag at the left side. The text is a large clear sticker. 

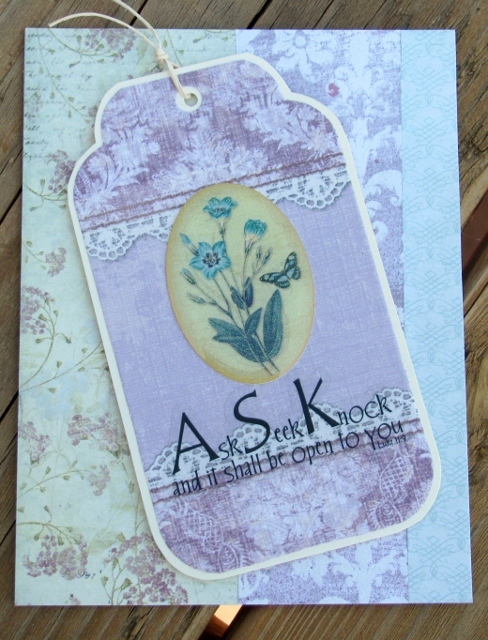
Three strips of patterned paper, a bordered tag with scrappers floss knot and a clear sticker. 


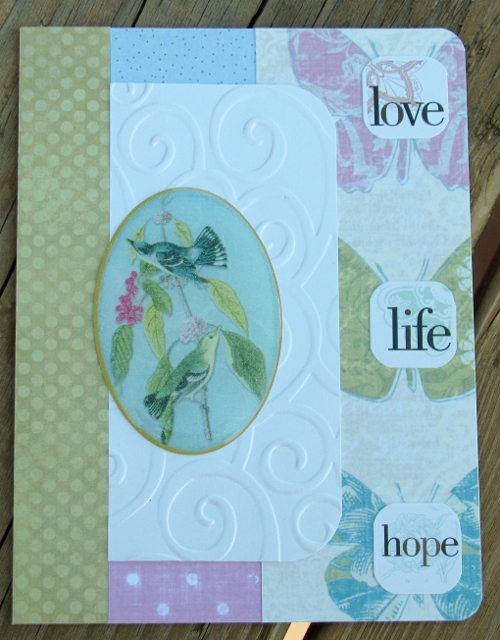
For this one the printed papers included this with the butterflies printed down it. I gave each butterfly a color-coordinating word sticker. Then I mounted some textured shiny paper with two rounded colors to be the backpiece for the focal wafer.


Sorry about the quality of the photos. I got a new computer and that meant new photo-editing software. Still learning!

Ddd


Posted by studio3d@ccgmail.net at 12:01 AM PDT
Monday, 3 September 2012
Hummingbird House
Topic: Scrap Recovery

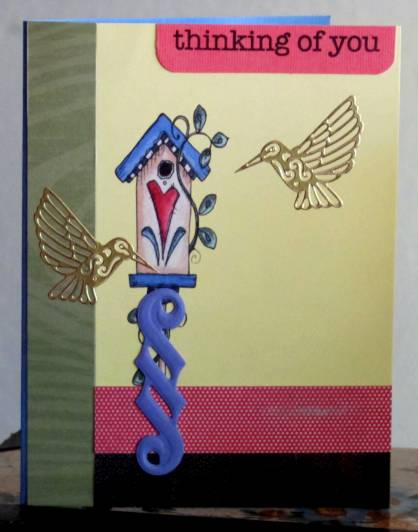
I grabbed one of the kits I had created a while back and whipped up this card. The birdhouse is from the page-a-day scrapbooking calendar. I combined it with one green paper, one red dotted paper and a brown paper. The stand is a diecut bracket that someone sent me in a swap.


I finished it off with a pre-stamped sentiment with rounded corners and two peel-off gold hummingbird stickers.

Ddd


Posted by studio3d@ccgmail.net at 12:01 AM PDT
Sunday, 2 September 2012
Zucchini Marathon
Topic: In The Kitchen

Sometimes the neighbors are overly generous with their zucchini (OK, they ALWAYS are). This year I was given some real whoppers so I had a marathon baking session. I would like to share some of my favorite recipes and methods here.

First up is a new-to-me recipe for a pie - yep, a zucchini pie! It is mock-apple and it truly delicious. There is NO telling this is zucchini, either.

MOCK APPLE PIE WITH ZUCHINI

6 cups zucchini

1 ¼ cups sugar

1 ½ Tbsp flour

1 ½ tsp cream of tartar

1 ½ tsp cinnamon

dash of salt

dash of nutmeg

pastry for double crust 9 inch pan

Peel very large zucchini, slice lengthwise, remove and discard seeds. Slice like apple. Add to ¼ cup lemon juice and ¼ cup water in a saucepan and bring to a boil. Simmer 10 minutes until just tender. Drain and cool. Add remaining ingredients and place in unbaked pie crust in a 9-inch pan. Cover with second crust and flute and seal the edges. Cut slits for steam. Bake at 350 degrees for 50 to 60 minutes until top is browned.

-------------------------

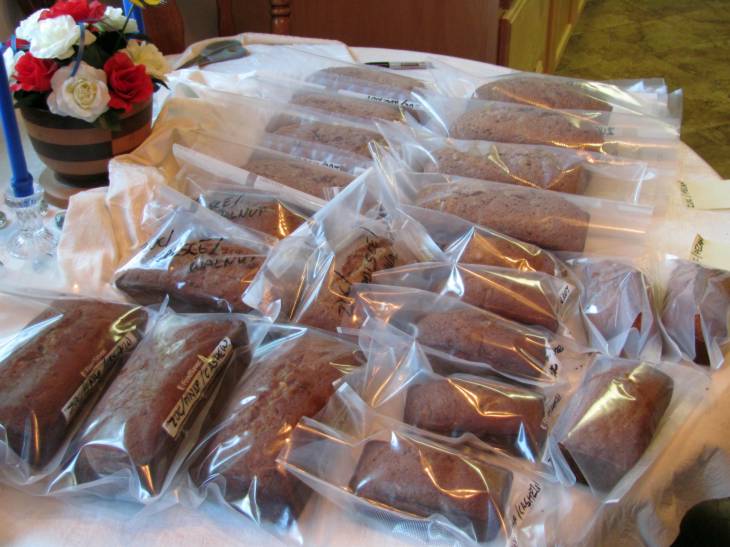
Then I made up 22 full-size and 8 mini loaves of zucchini bread. I have three recipes that I use so that we have some variety and I always double the recipes.  For a marathon session I get out some gallon ziplock bags. For each recipe I place all the wet ingredients, including the sugar and zucchini in one big bag. I measure out all of the bags at once (for this session I ended up with 6 bags of double recipes. The number of bags I have is entirely dependent on how much zucchini there is. I measure that into each bag FIRST and build the rest of the recipe around it. I label the bags with a marker as to which recipe they are.
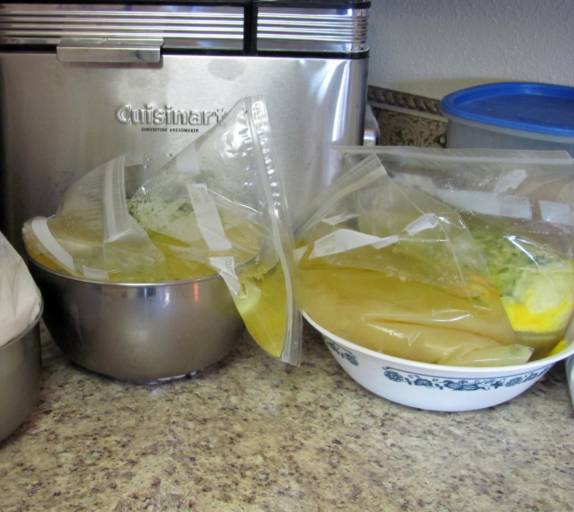

Then I take another set of bags and measure out all the dry ingredients, including the nuts. These also get marked with the recipe name.

Now I just match up bags of wet and dry by recipe and set them aside.
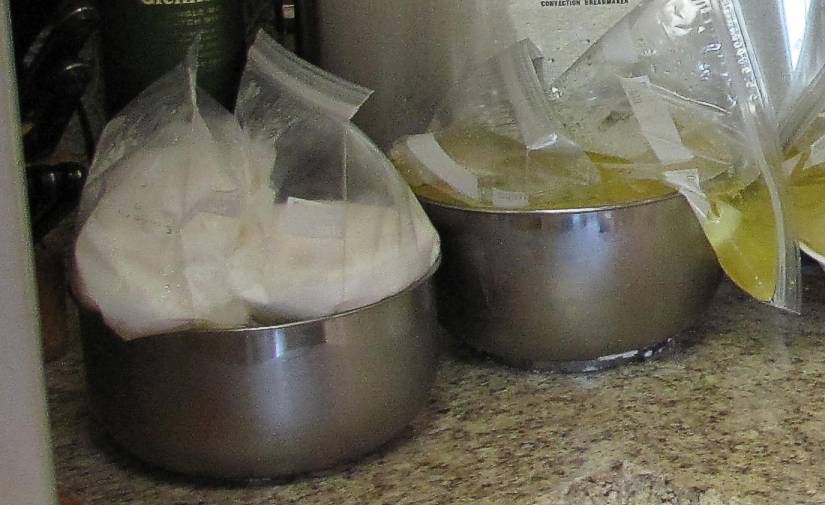

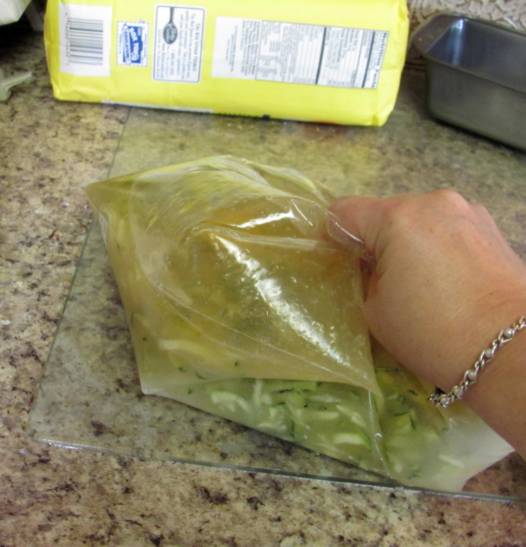
Now I'm ready to mix up some zucchini bread. I massage a bag of wet ingredients to get them unstuck from the sides of the bag.

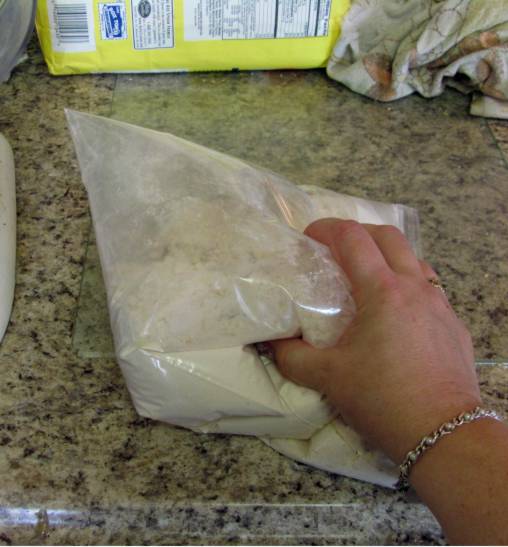
Pour that into the mixer bowl and start it up on low speed. Then I massage and roll around a bag of dry (in place of sifting).

With the mixer running I feed the dry ingredients into the bowl gradually.
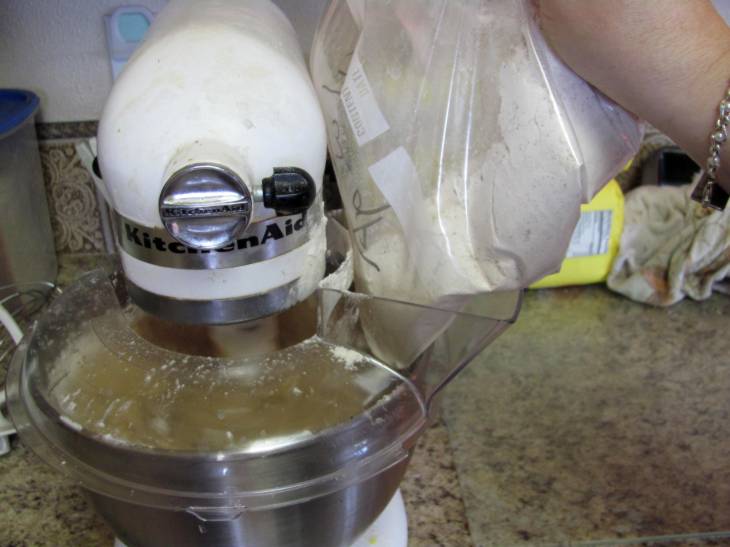

I leave the mixer running while I spray the pans with non-stick spray. I read a great idea on another blog the other day and tried it out... place the pans on the door of your dishwasher. All the overspray goes on the door and is cleaned up when the dishwasher is run.


While the loaves are in the oven I wash the mixer bowl, paddle and spatula. That way I'm ready for the next batch to be mixed up. When the loaves come out of the oven I turn them out to cool on a wire rack. They stay here until the next batch comes out of the oven.
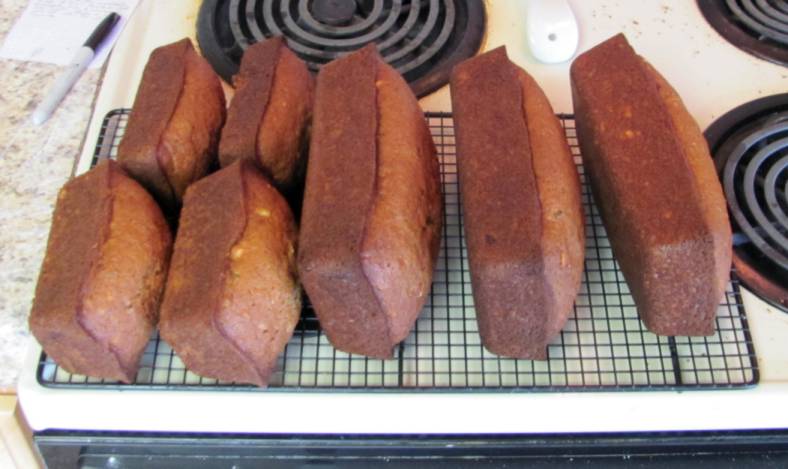

When the loaves are cooled to this point I slip them into vacuum seal bags but leave the ends open. I use a marker to write the product name on the bag. When they are completely cooled I will seal them with the vacuum sealer. Here is the layout partway through the marathon. At this point there are 4 more loaves in the oven and 4 still to mix up.

Here are the recipes I used today:

ZUCCHINI APPLESAUCE LOAF

2 eggs

1 cup vegetable oil

2 cups white sugar

2 cups grated zucchini

1 cup applesauce

2 teaspoon vanilla extract

3 cups all-purpose flour

1 1/2 teaspoon baking soda

1/2 teaspoon baking powder

1 teaspoon salt

2 teaspoons ground cinnamon

1 1/2 teaspoon ground nutmeg

1 cup chopped nuts (walnut or pecan)

Beat eggs, oil, and sugar in a large bowl. Stir in zucchini, pineapple, and vanilla.

In another bowl, measure and combine flour, soda, baking powder, salt, cinnamon, nutmeg, and nuts. Pour all at once into batter. Stir to moisten. Pour into greased loaf pans.

Bake in 350 degree oven for 45 minutes to 1 hour until bread tests done. Cool for 10 minutes before turning loaf out to cool on rack.


ZUCCHINI PINEAPPLE LOAF

2 eggs

1 cup vegetable oil

2 cups white sugar

2 cups grated zucchini

1 cup crushed pineapple with juice

2 teaspoon vanilla extract

3 cups all-purpose flour

1 1/2 teaspoon baking soda

1/2 teaspoon baking powder

1 teaspoon salt

2 teaspoons ground cinnamon

1 1/2 teaspoon ground nutmeg

1 cup chopped nuts (walnut, pecan, unsalted       

               cashew, or macadamia)

Beat eggs, oil, and sugar in a large bowl. Stir in zucchini, pineapple, and vanilla.

In another bowl, measure and combine flour, soda, baking powder, salt, cinnamon, nutmeg, and nuts. Pour all at once into batter. Stir to moisten. Pour into greased loaf pans.

Bake in 350 degree oven for 45 minutes to 1 hour until bread tests done. Cool for 10 minutes before turning loaf out to cool on rack.


ZUCCHINI BREAD    our old standby

Mix together:

3 eggs

1 c. oil

2 c. sugar

2 c. grated zucchini

3 t. vanilla

Sift together and stir in:

3 c. flour

1 t. salt

¼ t. baking powder

1 t. soda

¾ t. nutmeg

3 T cinnamon

Add 1 c. chopped nuts (walnuts or pecans)

Bake at 325o for 1 hour in 2 greased and floured loaf pans (makes 4 mini-loaves)

 -----------------------

I freeze up my loaves and we eat on them all year as well as passing them on to friends, taking them to dinners, and using them as thank-you gifts. I will do some Green Tomato bread to add to this stock when I get some off my vines. Here is that recipe:

GREEN TOMATO BREAD

1 ½ cups ground green tomatoes

½ cup grated tart apple

2 cups sugar

1 cup vegetable oil

3 beaten eggs

1 teaspoon vanilla

3 cups flour

1 teaspoon baking powder

1 teaspoon baking soda

1 teaspoon salt

2 ½ teaspoons cinnamon

¼ teaspoon ground cloves

¼ teaspoon grated nutmeg

¾ cup chopped nuts

½ cup raisins (optional)

            In a large bowl, combine green tomatoes, apple, sugar, oil, eggs and vanilla. Into separate bowl, sift dry ingredients. Stir dry ingredients into wet ingredients.

            Add nuts and raisins (if using) and stir to combine. Divide mixture between two greased 9x5 inch loaf pans. Bake at 325 degrees for 1 hour, or until a tester comes out dry.

            NOTE: The green tomatoes can be ground and measured out for freezer storage until you are ready to make bread, if you wish.


Hope you enjoy this!

Ddd


Posted by studio3d@ccgmail.net at 12:01 AM PDT
Saturday, 1 September 2012
Going, Going, Gone
Topic: Quilting

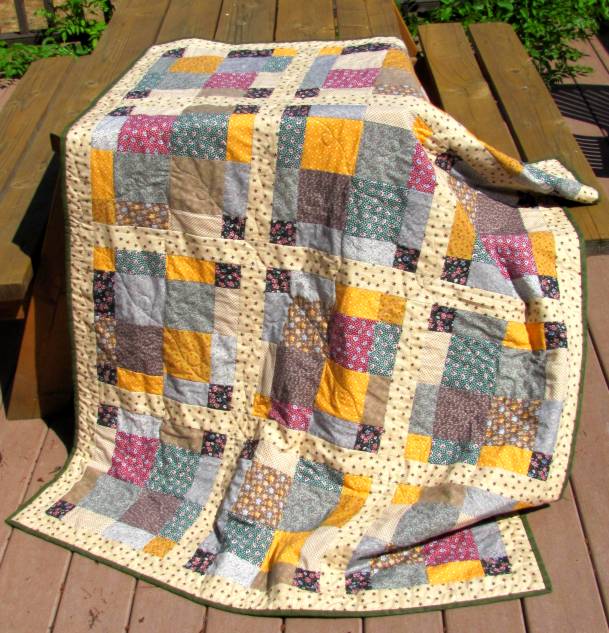
I got some donated scraps that someone had started combining into 9-patch blocks. There were more 5-inch squares cut and come extra fabric so I cut and whacked and stitched until I had 12 blocks. They were real scrappy and no way to lay them out in any kind of 'pattern' so I remembered a technique I had read about on a blog called 'Disappearing 9-Patch'. What you do is cut the 9-patch in half top to bottom, swap the right with the left and combine with another block. Then you do the same by cutting side to side and moving the bottoms to the tops and mixing with other blocks.

The result is 4 whole blocks in the center surrounded with half-blocks all around the sides and quarter blocks in the corners. Looks complicated with little work.

I pieced these together with 2 1/2 inch strips and quilted with a burnt-orange backing. I gave it a dark green binding. 

The result is roughly 4 x 5.5 feet.

This quilt will be donated to our local hospital for their Passages program. The chaplain's office gives them to patients who are not expected to survive their stay. The family keeps the quilt afterwards.

Ddd


Posted by studio3d@ccgmail.net at 12:01 AM PDT
Friday, 31 August 2012
Challenging Hearts
Topic: Paper Embroidery

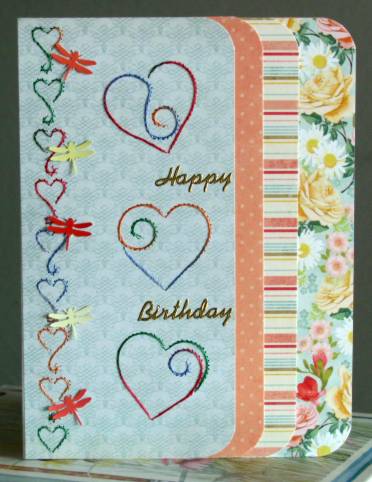
One of the groups sent us a pattern challenge. It had several elements and we got to choose which parts we wanted to use. I chose one of the borders and one of the hearts. The original heart has three swirls in it so I used one swirl in each of three versions. All these elements were stitched with verigated thread on a light teal cardstock.

I selected some coordinating cardstock from a new 6 x 6 paper pad and combined them to make a decorative edge with rounded corners.


I used some dragonflies punched from paint strips for the left border and added gold peel-off sticker greetings.

Ddd


Posted by studio3d@ccgmail.net at 12:01 AM PDT
Thursday, 30 August 2012
Challenging Embroidery
Topic: Paper Embroidery

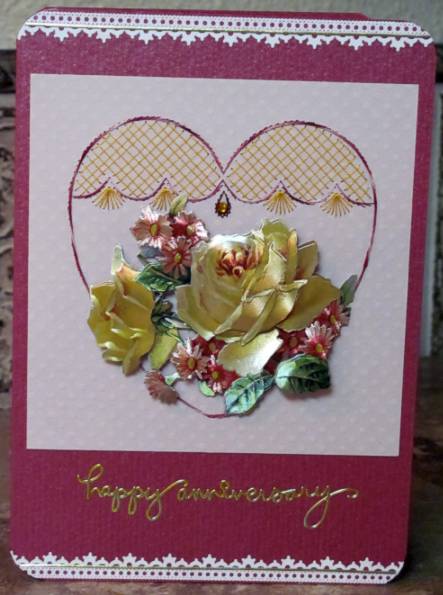
One of my groups gave us a challenge to make an anniversary card. Another set up a swap of cards using yellow and pink. Both had to be paper embroidery so I combined the two into one card.

The stitched heart is a free pattern from Ann's Paper Arts which I stitched using golden yellow and a veregated pink on a dusty pink dotted cardstock. I added a foil rose bouquet in 3D and set this on a dark pink shimmer cardstock with rounded corners.


I used white peel-off lace trim at the top and bottom. Then I used Copic marker to add yellow coloring to silver script stickers and silver border trim before adding them to the card. One single yellow rhinestone was placed in the embroidery.

Ddd 


Posted by studio3d@ccgmail.net at 12:01 AM PDT
Wednesday, 29 August 2012
Down By The Riverside
Topic: Field Trip

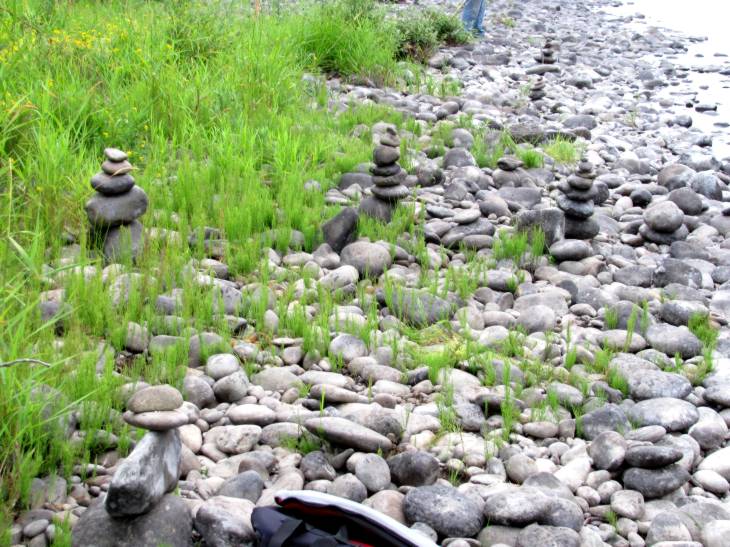
We went down to the river along a large rock bar the other day. The bar is covered with brush so you cannot see the shoreline of the bar from the embankment where we came in. Imagine our surprise when we walked to the far side and found about 25 little stacks of rocks that someone built over there. As access is difficult here and it is about 4 miles downstream from the local town, we assume a boater or rafter came ashore to do this.


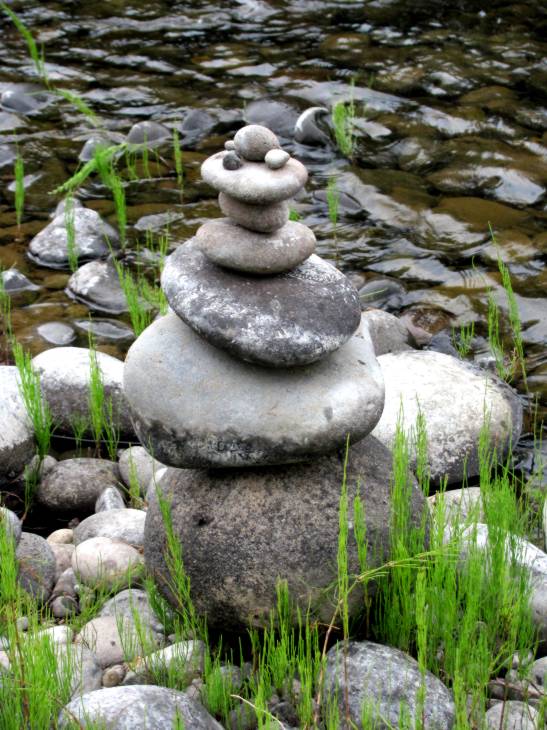
Some were more elaborate than others.


They were interesting to look at and we had to look up online to see if they are meant to represent something or what other purpose they have. They are apparently just built for the satisfaction of having done it and for the entertainment of people who discover them.


Actually, we WERE entertained by them. I added a couple of small rocks to one as we were leaving.

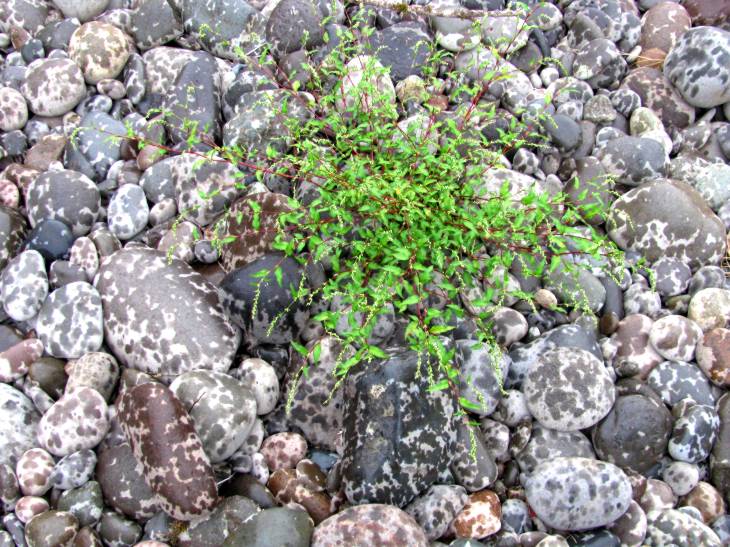
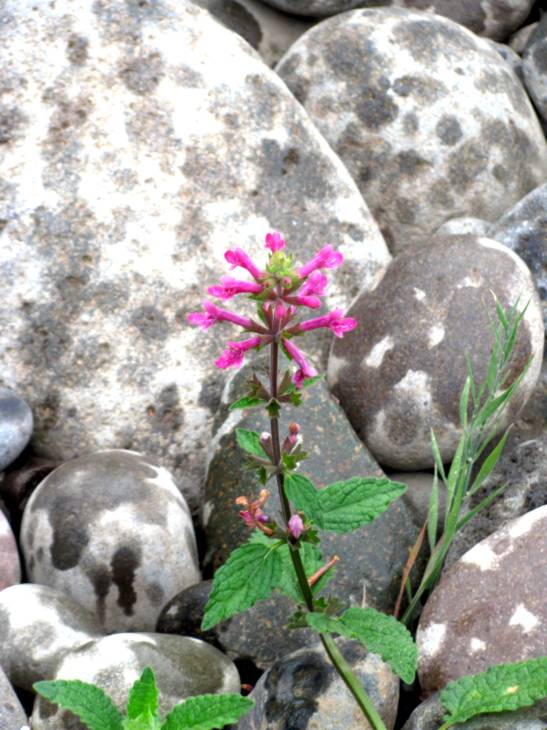
Then, it started to rain a bit so we headed back. I found more beauty in the flowers that were struggling to survive on this rocky ground.


"Thanks on the great job on the outdoor decorations", to God and whoever the other guy was.

Ddd 


Posted by studio3d@ccgmail.net at 12:01 AM PDT
Newer | Latest | Older