« October 2012 »
S M T W T F S
1 2 3 4 5 6
7 8 9 10 11 12 13
14 15 16 17 18 19 20
21 22 23 24 25 26 27
28 29 30 31
You are not logged in. Log in
Entries by Topic
All topics  «
3D paperwork
A - Z challenge 5
A - Z challenge 7
A - Z challenge round 4
A to Z challenge round 3
A to Z round 2
A to Z round 6
A-Z round 1
Around the House
Art Challenges
Artist Trading Cards
Backgrounds
Beads
Bible Journaling
Books
Boxes
Collage
Color Challenge
Coloring
cookbook
Die Cuts
Digital Projects
Digital Stamps
Drawing
Dry Embossing
Fabric Stuff
Fantastic Folds
Field Trip
Home Decor
How Does Your Garden Grow?
Hymnal Art
In The Kitchen
In the studio
Jewelry
Lettering
Links
Multi-Technique
Music to Work By
Musings
Nail Art
New Work
Online Class
Other Hobbies
Other Projects
Painting
Paper Embroidery
Paper Piecing
Photo
Pretty Paper
Quilting
Random
reading
Scrap Recovery
scrapbooking
Sewing
Sketch Challenge
Some Backlog
Stamping
Stencils
Stickers
Supplies
Teabag Folding
Techniques
Testing
tips and tricks
Tutorial
Web resources
Welcome to my Blog
Work By My Friends
workflow
Writing
Blog Tools
Edit your Blog
Build a Blog
RSS Feed
View Profile
Group One
In & Out of Studio 3D
Saturday, 20 October 2012
All In Their Places With Bright Shining Faces
Topic: Backgrounds

A few weeks ago I reported on cutting up several pads of 12 x 12 cardstock for future use on cards. Some of that was printed with corner elements or background elements that only needed a bit of this and that to become a completed card.

The future is NOW! I pulled out some that inspired me and went to work on them.

Today's card uses the portion of one of Tim Holtz's papers that is imprinted with clock faces. None of them had hands so I used stamps to add them and then added brass brads in their centers. The sentiment is a pre-stamped one, cut with a flag end and distressed with 'old paper' ink to bring it to the same tonal range as the background.


A backing of chocolate brown paper frames it out.

Ddd


Posted by studio3d@ccgmail.net at 12:01 AM PDT
Friday, 19 October 2012
Get In Line
Topic: Paper Embroidery

The pattern challenge for October on one of the paper embroidery lists was one I already had in my files of free patterns. I had never stitched it though so this was a move in the right direction. I pricked it out on two-toned chocolate swirl cardstock and stitched in a golden yellow. After stitching I went to my stock of 3D elements and found one with the same chocolate and golden yellow colors in it. Not only that, it was a linear element so It fir perfectly with this border layout.

The 'tab' is an extra element from the 3D sheet that I stamped for this space.

Ddd


Posted by studio3d@ccgmail.net at 12:01 AM PDT
Thursday, 18 October 2012
His to Hold
Topic: Quilting

This is the companion quilt to the one shown yesterday. That was for the young lady and this is for the young man. I made this one from another arrangement of the Disappearing 9-Patch layout using scraps of nature fabrics - leaves, vines, pinecones, etc. I wanted to have a quilt that he could grow up with instead of one he would outgrow.

This is also 50 x 50, the same size as the last one. Since they are going to the same family I wanted them to be 'equal'. (Yeah, I'm a Mom, too).

Ddd


Posted by studio3d@ccgmail.net at 12:01 AM PDT
Wednesday, 17 October 2012
Come Snuggle
Topic: Quilting

I made his and hers quilts for a couple of children that they could use to snuggle with their mom on the couch. For the girl's quilt I used scraps floral scraps from a quilt I am in the middle of constructing for someone else. I even used the same basic layout - a mix of 9-patch and large blocks set on point.


This is about 50 x 50 inches.

Ddd


Posted by studio3d@ccgmail.net at 12:01 AM PDT
Tuesday, 16 October 2012
Just Try a Little Sample
Topic: Quilting

When I was making the quilt I called Celtic Dreams I thought I had a better way to construct the blocks - by using strips instead of paper piecing. Um...not so much. It was impossible  to keep the strips uniform and they did not fit together right. I mucked around with it enough to complete three blocks - what would have been the centerpiece of the larger quilt. But in the end it was just too loosey-goosey for me and I couldn't deal with the mis-matching of the corners. I also couldn't imagine trying to do the rest of the quilt that way - fudging, shifting, and cheating my way through the whole thing.

So I set that center set of blocks aside and started over with the quilt and did it with paper piecing as it was supposed to have been done in the first place. Fast-forward six months and I used up the scraps to add corners and borders and backed it with another large scrap. I added a hanging sleeve and turned this into a wall hanging for my fireplace.

I joked that I should name this one 'From a Distance' because it is best viewed from there!

Ddd


Posted by studio3d@ccgmail.net at 12:01 AM PDT
Monday, 15 October 2012
Formula Two
Topic: Sketch Challenge

This is day two of the Christmas cards created with the cutting formula provided by Club Scrap at http://clubscrapcreates.blogspot.com/2012/10/owh-sketch-90-had-babies.html

We were left with a patterned card base, two patterned blocks in different sizes and a strip. NONE of these follow the provided sketch!

By using the smaller blocks on two of yesterday's cards I ended up with two larger blocks for today's cards. This one I turned on it's side and decorated with three angel stickers. Then the strip wasn't big enough to hold my greeting sticker so I mounted it on something else and popped it up on foam.

This one also went on its side so I would have room for the foil "MERRY" stickers. I went casual on the placement, repeating at the top and bottom. Then I used the companion foil sticker on the long strip and mounted it with foam tape.

This one actually uses the two blocks from the sketch but, amazingly, I didn't use them in the specified alignment. Imagine that! I backed them with cream cardstock to define them and added a clear sticker to each. The left one is popped up on foam tape. The bow is a punch shape with details in marker.


And then there is the cleaning up of the scraps. I used the patterned card base, the smallest block, the strip and a bunch more strips left over from where I had left them off of other cards. The greeting block and all the poinsettias are clear stickers.


So there you have it... cut once, add a couple packages of stickers and some tape, foam tape and make 8 cards in a snap! Thanks Club Scrap. That filled my Christmas box to OWH and it is outta here.

Ddd


Posted by studio3d@ccgmail.net at 12:01 AM PDT
Sunday, 14 October 2012
Formula One
Topic: Sketch Challenge

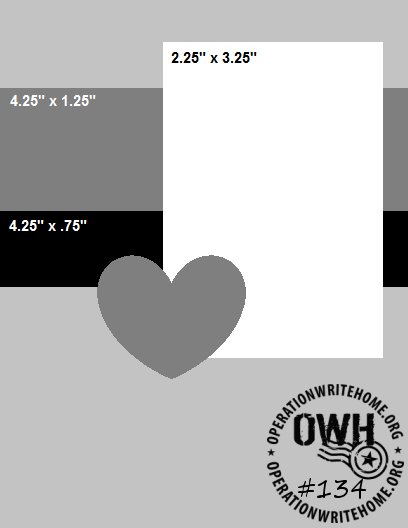
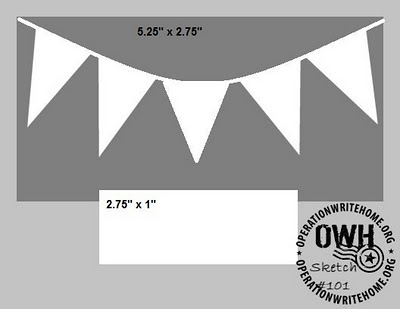
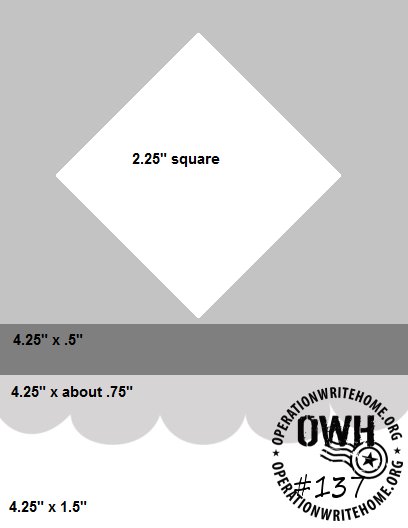
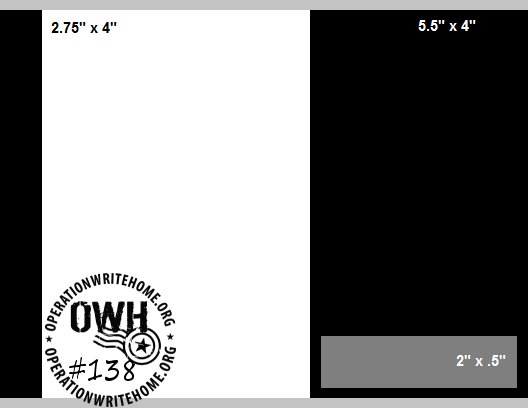
While not REALLY a challenge, on World Card Making Day, Club Scrap posted another formula for cutting multiples of an OWH sketch. Chrck out their post here http://clubscrapcreates.blogspot.com/2012/10/owh-sketch-90-had-babies.html

The bonus was that they included a sketch to use up the scraps that the cutting formula produced.

I needed some more Christmas cards to send to OWH with my latest package and I already had the papers out from recent projects so I jumped right into this.

Today I will show the four cards produced with the sketch and tomorrow will be the four resulting from the scraps. Ready?

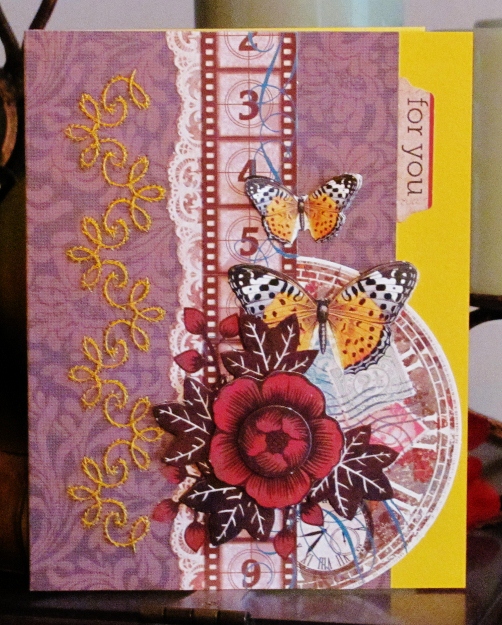
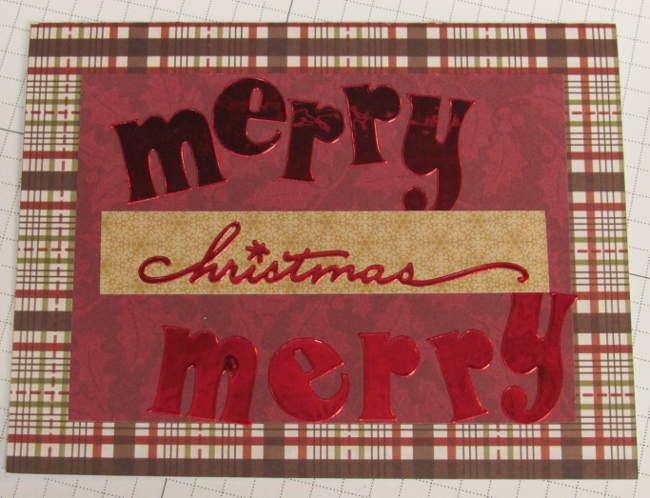
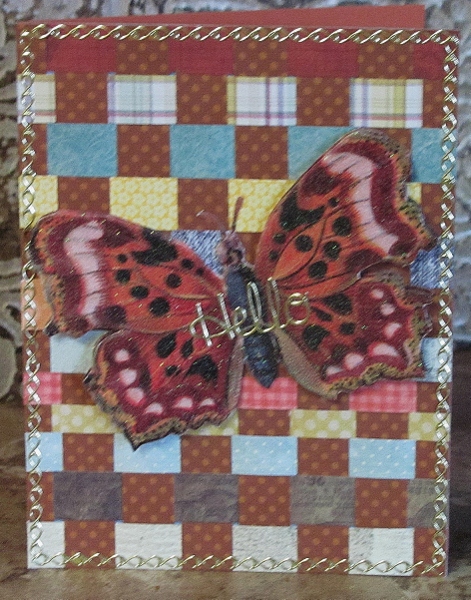
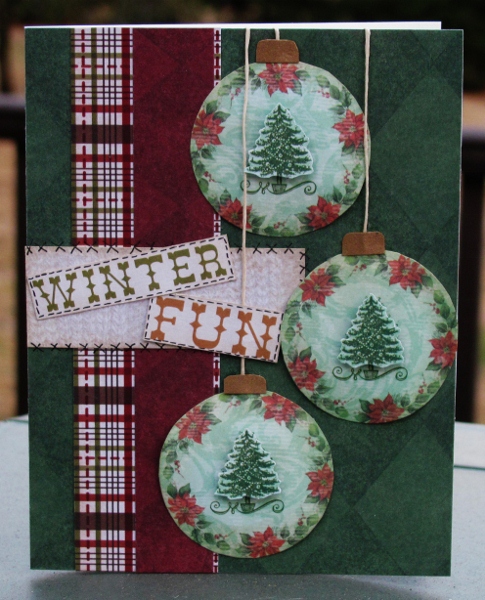
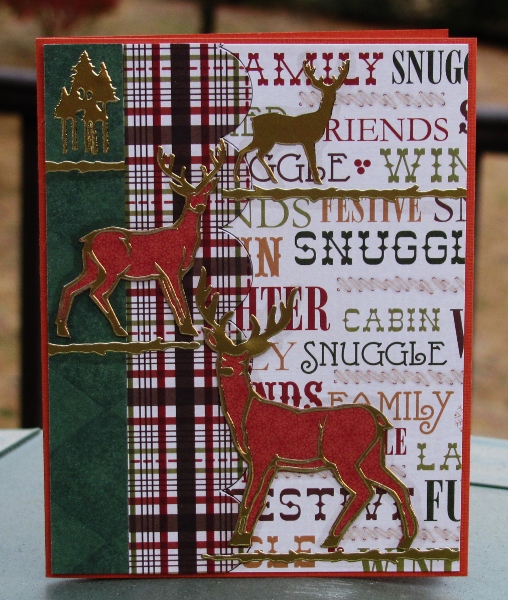
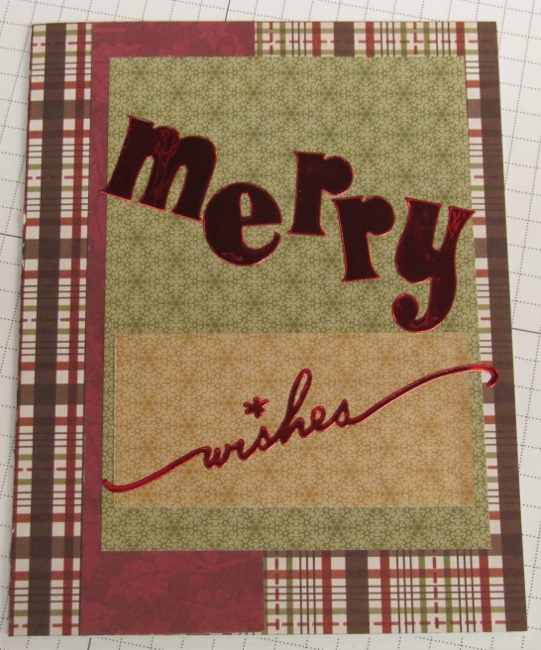
I really love this plaid cardstock! I used three more subdued prints in contrast to it and decorated with foil stickers.


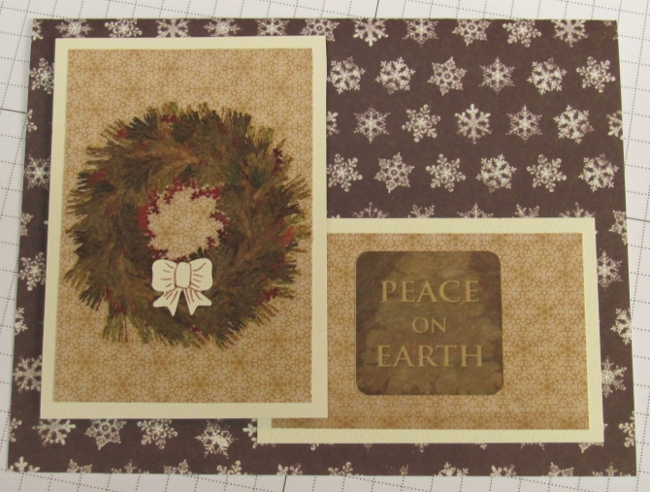
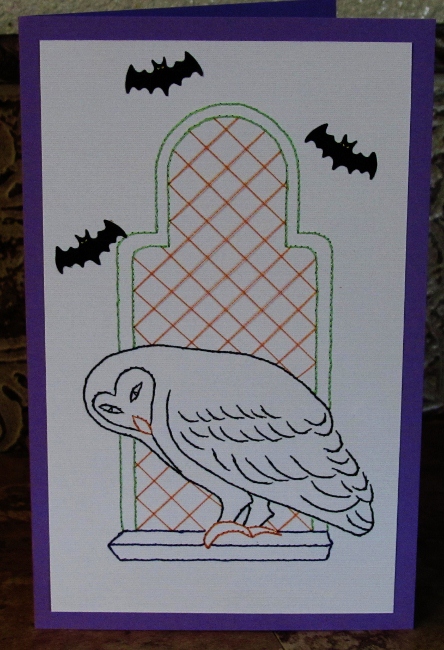
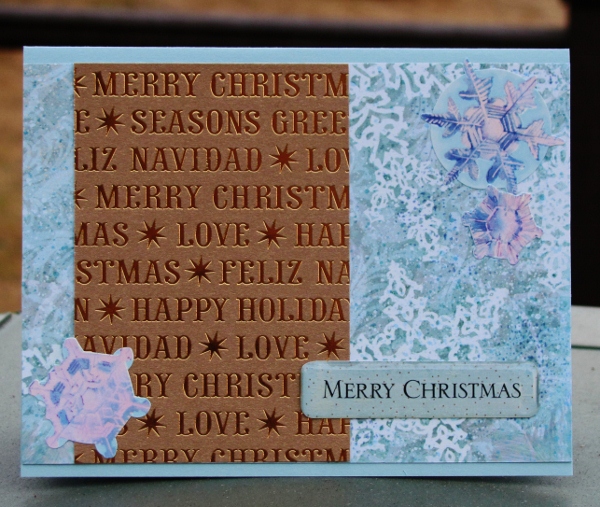
And the sketch went off track just that fast! LOL! I turned this one on its side and moved the smallest band for an orientation that suited the 3d sticker I had. Then I added clear stickers for the corner treatments.

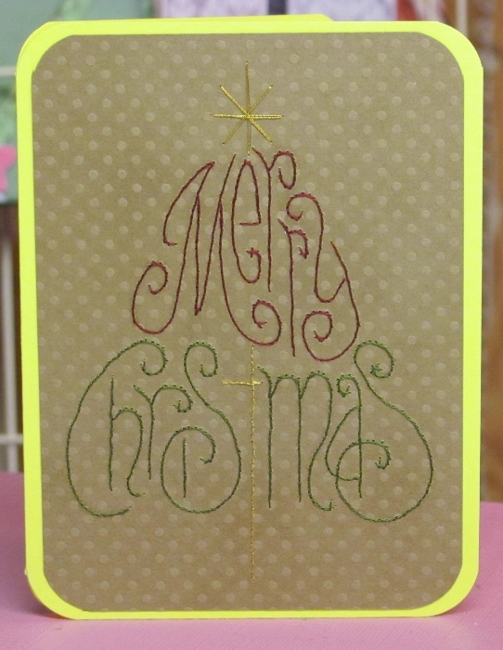
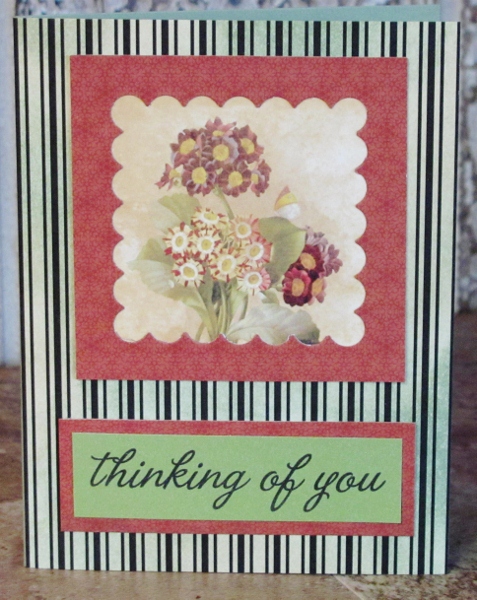
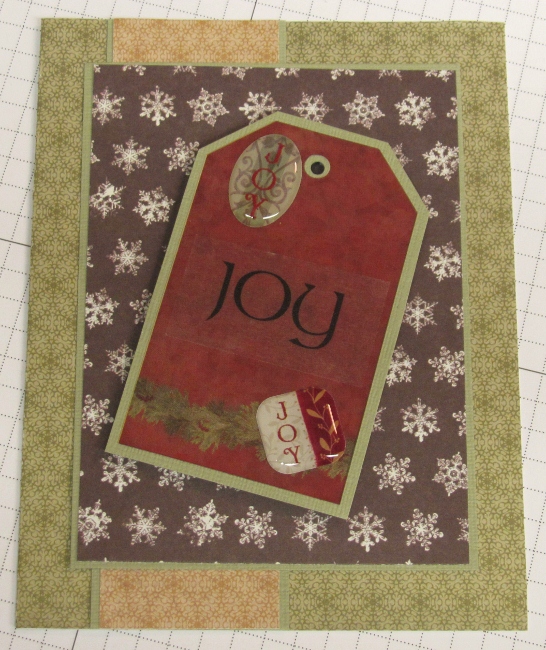
And to get further off track, I replaced the smallest block with a clear sticker tag, mounted to cardstock and raised up on foam. All the elements are bordered with green and three 'joy' stickers in different styles decorate the tag.


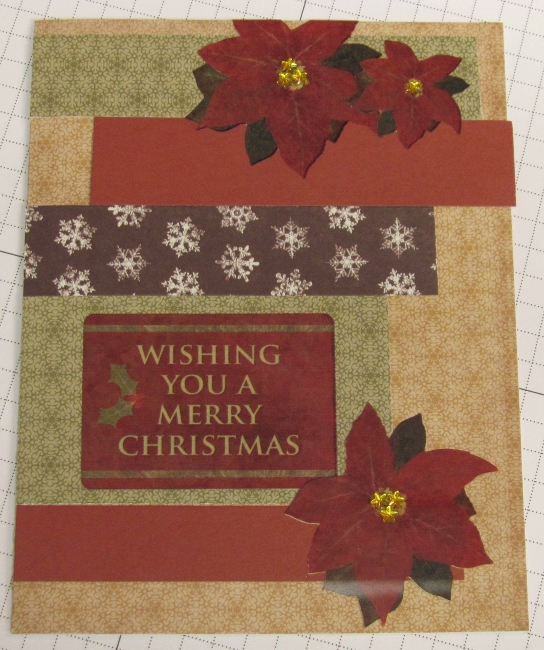
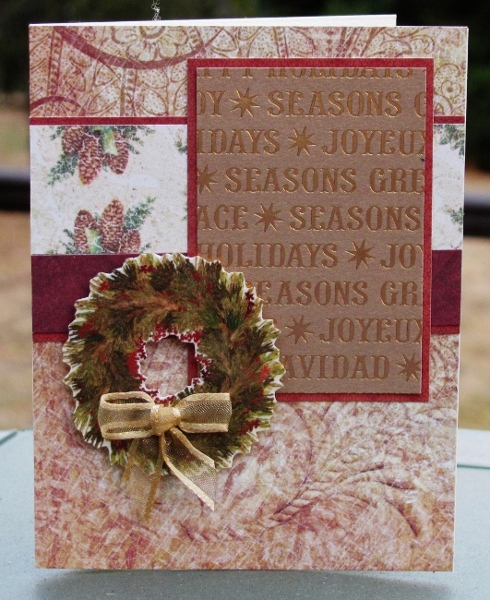
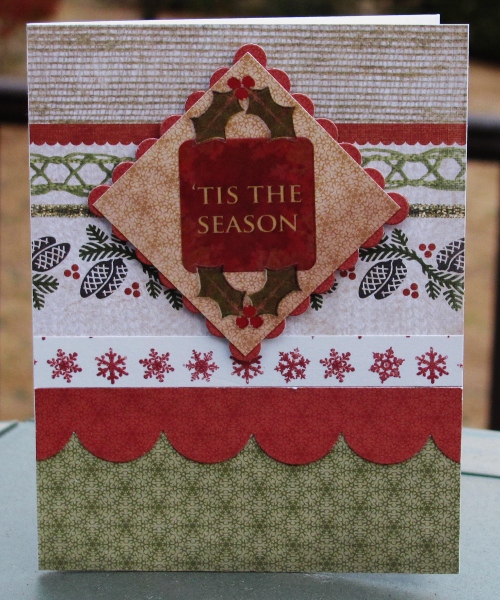
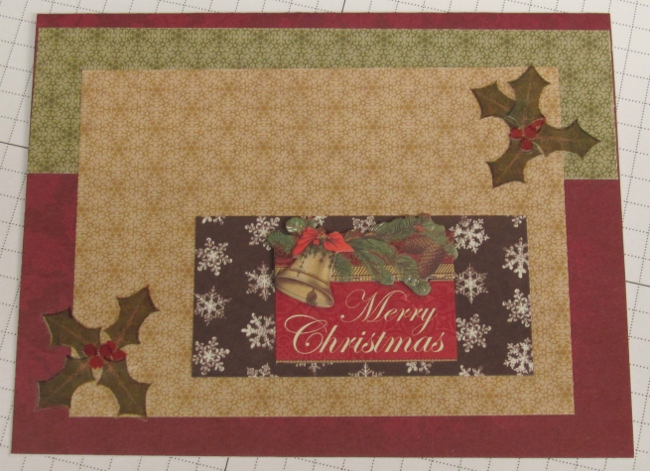
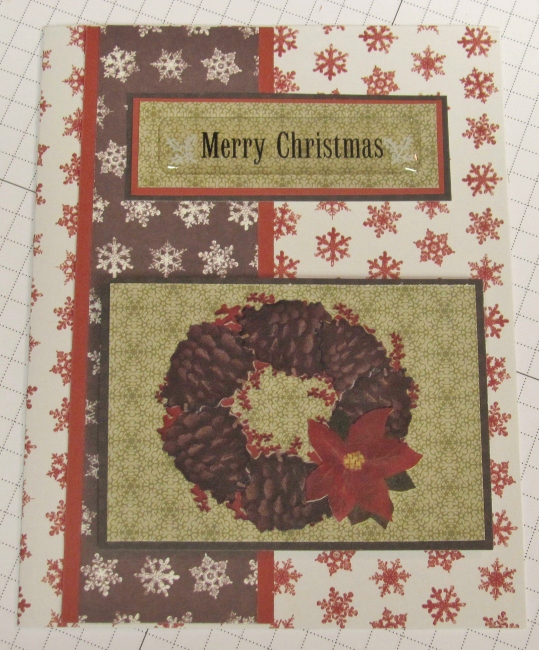
This really IS the same sketch! I dropped the large panel out of this one and added another small panel at the top. All the panels are bordered in reds and browns to define them. I added a thick acrylic sticker to the top panel and layered a wreath, pinecones and poinsettia clear stickers to the bottom panel.

A sketch is just a suggestion, isn't it?

Ddd


Posted by studio3d@ccgmail.net at 12:01 AM PDT
Saturday, 13 October 2012
Oh Christmas Tree
Topic: Paper Embroidery

One last paper embroidery card for the 2-a-month challenge. This is actually for November but I needed to get it in my box for OWH so did it early. I also only made one.

This is another free pattern (the kind I love best) and it is very stitching intensive. I used a tan dotted paper and stitched with dark red and green. The star and the T (cross) are stitched in metallic gold thread.


I rounded the corners to reflect the curves in the stitching and mounted on bright yellow cardstock with rounded corners. This pulls out the gold stitching.

Ddd


Posted by studio3d@ccgmail.net at 12:01 AM PDT
Friday, 12 October 2012
No More Loafing Around
Topic: In The Kitchen

Green tomatoes yielded 24 loaves of delicious bread. Yes I CAN count - we already ate one warm from the oven!


My delicious recipe uses green tomatoes and tart apples (I used Granny Smith). I used the same marathon baking method as for my zucchini bread (double batches with dry ingredients in one gallon ziplock and wet ingredients in another - combine in the mixer).

I also added two mock apple (zucchini) pies to the freezer along with these loaves of bread.

Ddd


Posted by studio3d@ccgmail.net at 12:01 AM PDT
Thursday, 11 October 2012
Who's Ready For Halloween?
Topic: Paper Embroidery

Challenge: Make a Halloween Card with Paper Embroidery

I pulled out a pattern of an owl and, though it is not a typical Halloween owl, I used Halloween colors to bring it into the right feeling. Green and orange for the window frame, purple for the sill and black for the owl. I did add some orange for the feet and beak.

I added three bat stickers around the top and mounted it all to a purple base card.

Bring on the creepy!

Ddd


Posted by studio3d@ccgmail.net at 12:01 AM PDT
Wednesday, 10 October 2012
In and Out
Topic: Backgrounds

The background on this card was created for a challenge to do something with weaving. I cut strips of paper from table scraps and wove them over a base card.

The butterfly is cut from a scrapbook paper and is ebedded with glitter. Actually, there are two identical butterflies mounted one over the other. The bodies are stuck together and the wings on the upper butterfly are raised up on foam tape.


I used peel-off sticker borders around the edges and a greeting on the center of the butterfly.

The camera refused to focus properly on the glittery surface.

Ddd


Posted by studio3d@ccgmail.net at 12:01 AM PDT
Tuesday, 9 October 2012
It's a Frame-Up
Topic: Die Cuts

Technically the die cut item is the HOLE in the frame but I guess this qualifies.  I started out just messing with things on the table left over from other projects. I started with the frame and then found a paper with spot-printed botanical groupings I pulled out a stamped greeting to use that matched the green in the illustration and a bit of stock matching the frame. With all those elements on the table I looked for a good background and chose a cream and black stripe. WHAT? Cream and Black? Yeah, I used distress inks to make it green.


It all came together so easily.

Ddd


Posted by studio3d@ccgmail.net at 12:01 AM PDT
Monday, 8 October 2012
A Different Perspective
Topic: Photo

We went on a 'nature walk' the other day to the local 'environmental center' on a college campus. It is, disappointingly, getting overgrown and looks pretty scrungy. But we did happen upon the observatory that is next to it and I took a few photos of that.


It's sad when the man-made is more photogenic than the natural elements.

Ddd


Posted by studio3d@ccgmail.net at 12:01 AM PDT
Sunday, 7 October 2012
Before They Blow Away
Topic: Photo

I so enjoy the fall colors! Every year we make a special trip in to town to view 'THE TREE'. Anyone who has lived here through the season knows about the one enormous maple tree that has the best color ever. But it's a challenge to see it at its peak because one day it is green, then yellow, then WHAM it is flaming orange and a couple of days later every single leaf is on the ground. It's like little elves go out in the night and pick them all of and throw them down.

So, when I can see it at that peak time it is quite a treat:


The other spectacular tree is right in our front yard. We actually have THREE maple trees in the yard. One turns yellow, one turns brown, and this one on the end goes nuts with color. It is so close to the house that the side that turns color is over the roof so it is hard to photograph.


You can see it's not quite 'there' yet, but it will be soon. FALL IS HERE, can winter be far behind?

Ddd


Posted by studio3d@ccgmail.net at 12:01 AM PDT
Saturday, 6 October 2012
World Card Making Day - OWH Bloghop
Topic: Sketch Challenge

I am so excited to be participating in my very first bloghop! Today is World Card Making Day and Operation Write Home challenged us to create winter cards (including holidays if we wished) using an OWH sketch.

I chose to use sketch 134 seen here:


I have collected several 12 x 12 pads of Christmas papers and cardstocks over the years and use bits and pieces from them interchangeably. I keep them all together in one bin along with my Christmas stickers, greetings, rubons, etc. I gave up long ago trying to keep track of the manufacturers so won't provide any information along those lines.

This is the card I created (enlarged to show detail):

A patterned background is overlaid by two patterned paper strips which have been given a coordinating border. The panel on the right is a tone on tone metallic gold print. Since this is already a mix of Christmas words I did not add a sentiment to the card. This panel also got a coordinating border to separate it from the background.

The wreath is from a sheet of clear stickers. I mounted it to cream cardstock and trimmed it out. Then I mounted it up on foam tape and added a sheer ribbon bow using glue dots to adhere it.

Thanks for visiting my blog. Don't forget to click on the heading banner or on the link below to return to the bloghop.

http://operationwritehome.org/starsandstamps/

Ddd


Posted by studio3d@ccgmail.net at 12:00 AM PDT
Updated: Tuesday, 25 September 2012 1:01 PM PDT
Friday, 5 October 2012
Better and Better
Topic: Sketch Challenge

I think these winter and Christmas cards using OWH sketches are getting better and better as I go. I hope you agree! Don't forget - I will be featuring the best one on October 6 for an OWH bloghop for World Card Making Day. Be sure to check back then and I'll provide a link to the rest of the bloghop for you.

Sometimes the sketch itself tells you what it wants to be. That was the case the first time I saw sketch 103:


My very immediate thought was 'those should be Christmas ornaments'! I found some paper in the stach that had round elements and cut circles around three of them to create the baubles. They got their edges darkened with 'old paper' distress ink so they would appear to be spherical. I also cut out three of the little trees and opped them up on foam in the middle of the ornaments and created a little 'cap' for each out of gold cardstock. The baubles are mounted with foam tape in the center and ATG glue around the edges so they are actually 'puffy' on the card. A length of scrappers floss is caught underneath each of the caps and wrapped to the back of the front panel.


I cut the words from the paper with the overall text print and mounted them to some of the cable knit printed paper. These were attached over the background collage of masculine prints and then each was given some faux stitching. The larger one got X stitching which I think looks cozy and cute.

Ddd


Posted by studio3d@ccgmail.net at 12:01 AM PDT
Thursday, 4 October 2012
What's Up, Chickadee?
Topic: Sketch Challenge

Still working on winter and Christmas cards using OWH sketches. Don't forget - I will be featuring the best one on October 6 for an OWH bloghop for World Card Making Day. Be sure to check back then and I'll provide a link to the rest of the bloghop for you.

For today's card I chose sketch 101:


There are some times when the materials tell you what they want, despite your plans. In this case I was happy to go on their little ride, because they seemed to know what they were doing!

I started by knowing I wanted the banner to house the letters from a sticker set I had on hand. Then I found the bird print (cut down from a 12 x 12 page). After that it was a matter of shifting the elements so none of the important stuff would be covered up and weilding various glues to hold it all in place.


I provided some definition to the banner by using a little sketch black line as a border. Then I added faux stitching across the top of the banner and around the two printed papers. A bit of scrapper's floss was glued in to the top of the banner. The text sticker on the small panel is from the same set as the MERRY letters.

Cute, cute, cute!

Ddd


Posted by studio3d@ccgmail.net at 12:01 AM PDT
Wednesday, 3 October 2012
Yipes, Stripes!
Topic: Sketch Challenge

In the continuing work on winter and Christmas cards I'm still using OWH sketches. Don't forget - I will be featuring the best one on October 6 for an OWH bloghop for World Card Making Day. Be sure to check back then and I'll provide a link to the rest of the bloghop for you.

The card today came together in a snap using sketch 137:


The key to this ease of construction was starting with a print that was striped! From the top down to the top of the snowflake row is all one print. Then the row of snowflakes, the scallop and the green bottom are each separate pieces. I made it look coordinated by using three colors of the same small print in the scallop, the green and the upper diamond. For that diamond I cut it a tiny bit smaller so it would fit on the scalloped square I cut with a Spellbinders die. This relates it back to the larger scalloped strip at the bottom.


The diamond is popped up on foam tape and features some clear stickers.

Ddd


Posted by studio3d@ccgmail.net at 12:01 AM PDT
Tuesday, 2 October 2012
Do You Like This One, Deer?
Topic: Sketch Challenge

Continuing to work on winter and Christmas cards using OWH sketches. Don't forget - I will be featuring the best one on October 6 for an OWH bloghop for World Card Making Day. Be sure to check back then and I'll provide a link to the rest of the bloghop for you.

For the card today I worked with sketch 130:


Although I kept rigidly to the measurements for the sketch elements I deviated when it came to the embellishments. (Actually, I'm amazed that I lasted this long in the process without totally hammering a sketch!)

I wanted this to have a totally masculine feel so I started with a cozy plaid and a text background.  All of the pictorial elements are Dazzles brand stickers. On the outline ones, I mounted them to colored paper first and trimmed them out before adding to the card. Each element got a bit of gold stitcker trim to ground it and I also added some shadow around each piece with W3 Copic marker. I may go back and add W5 as the deer still merge into the background too much for my taste.

No sentiment was added so this can be an 'anytime' winter card.

Ddd


Posted by studio3d@ccgmail.net at 12:01 AM PDT
Monday, 1 October 2012
Inspired by Sketches
Topic: Sketch Challenge

Continuing to work on some OWH sketches, turning them into winter and Christmas cards. Don't forget - I will be featuring the best one on October 6 for an OWH bloghop for World Card Making Day. Be sure to check back then and I'll provide a link to the rest of the bloghop for you.

Today I worked with sketch 138:


I had some blue paper with a very wintery feel to use as the background. I didn't want to detract from it so I used a tone-on-tone gold metallic print text block. I added three snowflake stickers and a puffy acrylic clear sentiment. The sentiment is mounted on coordinating blue paper and trimmed out before adhering to the card.


You can almost feel the icy chill of winter coming!

Ddd


Posted by studio3d@ccgmail.net at 12:01 AM PDT

Newer | Latest | Older