« January 2014 »
S M T W T F S
1 2 3 4
5 6 7 8 9 10 11
12 13 14 15 16 17 18
19 20 21 22 23 24 25
26 27 28 29 30 31
You are not logged in. Log in
Entries by Topic
All topics  «
3D paperwork
A - Z challenge 5
A - Z challenge 7
A - Z challenge round 4
A to Z challenge round 3
A to Z round 2
A to Z round 6
A-Z round 1
Around the House
Art Challenges
Artist Trading Cards
Backgrounds
Beads
Bible Journaling
Books
Boxes
Collage
Color Challenge
Coloring
cookbook
Die Cuts
Digital Projects
Digital Stamps
Drawing
Dry Embossing
Fabric Stuff
Fantastic Folds
Field Trip
Home Decor
How Does Your Garden Grow?
Hymnal Art
In The Kitchen
In the studio
Jewelry
Lettering
Links
Multi-Technique
Music to Work By
Musings
Nail Art
New Work
Online Class
Other Hobbies
Other Projects
Painting
Paper Embroidery
Paper Piecing
Photo
Pretty Paper
Quilting
Random
reading
Scrap Recovery
scrapbooking
Sewing
Sketch Challenge
Some Backlog
Stamping
Stencils
Stickers
Supplies
Teabag Folding
Techniques
Testing
tips and tricks
Tutorial
Web resources
Welcome to my Blog
Work By My Friends
workflow
Writing
Blog Tools
Edit your Blog
Build a Blog
RSS Feed
View Profile
Group One
In & Out of Studio 3D
Monday, 13 January 2014
Operation Write Home sketch 06
Topic: Sketch Challenge

Sometimes a sketch just hollers out what it wants to be! Such was the case with OWH sketch 96:

When I saw this I immediately thought of a paneled door with a wreath on it. The effort was all in execution.

I had an awesome woodgrain scrap and cut that up into the 4 panels. Since I did not have any more for the door base I created some on glossy paper with ink pads and markers. It did not have to be precise because so little of it shows in the end.

I used a scoring board to score 1/8" from all the edges of the panels and turned them back to crease. I had to clip the corners so they would not wrinkle or bunch up.  Each panel got a full coverage of foam tape on the back and was adhered to the door base. I then used alcohol markers in warm greys to shadow the sides of the panels (Copic W7 for right and bottom, Copic W5 for left and top).

The wreath is a clear sticker adhered to a green printed background and trimmed out. The same green was used to back the clear text sticker.


I added tiny green rhinestones to the wreat as a finishing touch.

Ddd


Posted by studio3d@ccgmail.net at 12:01 AM PST
Sunday, 12 January 2014
Operation Write Home sketch 05
Topic: Sketch Challenge

Using OWH sketch 05 was rough going until I found a little snippet of paper left on the desktop that fit the scale perfectly.

Here is the sketch:


I followed the sketch faithfully until I got to the oval sentiment. The little bird on a script background was paired with a floral paper over a woodgrain. Then I simply added a sentiment strip with a flag-cut end.


I had a bit more of the bird paper but not enough to make the block as tall as the sketch. So I just narrowed that whole strip, keeping all the background papers the same as before. I framed up a stamped sentiment with some of the floral and popped it up on foam tape.

I decided to try out some detailing on this version and bordered every piece with some faux stitching in brown pen. I think this gives it a more rustic look.

Ddd


Posted by studio3d@ccgmail.net at 12:01 AM PST
Saturday, 11 January 2014
People of the Heart
Topic: Dry Embossing

I saw this idea on a blog somewhere a long time ago and sketched it to try later. Well, what do you know? Later is here!

The plan starts with a couple of large heart punches or diecuts. I had neither but I did have an old Coluzzle with a heart shape. Yep, I can use that!

For the lady I cut hearts out of pink and salmon shimmer cardstock and ran both through the Cuttlebug with the swiss dots folder. I used a round punch to open up the neckline, added three tiny brads for buttons and a paper rose for a corasge.

The man is made with white and black shimmer cardstocks. The black is embossed with the twill folder and then cut halfway down the center. This allowed me to fold back the lapels. I tied a knot in a folded black 1/8" ribbon and then attached it to the white heart. The black heart is then layered over top of it.

With a black border, the background is metallic silver run through the hearts embossing folder.

This would make a good anniversary or valentine card, but it is actually going out in a swap.

Ddd


Posted by studio3d@ccgmail.net at 12:01 AM PST
Friday, 10 January 2014
It's A White-Out
Topic: Die Cuts

For a swap I needed a card using nothing but white. Well, short of turning in a single piece of white cardstock folded in half, the only way I know to do this effectively is to use lots of layers and textures.

I used dies to cut roses, butterflies and words and I used folders to emboss the butterflies and a background. The roses are embossed with the same die that cuts them.

Foam tape raises the floral frame off the background and the butterflies are glued only at the centerline.

Ddd


Posted by studio3d@ccgmail.net at 12:01 AM PST
Thursday, 9 January 2014
March of My Penguins
Topic: Stamping

A challenge over at the OWH blog was to make a card with a penguin - and to use your most original image so everyone wouldn't make near duplicates. No problem there - the only penguin stamp I have is the one I carved several years ago.

I started with plain white cardstock and used masking to stamp the penguin three times. The only bit of coloring is the little bit of blue in the snow underfoot. I trimmed the panel so I could give it a red border and made a matching bowtie for one of the birds using 1/8" ribbon.

I used some little peg stamps to make the sentiment and added lines with black pen to turn the squares into cubes. This got bordered in red and popped up on foam tape.

Ddd


Posted by studio3d@ccgmail.net at 12:01 AM PST
Wednesday, 8 January 2014
Operation Write Home sketch 04
Topic: Sketch Challenge

Well, here I am, up to #4, and I haven't followed any sketch exactly yet. No surprise there, huh?

Here's the sketch I was supposed to be using:

Those lopsided borders weren't doing it for me so I cut my main panel down even further. Then I didn't have any sentiments with the right dimensions so I cheated on that, too. And finally, the 'ribbon' was way too high on the card for my taste so I changed it to twine and dropped it down.

I keyed the colors off the bird printed paper. I think this is originally from a set of Christmas papers. I added some woodgrain paper for wide borders and then pulled a mossy green from the bird print to use as borders and for the twine.

Just the text block is up on foam tape.

Ddd


Posted by studio3d@ccgmail.net at 12:01 AM PST
Tuesday, 7 January 2014
Operation Write Home sketch 03
Topic: Sketch Challenge

For the OWH sketch 03 I fiddled a bit with the sizes of the parts so I could work with what I had on hand. Here's the sketch:

Actually, there was only one dimension specified but I adjusted 'relative sizes' not 'absolutes'. You notice that when the sketches started there was very little bordering shown but I am to a point where I like the definition it gives, so try to include it if possible.

The three circle elements are chipboard stickers from the Tea For Two kit I used a few months back. There was a striped 'sampler' page with one section using the same motif so I snipped that off for a bottom border. This disguised the fact that my red bordering paper scrap was not big enough for the whole card front.

I used complementary papers and a stamped greeting to finish this off.


The text panel is popped up on foam tape which raises it to the same level as the thick diecut circles.

Ddd 


Posted by studio3d@ccgmail.net at 12:01 AM PST
Monday, 6 January 2014
Operation Write Home sketch 02
Topic: Sketch Challenge

Sketch 02 from OWH was too simple to leave it alone as designed:

After choosing a large text stamp (already stamped on blue cardstock) I sorted through old 6x6 pads and selected a vintage floral on coral and a strip of music. These got some red and blue borders and left me with a very plain card.

In going through desktop scraps I came up with a cloud stamped on patterned paper, a scalloped circle that I cut down into a parasol (and added a handcut handle), and a punched sunshine.


These touches, as well as the coral twine called for in the sketch, gave the card more pizazz. The cloud and the parasol center are popped up on foam tape.

Ddd


Posted by studio3d@ccgmail.net at 12:01 AM PST
Sunday, 5 January 2014
OWH Sketch 01
Topic: Sketch Challenge

Sometimes I need an ongoing challenge to give me some direction when I want to create but don't have anything specific in mind. So I decided to start making at least one card from each of the Operation Write Home sketches in order beginning with the first.

They may not necessarily be done on consecutive days - in fact they probably won't be - but it's a direction anyway.

So, today I started with sketch 01 which is this:

I had a large text block left over from a previous project back in November and decided to use that for the feature panel. I chose a couple of papers from recently used 6 x 6 paper packs and did some bordering in a warm grey to go with the printed lines in the floral paper.

I added color with alcohol markers to the candles to match the floral paper and then added more yellow to flowers as most of the yellow was covered up in mounting the text block.

The text block is popped up on foam tape for dimension.

Ddd


Posted by studio3d@ccgmail.net at 12:01 AM PST
Saturday, 4 January 2014
Bath Curtain
Topic: Sewing

In a new bath we added to the house we needed to have curtains for the window. Since the window glass is frosted the curtains did not to be concealing, but only decorative.

A beautiful shower curtain from a previous bathroom was on hand and matched the theme and coloring in the new bath. So I cut it up to use.

The window has a 'box' over it that conceals plumbing from the upstairs bath so I created a valance to cover that. Then a separate rod was used below the box for the side curtain panels.


To keep the side panels off to the edges where they belong I created a rod cover that is gathered on fairly tightly.


You never really know what's coming next on this blog, do you?

Ddd


Posted by studio3d@ccgmail.net at 12:01 AM PST
Friday, 3 January 2014
Inspired By Starry Night
Topic: Nail Art

I recently picked up this book from the library and was inspired by the title and the colors to create some winter nail art. 

The book spends some time in Alaska where the characters are enthralled with the vast amount of stars in the sky. I painted my nails with blue and then created the starry sky with an overlay of gold glitter in clear polish. The wintery portion was to create snowflakes with silver glitter polish.

These nails don't match a single thing in my wardrobe so I might have to carry this book around everywhere until it's time to change them out! LOL!

Ddd


Posted by studio3d@ccgmail.net at 12:01 AM PST
Thursday, 2 January 2014
Still Ahead of the Game
Topic: Multi-Technique

More scraps laying on the table so I decided to make more of the very early Christmas cards.

For the first one I had used the front side for experimenting so I had to turn it over and play with the side where the pattern was indented instead of raised. This also put the border strip on the left. coloring was more challenging since I was coloring into the indented areas but it worked out fairly well. I couldn't stamp the text onto the background because it would have missed where there were sunk in dots. So I stamped on a buff paper, cut a fishtail and raised it up on foam tape. I liked black bordering for this.


I had one more of the embossed panels left but no more of the globes or diecut word. So I just colored it up and left off the ground line. I stamped the full greeting on the background and added a star in the sky which I colored with yellow.


This needed a bit of pizzaz so I used three different colors of Stickles to add over the snow ground and dots, colored background dots and the star.


Black bordering worked really well on this one, too.

Ddd


Posted by studio3d@ccgmail.net at 12:01 AM PST
Wednesday, 1 January 2014
A Whole New Wardrobe
Topic: Sewing

You've probably seen those TV cooking shows where the participants are given a basket of ingredients and an inspiration theme and have to create something edible. Well, in a twist on that I started with THIS fabric:

...and the assigned inspiration theme of ''Wrestlers". Actually, I didn't get a 'basket of ingredients' so this was from the 'pantry and fridge'. I was sent a wrestler action figure to make clothing for and the assignment was under way.

This was the piece I made from the flashy red sequin fabric... trunks!

Very manly, huh? And this is after a lot of pattern drafting and test garments. When I made clothes for my teen dolls and later for my daughter's dolls, they had fully moveable parts, small hands and feet and no molded on clothing. For this doll his arms tend to move away from the body, he has balled fists and booted feet, non-moveable legs and he has bulky undies. These things make for great wrestling action but a challenge in fitting clothes!

I found some advice on the internet on drafting clothing patterns with no shoulder seams, built in sleeves, and one-piece legs on pants. A bit of experimenting with sewing order and I was ready to roll.

After making the trunks I decided to add a crop-top shirt to match it:

Then, because most of my 'pantry' is quilting fabrics, I needed to have stretchier fabrics to allow for dressing him around his physical challenges. I went to the fabric store and got 6 stretchy knits. Another nice thing about these is that the edges don't have to be hemmed and they still won't fray. YAY!

I now had one shirt pattern and one pants pattern and just made whatever adjustments were needed for styling other clothes. I made him a sleeveless tee and slacks:

Then I added a jacket:


He got a standard tee and another pair of pants (which are actually green):


Then I went back to my own stash and made him a few capes towear into the ring. This one is a crispy red with glitter in it:

I made one of faux leather:


And a patriotic one (I call this one his Captain America cape)


Then because he needed something to wear lounging around the dressing room between bouts, I made him a long robe:

This wrestler dude is really ready for anything now.

Ddd


Posted by studio3d@ccgmail.net at 12:01 AM PST
Updated: Tuesday, 24 December 2013 9:25 PM PST
Tuesday, 31 December 2013
Let's Wrap It Up, Folks!
Topic: Multi-Technique

WOW! Time for the year-end-review already? What a busy and fulfilling year it has been in my art world. I had a hard time choosing just one item from each month to showcase.

JANUARY

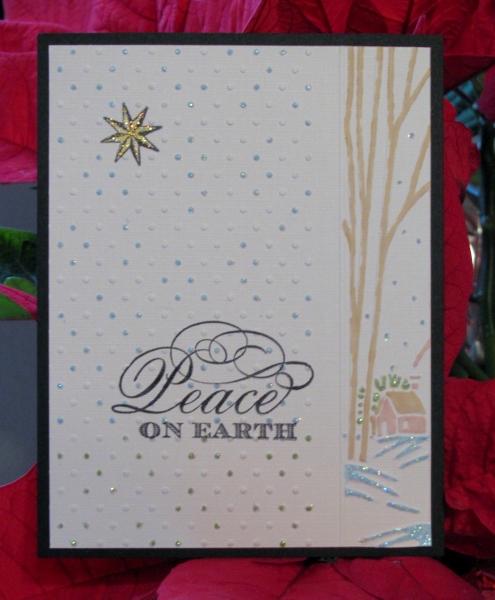
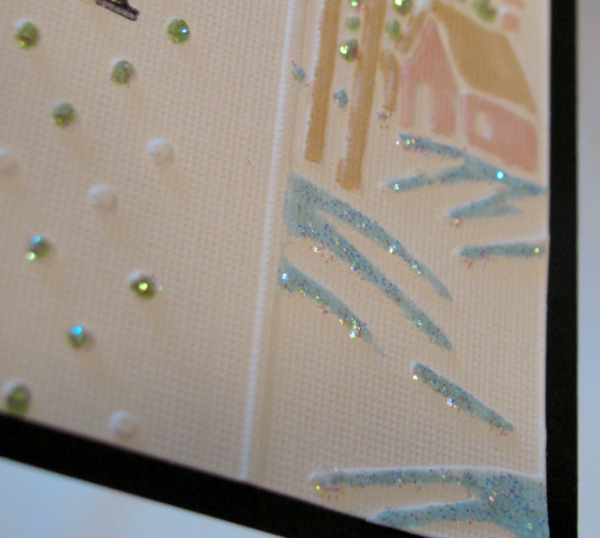
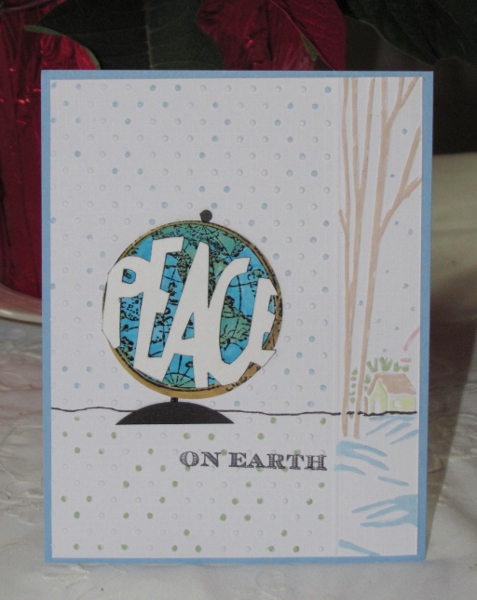
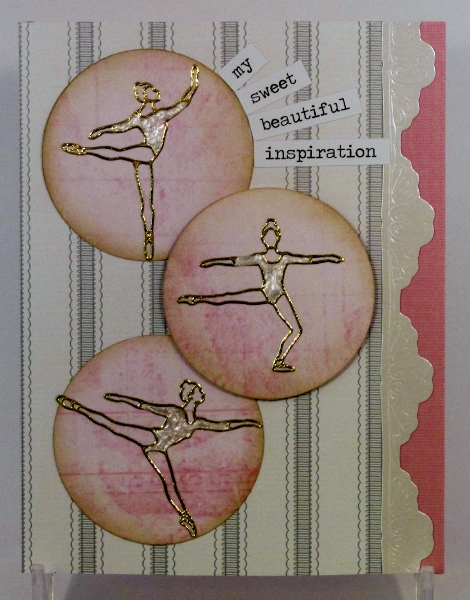
On January 22nd I posted this card made with peel-off stickers, pearl pen, shimmer cardstock trim, Martha Stewart paper, Tim Holtz distress paper, and Distress Ink.
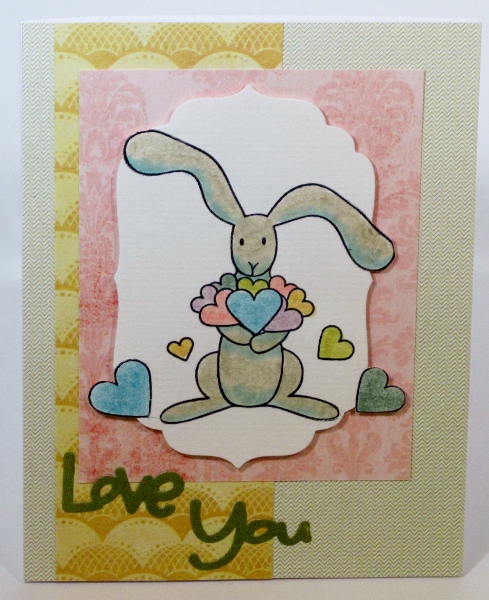
FEBRUARY

On February 26nd I shared this card as part of a tutorial I wrote on 'hacking' acrylic stamps to make parts adjustable (the ears in this case). The card also features 'out of the box' diecutting and 'watercoloring' with Distress Marker ink.
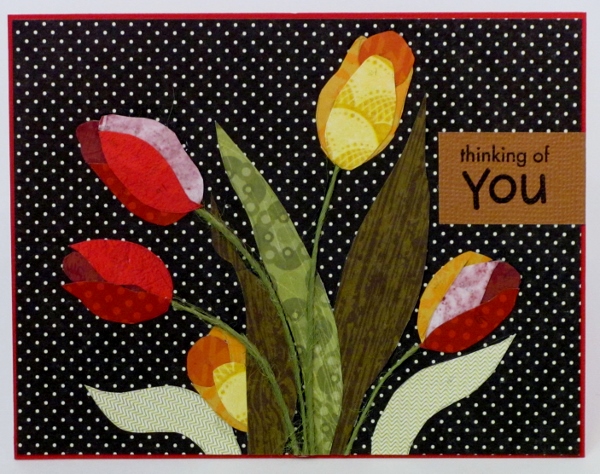
MARCH

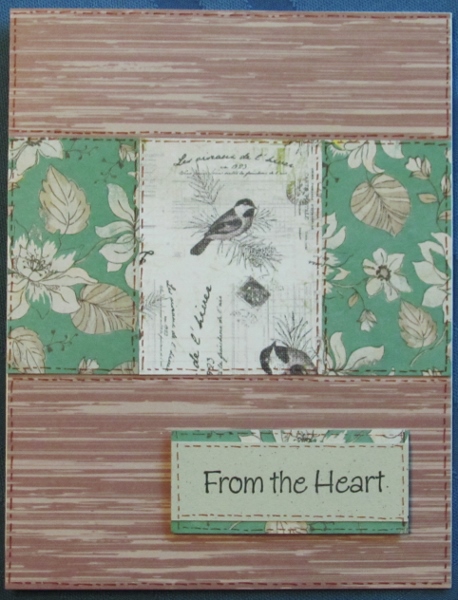
I shared this card I made on March 29th using a pattern designed for an applique quilt. I used patterned papers instead, carefully cut and layered.
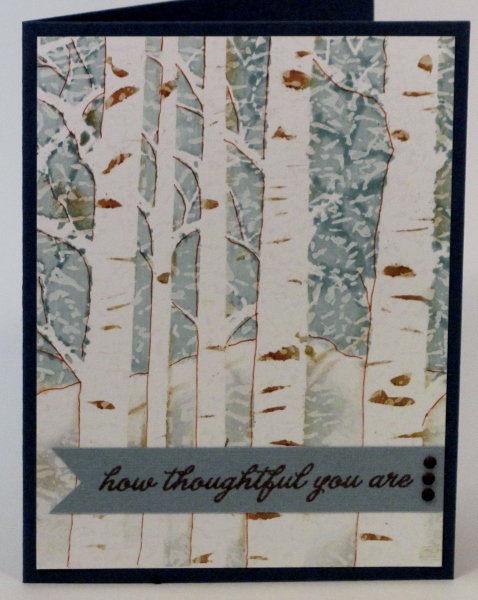
APRIL

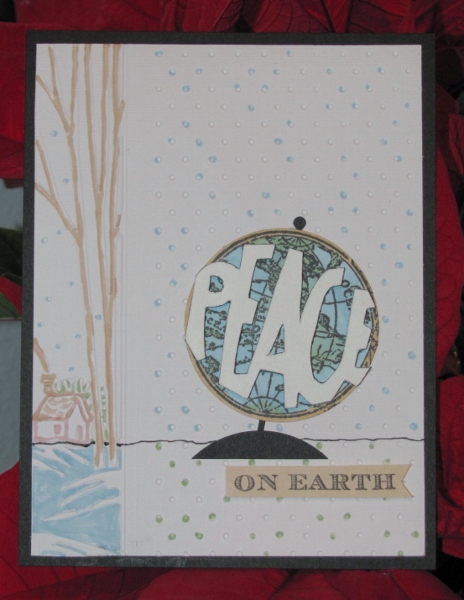
On April 14th it was a card I created using a waxed paper background, a stencil and Distress Inks. I want to go make more of these.
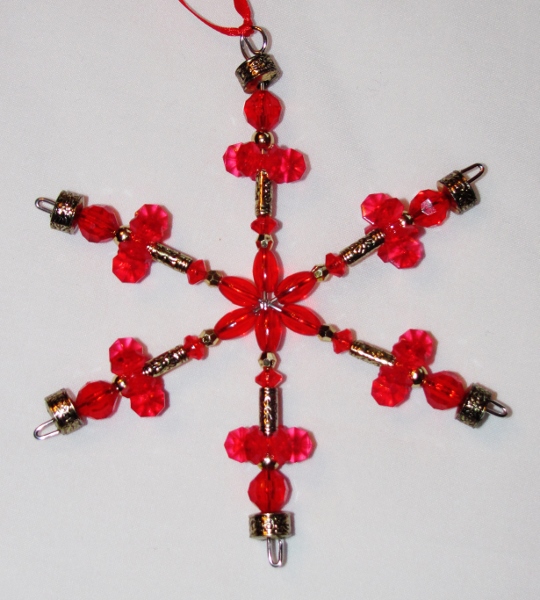
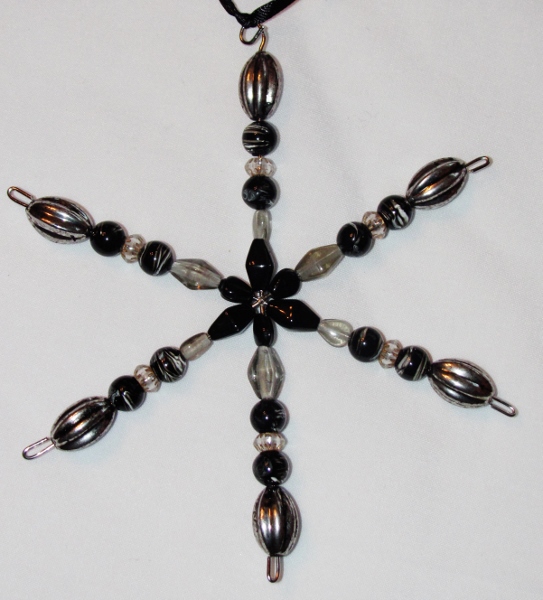
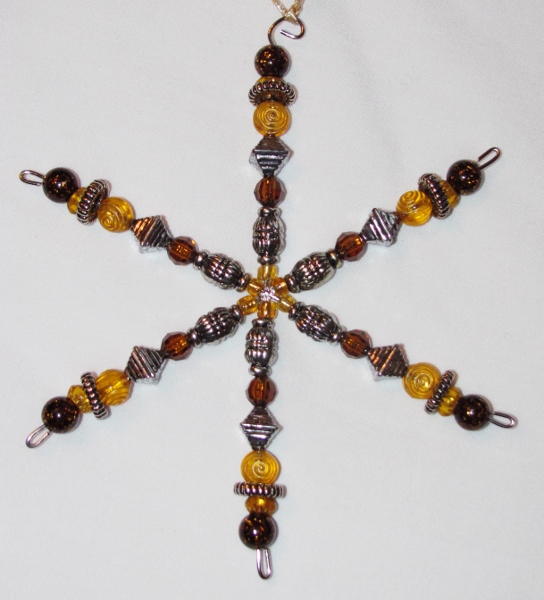
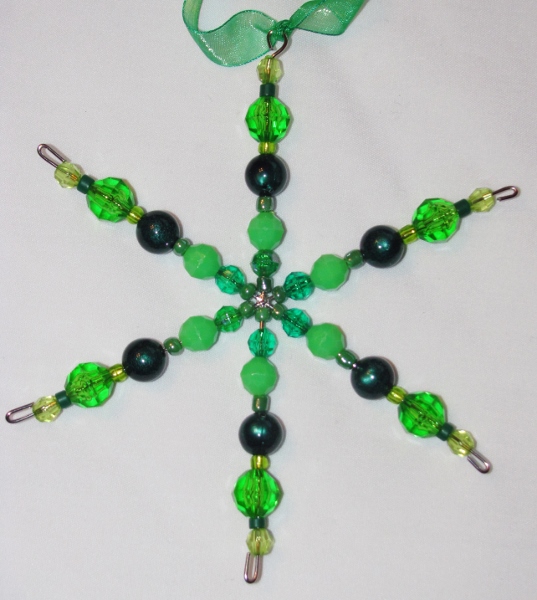
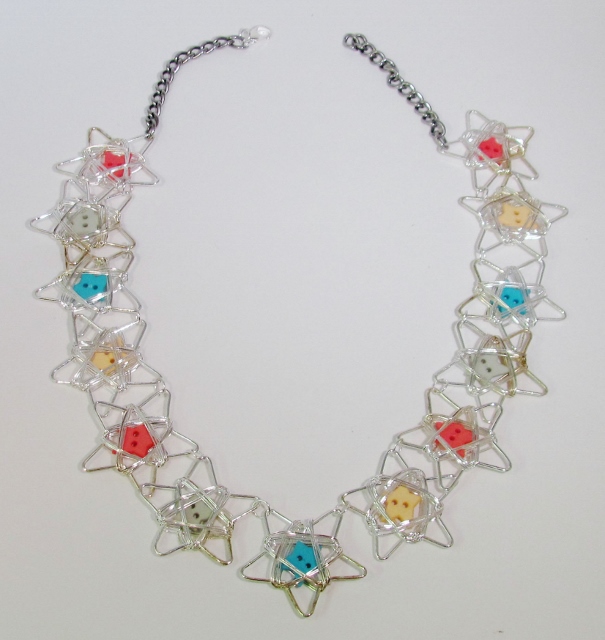
MAY

The project I chose from May was posted on the 9th. This necklace was constructed from store-bought wire stars, star buttons, an old bracelet and jump rings. This was a big hit with the 'jewery staff' on our cruise ship!

JUNE

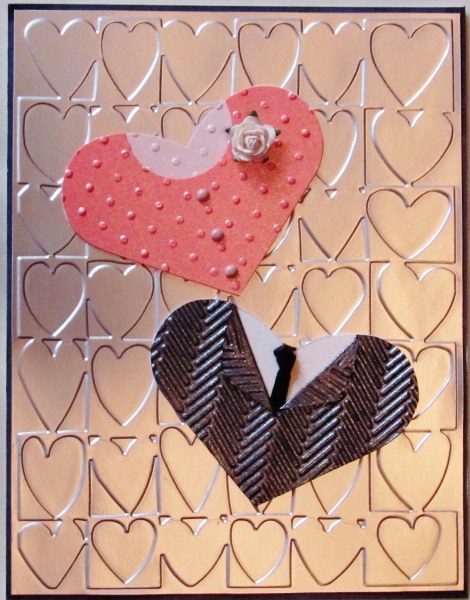
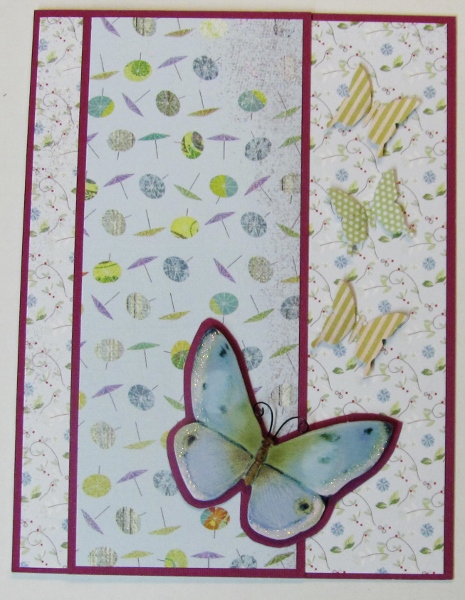
On June 20th I shared some cards using formula cutting of 6 x 6 paper pads and mix-and-match assembly. I especially like this one with a butterfly sticker and three butterfly punches.

JULY

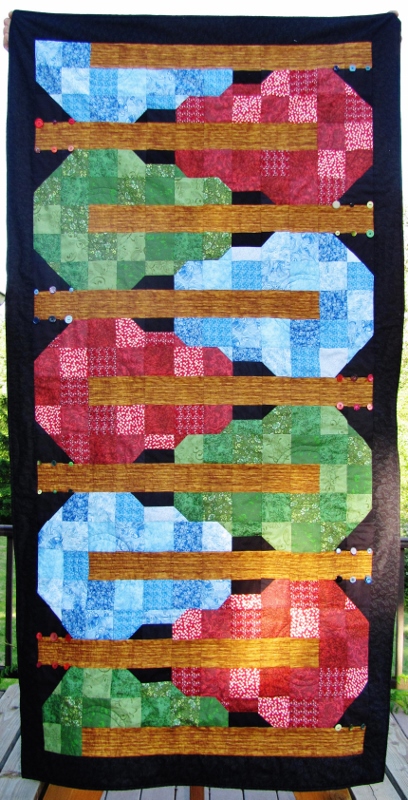
From July 2nd I just had to share again the awesome wall hanging I designed for my son-in-law. I also wrote a tutorial/pattern for this which is available on request.

AUGUST

August 25th was the post date for my largest quilt to date. The king size creation is a tribute to our late black lab - Chuck the Dog - and a gift to my hubby. Features include applique (center), original paper piecing (dog heads), fussy cutting (puppy blocks), and free-motion quilting.

SEPTEMBER

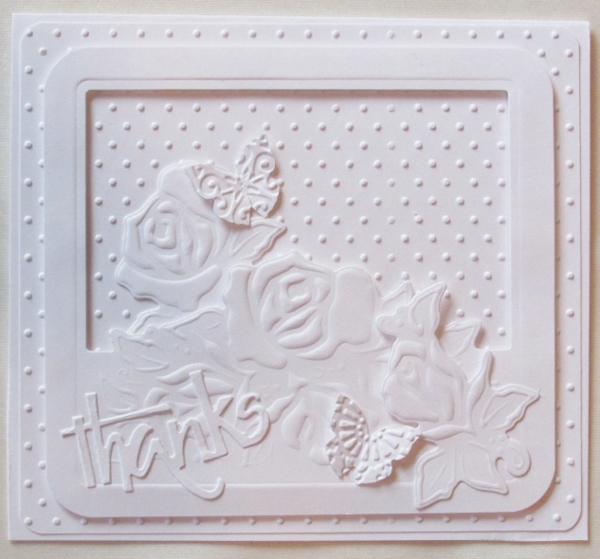
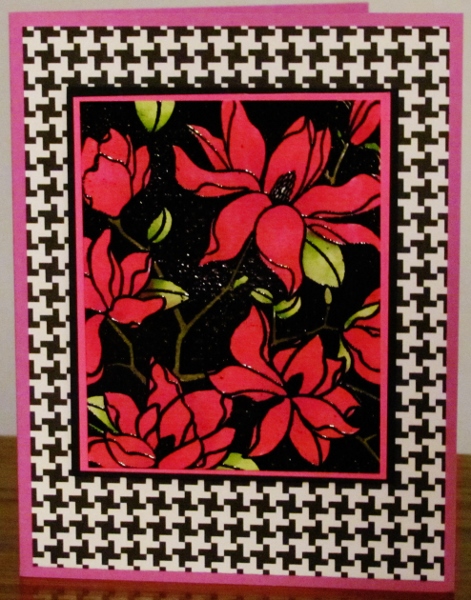
On September 1st I shared some cards using a black embossed background stamp and watercolor markers. I love the dramatic look of this.

OCTOBER

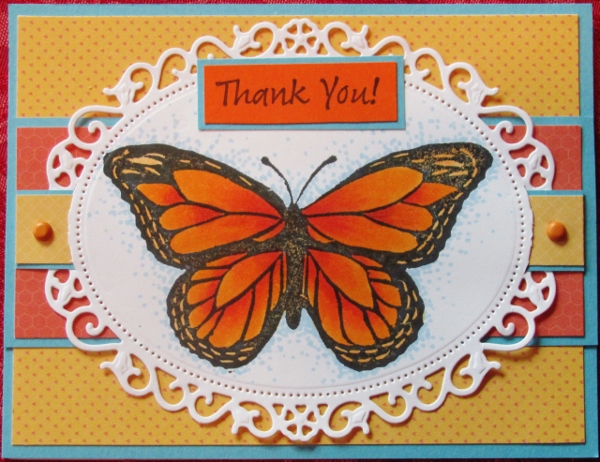
October's best share was on the 8th. I used my own hand-carved stamp on a fancy diecut and colored with blended alcohol markers. I employed a new-to-me background shading technique, too.

NOVEMBER

Narrowing down November to just one was the most difficult but I finally settled on the Birdhouse Neighborhood quilted wall hanging from the 21st. This was the most inventive quilt I have done and I absolutely love everything about it.
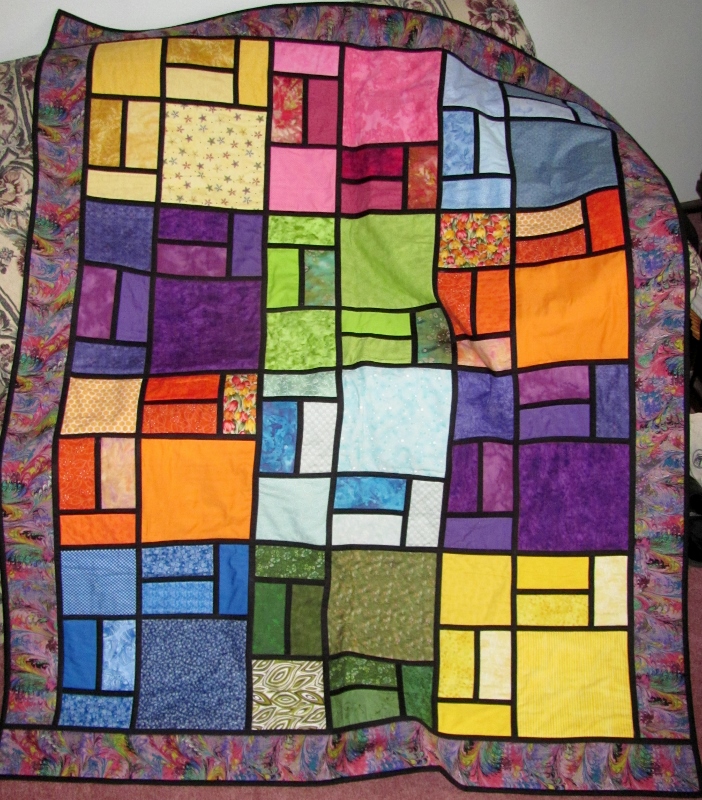
DECEMBER

And finally, the December 8 project which is another quilt! I made this with scraps from other quilts I have made (41 of them to date) and only had to buy for the border and backing. I love picking out the fabrics and remebering where they were used before.

So there you have it! My favorite cards, quilts and jewelry from 2013 and the techniques that make them special. Many more quilts this year in the review but I then made more quilts this year than in the past, too!

I will close out this year with a special wish for each of you to have a Happy New Year. Go forth and create!

Ddd


Posted by studio3d@ccgmail.net at 12:01 AM PST
Monday, 30 December 2013
Head Start
Topic: Multi-Technique

I had one more idea jump into my head while cleaning off some scraps off the desktop - specifically a word diecut and a punched white circle. The word was a Tim Holtz shaped cut of 'peace'. When it fell on top of the circle I was inspired to create the first two Christmas cards for NEXT year!

I dig out an old stamp of an antique map of two hemispheres and stamped it on the circle. I actually did this with two circles and different inks so I could do the coloring in watercolor markers and in alcohol markers to see which I would like better. I liked the both so made cards with each.

I added some black punched bits to create a globe stand then mounted the cut word on foam tape over top.

To create the background I used two embossing folders on white cardstock. The right side is a border folder and the main field is the swiss dots folder. I used the same style of markers to color the embossing and drew a ground line with black marker.

The globe was mounted and a coordinating border added to the card base. Then I stamped additional text at the bottom.

Here is a view of the raised word:


I wouldn't say I'm READY for next Christmas, but I do have a head start.

Ddd 


Posted by studio3d@ccgmail.net at 12:01 AM PST
Sunday, 29 December 2013
A Few More Flakes
Topic: Beads

I had so much fun making those beaded snowflake ornaments (except when I poked my thumb with the wire) that I decided to do more and use them on packages for Christmas. I still had the bead bins all over my work surface so it was easy to come up with sets of beads to use. Other than pinching my palm with the pliers, this session was injury-free.

Here are the 6 new flakes I made:

Red and gold:


Black and Gray:


Amber and Silver:


Blue and Clear:


Pink and Clear:


Green and More Green:

I may need to get a new set of wirecutters for jewelry since this wire is SO hard it nicks the edge.

I still have about 10 of these wire frames to use next year. Hmmm, maybe for a necklace?

Ddd


Posted by studio3d@ccgmail.net at 12:01 AM PST
Saturday, 28 December 2013
The Cat's Out Of the Bag
Topic: Sewing

Another Christmas gift from the sewing room.

I got a free pattern from the internet of a hobo bag small enough to be a purse. I edited the pattern to add a split pocket on the inside and the outside. Since this is a reversible bag you always have one in and one out!

I used scraps of fabric with paw prints on them - one black with multicolored light paws and one tan with darker paws. When I used this fabric for a quilt they were dog prints - but since the recipient is a cat lover they've magically been transformed into cat paw prints.

This is the view with the black side out:


And here is the view when reversed to the light side:

The pockets are on opposite sides of the bag so one side will not be bulkier than the other.

Ddd


Posted by studio3d@ccgmail.net at 12:01 AM PST
Updated: Tuesday, 17 December 2013 6:59 AM PST
Friday, 27 December 2013
The Mighty Protector
Topic: Sewing

For a time the short adult clothing protectors (bibs) were a grand success but as circumstances changed so have the needs. These are the changes that I made to the original pattern:

1 - from short to long: Originally waist length, now down to the knees. Now they will no longer have to put a towel on the lap to keep spills off their clothing.

2 - short open pocket to deep split pocket: The original pocket could hold a napkin, kleenex or hankie but  a shift could open the pocket for these items to tumble out. Now there is a seam up the middle to create two pockets that will not gape open.

3 - from cotton to terrycloth: These needed to be more absorbent so spills would not simply slide or drip off. Terrycloth met the criteria.

4 - from completely bound to partially bound: The old style had all the edges bound with bias tape. These new ones are only bound around the neck and across the top of the pocket. The rest has a single-turned hem with a decorative stitch over top.

The neck still closes with velcro.

I made a 'wardrobe' of 6 clothing protectors in yellow, green, brown, blue, lavender and coral. All the bias tape and decorative thread are in coordinating colors.

These take just one-half yard of fabric each. So they start out at 18 inches wide and finish at around 17 1/2.

Ddd


Posted by studio3d@ccgmail.net at 12:01 AM PST
Thursday, 26 December 2013
Please Be Seated
Topic: Around the House

Here's a peek at the holiday table setting. I had fabric napkins and looked online to see how to fold them like a poinsettia. This version was simple to do but ended up with a plain center.

Off I went to the studio to make some centers with paper crafting.

I used a diecut flower as a base but it was rounded petals. I hand trimmed them to a point. There were two sizes of the flower so I treated both the same. I used a stylus to score a vein down the center of each petal then layered them. I popped in a golden center of a punched sunburst.

To turn these into place cards I free-hand cut three green leaves and scored a center vein on each. The name was hand lettered and the leaves glued to the back.


These just lay on the center of the napkin.

Ddd


Posted by studio3d@ccgmail.net at 12:01 AM PST
Wednesday, 25 December 2013
Deck the Halls, and Walls, and Windows
Topic: Around the House

M*E*R*R*Y  C*H*R*I*S*T*M*A*S

So you can get back to your holiday festivities I will quickly show the holiday decor at our house.

ENTRY

MANTLE:

HEARTH


MIRRORED CASES:


FICUS:

TREE:

DESKTOP

DININGROOM WINDOW:

KITCHEN WINDOW:

Alright, everyone! Back to your presents and pie.

Ddd


Posted by studio3d@ccgmail.net at 12:01 AM PST

Newer | Latest | Older