« March 2014 »
S M T W T F S
1
2 3 4 5 6 7 8
9 10 11 12 13 14 15
16 17 18 19 20 21 22
23 24 25 26 27 28 29
30 31
You are not logged in. Log in
Entries by Topic
All topics  «
3D paperwork
A - Z challenge 5
A - Z challenge 7
A - Z challenge round 4
A to Z challenge round 3
A to Z round 2
A to Z round 6
A-Z round 1
Around the House
Art Challenges
Artist Trading Cards
Backgrounds
Beads
Bible Journaling
Books
Boxes
Collage
Color Challenge
Coloring
cookbook
Die Cuts
Digital Projects
Digital Stamps
Drawing
Dry Embossing
Fabric Stuff
Fantastic Folds
Field Trip
Home Decor
How Does Your Garden Grow?
Hymnal Art
In The Kitchen
In the studio
Jewelry
Lettering
Links
Multi-Technique
Music to Work By
Musings
Nail Art
New Work
Online Class
Other Hobbies
Other Projects
Painting
Paper Embroidery
Paper Piecing
Photo
Pretty Paper
Quilting
Random
reading
Scrap Recovery
scrapbooking
Sewing
Sketch Challenge
Some Backlog
Stamping
Stencils
Stickers
Supplies
Teabag Folding
Techniques
Testing
tips and tricks
Tutorial
Web resources
Welcome to my Blog
Work By My Friends
workflow
Writing
Blog Tools
Edit your Blog
Build a Blog
RSS Feed
View Profile
Group One
In & Out of Studio 3D
Monday, 24 March 2014
Operation Write Home sketch 42
Topic: Sketch Challenge

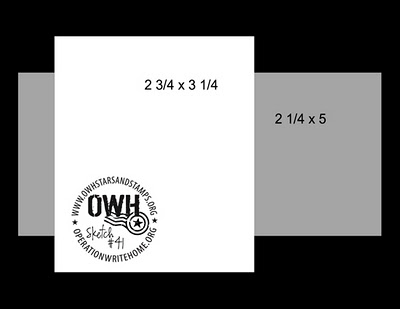
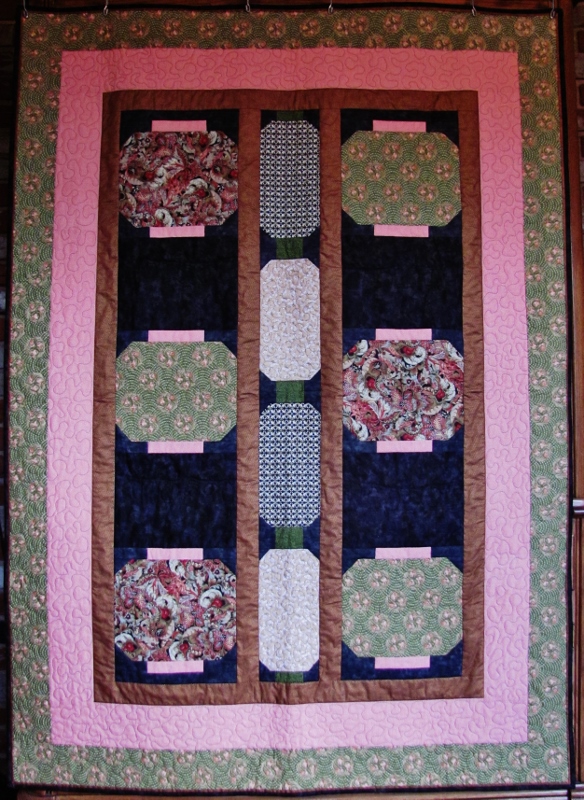
For OWH sketch 42 I had to decide whether to go by the picture or by the measurements given. 


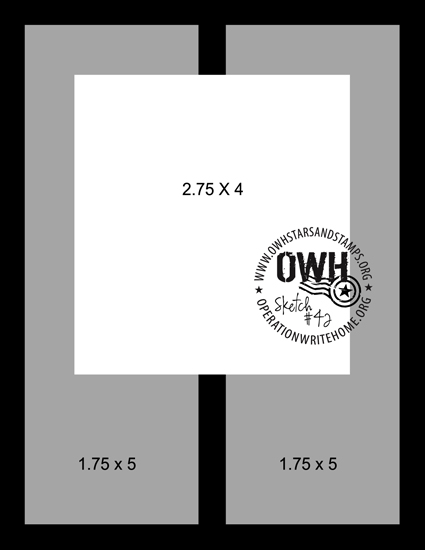
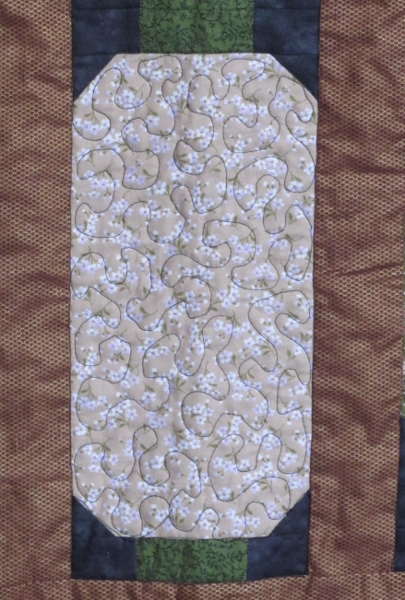
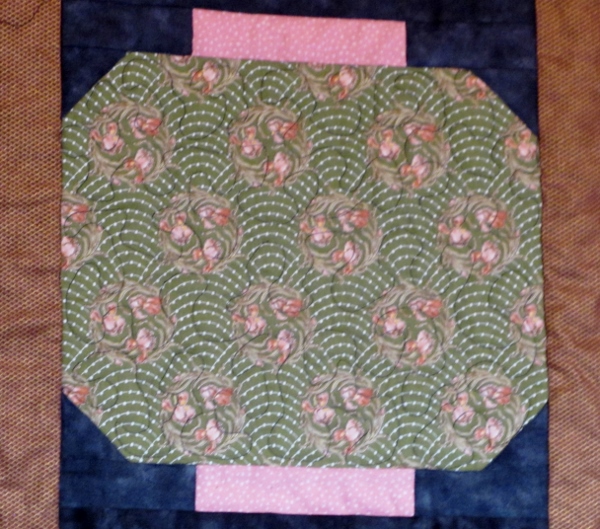
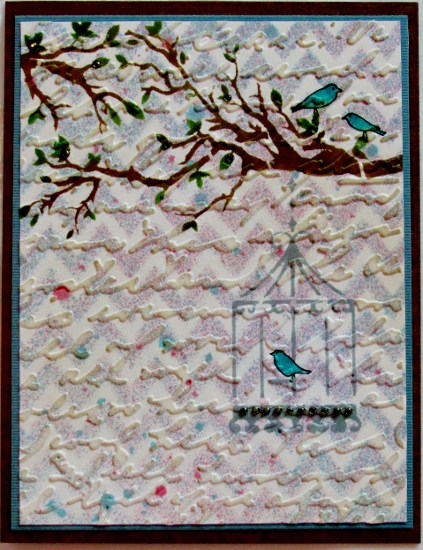
You can see that the center block is shown shorter than the noted 4 inches. Since the piece I wanted to use for that part was longer, I chose to use the measurement instead of the picture.

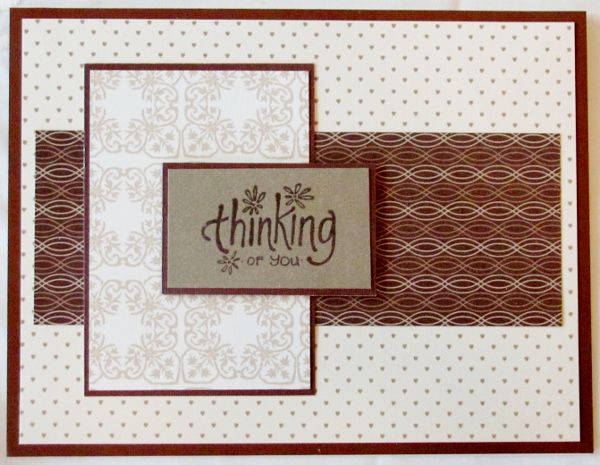
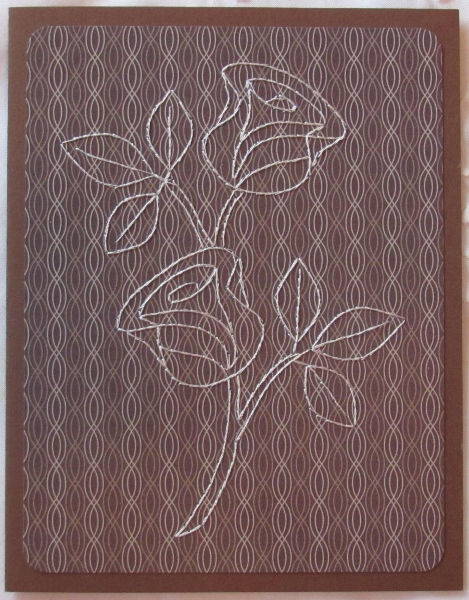
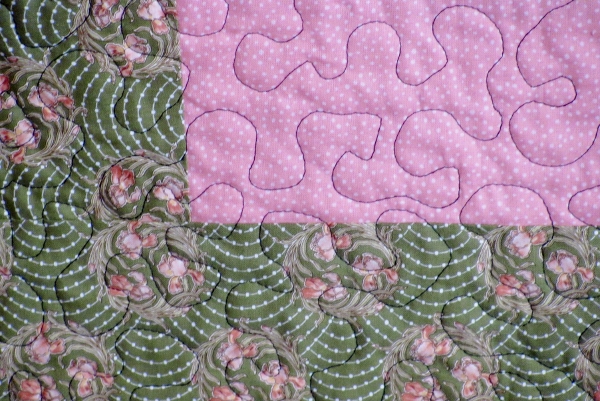
I selected different papers for the two background panel, one lace and one embossed swiss dots, and used a dark rose Distress Ink on the edges to bring them together. I used the ink on the raised dots as well.The feature panel is a printed tag from which I trimed the punched end. I inked the edges of this and stamped a decorative sentiment in the lined portion. Then I used marker to color in the border of hearts and alternating stripes on the edges.


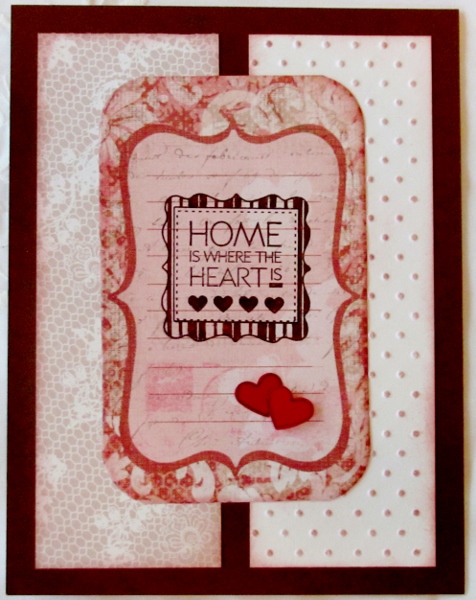
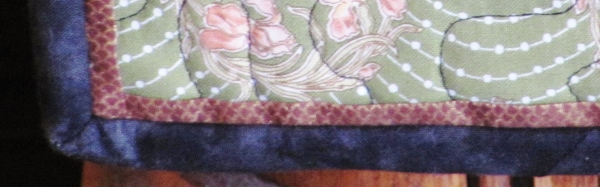
This is all set on a brown card base. I added two burgundy punched hearts, one on foam tape, and defined their edges with fine line black marker.

Ddd 


Posted by studio3d@ccgmail.net at 12:01 AM PDT
Sunday, 23 March 2014
Operation Write Home sketch 41
Topic: Sketch Challenge

Yeah, we're back to these sketches for awhile. Today we are focusing on sketch 41:


I am still working out of those envelopes of coordinated papers I sorted scraps into and I came up with this set of cream and brown patterns. I added a backing in brown and used the same for some bordering. Then I went to the pre-stamped sentiments bin and pulled this text block that coordinates.

The sentiment block was also bordered in brown and then popped up on foam tape.

Ddd


Posted by studio3d@ccgmail.net at 12:01 AM PDT
Saturday, 22 March 2014
You're Such a Pansy
Topic: Paper Embroidery

When we got the assignment to do a paper embroidery pansy card I immediately thought of my own stitching pattern. I decided I wanted to use a different color combination, though and did a Google image search for ideas. I really liked the dark red with purple centers and that bright yellow beard.

The full pattern was a little overwhelming so I cut it down to one bloom, two buds and a few leaves. I also changed up the stitching to include outlines and to stitch only half the veins in the leaves.

I pricked it out on a pink woodgrain paper and did the bordering in burgundy and purple over a pink card base.

Love it!

Ddd


Posted by studio3d@ccgmail.net at 12:01 AM PDT
Friday, 21 March 2014
That's Not What I Wanted
Topic: Paper Embroidery

Challenge Make a black and white paper embroidery card.

Chose paper, chose pattern, pricked out, chose thread, stitched half of it, got better lighting.... WHAT'S THIS? My paper is BROWN and white? Oh, brother. 

I finished stitching it and after I photographed it I ran a software filter to convert the picture to black and white. So I actually got a pic of what I thought I was stitching all along.

Here is the converted photo:

And here is what the actual card looks like in all its 'brown-ness'.


It's not that I don't like it, cause I do. It just isn't what the challenge asked for.

Ddd


Posted by studio3d@ccgmail.net at 12:01 AM PDT
Thursday, 20 March 2014
It's NOT a Pox
Topic: Nail Art

Inspired by the new spring pastel nail colors in a Cover Girl ad and sucked in by a coupon offer, I bought two small bottles of polish. Unfortunately, the new pastels did not come in the little bottles so I ended up with slightly brighter shades than I anticipated. Oh Well...

I wanted to use both of my new shades and found the easiest way to do that was to immediately dot on color two as soon as color one's second coat was laid on - nail by nail. This allowed the dots to self-level and spread rather than sitting on top and being slightly raised.

Overall, I like the effect even though it is a smidge bright for me.

Not only that, but look how coordinated and hip I look when dialing my new iPhone! LOL!

Ddd


Posted by studio3d@ccgmail.net at 12:01 AM PDT
Wednesday, 19 March 2014
Cotton Fabric Lanterns
Topic: Quilting

Title translated to Rantan Men'orimono. I thought it sounded more exotic than 'Cotton Fabric Lanterns'.

This is the quilt I cut out at the same time as Logan's Lanterns but it got borders of two of the other fabrics contained in the feature.

All of the lanterns were quilted with meandering in black thread:

The  fishscale bands were all stitched in the ditch:

The borders were also quilted in meandering:

The black blocks got the same strings of free-motion lanterns as Logan's Lanterns.

I also used the same technique to make an inset at the border.

This quilt will go to the Passages program at the hospital.

Ddd


Posted by studio3d@ccgmail.net at 12:01 AM PDT
Tuesday, 18 March 2014
On The Down Bead
Topic: Paper Embroidery

Can you name that tune? I'm not even sure anyone can PLAY that tune!

An assignment to use beads on paper embroidery led me to choose a pattern with musical notes on it. However, the original pattern had SIX lines on the staff. That's not right! So I eliminated one line. Then, all the plain old notes were boring so I added flags to some to change the timing and tied some of them together. More interesting to view, but not musically sound, I'm sure.

I pricked this pattern out on a musically printed cardstock complete with gold foiling on some elements. I double-stitched the beads onto the notes to make them more secure for mailing.


I added a little treble clef sticker as a finishing touch.

Ddd


Posted by studio3d@ccgmail.net at 12:01 AM PDT
Monday, 17 March 2014
Kitten Claws
Topic: Nail Art

Quite a while back I shared some nail art of tiger stripes - yellowish base coat with black tiger stripes. I wanted to use the same paint method but with different colors for a more feminine look.

I used some Barbie pink polish as a base and added the stripes with silver glitter.


Here's a couple of the nails close-up


Sorta like tiger stripe but probably more like kittens.

Ddd


Posted by studio3d@ccgmail.net at 12:01 AM PDT
Sunday, 16 March 2014
Some of This, Some of That
Topic: Color Challenge

This challenge used four unusual colors together: Burgundy, Red Violet, Dark Blue and Pine Green. When the swatches were laid out together I had a hard time envisioning something harmonious coming out of that, but we were only required to use two of the colors.

In sorting through scraps of designer paper I acrually found a floral with three of the colors in it! It was a corner treatment so I trimmed away the background with a craft knife and backed it with a solid burgundy piece.

I added a red violet border to this and let all the green come from the illustration.

By bordering the sentiment with the dark blue I actually managed to use all four colors.

The sentiment is popped up on foam tape.

Ddd


Posted by studio3d@ccgmail.net at 12:01 AM PDT
Saturday, 15 March 2014
A Layered Birdhouse
Topic: Stencils

For a February swap we were to make a card using birds or birdhouses. I immediately thought of the stencil I have of birdcages hanging in a tree.

I only wanted one birdcage so I blocked out all the others with removeable tape. I used daubers and Distress Ink to color the open areas of the stencil: green for the leaves, brown for the branches, teal for the birds and grey for the birdcage.

Then I removed this stencil and replaced it with a chevron stencil. This time I used glimmer sprays in blue and pink to spritz the card. This required a heat gun drying step.

I followed this by running the piece through the Cuttlebug with the script folder. Then I used a foam pad to sponge on some Distress Ink in old paper to the raised portions except inside the birdcage.

Then I trimmed down the panel and mounted it on teal and brown cardstock.

I added a string of rhinestones across the base of the birdhouse and some matching individual ones at the base of some of the leaves.

This came out precisely as I envisioned it. How often does THAT happen?

Ddd


Posted by studio3d@ccgmail.net at 12:01 AM PDT
Friday, 14 March 2014
Jazzy Cupcake
Topic: Paper Embroidery

Have you been keeping count? This is paper embroidery number 11 from the vacation series.

On assignment to make a birthday card for our stash, I chose the cupcake by Darsie Burno. I pricked it out on red swirly paper and stitched in bright threads.


Backing with red chevrons adds to the jazzy feel of this card. Hard NOT to get excited by this.

Ddd


Posted by studio3d@ccgmail.net at 12:01 AM PDT
Thursday, 13 March 2014
Sitting Pretty
Topic: Paper Embroidery

What a combo! I selected the bunny from a pattern that had several images around the borders and then decided to place him on cardstock with a corner of flowers. Now it looks like he just emerged from the garden hedge.

I chose an unconventional teal for the figure to make him an Easter Bunny and bordered with more teal - a little darker.


I found that Distress Ink in Peacock was a perfect match and used that to stamp the greeting.

Ddd


Posted by studio3d@ccgmail.net at 12:01 AM PDT
Wednesday, 12 March 2014
Twisted Tree
Topic: Paper Embroidery

Lots of thread - little time. That is the definition of this Christmas tree stitching. I think more time was used to keep threading the needle than in actual stitching.

I used the snowflake and text paper for a background on this one and layered it over some tan chevrons.

Rhinestones, placed between the stitching lines, turn this potted pine into a real Christmas tree.

Ddd


Posted by studio3d@ccgmail.net at 12:01 AM PDT
Tuesday, 11 March 2014
Hexies for the Holidays
Topic: Paper Embroidery

I don't like hexagons! Don't know why, either. They just rub me the wrong way. Octogons - OK; triangles - So-so; squares - oh yes! Hexagons - take them away please! LOL!

Anyway - I had a pattern for a cross make up of 'snow crystals' and I wanted to just use the flakes independently. Because of their six-sided nature I decided to actually use a hexagon background (it came in a 6x6 pad I bought). I pricked out three of the flakes and nine of the little centers to stitch. 

Now, you can't tell it from the photo but the flakes are stitched with navy blue AND royal purple.

No reason why I backed it with dark teal other than it looked good with the yellow and pink background.

I added a blue rhinestone to each of the large flakes.

Ddd


Posted by studio3d@ccgmail.net at 12:01 AM PDT
Monday, 10 March 2014
Spring Venus
Topic: Paper Embroidery

On assignment to make a 'spring' card I hacked a couple of patterns and combined into one.

The seated woman is from a breast cancer pattern. The flowers are from another free pattern but I've cut it into so many bits and rearranged them that I don't have a record of whose pattern it is.

I used verigated thread for the flowers and vines and selected solid colors for the woman, butterfly and leaves.

I don't make many square cards because they cost more to mail, but this pattern really looked best when cut that way. I added backing of a field of flowers all in muted tones that are found in the feature.

Ddd


Posted by studio3d@ccgmail.net at 12:01 AM PST
Sunday, 9 March 2014
Playing Cricket
Topic: Paper Embroidery

Assignment: Insects

Other than butterflies and dragonflies I don't have 'insect' patterns. Oh, wait! There is that really lame lady bug... Well in one of the books I own I came up with this cricket. 

I pricked it out at home and photocopied the instructions with the colors. However, I didn't take the photo of the finished product so I had to guess at the stitching of the back legs. I don't hang around looking at crickets either, so either they are right or wrong - but they're done!


Not my favorite pattern - kind of creepy!

I bordered to match the leaves and then backed with a triple honeycomb print.

Ddd


Posted by studio3d@ccgmail.net at 12:01 AM PST
Saturday, 8 March 2014
Beddy Teddy
Topic: Paper Embroidery

For a swap the assignment was 'teddy bear'. I only have one pattern for a bear and it was for a baby card with a bear sleeping on a cloud. I'm not sure WHY the bear was on a cloud but I only pricked out enough of those lines (and added a couple) to turn the cloud into a blanket.

The blanket was stitched in light teal and the bear in light brown (with little pink ears).


Bordeering with teal and backing with a brown chevron ( which says "Zzzz" to me ) was the finishing for this.

Ddd 


Posted by studio3d@ccgmail.net at 12:01 AM PST
Friday, 7 March 2014
Shimmering Thanks
Topic: Paper Embroidery

A group's swap assignment was to make a paper embroidery thank you card. I decided to stitcch just the frame for a sentiment.

The cardstock is a large swirl (cut down from 12x12) with a shimmer finish. I did all the stitching in silver metallic thread, trimmed and backed it with a mint green card base.


I used a 'Dazzles' brand peel-off sticker in silver for the sentiment.

Ddd


Posted by studio3d@ccgmail.net at 12:01 AM PST
Thursday, 6 March 2014
Five Tree Forest
Topic: Paper Embroidery

For my second card of the Christmas stash-builders I selected a pattern of a forest of trees. I pricked it out on a green holly paper and stitched using three shades of green thread. The star uses golden yellow thread.

I framed it top and bottom with a red chevron.


I decided it needed more to define it as Christmas so I added red rhinestones all over the center tree.

Ddd


Posted by studio3d@ccgmail.net at 12:01 AM PST
Wednesday, 5 March 2014
Baubling Along
Topic: Paper Embroidery

For the February Christmas card stash-builder challenge I chose a free pattern with words and baubles. I used a background ovf words and snowflakes and stitched with metallic threads.

This really comes together quickly.

I used a border of shimmer red cardstock to go with the thread choice.

Ddd


Posted by studio3d@ccgmail.net at 12:01 AM PST

Newer | Latest | Older