« June 2014 »
S M T W T F S
1 2 3 4 5 6 7
8 9 10 11 12 13 14
15 16 17 18 19 20 21
22 23 24 25 26 27 28
29 30
You are not logged in. Log in
Entries by Topic
All topics  «
3D paperwork
A - Z challenge 5
A - Z challenge 7
A - Z challenge round 4
A to Z challenge round 3
A to Z round 2
A to Z round 6
A-Z round 1
Around the House
Art Challenges
Artist Trading Cards
Backgrounds
Beads
Bible Journaling
Books
Boxes
Collage
Color Challenge
Coloring
cookbook
Die Cuts
Digital Projects
Digital Stamps
Drawing
Dry Embossing
Fabric Stuff
Fantastic Folds
Field Trip
Home Decor
How Does Your Garden Grow?
Hymnal Art
In The Kitchen
In the studio
Jewelry
Lettering
Links
Multi-Technique
Music to Work By
Musings
Nail Art
New Work
Online Class
Other Hobbies
Other Projects
Painting
Paper Embroidery
Paper Piecing
Photo
Pretty Paper
Quilting
Random
reading
Scrap Recovery
scrapbooking
Sewing
Sketch Challenge
Some Backlog
Stamping
Stencils
Stickers
Supplies
Teabag Folding
Techniques
Testing
tips and tricks
Tutorial
Web resources
Welcome to my Blog
Work By My Friends
workflow
Writing
Blog Tools
Edit your Blog
Build a Blog
RSS Feed
View Profile
Group One
In & Out of Studio 3D
Tuesday, 10 June 2014
Operation Write Home sketch 76
Topic: Sketch Challenge

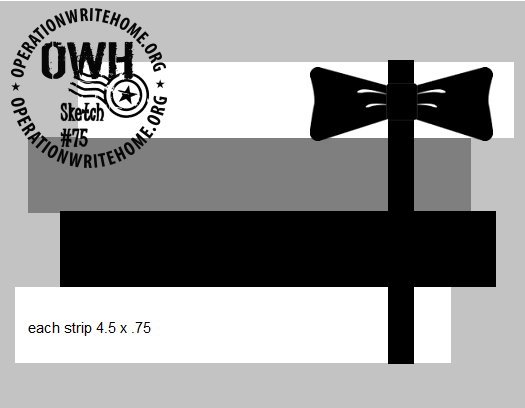
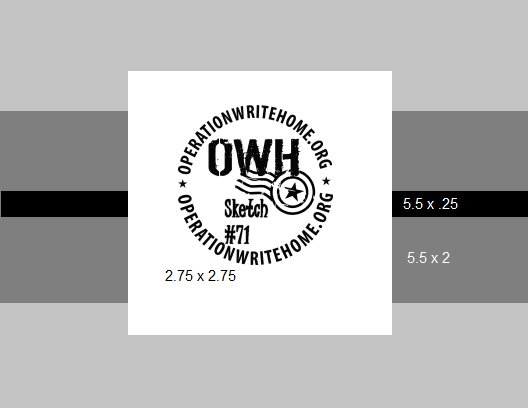
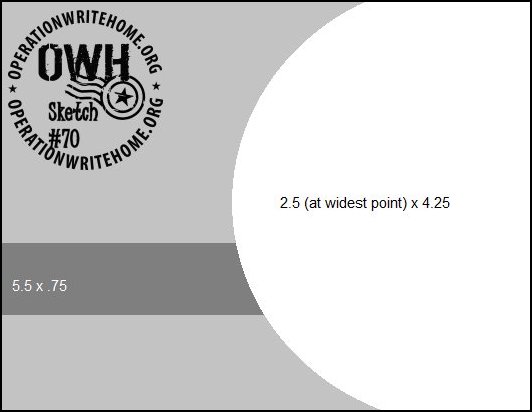
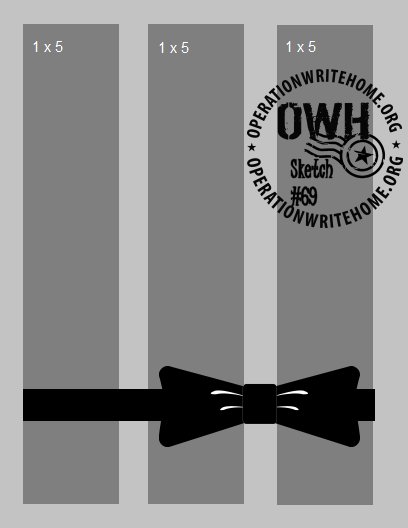
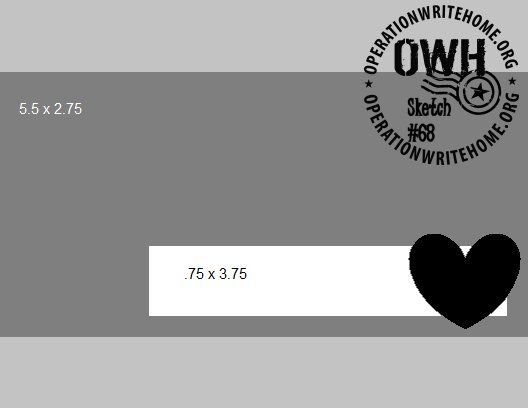
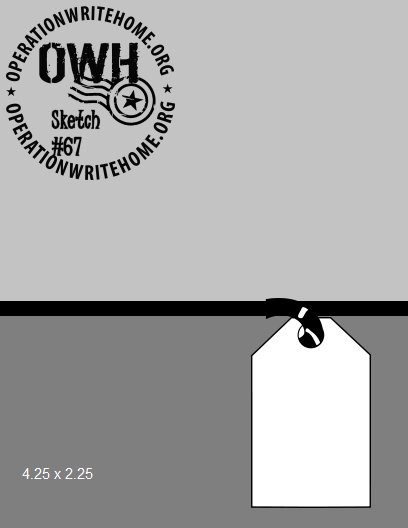
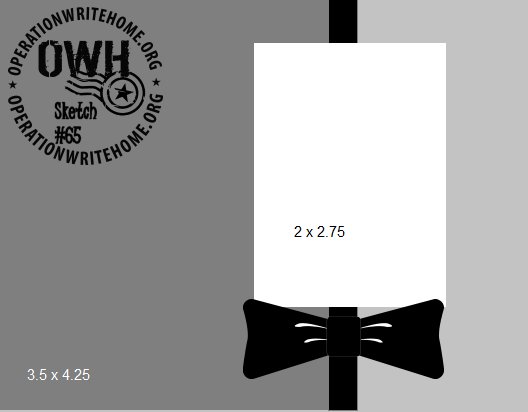
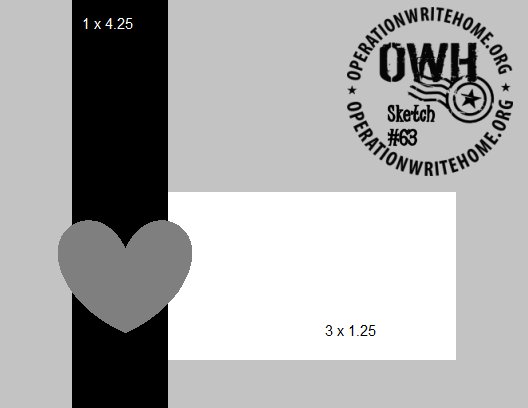
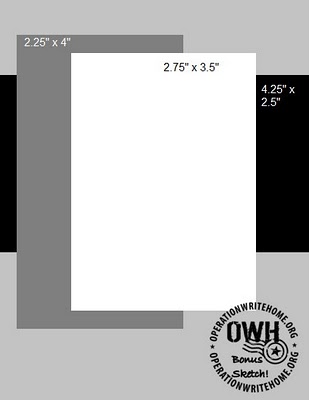
Time for OWH sketch 76:


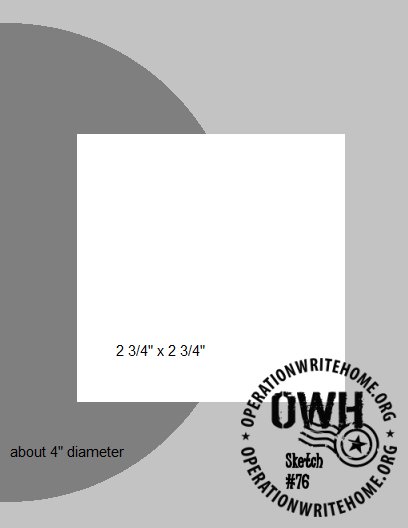
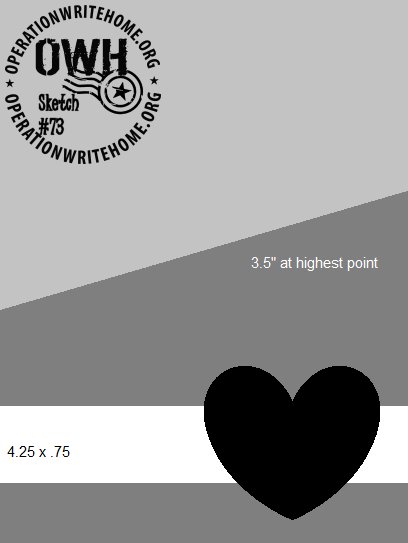
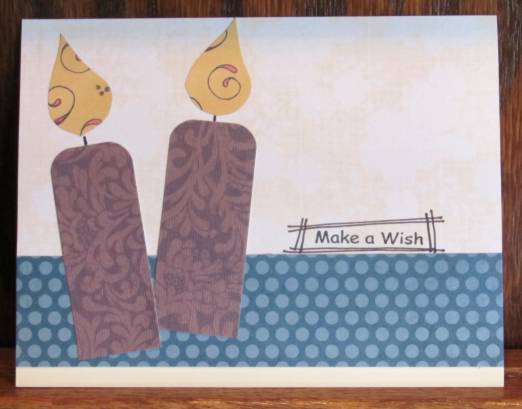
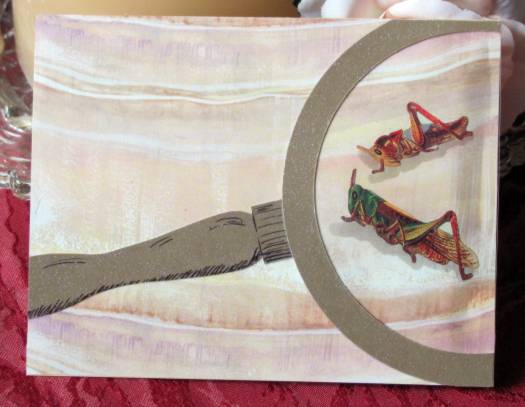
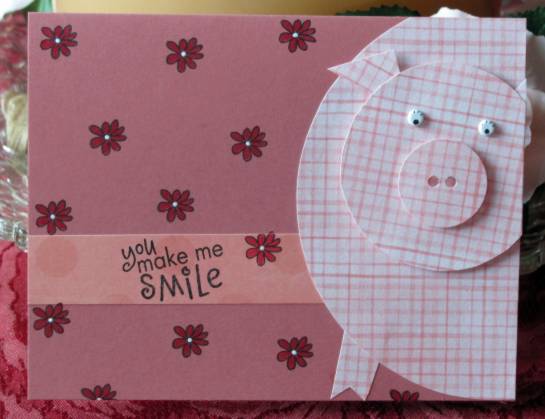
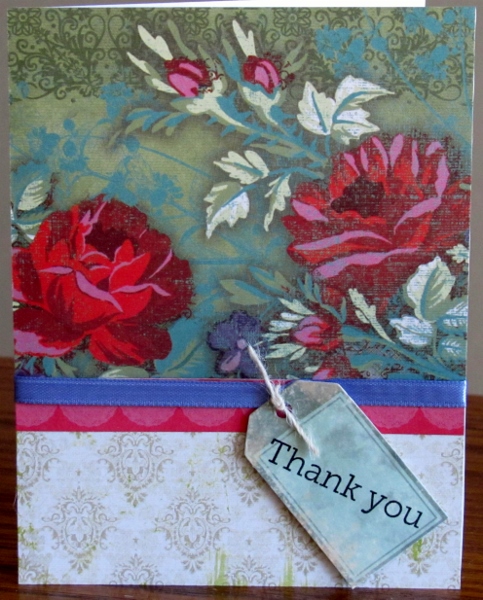
When I first saw this sketch it reminded me of the one with the circle element on the end that I did not too long ago. But I decided not to fuss with turning the circle into anything and played it pretty straight.

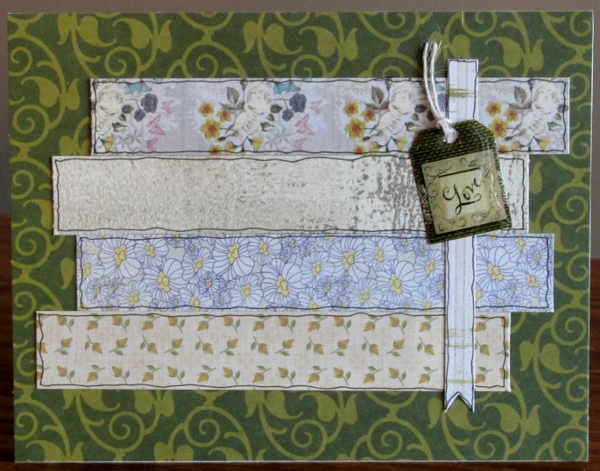
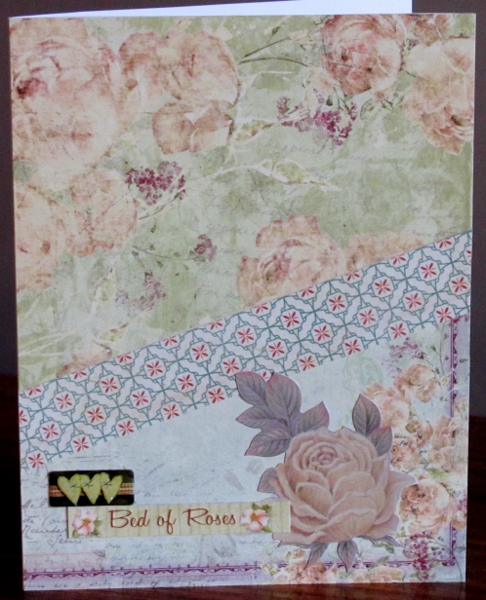
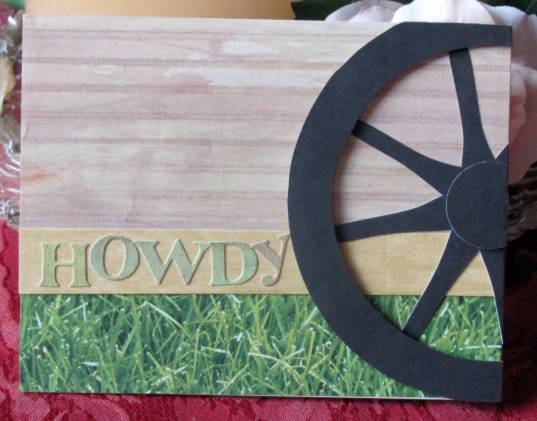
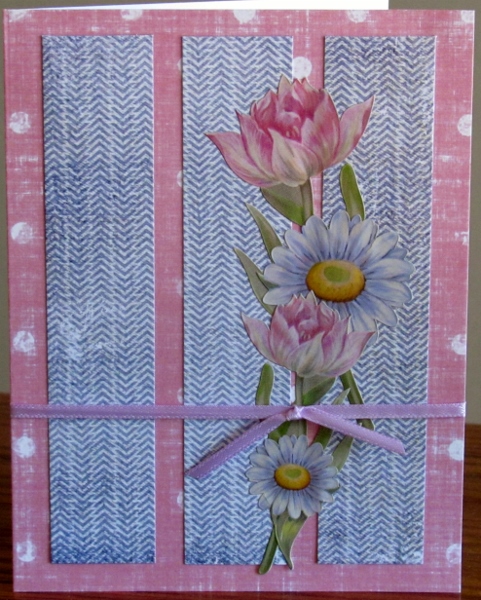
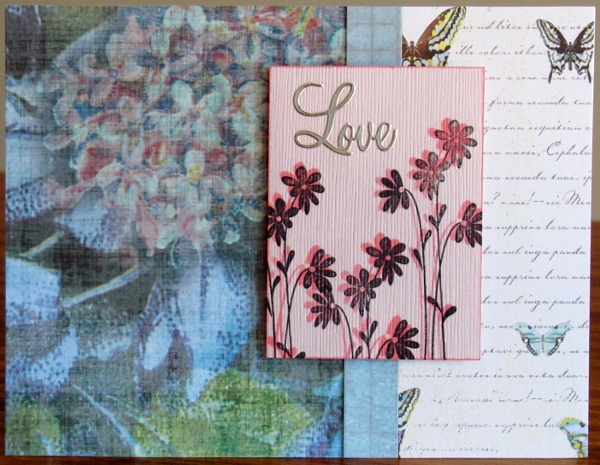
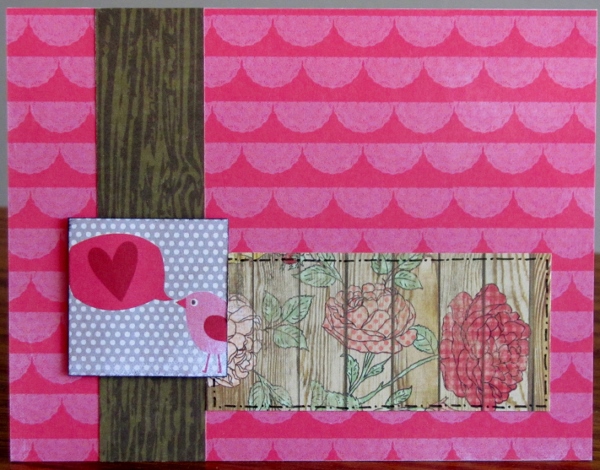
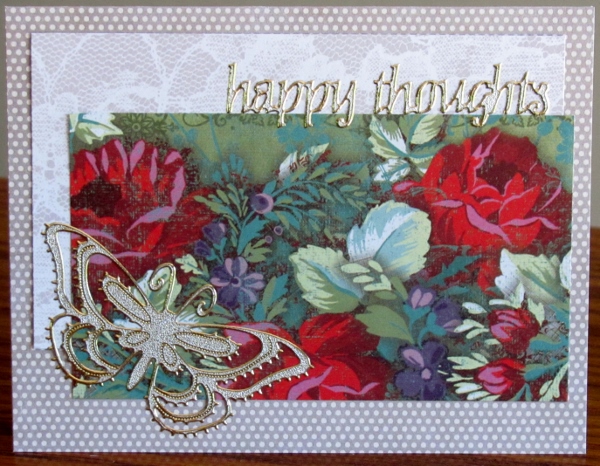
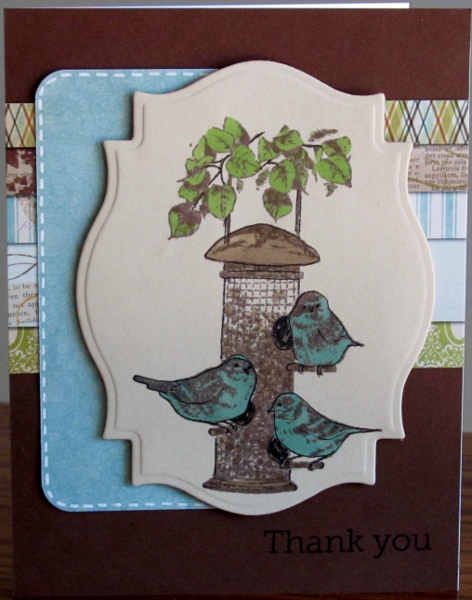
The interest it built through the paper selections. I started with the stripe for the circle then chose the background because the pattern was subtle and it worked well with the neutral in the circle.

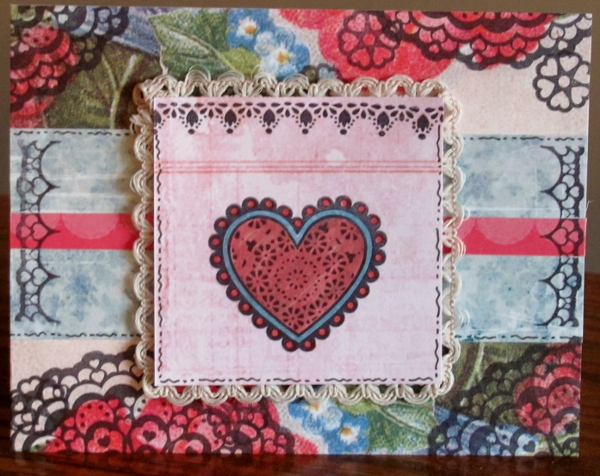
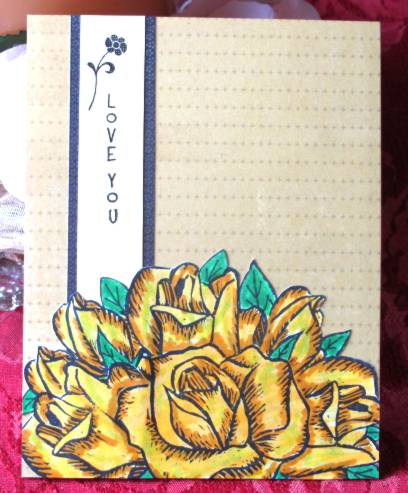
I found the center panel and the blue was a perfect match for the circle. I did have to give it a little border to separate it from the background. Note now the border slides behind the blue floral elements.

The sentiment is made up of cardstock stickers.

This is another case where I am trying to use up some of the scraps I create on a card soon after I cut that initial piece of paper.

Ddd


Posted by studio3d@ccgmail.net at 12:01 AM PDT
Monday, 9 June 2014
Operation Write Home sketch 75
Topic: Sketch Challenge

Yes, that DOES say sketch 75. Can you believe we've come this far?


I should call this card 'no imagination' because it is a straight-up version of the sketch.

I chose a tone on tome green for the background and added strips of alternating yellow-toned and blue-toned papers. I did a bit of fine marker bordering to separate the strips from one another.

Rather than the ribbon called for in the sketch I used a striped paper strip and extended the top and bottom. The botton edge got a banner end and I also used the pen bordering on this.


In place of the bow in the sketch I used a thick acrylic tag sticker and looped twine through the hole.

Ddd


Posted by studio3d@ccgmail.net at 12:01 AM PDT
Sunday, 8 June 2014
Operation Write Home sketch 74
Topic: Sketch Challenge

I'm so glad I started this slef-challenge. It gives me an automatic starting point when I sit down to create and don't know what I want to make. I just open up the sketch, riffle through some papers, select some embellishments and the next thing you know I've got a card.

Today I'm using OWH sketch 74:


As soon as I saw this I knew I wanted to use a new Tim Holtz stamp I had picked up but not used yet. I stamped the globe on a patterned background paper and, since it had those sketchy lines on it I used colored pencils in sketchy lines for coloring. Then I trimmed off all the background around it to turn it into the round elements for the sketch.

Nifty distressed striped papers form the background.

I drew in some axis lines above and below the globe and popped it up on foam tape.

The words are cardstock stickers.

Ddd


Posted by studio3d@ccgmail.net at 12:01 AM PDT
Saturday, 7 June 2014
Operation Write Home sketch 73
Topic: Sketch Challenge

Yep, its another OWH sketch today - this time its number 73:


Keep in mind that a heart or flower on a sketch is a generic element that allows for the use of your choice of embelllishment in that area.

I started with two papers that coordinated, one with an overall floral and one with only corner elements. I laid these together and cut the angle on both at the same time. When one of each paper was nested together at the cut I had the background for two cards at the same time.

The first one uses the over all floral on the top and on the bottom the paper had a right-side bunch of yellow roses. I used the decorative strip on an angle instead of across the bottom like the sketch. The large yellow rose at the bottom is a sticker as are the text and the hearts sticker.

Using the other set of papers, with the floral on the bottom,  I straightened the bottom strip back to the prescribed position and used a semtiment sticker at the angle of the papers.

The floral is a plastic sticker on which I used a fine line black marker to outline all the elements. This made it stand out from the background where it was blending in too much.

Ddd

Posted by studio3d@ccgmail.net at 12:01 AM PDT
Friday, 6 June 2014
Operation Write Home sketch 72 - reprise
Topic: Sketch Challenge

Sketch 72 from OWH is one that I used back on September 22, 2011. It was also another that I liked so much that I made several cards using it.

These are my three favorites:

For the first I cut down the height a bit and rounded the tops on the two uprights so I could add flames. They were canted a little for a little interest.


On this one I added some flourishes and an embellishment over the uprights.

For the last one I rotated the sketch to make a vertical card. The butterfly embellishments are cardstock diecuts and come with the borders on them. I had a vertical sentiment that worked well on this one.


I love it when a sketch is so inspiring.

Ddd


Posted by studio3d@ccgmail.net at 12:01 AM PDT
Updated: Friday, 6 June 2014 7:27 AM PDT
Thursday, 5 June 2014
Operation Write Home sketch 71
Topic: Sketch Challenge

I bought a new stamp set... Okay, I bought it back in February thinking I would make some Valentines. Did I? No! But there is no expiration date on stamps so I finally busted it out and used it.

I was working from OWH sketch 71:

The new stamp set is a collection of doilies and lace elements. YUM!

I selected shabby chic and floral papers and stamped away using a large doily, a heart doily, a small doily and two lace trim stamps. I drew some doodle bordering in black pen and used distress markers to color in the heart doily on the feature.

I also added some real lace trim around the feature panel.

The feature panel is popped up on foam tape.

Ddd

Posted by studio3d@ccgmail.net at 12:01 AM PDT
Wednesday, 4 June 2014
Operation Write Home - sketch 70 (reprise)
Topic: Sketch Challenge

Sketch 70 was only the third one I used from OWH back on September 15, 2011. I remember, having looked at the sketch, driving down the road brainstorming all the things that the half circle could be turned into.

As it turned out I came up with 15 cards based on this sketch. Here, again, are my favorites:


I still like these as much as when I first did them.

Ddd 


Posted by studio3d@ccgmail.net at 12:01 AM PDT
Tuesday, 3 June 2014
Operation Write Home - sketch 69
Topic: Sketch Challenge

"Not much to go on." That was my reaction to OWH sketch 69:

I actually went away from the scraps for this card and selected specific papers to make it. I did follow the sketch for measurements and materials (ribbon) and then used floral stickers to create a focal point that was not referenced at all in the sketch. I used two large and two medium flowers of two different types that coordinated with the colors in the background papers.

I moved the ribbon up a bit to fit between blooms and tied a knot instead of a bow.

Ddd


Posted by studio3d@ccgmail.net at 12:01 AM PDT
Monday, 2 June 2014
Operation Write Home - sketch 68
Topic: Sketch Challenge

OWH sketch 68 was another that I felt was just too simple until I jazed it up with my selection of materials:

I had this silver on white butterfly cardstock that I wanted for the feature panel. It was pretty plain so I went for the lacy background. When I ran across some irridescent butterfly stickers I selected different ones to overlay those printed on the panel.

I used some 'champagne' rhinestones as heads for the butterflies.


I mounted a Dazzles sticker on a dotted paper and mounted it on foam tape.

Ddd


Posted by studio3d@ccgmail.net at 12:01 AM PDT
Sunday, 1 June 2014
Operation Write Home - sketch 67
Topic: Sketch Challenge

Look at me, all 'sticking to the sketch'... sort of. Here is OWH sketch 67:


All I did was change the size of the papers, add an extra strip, add twine and turn the tag on an angle. You still recognize it though, right?

I really wanted to use the rose paper so that became the driving force for all the other changes. It needed to be this size so I wouldn't cut off any flowers. When I added the lower piece it needed something to make the transition so I added the scalloped print. The purple ribbon is straight from the sketch but I needed the twine for attaching the tag.


The tag was selected for color and I stamped it before popping it up on foam tape.

Ddd


Posted by studio3d@ccgmail.net at 12:01 AM PDT
Saturday, 31 May 2014
Operation Write Home - sketch 66
Topic: Sketch Challenge

A little celebration is in order - this is the 7th anniversary of this blog. Since May 31, 2007 I have posted every day - with a few extra posts here and there. That is 'at least' 2,555 blog posts featuring art, crafts, quilting, writing, travel, photos, gardening, and other things that interest me and keep me busy.

I sometimes (often) wonder if anyone ever reads what I post as comments are nearly nonexistant (except for the occasional shout out from my mom or daughter). I have come to the realization that, if this blog continues, I had better be doing it for my own satisfaction and not for any acknowledgement or recognition from outside.

So, Happy Blog-iversary to Me!

And now, on to the project for the day - OWH sketch 66:


This is another card where I had specific paper scraps I wanted to use but they weren't big enough to follow the sketch. So I added some more scraps and pieced the vertical bars more than specified.

I wanted to use a fancy Dazzles butterfly sticker for the feature element but I lowered it for better composition.


As I was digging the waste dots out from the butterfly wings I realized I could use them on the card, too. So I placed them in a line down one of the vertical strips and that pulls it all together.

Ddd


Posted by studio3d@ccgmail.net at 12:01 AM PDT
Friday, 30 May 2014
Operation Write Home - sketch 65
Topic: Sketch Challenge

After so many sketches where I used a lot of artistic license, I have found myself sticking more closely to the prescribed layouts. Such is the case with OWH sketch 65:


In this case I had the two outer papers I wanted to use but they weren't quite as wide as needed. So I did make that vertical strip a bit wider. That kept me from using a ribbon for it as the sketch shows.

I cut a piece of pink paper to coordinate with the colors in the hydrangea. I used a floral stamp on it, making three impressions. The black stamping was too stark so I over-stamped with Distress ink, slightly off register. I used the same ink to tone the panel edges and mounted this up on foam tape.


The text is a silver Dazzles sticker.

Ddd


Posted by studio3d@ccgmail.net at 12:01 AM PDT
Thursday, 29 May 2014
Operation Write Home - sketch 64
Topic: Sketch Challenge

This OWH sketch was, again, extremely simplistic


Well, what can you do with that?

I found a piece from a 12x12 sheet and cut the illustration on it to fir the sketch. One piece of coordinating background was used, though I did move the feature down and to the left so it wouldn't be running off the edges like the sketch.

I wanted to make some reference to the clock in a sentiment so selected two puffy acrylic stickers to use together.

Ddd


Posted by studio3d@ccgmail.net at 12:01 AM PDT
Wednesday, 28 May 2014
Operation Write Home - sketch 63
Topic: Sketch Challenge

Usually a very simple sketch will be a challenge for me and I end up throwing in extras to give it some zing. However, with OWH sketch 63 I stayed the crazy impulses and kept it simple:


How did I manage that, you may ask? By using papers with lots of character! I selected a scallop all-over print for the background. Then I used up more of the woodgrain scraps. The boards had flowers printed on them so that added some interest to the cross-piece. The dotted paper I used yesterday had a little border with birds in the right colors for this card so I cut a square unit from that to replace the heart on the sketch.


I used a black inkpad to enhance the edges of this piece and mounted it on foam tape.

Ddd


Posted by studio3d@ccgmail.net at 12:01 AM PDT
Tuesday, 27 May 2014
Operation Write Home - bonus sketch 62b
Topic: Sketch Challenge

Bonus sketch 'b' from OWH's sketch 62 post looks like this:


At least that's what they say. However, I had a specific paper I wanted to use and it was oriented on the horizontal so I rotated the sketch 1/4 turn to the right.

That special paper was of painted roses and the size was determined by what was already cut. This left more toom for the layer underneath to show so I filled that with a lace print.

I wanted the background to be active but not so busy it would compete with the floral so I decided to use this grey and white dot.


Both the butterfly and the entiment are from one of the new Dazzles sticker sheets I bought.

Ddd


Posted by studio3d@ccgmail.net at 12:01 AM PDT
Monday, 26 May 2014
Operation Write Home - bonus sketch 62a
Topic: Sketch Challenge

When OWH posted sketch 62 on the blog they included two bonus sketches. Since I am trying to create the sketches in order I figured I'd slip these in today and tomorrow.

In my scraps I already had a diecut shape left over from cutting a frame card. I stamped an image on it using brown ink and used alcohol markers to color it in. It needed a bit more definition so I did some line enhancements with a fine black marker.

Also in the scraps I found a paper which I had rounded the corners on and outlined with white dashed lines. This matched my birds so that was a 'go'. Then I found the 'sample sheet' from one of my 6x6 paper pads and the colors were perfect so I cut the crosspiece from that.

Chocolate brown paper for the card base echoed the striped paper as well as the illustration.


The stamped sentiment actually shows better in real life.

Ddd


Posted by studio3d@ccgmail.net at 12:01 AM PDT
Sunday, 25 May 2014
Operation Write Home - sketch 62
Topic: Sketch Challenge

Hey, I'm back with more OWH sketches - working my way through from beginning to end. Today we are up to sketch 62:

I wanted this to be a 'manly' card so I started with papers with woodgrain on them. The background is printed like boards and the frame is just stained wood. I pulled out a paper with a mesh print on it and stamped a star sketch stamp from a new set I bought.

I colored the star with Distress markers then roughed up the panel edges and used Distress ink pad to darken them. 

Three star brads were mounted in place of the single element on the sketch and the panel was popped up on foam tape.

I used a lattice strip across the card bottom and stamped with a sentiment.

I used the same two Distress markers to color in the stars in the sentiment.

Ddd


Posted by studio3d@ccgmail.net at 12:01 AM PDT
Saturday, 24 May 2014
Pinwheel Parade
Topic: Quilting

On the Missouri Star Quilt Company's video tutorials I found one for what they have called disappearing pinwheels - churndash version: (http://www.youtube.com/watch?v=zZUXNMpKF74)

This fascinating construction starts out by facing two contrasting squares together (I used 11 inch) and stitching around all 4 sides with a 1/4 inch seam. Then the blocks are cut on both diagonals and opened up to reveal 4 matching half-square triangles. These are then placed together to form a pinwheel and stitched into a single block. 

I made these pinwheels with six each of red/white and blue/white fabric combinations. Each red and each blue were different fabrics from my stash.

All of the pinwheels got trimmed to 12.75 inches and then were cut into 9-patches of 4.25 inches. I rotated the corner blocks and the side blocks so all the color faced the pinwheel and then swapped the pinwheel centers to the opposite color of block. I then swapped the reds from block to block to make then scrappy and repeated the process with the blue ones. These were all assembled back into churndashes with contrasting pinwheel centers.

I cut strips to frammed the blocks with one-inch of contrasting color and assembled my quilt top with 1/2 inch white sashing. A white border wraps it all up.

The most challenging element of this construction is that, after that initial cut, every seam is on the bias until the block frames go on.

I quilted this in the ditch on the inside of the frames and on the 'tic-tac-toe' lines of the blocks.

Ddd


Posted by studio3d@ccgmail.net at 12:01 AM PDT
Friday, 23 May 2014
Hydrangea Nails
Topic: Nail Art

I needed a new manicure and decided I wanted to do something with sponging which gives a gradient effect. For this to work you need to have at least three related colors of polish. The only ones I had were blue and purple - by chance two shades of each.

The first step is to base coat and then apply the polish you want to be closest to the nail bed over the whole nail. Apply a second coat to the half nearest the cuticle. I chose my darker blue for these coats.

Then a makeup sponge is used to pat on the next color to 3/4 of the nail starting at the tip of the nail, blending as this color ends. This polish was my light blue.

Repeat this process to only half of the nail from the tip up with the next color. This was my light purple.

Finish with the fourth color on only the 1/4 of the nail at the tip. This was my dark purple. Then everything gets one to two coats of topcoat to smooth and seal the nails.

Here is a closeup of the thumb so you can see the way the blend works.


This color combination reminds me of hydrangea blooms which are my favorite flower.

This is a really easy treatment to accomplish - on both hands. Some manicures are hard to do on your dominant hand because of coordination/control issues. But this one only requires patting with the sponge and does not need precision.

Both the dark blue and dark purple are dollar store polishes while the light tones were coupon specials. What a beautiful effect for a bargain price!

Ddd


Posted by studio3d@ccgmail.net at 12:01 AM PDT
Thursday, 22 May 2014
New Residents or Tourists?
Topic: Around the House

We seem to have some new residents in our yard. For a few weeks, this pair of geese have been seen strolling about the back lawn, up the access road, and in the pasture.


Unlike the ducks who have also been frequenting the area, you can't tell who is the 'he' and who is the 'she' as one takes the lead for a while and then the other. Usually one is grazing while the other keeps a watch for danger and then they will switch off.

We assume they are nesting in here since they only appear as a pair and it is the right time of year for that sort of thing. 


We're hoping we'll get to see little goslings waddling around at some time and also hope these will become permanent residents and not just tourists passing through.

The duck pair do have at least three little black and yellow splotched ducklings. I was uable to get a photo of them but did manage to catch dad in a couple of shots.


Mom is there on the left but blends in too well to pick out.

UPDATE: Okay, a few hours after this post went live the mama duck broght out EIGHT babies and herded them up and down the road, right up to the edge of the back lawn.


Aren't they so cute?

Then we had the first visitors to the new birdfeeders we put out off the deck railing. I believe these are goldfinches and we had put thistle seed in the feeder to attract them.


What a lot of fun in our backyard this year!

Ddd


Posted by studio3d@ccgmail.net at 12:01 AM PDT
Updated: Thursday, 22 May 2014 8:26 AM PDT

Newer | Latest | Older