« August 2014 »
S M T W T F S
1 2
3 4 5 6 7 8 9
10 11 12 13 14 15 16
17 18 19 20 21 22 23
24 25 26 27 28 29 30
31
You are not logged in. Log in
Entries by Topic
All topics  «
3D paperwork
A - Z challenge 5
A - Z challenge 7
A - Z challenge round 4
A to Z challenge round 3
A to Z round 2
A to Z round 6
A-Z round 1
Around the House
Art Challenges
Artist Trading Cards
Backgrounds
Beads
Bible Journaling
Books
Boxes
Collage
Color Challenge
Coloring
cookbook
Die Cuts
Digital Projects
Digital Stamps
Drawing
Dry Embossing
Fabric Stuff
Fantastic Folds
Field Trip
Home Decor
How Does Your Garden Grow?
Hymnal Art
In The Kitchen
In the studio
Jewelry
Lettering
Links
Multi-Technique
Music to Work By
Musings
Nail Art
New Work
Online Class
Other Hobbies
Other Projects
Painting
Paper Embroidery
Paper Piecing
Photo
Pretty Paper
Quilting
Random
reading
Scrap Recovery
scrapbooking
Sewing
Sketch Challenge
Some Backlog
Stamping
Stencils
Stickers
Supplies
Teabag Folding
Techniques
Testing
tips and tricks
Tutorial
Web resources
Welcome to my Blog
Work By My Friends
workflow
Writing
Blog Tools
Edit your Blog
Build a Blog
RSS Feed
View Profile
Group One
In & Out of Studio 3D
Saturday, 16 August 2014
Operation Write Home - sketch 131
Topic: Sketch Challenge

Powerless - I was completely powerless. I knew it was coming... I even knew what time it would happen to me. This allowed me to be prepared for what would happen.

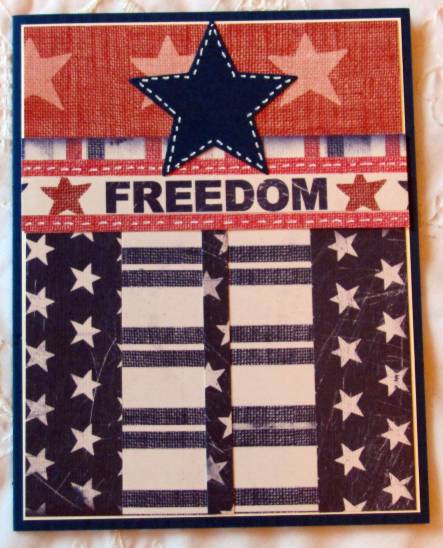
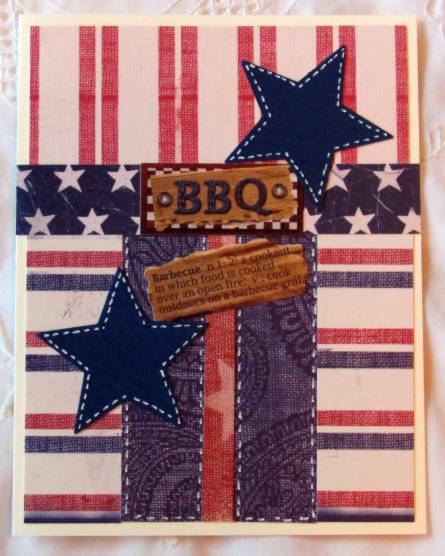
So what did I do to prepare for the day the electrician would shut off all the power to the house for most of the day? I sorted out select card-making supplies from my stash and had hubby schlep them upstairs to the dining room table. I also stamped a slew of images on watercolor paper to color and use on cards.

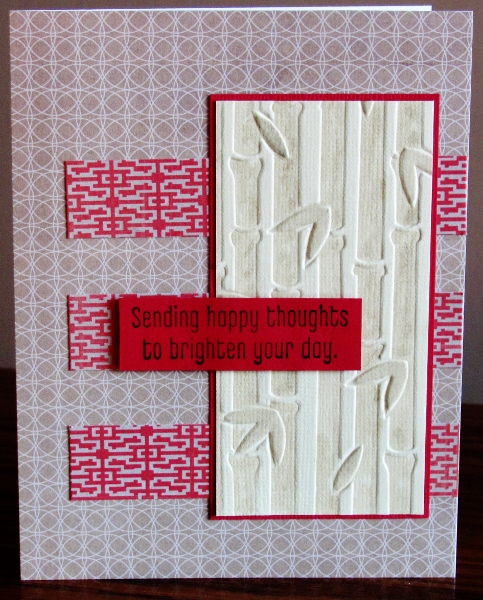
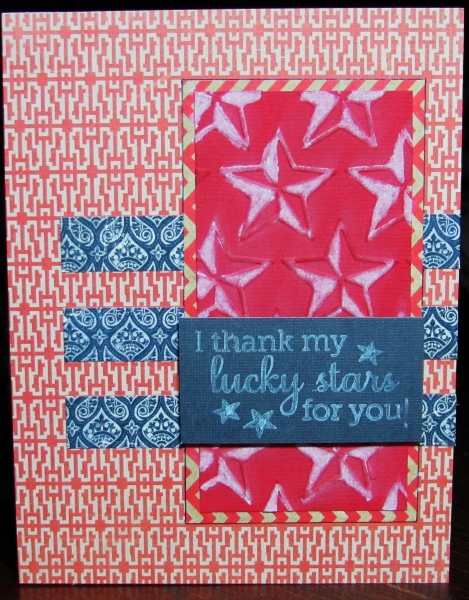
Here's what my set-up looked like for the several hours it took me to turn out 16 cards.

I've got my collection (massive) of stickers, tools including three adhesives, two rulers, craft knife, paper cutter and scissors, bone folder, distressor, aquabrush, acrylic block, pricking tool, foam pad, corner chomper and fine-line markers. I also have various supplies including cardstock in black, white, and a stack of mixed colors. Two pads of pre-cut solid colors plus a wide choice of printed cardstocks round out the paper selections. Embellishments included a selection of rhinestones, brads and tissue tapes. My full complement of watercolor markers and Distress markers rounded out the supplies list.

With the stage set I spent the first part of the day using Distress Markers as watercolor by coloring on an acrylic block and picking up with an aquabrush OR coloring direct to paper with or without a followup with clear water in the aquabrush.

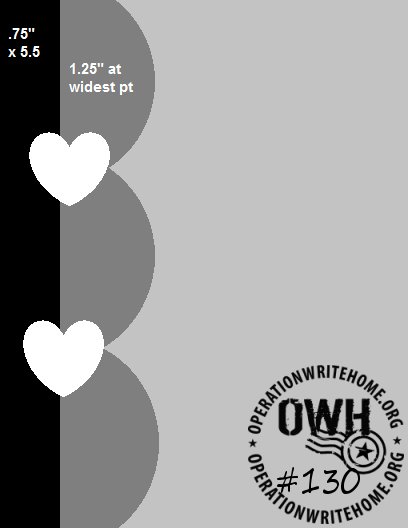
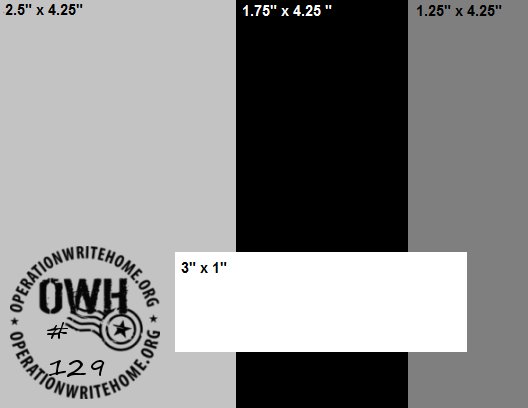
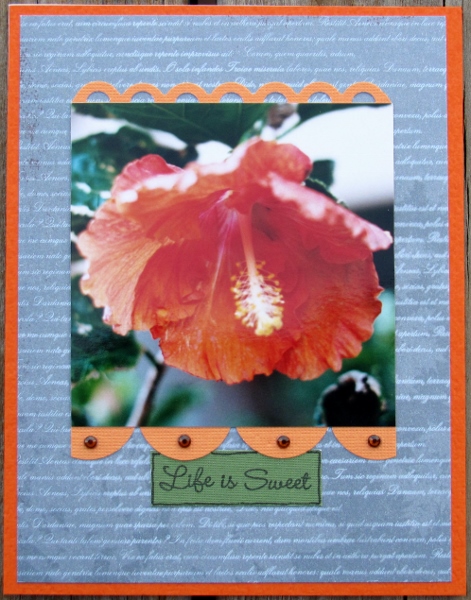
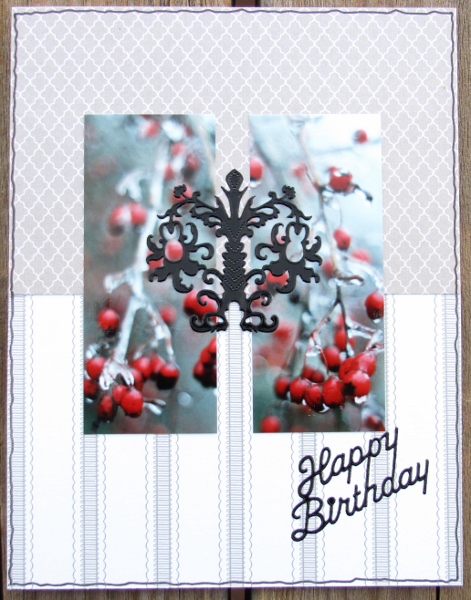
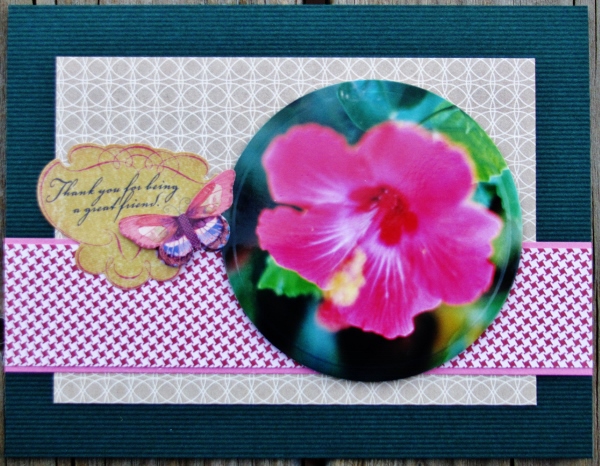
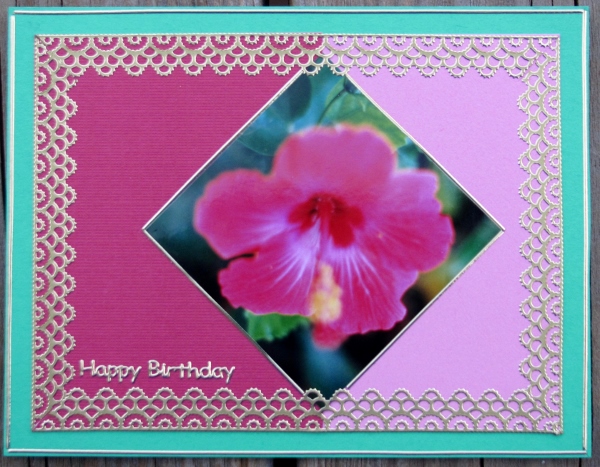
Then I went through the next several OWH sketches, assigning newly colored images to them based on size and orientation. I trimmed them to size and set to work making up the cards.

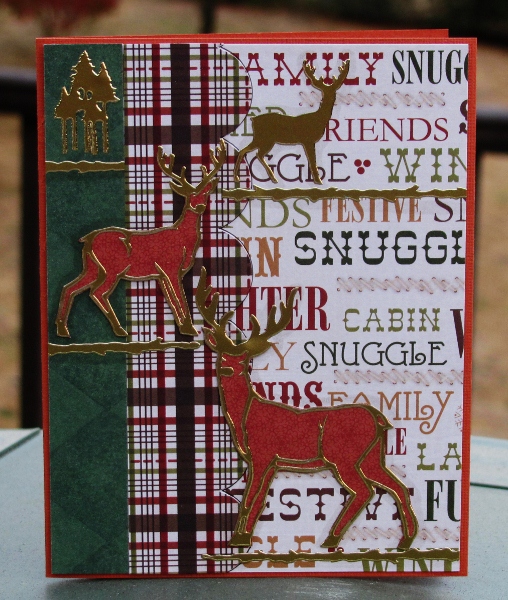
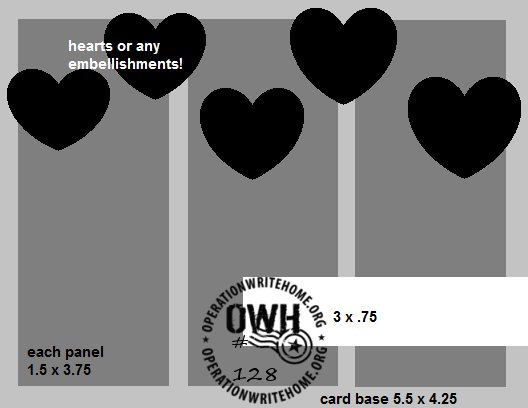
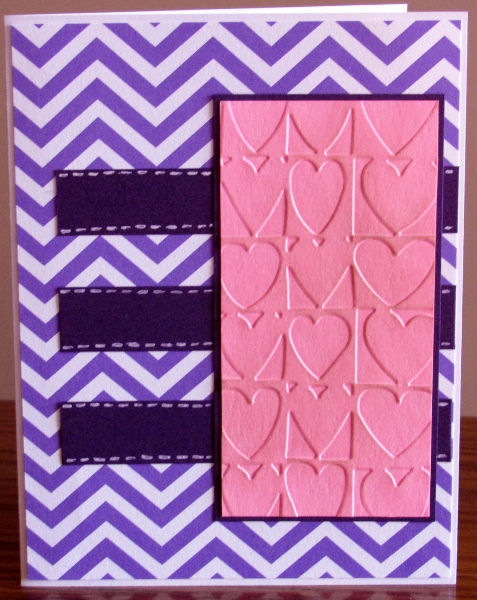
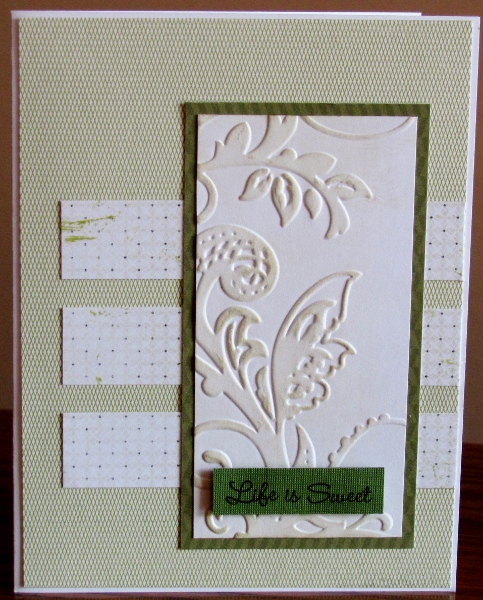
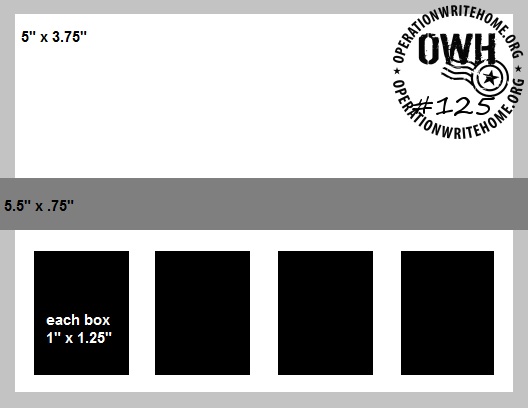
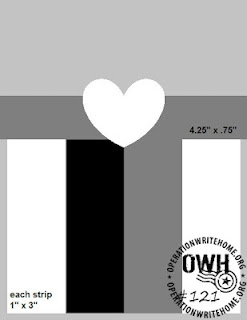
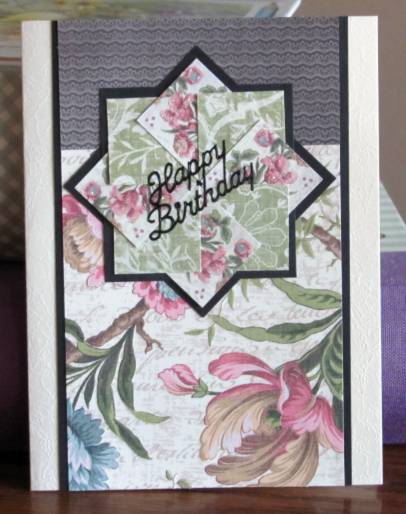
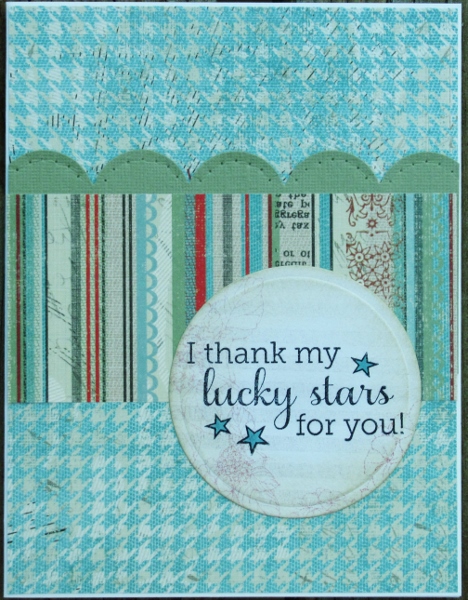
First sketch up for use was OWH 131:

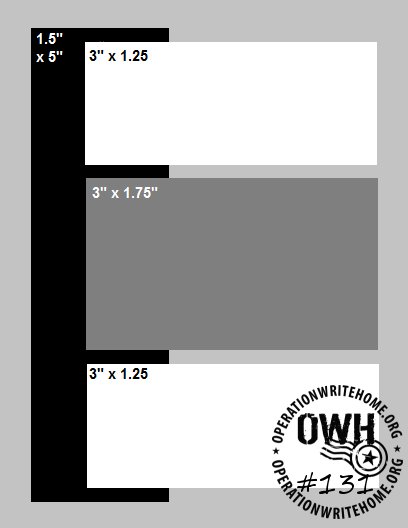
The image I chose for this was a mountain landscape. It had a bit of purple in the coloring so I chose purple for the main background. A strip of green for the vertical bar picks up the color of the grasses and three blocks of woodgrain reinforce the outdoorsy theme.

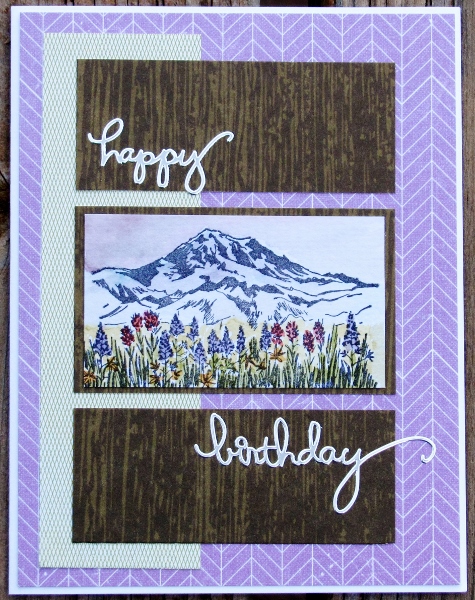
I added some silver peel-off stickers to provide the sentiment.

Ddd


Posted by studio3d@ccgmail.net at 12:01 AM PDT
Friday, 15 August 2014
Operation Write Home - sketch 130 (repeat)
Topic: Sketch Challenge

Another milestone reached - we're at OWH sketch 130:

This is another sketch that I used before - back on October 2, 2012.

I was working on Christmas cards at the time so it has a winter feel to it. I used papers from a coordinating 12x12 stack and decorated with gold Dazzles stickers.

I backed the 'hollow' Dazzles with paper to match the card base.

Ddd


Posted by studio3d@ccgmail.net at 12:01 AM PDT
Thursday, 14 August 2014
Operation Write Home - sketch 129
Topic: Sketch Challenge

Seems simple enough to use OWH sketch 129:

Selected three papers, cut the papers to fit, trimmed them a bit to leave a nice border, attached them together, stuck them to the front of the card.... oops -- upside down! I used plenty of adhesive so they are staying right there.

Hmmm... test out the crosspiece and it looks good on there - with a little added white border.

I just added a 3D butterfly sticker for added interest.

I stamped a sentiment three times and added some drawn lines for emphasis.

Ddd


Posted by studio3d@ccgmail.net at 12:01 AM PDT
Wednesday, 13 August 2014
Operation Write Home - sketch 128 (repeat)
Topic: Sketch Challenge

Time for another reprise of a sketch - OWH 128:


I think this was one of my more inventive uses of a sketch which I used on August 5, 2012.

I made the three blocks into houses and used five clouds for the embellishments across the top. I didn't use quite such a regimented layout either.

A mixture of papers make up the background and I added a sentiment along the bottom border.

Ddd


Posted by studio3d@ccgmail.net at 12:01 AM PDT
Tuesday, 12 August 2014
Operation Write Home - sketch 127
Topic: Sketch Challenge

Simple sketch = elegant finish. that's what I found with OWH sketch 127.


I pulled out another copy of the tropical flower and some recently used table scraps. The asian fret-work print mimics color on the upper edge of the pod and the subtle green strip goes with the background.

I used a bit of purple twine to coordinate with the bits of purple in the flower head.

A touch of white bordering adds to the clean and elegant look.

Ddd


Posted by studio3d@ccgmail.net at 12:01 AM PDT
Monday, 11 August 2014
Operation Write Home - sketch 126
Topic: Sketch Challenge

Just like yesterday, I had a bunch of ideas on using another sketch. This time it is OWH 126:

I decided I wanted to use an embossed panel as the feature for this sketch and selected four of them.

First, I used hot pink with the heart blocks folder. I distressed it with 'old paper' ink to make the embossing stand out more. I bordered this in purple and added a purple chevron background along with three plain purple strips. The strips got some faux stitching with white gel pen.

Next I embossed the bamboo folder on a cream cardstock. I used Distress Markers like watercolors to color up the parts of the bamboo. T carry the Asian theme further, I selected papers with geometric prints in tan and Chinese red. The feature panel is banded in red and the sentiment is stamped on the same red and popped up on foam tape.

I used the star folder to emboss a red cardstock. I then used the 'picket fence' Distress Marker to color the raised areas of the stars. It was a little stark so I used 'old paper' Distress Ink on a blender to tone it down. Red and tan papers are used for background and bordering while a blue print is used for the strips. I colored a sentiment stamp with 'picket fence' marker and huffed on it before stamping on blue cardstock. This block is popped up on foam tape.

This one is my favorite. A floral corner border was embossed onto white cardstock and toned with Distress Ink. This was banded in green to coordinate with a green background and green strips. A simple sentiment stamped on green is popped up on foam tape.

I shall try to restrain myself from making so many multiples... unless I come to a really awesome sketch.

Ddd


Posted by studio3d@ccgmail.net at 12:01 AM PDT
Sunday, 10 August 2014
Operation Write Home - sketch 125
Topic: Sketch Challenge

I love a sketch that generates so many ideas for use. Here's OWH sketch 125:


I had a lot of ideas about what to put in those four boxes but I narrowed it down to just three. First, I pulled a sheet of gold Dazzles butterflies and placed them on grey script-covered rectangles. After combining with several coordinating papers I added gold Dazzles script and a line of 'nail head' stickers.

Next I chose some fun frog stickers and placed them on a large dot paper bordered in black. A green background with a dotted stripe starts off calmly enough but that one jumping frog knocks his block out of line with the others. I carried that up into the stamped sentiment by making it askew as well and then added two green teardrop rhinestones to form a heart.

I went from zany to classy by using vellum stickers of pansies on pale striped paper. These were banded in green to go with the subtle background paper and the band of green printed paper. Everything else is banded in shades of purple like the pansies. I added a stamped sentiment and a hand drawn purple outline.


I won't make quick progress on the sketch self-challenge if I make multiples on many of them but it does add more quickly to the stash of cards to send to Operation Write Home.

Ddd


Posted by studio3d@ccgmail.net at 12:01 AM PDT
Saturday, 9 August 2014
Operation Write Home - sketch 124
Topic: Sketch Challenge

Want a great sketch to feature a large illustration? OWH sketch 124 fits the bill:


There's actually a backstory to the illustration I used. MANY years ago I was fascinated with 'watercolor quilts' and wanted to try my hand at that sort of design without actually quilting anything. So I turned to wallpaper sample books. I took several pages of coordinating patterns and cut them into 1-inch squares. Then I sorted them by how much and where they had the flowers: were they half on the diagonal, half on the square, only a tip, completely covered, just a leaf or part of one and so on.

Then I drew a large heart on half a sheet of watercolor paper and arranged the bits of wallpaper as shown. When they were all in place I took them off one-by-one and used Mod Podge to adhere them to the watercolor paper and seal it.

Then, before I sent it off as a gift I took photos of it. This photo is the result.

For this card, I had to cut the top and botom from the photo a bit but needed it wider than the sketch so as to not cut off any of the heart. I used a backing paper with a bottom scallop to enlarge the square closer to the sketch dimensions.

Backing and accent colors were drawn from the photo.

The sentiment is one I had in my pre-stamped file. I simply trimmed it and matched its border to that on the heart photo.

Ddd


Posted by studio3d@ccgmail.net at 12:01 AM PDT
Friday, 8 August 2014
Operation Write Home - sketch 123
Topic: Sketch Challenge

I am very fond of the OWH sketch numbered 123:

This very graphic layout just spoke to me and I decided to recreate it in shades of gray like the sketch. My grays all have a brownish cast to them but they all work together anyway. I cut the pieces as prescribed and then decided they all needed a bit of black border to separate them.


The single pop of color is the heart stamped in black onto red paper and trimmed out with a thin red border.

So simple - so elegant.

Ddd


Posted by studio3d@ccgmail.net at 12:01 AM PDT
Thursday, 7 August 2014
Opeeration Write Home - sketch 122
Topic: Sketch Challenge

It's an original!

I came to another sketch that I had NOT used before in OWH sketch 122:

I had another photo of a flower from my 'taken long ago' stash and wanted to use it for this sketch. This necessitated my rotating the sketch a quarter turn clockwise.

I pulled colors from the photo - purple, orange and green - and used these to select papers. What I discovered is how little orange I have in my printed papers.

The gridded lavender background paper makes a great base for the linear elements on the rest of the card. I reinforced this with a purple outline on the card base and around the photo.

This is not a frilly flower so is more masculine than most.

The sentiment is stamped.

Ddd


Posted by studio3d@ccgmail.net at 12:01 AM PDT
Wednesday, 6 August 2014
Operation Write Home - sketch 121 - repeat
Topic: Sketch Challenge

Another day off for me! I get to re-post a card from May 18, 2012, made with OWH sketch 121.

Although this sketch shows three different papers in the lower four spaces, I didn't like that and in all of the miriad cards that I made, I used a symetrical layout. I also did all of the cards using a BIG stack of patriotic papers - most of which look like they are woven fabric.

In some cases, I added other embellishments to change up the look a bit.

I found that a small divider between the center strips made them more defined.

Ddd


Posted by studio3d@ccgmail.net at 12:01 AM PDT
Tuesday, 5 August 2014
Operation Write Home - sketch 120 - repeat
Topic: Sketch Challenge

Before I started this challenge I didn't realize how many of the OWH sketches I had used before! Here is a reprise of sketch 120 from May 15, 2012.

I actually did a ton of these but used up scraps to create a pinwheel in place of the oval. These sometimes got stickers for sentiments or other sticker decorations on the card. Also, some of the cards were used with the sketch upside down.

Here are a couple from that session:


By chance, these two favorites use the same floral background paper.

Ddd


Posted by studio3d@ccgmail.net at 12:01 AM PDT
Monday, 4 August 2014
Operation Write Home - sketch 119
Topic: Sketch Challenge

I had some confusion over whether I had used this sketch before or not. The sketch was in my blog folder for 2012 but in the day by day photos I cannot find a card that looks anything like it.

So, I did a new card for OWH sketch 119:

I see that the upper paper in the sketch is part of the background but I just made the top and bottom strips the same. My scallop punch leaves little indents around the edge - but not consistently deep - so I went back with a craft pick and turned them into holes.

The circle element was die cut and embossed in my Cuttlebug  with a Spellbinders die. Then I darkened the edges with Distress Ink and stamped the sentiment.

I used Distress Marker to color the stars to match the houndstooth background paper.

Ddd


Posted by studio3d@ccgmail.net at 12:01 AM PDT
Sunday, 3 August 2014
Sparkle and Shine
Topic: Nail Art

I like to celebrate the WHOLE summer with red, white and blue in my house and, if my nails are long enough to do up, that theme carries over onto them.

Though not as long as I like them to be with a real flashy treatment, I did have a go at them. 

I began with a double doat of blue and red, working from opposite ends of the nails on alternate fingers. Then I layered on a coat of silver glitter that just lets the color peek through.

A couple of coats of clear topcoat smooths out the rough texture left by the glitter.

These will last a couple of weeks and then I'll have to think of something new for the last few weeks of summer. What to do?

Ddd


Posted by studio3d@ccgmail.net at 12:01 AM PDT
Saturday, 2 August 2014
Orange You Glad
Topic: Scrap Recovery

I recently took on the task of reviewing every photo we own and organizing them by topic. We had generally printed duplicates of every roll so we would have some to send to relatives but this meant I had a lot of duplicates that were never used. I tossed all redundant ones, blurry ones, and random 'whatever' shots.

I also culled out what I called 'artistic' pictures - usually photos of flowers that were taken who-knows-where and who-knows-when. These got put in an envelope to use in crafting.

So, it was time to make some cards and I decided to use florals as the feature element for a while.

First up is a close-up of a hibiscus - one of my favorite flowers. This one was in bright orange, which is a color I don't commonly use on my cards. I selected a muted orange patterned paper and did a straightforward framing of the whole photo.

I added some gold peel-off stickers of butterflies and a vine as accents.

Ddd


Posted by studio3d@ccgmail.net at 12:01 AM PDT
Updated: Tuesday, 15 July 2014 7:15 AM PDT
Friday, 1 August 2014
Operation Write Home - Sketch 118
Topic: Sketch Challenge

A new month today but still the same project! Moving on to OWH sketch 118:

I like the little scallops in the sketch and find that I don't use them as often as I probably should. I have two great scallop punches and decided to use them both to create a little more interest.

I had one more of the photos and it happened to be the same one that I started the whole process with - the orange hibiscus.

I brought back the orange background and covered this with a grey beaturing white text print. This created a calm setting for the floral banded on the top and bottom by those punched scallops.

I shifted the feature toward the top of the card so I had room to add a stamped and bordered sentiment panel at the bottom. Some orange rhinestones in the centers of the large scallops are the finishing touch.

Ddd


Posted by studio3d@ccgmail.net at 12:01 AM PDT
Thursday, 31 July 2014
Operation Write Home - Sketch 117
Topic: Sketch Challenge

Well, now! This is a sketch that is really different from the norm. Here is OWH sketch 117:

Yes, I had more photos - this time a duplicate of the icy berry branch. I cut it into two for the vertical bars. Then I found two papers with greys that match the photo and assembled to this point.

I couldn't bring myself to plop a big round element in the center, covering so much of the photo elements. In its place I used a 'round-ish' black Dazzles sticker that evokes the feeling of tree branches.


I added a black peel-off sticker for the sentiment and a doodle line with black marker for framing.

Ddd


Posted by studio3d@ccgmail.net at 12:01 AM PDT
Wednesday, 30 July 2014
Operation Write Home - Sketch 116
Topic: Sketch Challenge

On with the show - time for OWH sketch 116:

Still with some photos on hand I used one for the round element on this card. The background on the card is really a forest green - what is with this silly camera?

The background paper is filled with overlapping circles that echo the round floral. The pink and red patterned paper underlines the floral which has a border impressed into it.

I needed room for the sentiment sticker on the left so the round floral was pushed to the right. I also popped it up on foam tape to match the level of the 3D sticker.

Ddd


Posted by studio3d@ccgmail.net at 12:01 AM PDT
Tuesday, 29 July 2014
Operation Write Home - Sketch 115
Topic: Sketch Challenge

Now up to OWH sketch 115 in this long self-challenge:


Another flower photo, this time in soft pink, became the focus for this sketch. I used a large block of pink for the middle ground and set this against a field of red patterned paper. A black doodle line sets them apart.

A strip of green with a leafy pattern echoes the photo. This follows the sketch pretty faithfully.

I used a gold Dazzles sticker for the sentiment.

Ddd


Posted by studio3d@ccgmail.net at 12:01 AM PDT
Monday, 28 July 2014
Operation Write Home - Sketch 114
Topic: Sketch Challenge

OWH sketch 114 is 'not quite lopsided enough' in my opinion:

You can see the diamond is off center but it is at a place where one is not quite sure if it was meant to be centered but didn't quite make it. I should have just slid it all over where it looked better but I stuck with the sketch measurements.

I started by selecting two pinks in solids to maintain the graphic look of the sketch. A bright green (yes, green not aqua like it looks in the photo) background matches the photo.

Then I used some lacy gold peel-off sticker trim to create a frame. Some fine line gold sticker frames the green background.

The sentiment is also gold peel-off sticker.

Ddd


Posted by studio3d@ccgmail.net at 12:01 AM PDT

Newer | Latest | Older