« April 2015 »
S M T W T F S
1 2 3 4
5 6 7 8 9 10 11
12 13 14 15 16 17 18
19 20 21 22 23 24 25
26 27 28 29 30
You are not logged in. Log in
Entries by Topic
All topics  «
3D paperwork
A - Z challenge 5
A - Z challenge 7
A - Z challenge round 4
A to Z challenge round 3
A to Z round 2
A to Z round 6
A-Z round 1
Around the House
Art Challenges
Artist Trading Cards
Backgrounds
Beads
Bible Journaling
Books
Boxes
Collage
Color Challenge
Coloring
cookbook
Die Cuts
Digital Projects
Digital Stamps
Drawing
Dry Embossing
Fabric Stuff
Fantastic Folds
Field Trip
Home Decor
How Does Your Garden Grow?
Hymnal Art
In The Kitchen
In the studio
Jewelry
Lettering
Links
Multi-Technique
Music to Work By
Musings
Nail Art
New Work
Online Class
Other Hobbies
Other Projects
Painting
Paper Embroidery
Paper Piecing
Photo
Pretty Paper
Quilting
Random
reading
Scrap Recovery
scrapbooking
Sewing
Sketch Challenge
Some Backlog
Stamping
Stencils
Stickers
Supplies
Teabag Folding
Techniques
Testing
tips and tricks
Tutorial
Web resources
Welcome to my Blog
Work By My Friends
workflow
Writing
Blog Tools
Edit your Blog
Build a Blog
RSS Feed
View Profile
Group One
In & Out of Studio 3D
Monday, 13 April 2015
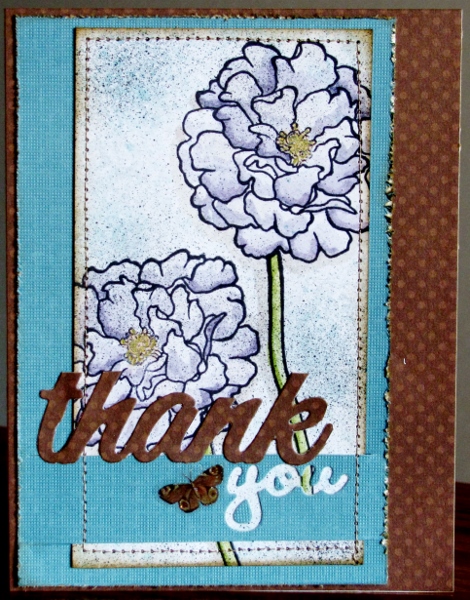
12 Tags of 2015 - April - version 3
Topic: Multi-Technique

We're still working on April in the projects inspired by Tim's 12 Tags of 2015.

As a reminder - this is Tim's version:
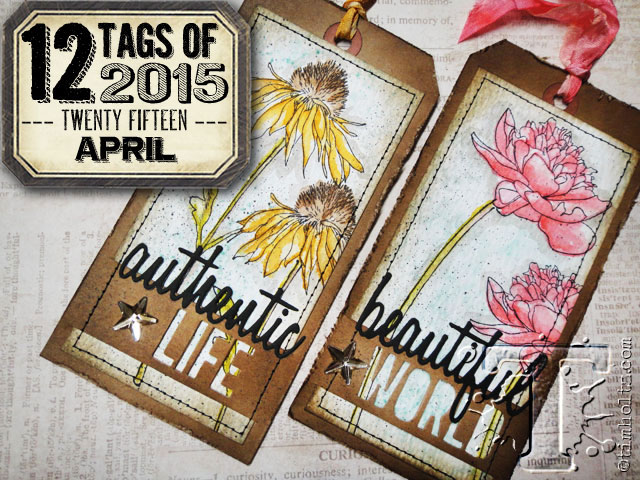
Here is the process for my third card:

-cut watercolor paper

-stamp flower heads and stems with Archival Ink in jet black

-mist paper with water

-use bulb sprayer to apply two colors of Distress Ink to background

-dry with heat tool

-use darker Distress Marker to draw partial outline on some of the petals

-use aquabrush to pull color into the petal

-dry

-scribble that color and another lighter one on acrylic block

-use aquabrush to color the petals with these inks

-use same process for stems

-dry

-use Pumice Stone distress marker scribbled on acrylic block to aquabrush a drop shadow around flowers and stems

-ink outer edges of paper with dark distress ink using a foam tool

-put black soot Distress Marker in bulb sprayer

-lightly speckle the background

-cut a backing piece

-ink edges with dark distress ink

-use die to cut out words

-cut a slit above and below the words

-feed the floral behind the diecut strip

-use sewing machine to stitch around all four edges of floral tag

-diecut another word from matching paper

-use very fine line marker to faintly outline the diecut areas and words to separate from the background

-use some of the floral marker ink to watercolor inside the cutout diecut area

-adhere whole to a card base coordinating with the florals

And here is the resulting third card:
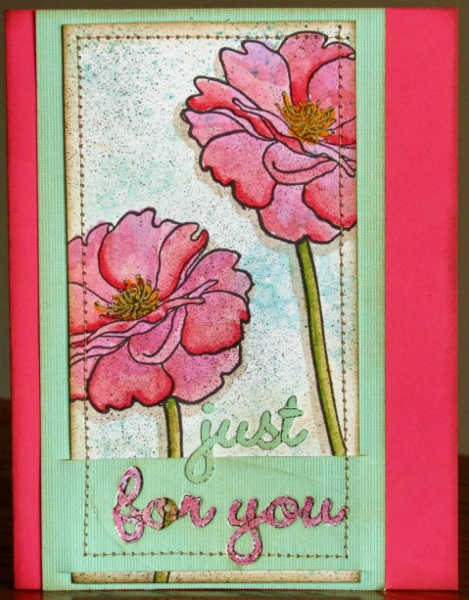
So, these were the three versions I made from Tim's directions.

Ddd

Posted by studio3d@ccgmail.net at 12:01 AM PDT
Sunday, 12 April 2015
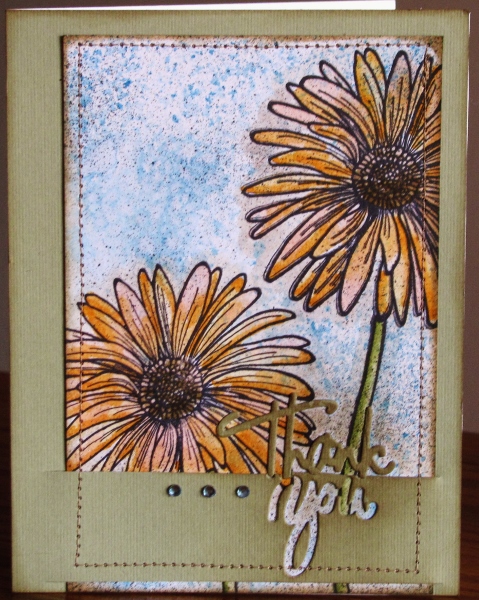
12 Tags of 2015 - April - version 2
Topic: Multi-Technique

Continung with my creations inspired by Tim's 12 Tags of 2015. We're working on April.

As a reminder - this is Tim's version:

Here is the process for my second version:

-cut watercolor paper

-stamp flower heads and stems with Archival Ink in jet black

-mist paper with water

-use bulb sprayer to apply two colors of Distress Ink to background

-dry with heat tool

-use darker Distress Marker to draw partial outline on some of the petals

-use aquabrush to pull color into the petal

-dry

-scribble that color and another lighter one on acrylic block

-use aquabrush to color the petals with these inks

-use same process for stems

-dry

-use Pumice Stone distress marker scribbled on acrylic block to aquabrush a drop shadow around flowers and stems

-ink outer edges of paper with dark distress ink using a foam tool

-put black soot Distress Marker in bulb sprayer

-lightly speckle the background

-cut a backing piece the size of the card front

-ink edges with dark distress ink

-use die to cut out word

-cut a slit above and below the word

-feed the floral behind the diecut strip

-use sewing machine to stitch around all four edges of floral tag

-diecut a word from matching paper

-attach rhinestones to front of diecut strip

-adhere whole to a card base

That being said, here is the resulting second card:

Version 3 will be up tomorrow.

Ddd

Posted by studio3d@ccgmail.net at 12:01 AM PDT
Saturday, 11 April 2015
12 Tags of 2015 - April - version 1
Topic: Multi-Technique

Time for another creation inspired by Tim's 12 Tags of 2015. We're now up to April.

This is Tim's version:

I made three cards from this inspiration but will only show one today (saving the others for the next couple of days). Here is the process:

-cut watercolor paper

-stamp flower heads and stems with Archival Ink in jet black

-mist paper with water

-use bulb sprayer to apply two colors of Distress Ink to background

-dry with heat tool

-use darker Distress Marker to draw partial outline on some of the petals

-use aquabrush to pull color into the petal

-dry

-scribble that color and another lighter one on acrylic block

-use aquabrush to color the petals with these inks

-use same process for stems

-dry

-use Pumice Stone distress marker scribbled on acrylic block to aquabrush a drop shadow around flowers and stems

-ink outer edges of paper with dark distress ink using a foam tool

-put black soot Distress Marker in bulb sprayer

-lightly speckle the background

-cut a backing piece

-use distress tool on edges

-ink edges with dark distress ink

-use die to cut out word

-cut a slit above and below the word

-feed the floral behind the diecut strip

-use sewing machine to stitch around all four edges of floral tag

-diecut a word from dark paper

-attach an embellishment to front of diecut strip

-adhere whole to a card base

That being said, here is the resulting first card:

Back tomorrow with version 2.

Ddd

Posted by studio3d@ccgmail.net at 12:01 AM PDT
Friday, 10 April 2015
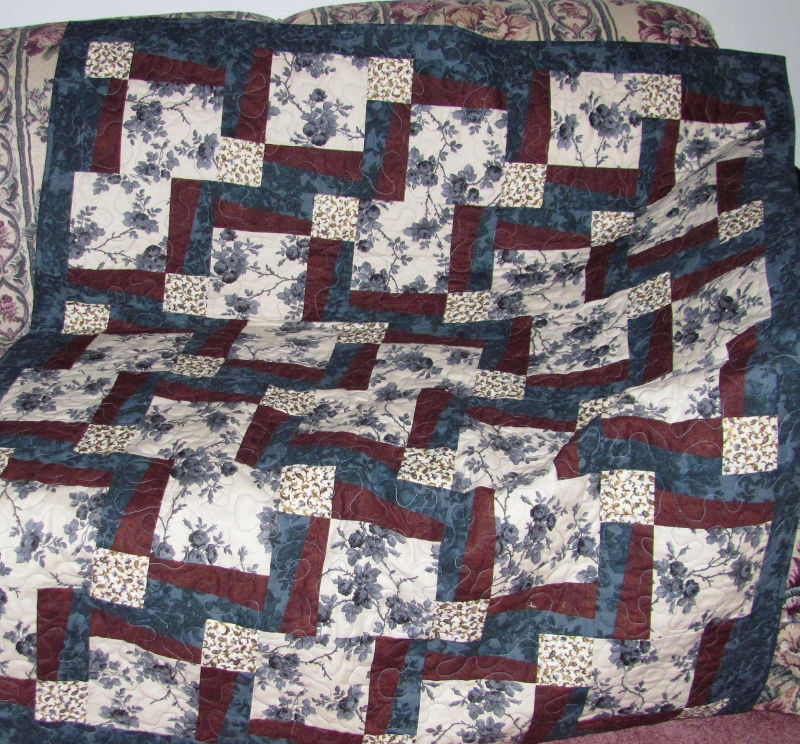
Heaven and Earth
Topic: Quilting

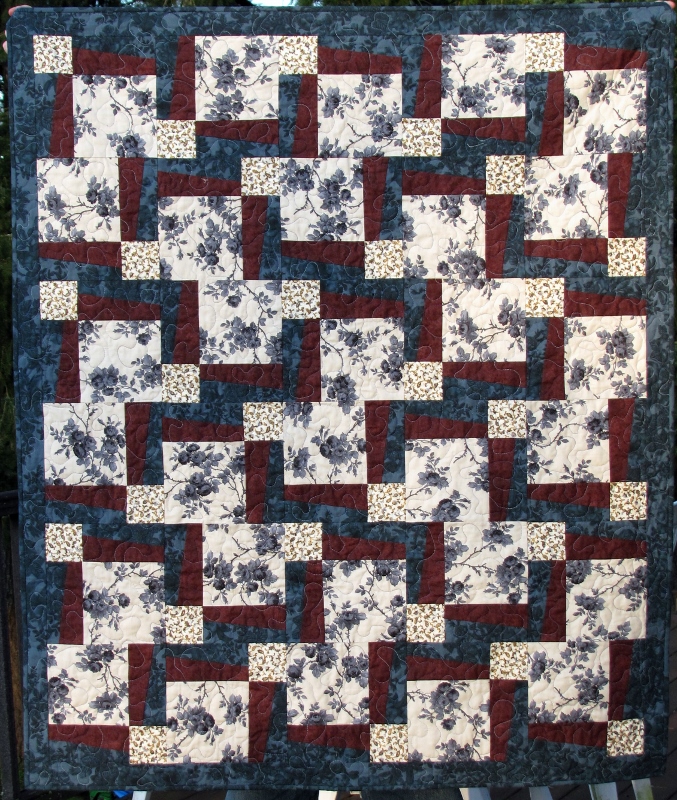
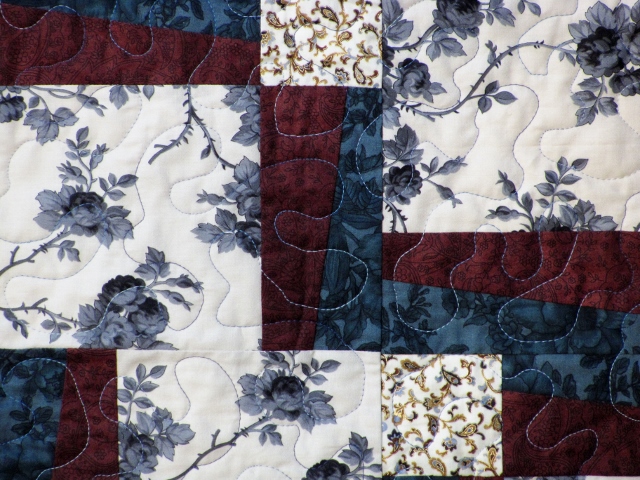
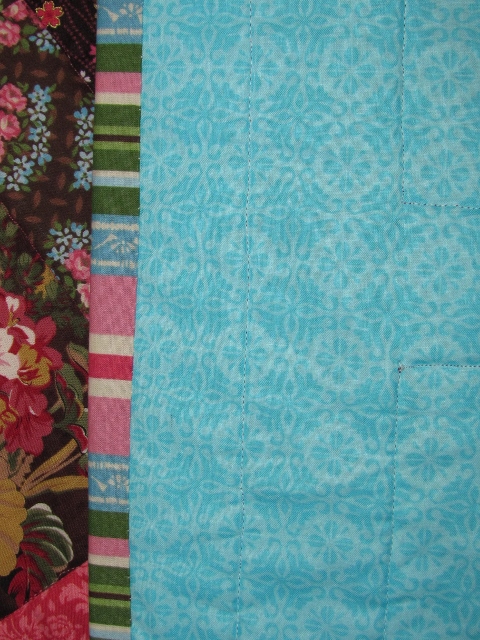
I've been wanting to do a blue and brown quilt for a long time. Love that color combination. I designed this one around the toile. WHY was this fabric in the 'bargain bin'? It's beautiful!


The pattern is from Nancy Zieman's 'Big Blocks' book, in the smaller size.

The quilt finished at 49 x 58.

So why that title? It recognizes the blue of the sky and the brown of the earth. Also, Mom noticed the zig zags like lightening bolts and I notice the flowers.


I quilted with blue verigated thread in a medium meander.

The backing is the same dark blue used on the front, as is the binding.

Ddd

Posted by studio3d@ccgmail.net at 12:01 AM PDT
Thursday, 9 April 2015
Rewind
Topic: Sketch Challenge

Remember this?


You should... it's only been 3 days since I posted it.

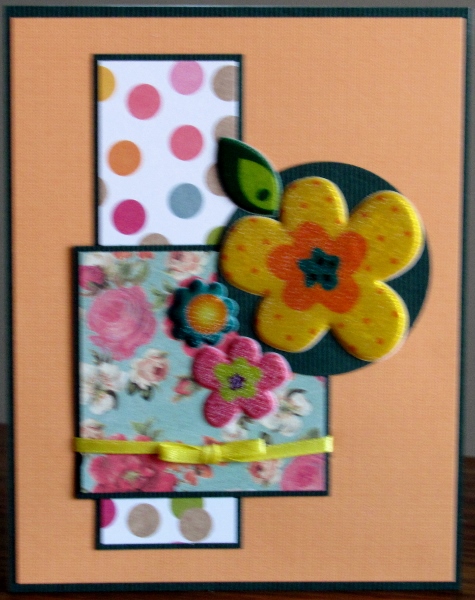
If you do remember it you'll probably also remember that I was very disappointed in its outcome. It bugged me so much that I decided to re-work it.

I took off the yellow roses cluster sticker and replaced it with a yellow puffy acrylic flower. That set of stickers had some smaller blooms, too, so I included two of those spilling over into the floral paper. Only one leaf on the sticker sheet and it was used on the top of the main bloom.

I like this MUCH better. The only drawback is the surface of the flowers is textured and reflective and my camera absolutely refuses to focus properly. Impossible to get a good clear photo of this.

Anyway, here's the new version:


I'm satisfied, now.

Ddd


Posted by studio3d@ccgmail.net at 12:01 AM PDT
Wednesday, 8 April 2015
Operation Write Home - sketch 204
Topic: Sketch Challenge

And finally, at the end of 12 days we have the final sketch of this run - OWH sketch 204:

Hey, look at me - following the sketch and all!

I liked the calm, subdued look I achieved yesterday and decided to continue in that vein.

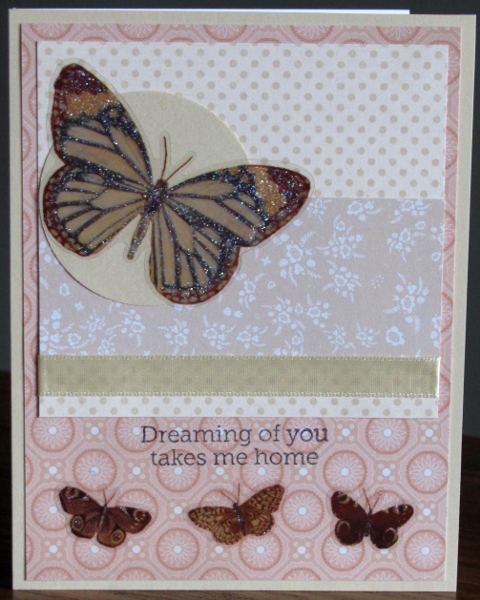
I started with the large butterfly sticker and added papers that were in the same palette - but lighter. Soft coral, taupe, cream and kraft make up the colors I selected. I combined dots and florals, too.

I added a cream satin ribbon where indicated on the sketch and selected three smaller butterflies for the embellishments at the bottom.

Ddd


Posted by studio3d@ccgmail.net at 12:01 AM PDT
Tuesday, 7 April 2015
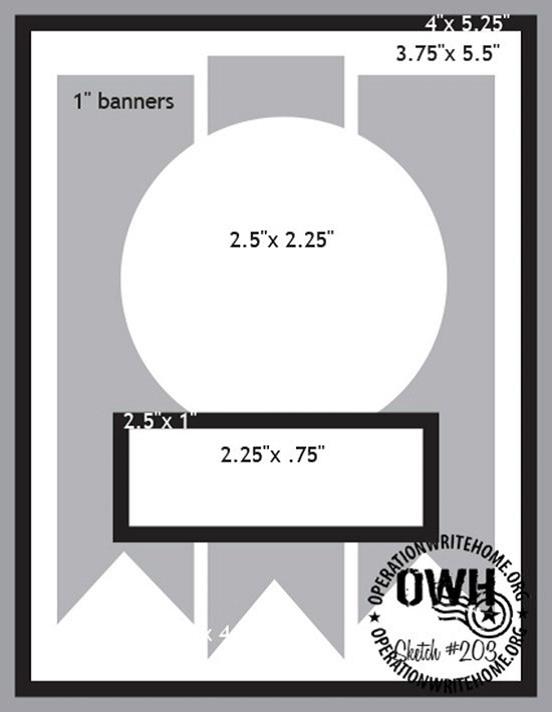
Operation Write Home - sketch 203
Topic: Sketch Challenge

I think OWH sketch 203 is one I can use to redeem myself from yesterday:

Yesterday I used all bright papers so I decided to swing completely opposite and go with muted patterns instead.

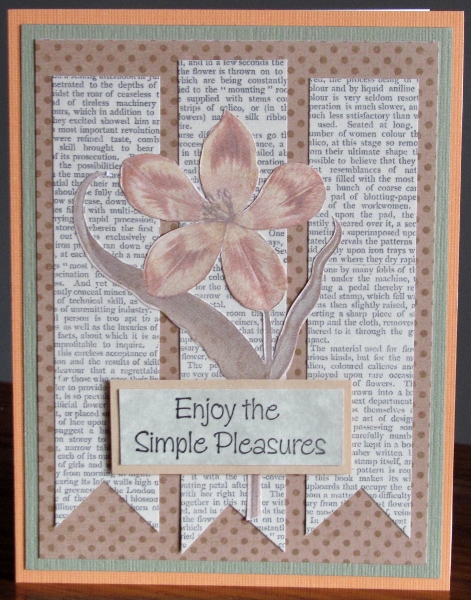
I started with the selection of a flower sticker with a circular head that represents the circle in the sketch. Backing this are the three banners elements cut from text with a slight green tinge. Dotted backing pulls some colors from the flower.

Double borders in soft green and a coral surround the card with a pop of color.


I finished the card with a bordered stamped sentiment popped up on foam tape.

Ddd


Posted by studio3d@ccgmail.net at 12:01 AM PDT
Monday, 6 April 2015
Operation Write Home - sketch 202
Topic: Sketch Challenge

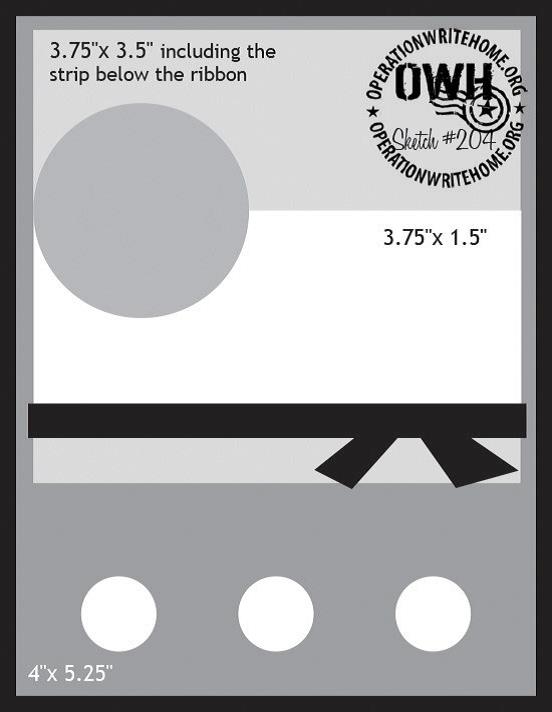
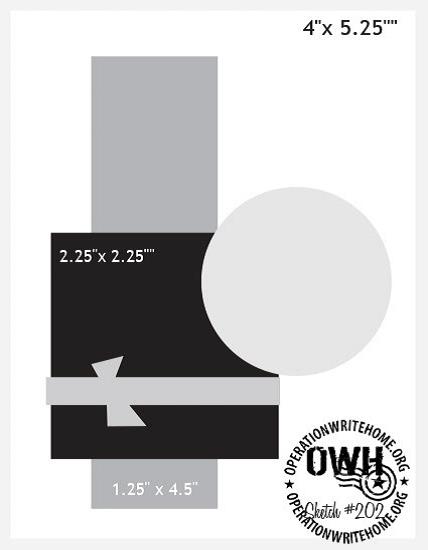
Disconnected. That is how I see OWH sketch 202:

Sure enough, my card came out looking disconnected, as well.

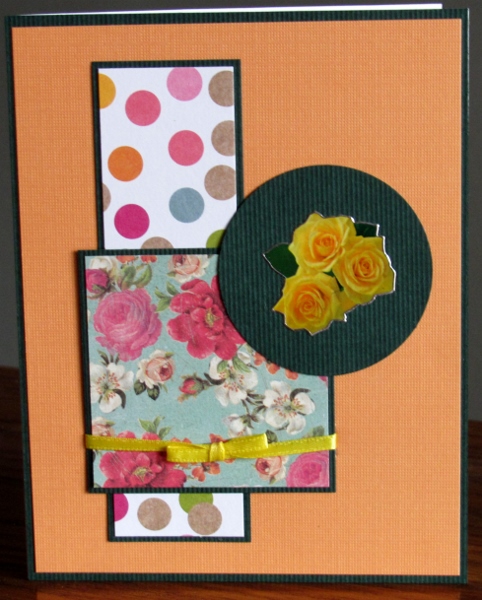
I started with the yellow roses sticker and punched a circle to back it. I kept trying to find papers that went with this and started with a paper with roses in other colors. Those colors carried over to the dotted paper.

Even though I backed all the elements and the card with dark green to unite them I think they all seem to be playing their own tune.


I guess I'll put this one in the 'fail' column and move on to the next sketch.

Ddd


Posted by studio3d@ccgmail.net at 12:01 AM PDT
Sunday, 5 April 2015
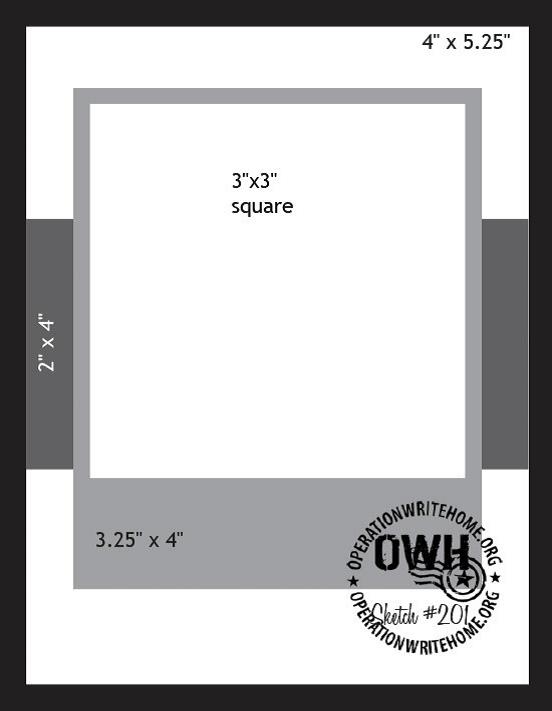
Operation Write Home - sketch 201
Topic: Sketch Challenge

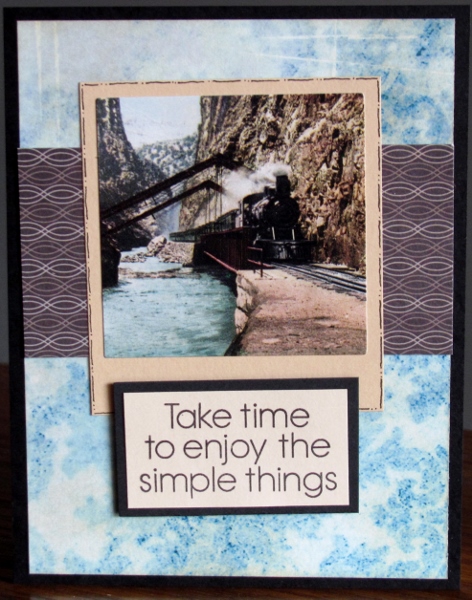
I think the main element in OWH sketch 201 is supposed to remind one of a polaroid photo.


The sticker I chose is a train photo but not as large as the sketch. So I just backed it with a paper in proportion to the design instead. This got a doodle line around it.

I pulled colors from the photo when selecting my backing papers. The blue piece was too blue so I used Distress Ink to bring it more to the turquoise.


Because the main element was reduced it left a large space at the bottom of the design. I bordered a stamped sentiment and popped it up on foam tape.

Ddd


Posted by studio3d@ccgmail.net at 12:01 AM PDT
Saturday, 4 April 2015
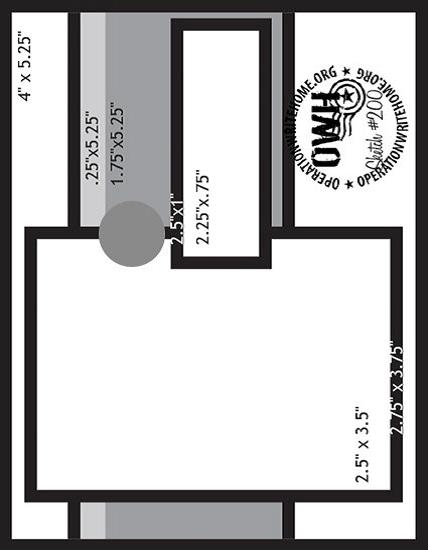
Operation Write Home - sketch 200
Topic: Sketch Challenge

Can you believe it? We are up to OWH sketch 200 today!


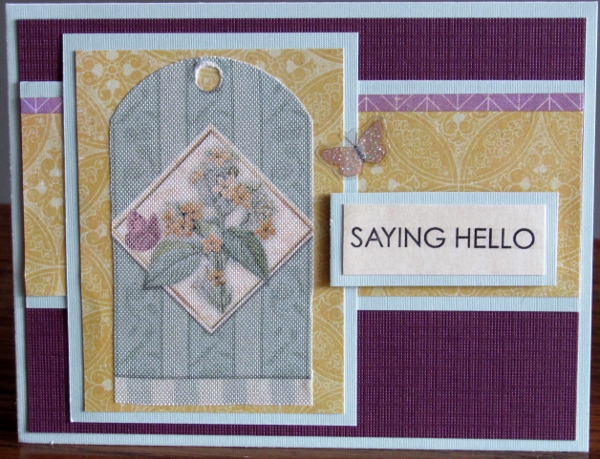
Another sketch tipped up on end, but I treated it in it's actual orientation.

Many years ago I bought a grab-bag of stickers from a craft supply website. There were a couple of sheets that were printed on fabric and the tag I used today was one of them.

I pulled papers that matched or coordinated with the colors in the tag. I went with lighter papers for bordering which gives the card a softer look than the sketch.

I used a single butterfly sticker for the embellishment which echoes the one of the left in the tag.

Ddd


Posted by studio3d@ccgmail.net at 12:01 AM PDT
Friday, 3 April 2015
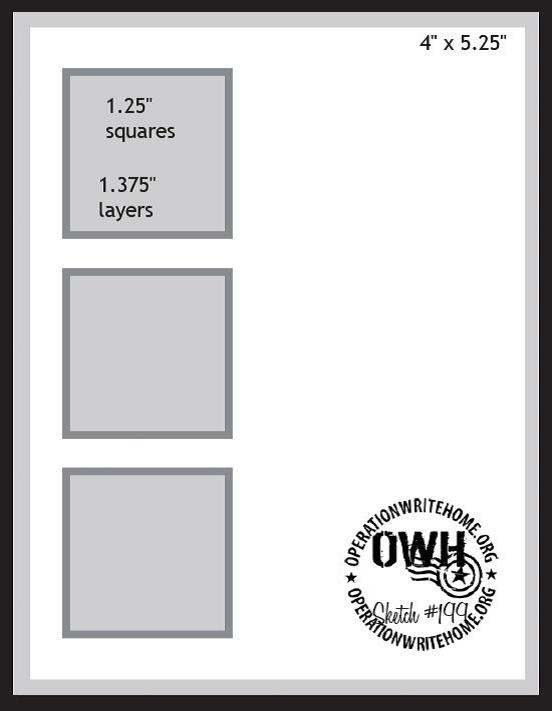
Operation Write Home - sketch 199
Topic: Sketch Challenge

OWH sketch 199 is a real yawner.

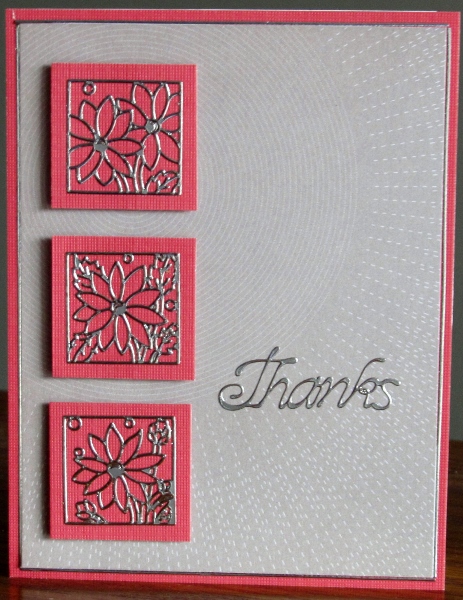
However, the card I made from it is NOT.

I had some silver peel-off sticker squares of florals that I wanted to use - and I had exactly three of them left. Fortuitous, huh?

To liven up the sketch I chose to back each sticker with a dark coral and popped them up on foam tape.

The background paper is a dove gray with a subtle burst pattern that really makes the three squares pop.

I backed the card front with more of the coral and separated it from the gray with thin silver peel-off strands.


As a finish, I added a silver peel-off sentiment.

Ddd


Posted by studio3d@ccgmail.net at 12:01 AM PDT
Thursday, 2 April 2015
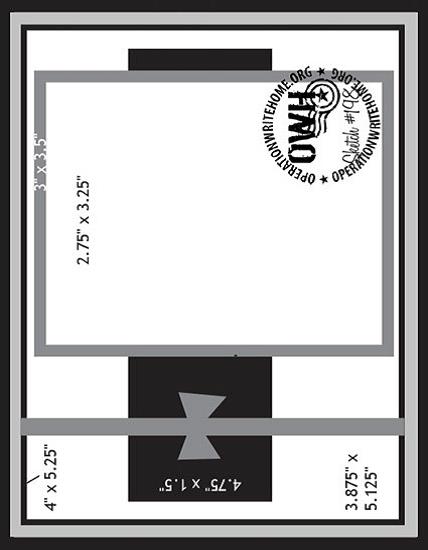
Operation Write Home - sketch 198
Topic: Sketch Challenge

Did I really use stickers on every one of these 12 cards from the marathon session? Yes, I did!

Here is OWH 198:


I didn't have to rotate this sketch! It was printed on the side so I really just used it as it was designed.

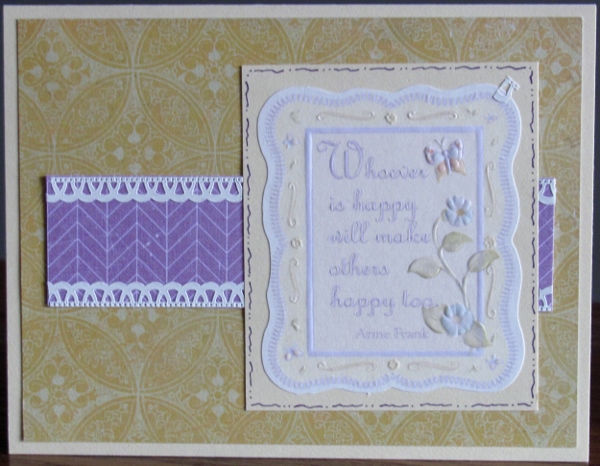
The sticker I chose was a little smaller than the feature block so I backed it with a cardstock in a similar color and drew on a doodle border to separate it from the background.

The background strip was too plain so I added some white peel-off sticker border along each edge. That strip was chosen for the link to the purple in the sticker.

The golden background also ties in to the colors in the sticker.

The outer border is the same paper as the main block.

Ddd


Posted by studio3d@ccgmail.net at 12:01 AM PDT
Wednesday, 1 April 2015
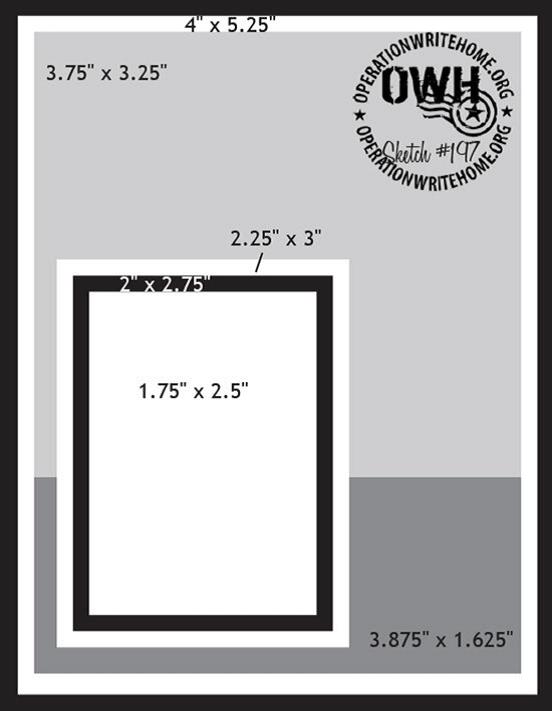
Operation Write Home - sketch 197
Topic: Sketch Challenge

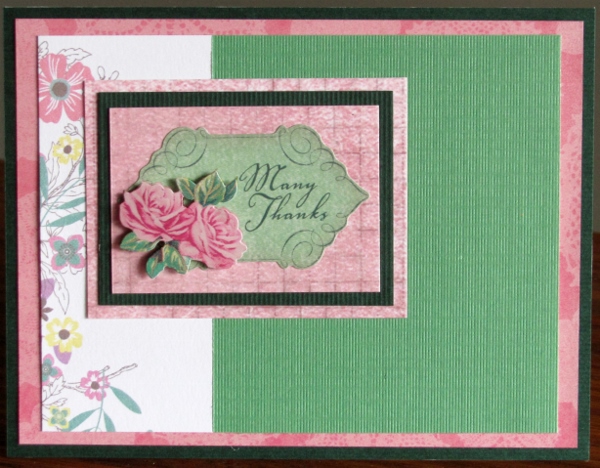
Layers, layers, layers! OWH 197 has layers.


It was, however, the wrong orientation for the 3D sticker I wanted to use so I stood it on it's ear! Actually, I let it lay down and be more restful.

I pulled pinks and greens from the sticker and repeated them for impact.

The left strip is from a border printed paper in a 6x6 pad. 

Since the sticker had the text printed on it there was no need for a separate sentiment.

Ddd


Posted by studio3d@ccgmail.net at 12:01 AM PDT
Tuesday, 31 March 2015
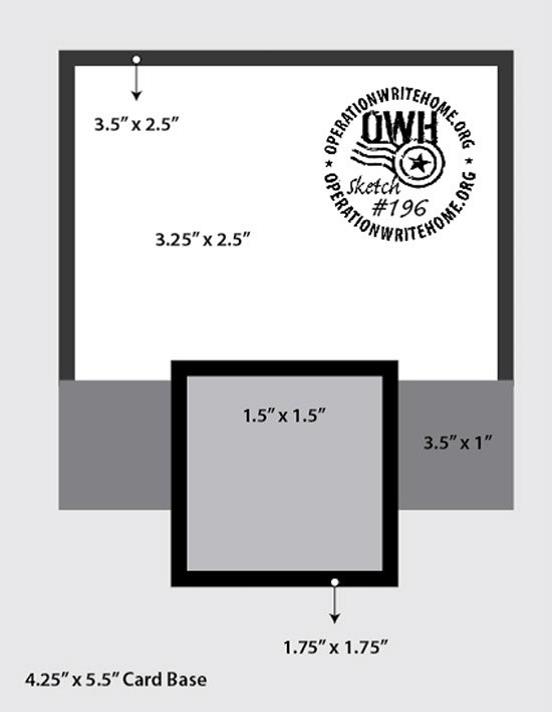
Operation Write Home - sketch 196
Topic: Sketch Challenge

OWH sketch 196 is a little strange. I wasn't quite sure why the inner border does not full enclose any element. Not only that but that bordering piece and the one on top of it show the same vertical dimension in which case there would actually be no border along the top.

I decided to go with the visual rather than the written and proceeded.

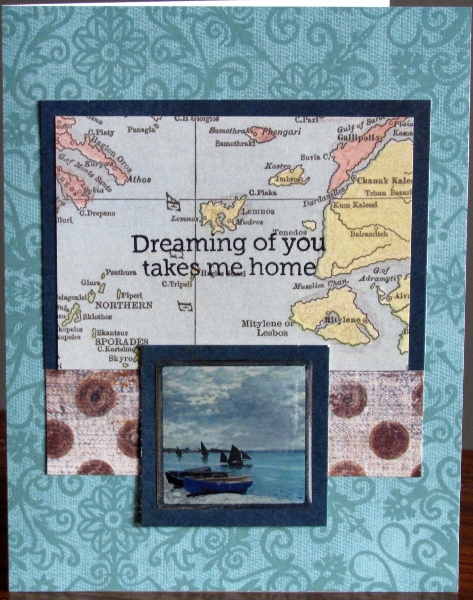
I had a thick acrylic sticker picture that was a good size for this layout. So I keyed all my paper choices off of it - color and theme both.

The boat in the picture led to the map paper and the color from that led to the background. More colors from the picture led to the borders and the dotted strip. All the elements have a vintage look to them.


That nostolgic look took me to stamping the yearning sentiment in the center of the map.

Ddd


Posted by studio3d@ccgmail.net at 12:01 AM PDT
Monday, 30 March 2015
Operation Write Home - sketch 195
Topic: Sketch Challenge

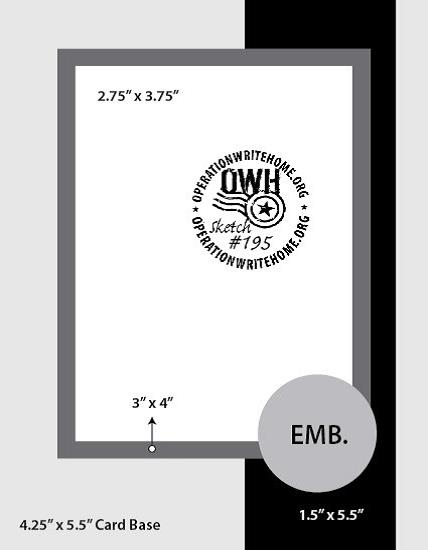
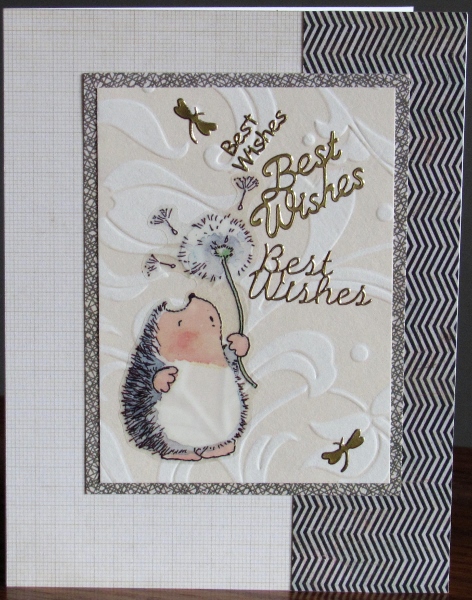
What shall I ever do when I've used up all the OWH sketches and have to come up with my own ideas? Fortunately, I still have many to go. Here is OWH sketch 195:


I found a clear sticker that has been in my stash for years and placed it on a textured panel that I have probably had just as long. LOVE this little hedgehog! I decided to use multiple peel-off text stickers to reinforce the blowing of dandelion fluff to make a wish.

Papers in cream and black patterns frame out the piece although that righthand strip is supposed to be pulled away from the card edge to meet the sketch design.


I used a couple of tiny gold dragonfly stickers in place of the large round embellishment.

Ddd


Posted by studio3d@ccgmail.net at 12:01 AM PDT
Sunday, 29 March 2015
Operation Write Home - sketch 194
Topic: Sketch Challenge

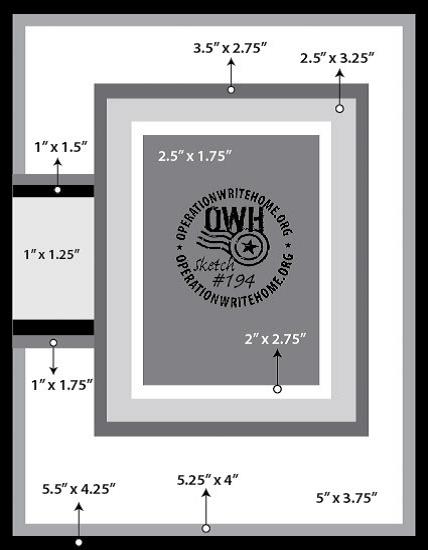
Stickers are a great way to fill the design elements of a sketch. Watch for one in OWH sketch 194:


This sketch had too many layers to suit me so I left off one in each area. This simplified the sketch but not to the point of boredom.

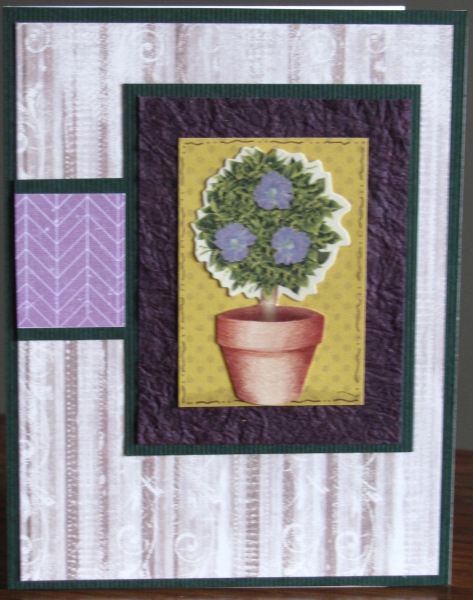
I started with the sticker which started out as a three level topiary. I 'pruned' it down to one level to suit the dimensions and mounted it on one layer. This was placed on purple mulberry paper and bordered with dark green.

The purple element on the left picks up color from the blooms in the bush and it is also bordered with dark green.

The loose stripe in the background has just enough purple to go with the other elements. It is bordered with the same dark green.

I used a purple fine line pen to doodle around the illustration panel and an alcohol marker to add a shadow under the pot.

Ddd


Posted by studio3d@ccgmail.net at 12:01 AM PDT
Saturday, 28 March 2015
Operation Write Home - sketch 193
Topic: Sketch Challenge

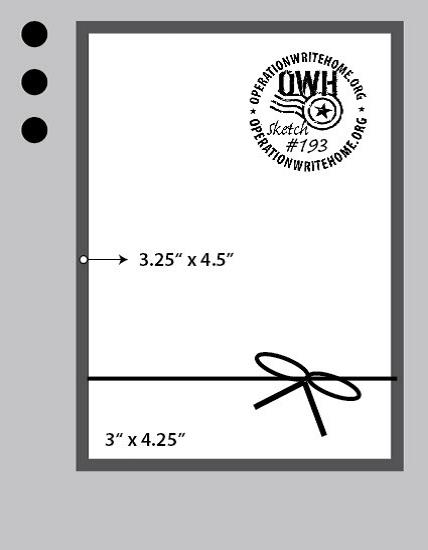
Another marathon sketch card session will take us through the next 12 days. Here is OWH sketch 193:


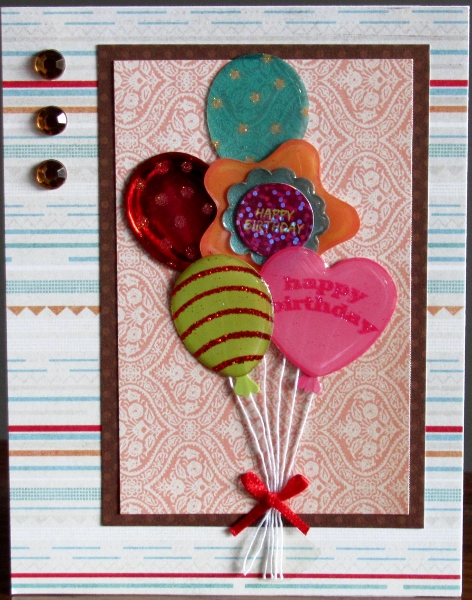
Now that's some wide open space! Fortunately I had a fun 3D acrylic sticker that would fill it up nicely.

I cut layers of coordinating papers and applied the composite sticker on top. The bow was already in the right place to fill the sketch design!


Three large sticky back rhinestones match some of the stripes in the background and the stars on the top balloon.

Ddd


Posted by studio3d@ccgmail.net at 12:01 AM PDT
Friday, 27 March 2015
New Garden Plan
Topic: How Does Your Garden Grow?

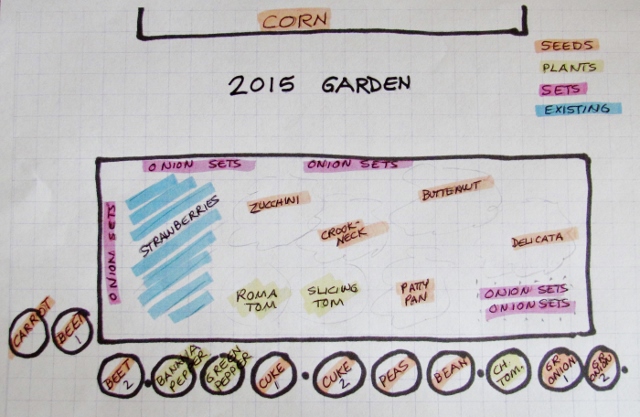
I have FINALLY admitted the fact that I cannot grow certain produce. One is radishes - undeveloped roots, woody, dry and hot. No change of soil, seed variety, weather, planting date... has had any effect in the 10 years I have been growing. I faithfully plant every year, trying some tweak or another... failure every time. So I decided to BUY my radishes and use the pot to grow something else this year.

I have likewise dropped turnips from the plan for the same reason. 

Then, due to some restrictions of diet, I am eliminating spinach and lettuce from my garden which left me with several barrels extra. I decided to double up on the things we really like that do grow well - beets, cucumbers, green onions - and split the two varieties of peppers into their own barrels.

Out in the big bed we have eliminated potatoes and are expanding the squash. Last year we had only acorn, delicata and yellow crookneck. This year we are trading the acorn for butternut and adding zucchini and patty pan (scallop). I hope to process and freeze a lot of the patty pan like we did the fried green tomatoes last year.

The bed for the corn remains the same.

Here is the plan for the 2015 garden:

I'm hoping for a good yield and plan to preserve (freeze) a lot like I did last year.

It's fun to have a gardening 'buddy' (Mom) - and one who helps eat up the produce.

Ddd


Posted by studio3d@ccgmail.net at 12:01 AM PDT
Thursday, 26 March 2015
Bed Of Roses
Topic: Quilting

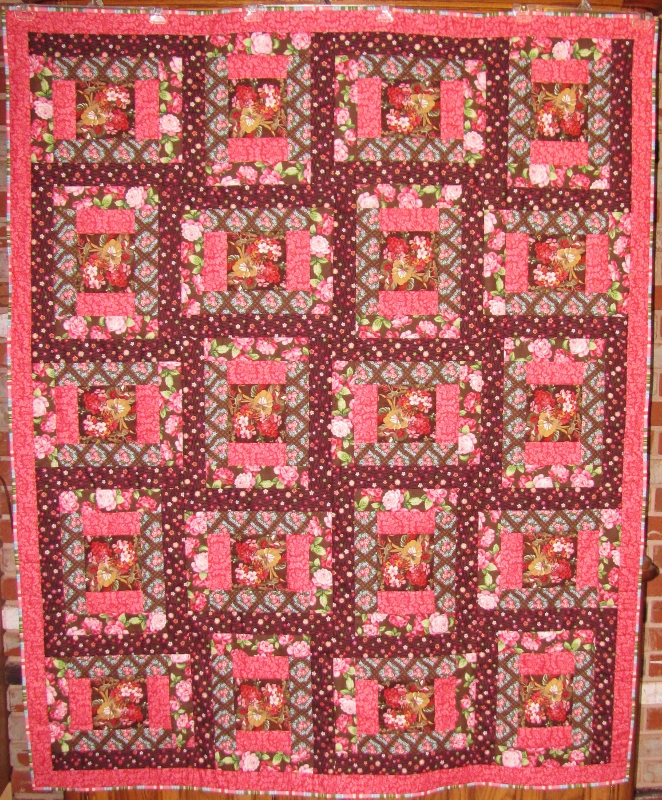
I thought I was getting a great deal when I stipped at the Mill End Store and found a roll-up of 2 1/2 inch fabric strips at only $13. SCORE! I loved the pink roses I could see around the outside and the colors of chocolate and various pinks. There was just a hint of blue and white on the folded edges of other fabrics peeking out.

The big awakening was when I got it home and unrolled it to discover there were only 4, yes - FOUR, fabrics in the roll. Lots of each one but only FOUR fabrics. Sadder than that was that one of them was a hideous stripe, one was a weird paisley, and only TWO of them were fabrics I liked - the pink and chocolate roses I had seen on the outside of the roll and a smaller print with blue squares make of tiny blue flowers and scattered with small roses.

Well, you can't make a quilt with only two strips (you could but you would be bored to tears). So I went digging in my stash for some go-alongs. I came up with some squares harvested from a wide stripe (from which I had previously used the narrow strips), some two-toned bricht pink with just the right amount of watermelon in it, and a chocolate brown with asian flowers and 'strands' of undulating dashed lines.

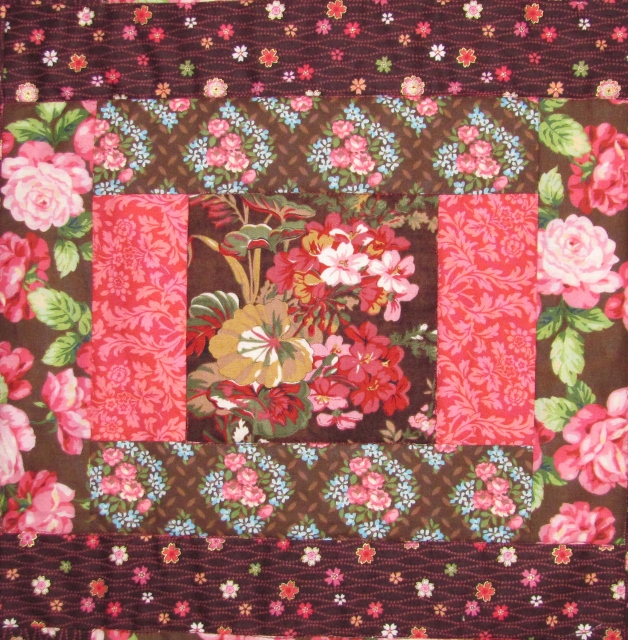
The stripe was fussy-cut into 5 1/2 inch blocks. Then I used the courthouse steps pattern to surround it with the pink, then the blue diamond, then the roses, and finished with the asian print.

Here is the basic block:


The two with roses are the only ones from the fabric roll.

I set these together in alternating directions in a 4 x 5 layout to finish up with this quilt:


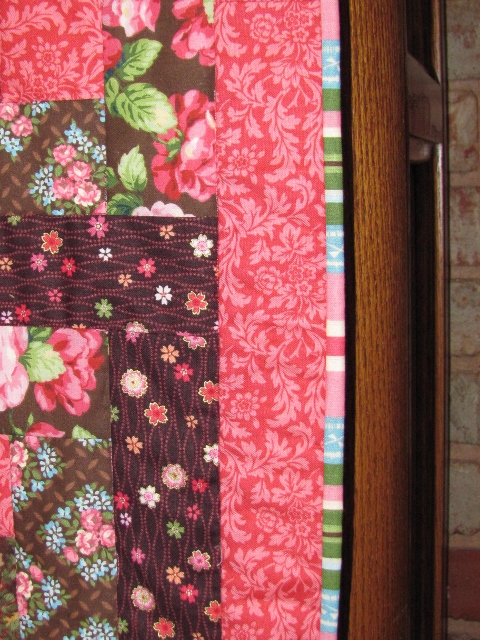
I could not imagine what I would ever use the ugly striped strips for so I decided to try them out as binding. I rolled mostly to the back to leave as little showing as possible on the front. Turns out to be about 3/8 inch.

That 2 1/2 inch strip (folded in half of course) left a LOT of wrap for the back binding. But against the relatively sedate backing the stripe is not so bad.


I used up the paisley from this roll on the denim quilt recently so I have exausted the supply of this strange fabric collection.

(In my mind, I wonder if this fabric was all cut into strips - poorly cut, I might add - because they knew it would NEVER sell as yardage.)

This quilt ended up larger than my normal lap quilts at 52 x 65.

Ddd


Posted by studio3d@ccgmail.net at 12:01 AM PDT
Updated: Thursday, 26 March 2015 8:28 AM PDT
Wednesday, 25 March 2015
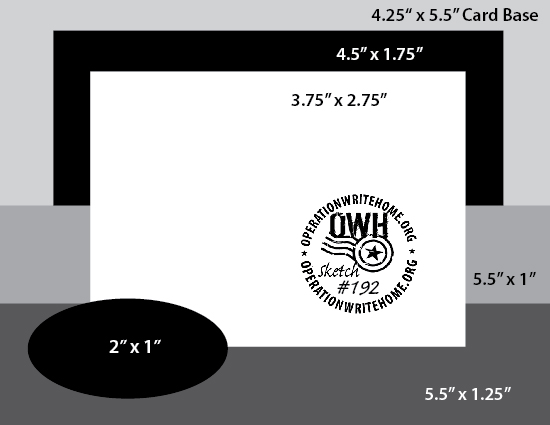
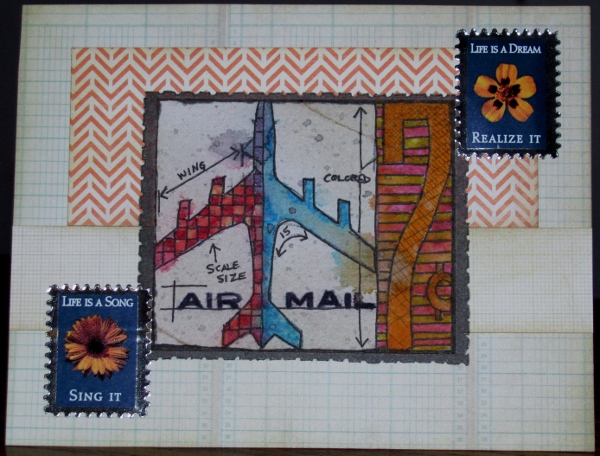
Operation Write Home - sketch 192
Topic: Sketch Challenge

It all started so innocently...


I had an uncolored image on watercolor paper. I trimmed it to the inner edges of the design and colored it with bright Distress Markers.

It was too stark so I misted it with water. This not only caused the colors to blend but made a couple of splotches on the background. Dried it with a heat gun... darkened the background with Distress Ink... used black ink to spatter... then I used a fine line marker to redraw the entire image. FINALLY, I like it.

I chose papers that echo the lines and angles of the image. I distress them with sponged ink and assembled the card.

The image was originally a 'postage stamp' so I redrew that motif around it and colored it with W7 Copic Marker.


I found in my sticker file a sheet of faux stamps that came as a 'fund raiser' junk mail enclosure. They made a suitable item for embellishment.

Ddd


Posted by studio3d@ccgmail.net at 12:01 AM PDT

Newer | Latest | Older