« May 2015 »
S M T W T F S
1 2
3 4 5 6 7 8 9
10 11 12 13 14 15 16
17 18 19 20 21 22 23
24 25 26 27 28 29 30
31
You are not logged in. Log in
Entries by Topic
All topics  «
3D paperwork
A - Z challenge 5
A - Z challenge 7
A - Z challenge round 4
A to Z challenge round 3
A to Z round 2
A to Z round 6
A-Z round 1
Around the House
Art Challenges
Artist Trading Cards
Backgrounds
Beads
Bible Journaling
Books
Boxes
Collage
Color Challenge
Coloring
cookbook
Die Cuts
Digital Projects
Digital Stamps
Drawing
Dry Embossing
Fabric Stuff
Fantastic Folds
Field Trip
Home Decor
How Does Your Garden Grow?
Hymnal Art
In The Kitchen
In the studio
Jewelry
Lettering
Links
Multi-Technique
Music to Work By
Musings
Nail Art
New Work
Online Class
Other Hobbies
Other Projects
Painting
Paper Embroidery
Paper Piecing
Photo
Pretty Paper
Quilting
Random
reading
Scrap Recovery
scrapbooking
Sewing
Sketch Challenge
Some Backlog
Stamping
Stencils
Stickers
Supplies
Teabag Folding
Techniques
Testing
tips and tricks
Tutorial
Web resources
Welcome to my Blog
Work By My Friends
workflow
Writing
Blog Tools
Edit your Blog
Build a Blog
RSS Feed
View Profile
Group One
In & Out of Studio 3D
Sunday, 3 May 2015
Operation Write Home - sketch 212
Topic: Sketch Challenge

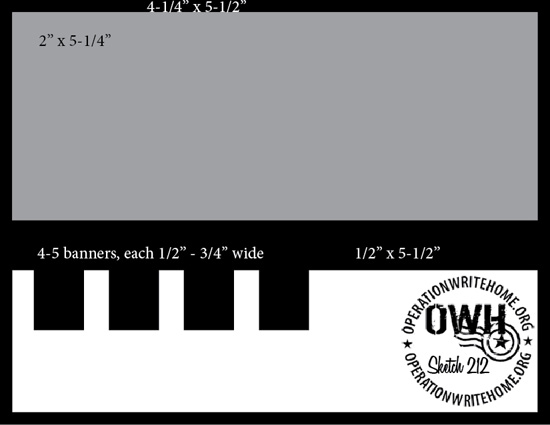
OWH sketch 212 is presented with some options:

I chose to take the options further and eliminated the outer border.

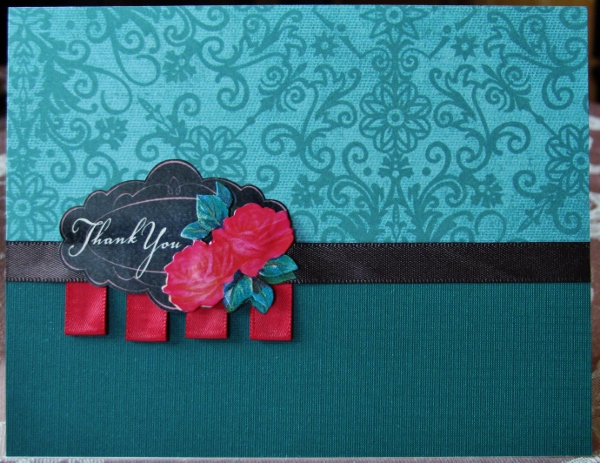
I decided to use four tabs as the sketch illustrates but I wanted to make them of folded ribbon for a different look. Then I thought, why not use ribbon for the narrow band as well? Why not?

I had started out by selecting a 3D sentiment sticker (the very last one I have) and keyed all the paper and ribbon colors off of that.

Truly love the rich teal papers which are actually greener than they appear here.


I have visions of someday using this sketch again by using those little banners to stand in for piano keys.

Ddd


Posted by studio3d@ccgmail.net at 12:01 AM PDT
Saturday, 2 May 2015
Operation Write Home - sketch 211
Topic: Sketch Challenge

Today - a little about my process. We'll illustrate with OWH sketch 211:
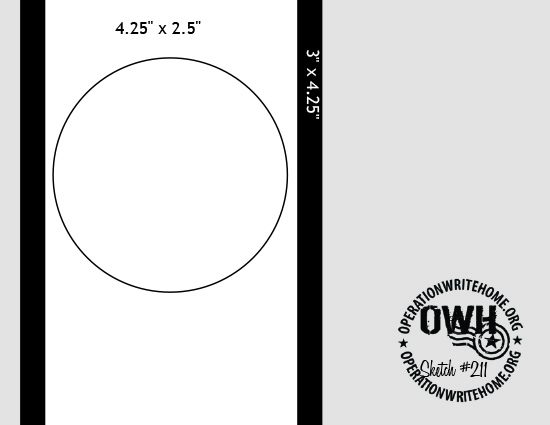

I work from a PDF of all of the sketches that I have punched and keep in a ring binder. I pull out the next 1, 2 or 3 pages (depending on how much time I have to play) and lay them out on the table.

Then I go through my stickers, diecuts and other decorative elements and assign one to each of the sketches I have laid out. For this sketch, I selected a sheet of butterflies and chose to work with the orange ones.

After all of the sketches have a feature element assigned, I stack up the sheets so I have only the next one exposed.

With the feature element in hand I start going through the scrap bin, then the scrap files, then the 6x6 files to find papers with the right colors that are of a size that are suitable for the sketch. For this sketch I had the black zigzag in the scrap bin, the green was cut from a new 6x6 page, and the orange was in the pre-cut solids.

I decided to punch out the circle for the backing paper to show through instead of punching a new paper to overlay it.

The card was all assembled and the butterflies stuck on.
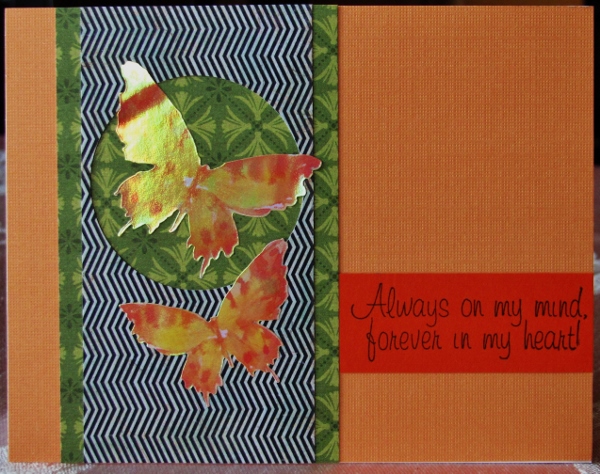

Unless the sentiment is contained on the feature element, I usually select this last. It will depend on the sketch and the balance of the layout to find just the right thing.

I select fron pre-stamped sentiments on white or colored papers, from stickers (in a section labeled 'blah, blah, blah'), rubons, peel-offs, and diecuts. In this case I selected a pre-stamped sentiment on orange.

Ddd


Posted by studio3d@ccgmail.net at 12:01 AM PDT
Friday, 1 May 2015
Operation Write Home - sketch 210
Topic: Sketch Challenge

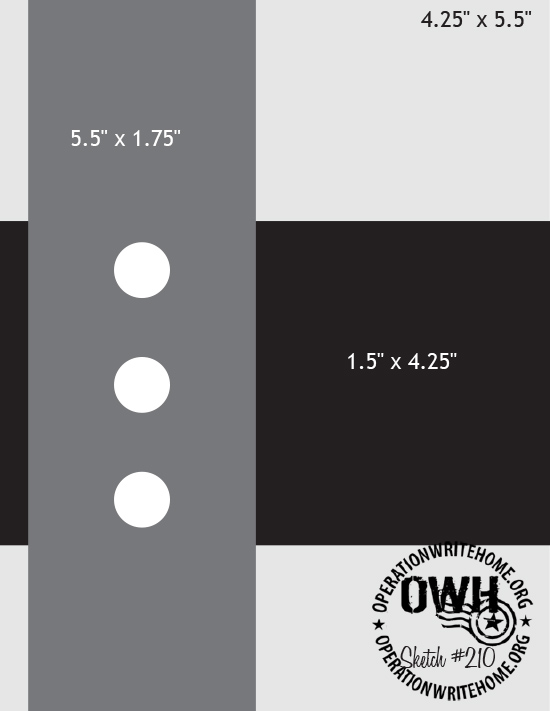
Sometime it would be fun to go back to the original posts for the sketches and see what other people made with them. I wonder how much they look alike and how they have been changed to look different. Here is OWH sketch 210:


In my case, I left out the three dots in the left strip and replaced them with a sticker floral. I selected papers from the scrap bin to complement those in the flowers, setting the tone for my interpretation.

I wanted something to remain in the spirit of the sketch with a nod to the dots, so I added a strip of rhinestones on the separating edge of the crosspieces.


It still looked too plain so I brought in a pre-stamped sentiment in yellow.

Ddd


Posted by studio3d@ccgmail.net at 12:01 AM PDT
Thursday, 30 April 2015
Operation Write Home - sketch 209
Topic: Sketch Challenge

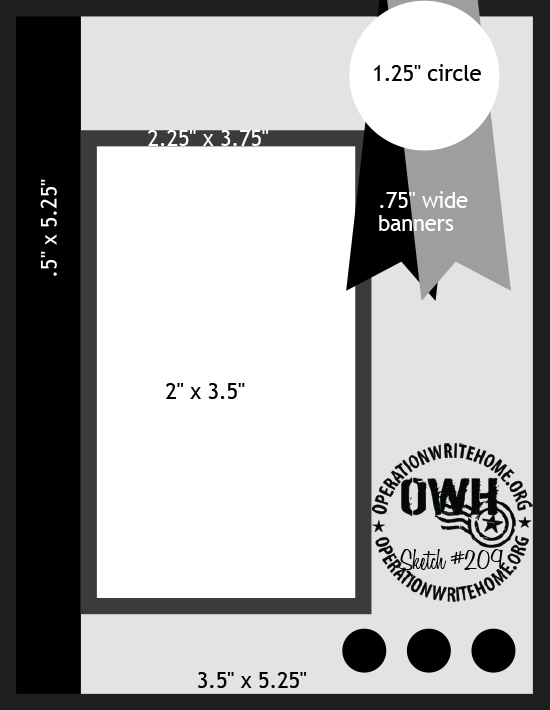
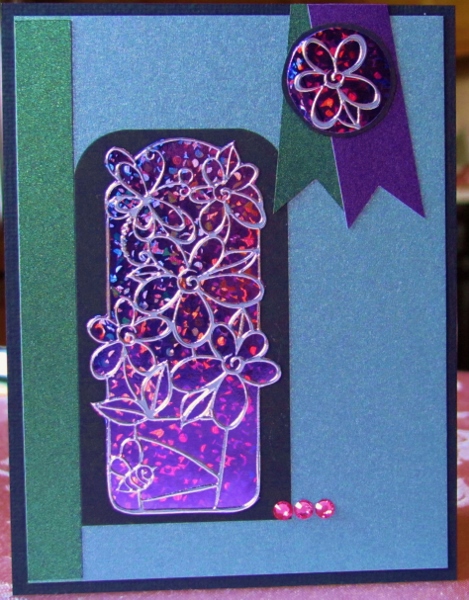
I realized that, by skipping over to the bonus sketches for a while I was not staying true to my plan to use all the sketches 'in order'. Unfortunately, I don't know when all of the bonus sketches originated so I have decided to do them at the end of the run of regular sketches. Here is OWH sketch 209:


I had this silver peel-off floral panel that I wanted to use, even though it was a bit smaller than the sketch. I stuck it on top of a holographic purple paper and trimmed against the sticker edges.

A single bloom was mounted to more of the paper and punched with a round punch. Both got black backing.

I used three shimmer papers for the other parts and assembled it according to the plan of the sketch.


I used rhinestones for the three dots in the sketch, but used smaller ones andchanged the placement.

Ddd


Posted by studio3d@ccgmail.net at 12:01 AM PDT
Wednesday, 29 April 2015
Operation Write Home - bonus sketch B6 - again
Topic: Sketch Challenge

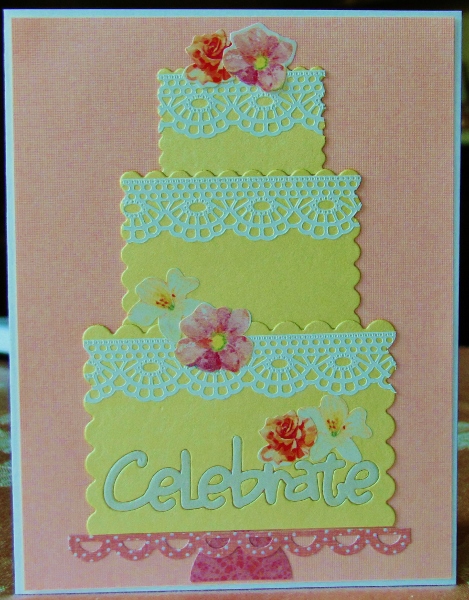
When I set out to make OWH sketch B6 I had two sets of scalloped squares to choose from for the cake layers. The set I used for today's card are the larger of the two so I had to make a few adjustments in the card design.

First of all, It left me room for larger white border stickers to use for the icing. Second, there was a larger base layer. This allowed me to diecut the text out of the layer and then inlay the same work cut from a different paper.

Because the cake was larger, I had to make a smaller cake plate. This one is made from a scallop punched strip over a half-circle punched out.


I decorated the layers with floral stickers.

Ddd


Posted by studio3d@ccgmail.net at 12:01 AM PDT
Tuesday, 28 April 2015
Loving Cats
Topic: Paper Embroidery

Let's take a little break from the sketches, shall we?

I needed a paper embroidery for a swap in the alphabet series. This assignment was "K is for Kitties".

I had a lot more cats in my file of patterns than I realized, but I fell in love with these cuddling cats. I don't know the resource for the pattern but it has been printed out with the legend 'free pattern from files'.

I pricked it out on grey paper with soft coral dots. The cats were stitched with two shades of brown with grey whiskers.

The pattern has a heart in the sky but I changed it to a crescent moon and stitched it in yellow.

I poked holes in the sky and installed tiny star brads. These started out white but I colored them with a bright yellow Sharpie marker.


I gave the whole thing a coral border and added a yellow sentiment, bordered and cut as a flag.

Ddd


Posted by studio3d@ccgmail.net at 12:01 AM PDT
Monday, 27 April 2015
Operation Write Home - bonus sketch B8 (reprise)
Topic: Sketch Challenge

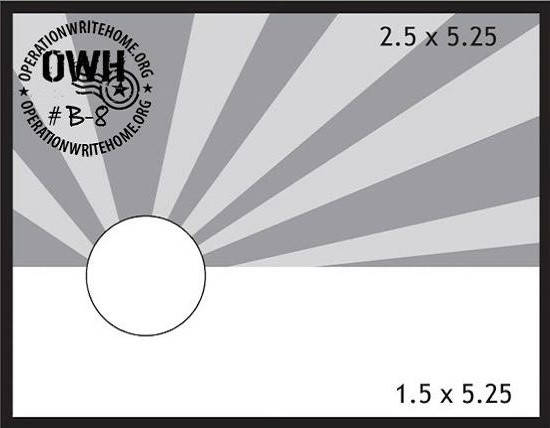
Back on September 30, 2011 I used one of the bonus sketches to make a zillion cards from my scraps. Here is OWH sketch B8:


And here a a few of the cards I make with it:


They all use scraps and ribbon, some use stickers and some stamps. The first one uses a silk flower and a flower brad, too.

Ddd


Posted by studio3d@ccgmail.net at 12:01 AM PDT
Sunday, 26 April 2015
Operation Write Home - bonus sketch B7
Topic: Sketch Challenge

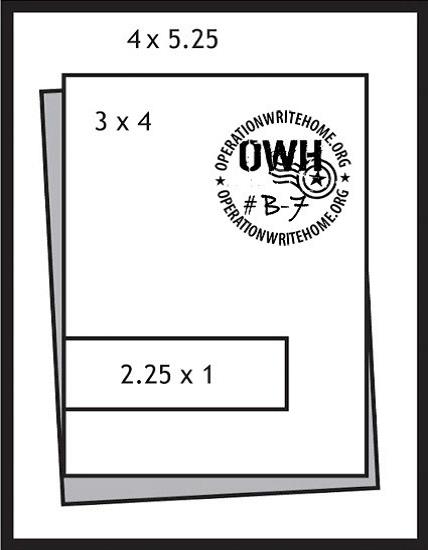
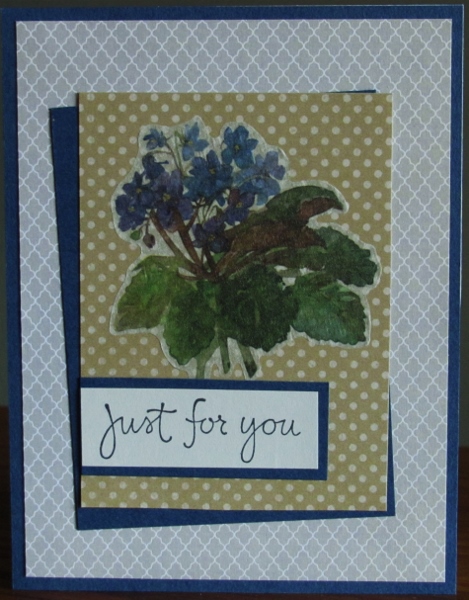
Still lots of bonus sketches to use up. This is OWH sketch B7:


Even with the one panel on the tilt, I think this layout looks rather formal. So I selected some low key papers, dark borders and an elegant floral illustration - a vellum sticker.

A simple grey diamond is used for the background and a tone-on-tone dot for the floral backing. Navy blue makes up the bordering in all cases.


The sentiment is stamped on a light grey and bordered for impact.

Ddd


Posted by studio3d@ccgmail.net at 12:01 AM PDT
Saturday, 25 April 2015
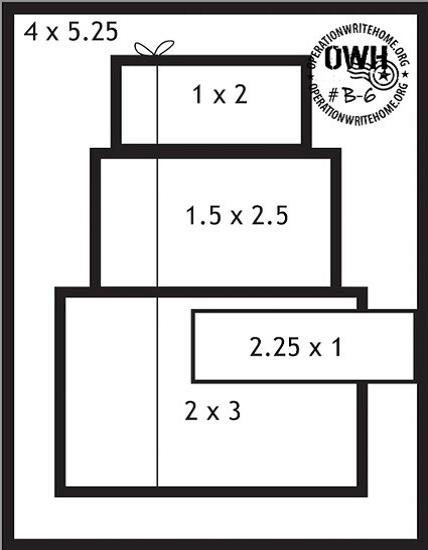
Operation Write Home - bonus sketch B6
Topic: Sketch Challenge

I've been thinking a card like this for a while and was excited to see this sketch come up that gave me the excuse to proceed with my idea. This is OWH sketch B6:


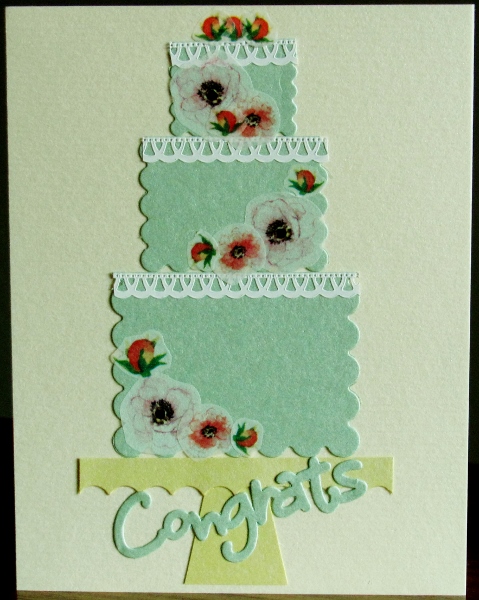
The idea I had? Use scalloped edge dies to make layers to construct a cake.

I had to go with the size of the dies I had on hand so my 'layers' end up smaller than on the sketch. So I just added a cake plate!

I used white peel-off sticker borders as the icing along the top. Then I used vellum floral stickers to decorate the layers.


I used all shimmer papers for the elements for the cutouts. I also diecut text and glued it across the cake plate.

Ddd


Posted by studio3d@ccgmail.net at 12:01 AM PDT
Friday, 24 April 2015
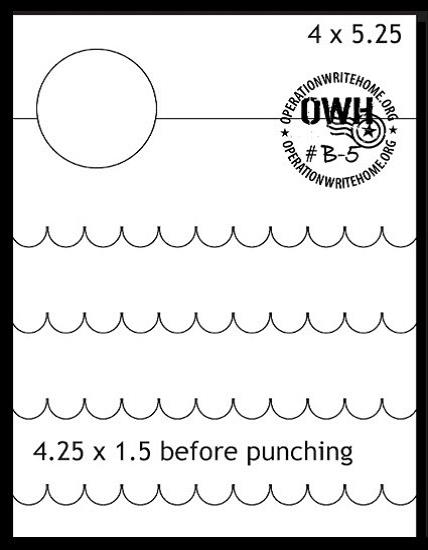
Operation Write Home - bonus sketch B5
Topic: Sketch Challenge

These bonus sketches are proving to be quite innovative. I hope that trend continues. This is OWH sketch B5:


There's that 3D sentiment sticker again! This is the last of this exact one I have, but there is one left with a slightly different design.

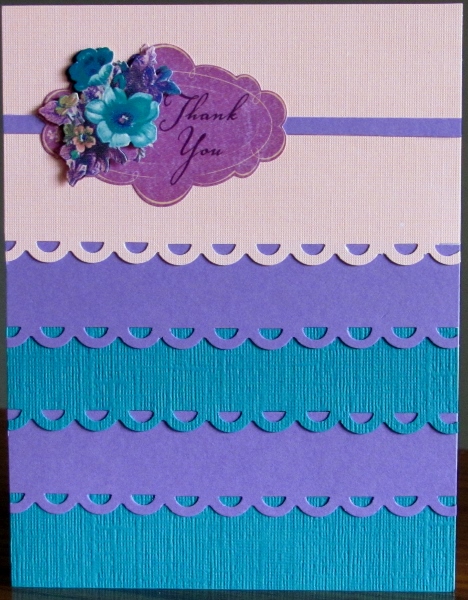
I like this simple open scallop because it still gives a lacy look without being too fussy.

I simply layered repeating rows of solid cardstock with the dark colors from the sentiment sticker at the bottom and the light pink from the floral area at the top. I added a thin strip of the purple to mimic the horizontal line on the sketch.

I wanted this to be simpler than the sketch so I ran everything all the way to the edges of the card front instead of leaving a border.

Ddd


Posted by studio3d@ccgmail.net at 12:01 AM PDT
Thursday, 23 April 2015
Operation Write Home - bonus sketch B4
Topic: Sketch Challenge

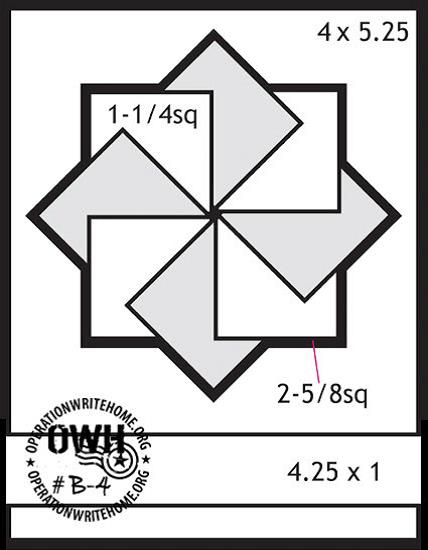
Another bonus sketch for you today! This is OWH sketch B4:


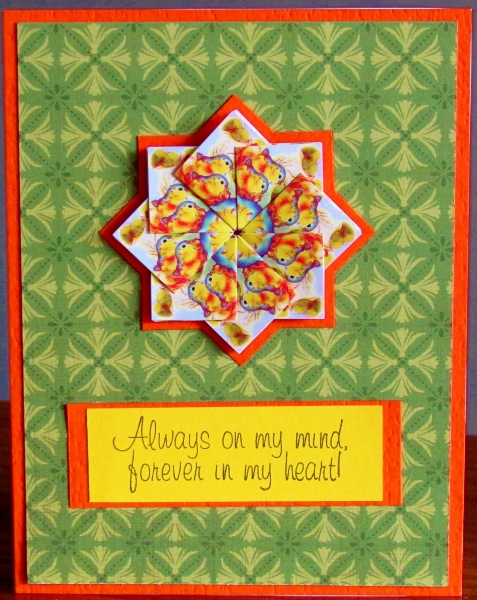
That centerpiece made me think of the teabagfolding I used to do a lot of. I looked in the drawer of those supplies and found a couple of packets of papers that were gifted to me in a swap. I used one set to made a simple folded medallion. The result was much smaller than the sketch but ther ARE just guidelines, after all.

I used the colors of the folding papers to choose the rest of the papers, orange for bordering, yellow for the sentiment and a green pattern for the background.

I used the orange to border the medallion and the sentiment, but cut the sentiment down so it did not compete.


I don't know if you can tell, but the papers for the medallion feature little yellow and orange birds. The fold exposes a pair of them in each corner.

Ddd


Posted by studio3d@ccgmail.net at 12:01 AM PDT
Wednesday, 22 April 2015
Operation Write Home - bonus sketch B3
Topic: Sketch Challenge

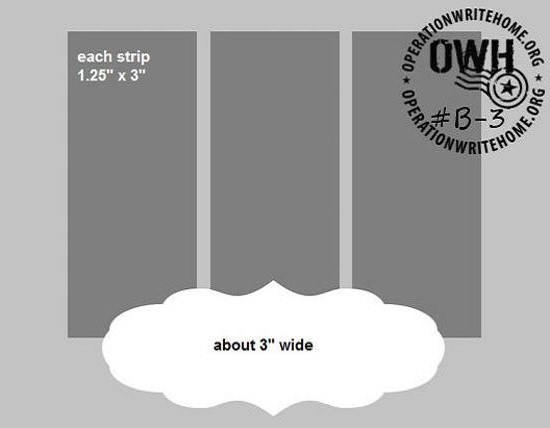
For this sketch I made it all about color coordination. This is OWH sketch B3:

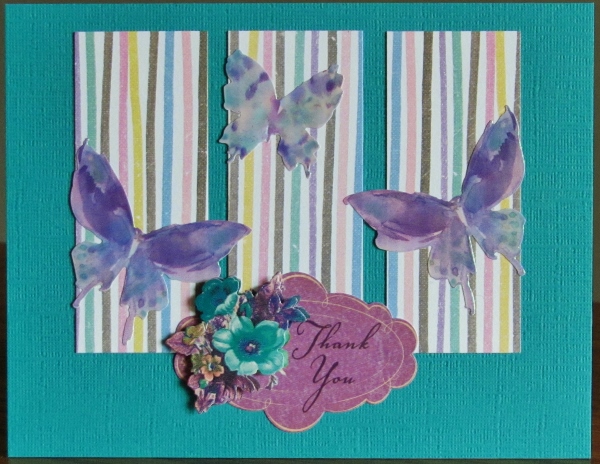
The shaped label in the sketch made me think about the 3D text stickers that I had in the files. I selected one of these and then chose the background paper and butterflies to match it.

The striped papers have these colors plus more to enliven the energy.


The true colors are actually brighter than this, but you get the idea.

Ddd


Posted by studio3d@ccgmail.net at 12:01 AM PDT
Tuesday, 21 April 2015
Operation Write Home - bonus sketch B2
Topic: Sketch Challenge

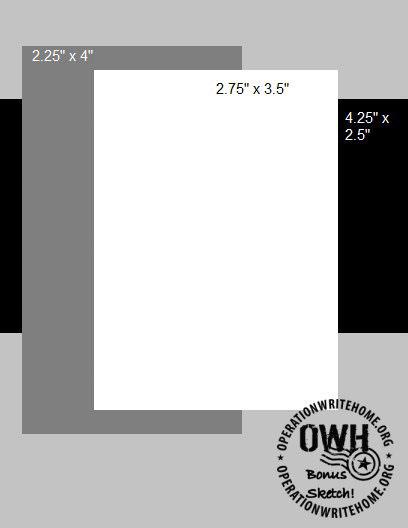
Another of the bonus sketches today - this is OWH B2:


Not much to go on, right?

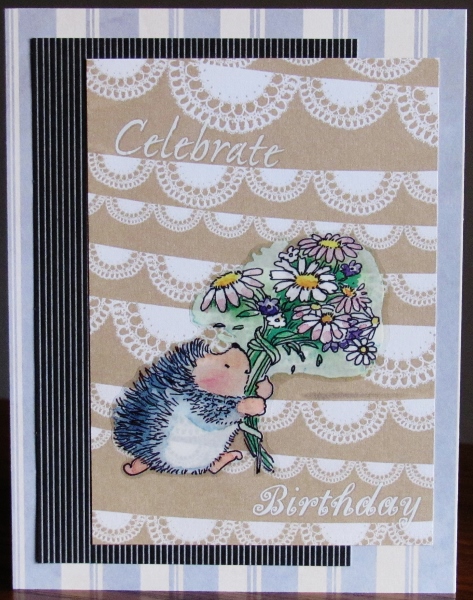
I created some interest by using busier papers than I normally would. The little hedgehog was my jumping off point. Then I added thebanner paper for the celebratory nature of it.

The black was selected to separate the banners from the striped background. It also echoes the quills on the hedgehog while the striped background echoes his belly color.


I kept looking at those wider strips of color in the banners and decided to use them for the sentiment by using white rub-ons.

Ddd


Posted by studio3d@ccgmail.net at 12:01 AM PDT
Monday, 20 April 2015
Operation Write Home - bonus sketch B1
Topic: Sketch Challenge

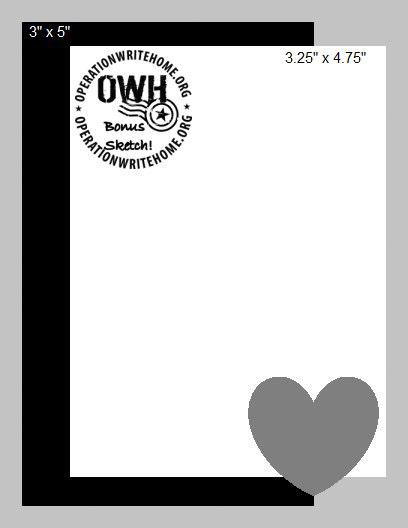
Some special challenges, presentations and blog hops resulted in a number of bonus sketches in the OWH sketch collection. These have been numbered in a 'B' series. I thought I intersperse a few of them in here.

This is OWH sketch B1:


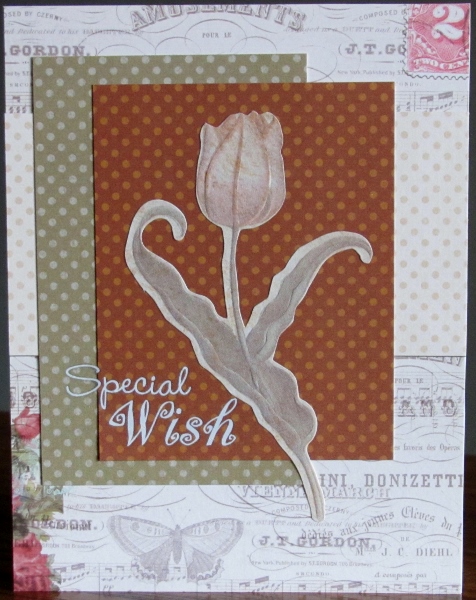
Because the space was so wide open I decided to focus it a bit by using a larger scale sticker. This low contrast tulip fit the bill perfectly.

I chose papers that borrowed colors from the illustration and the background also has a vintage feel.

Bu repeating the dots in three of the papers it gives the layout some unity.


I used white rub-on words for the sentiment.

Ddd


Posted by studio3d@ccgmail.net at 12:01 AM PDT
Sunday, 19 April 2015
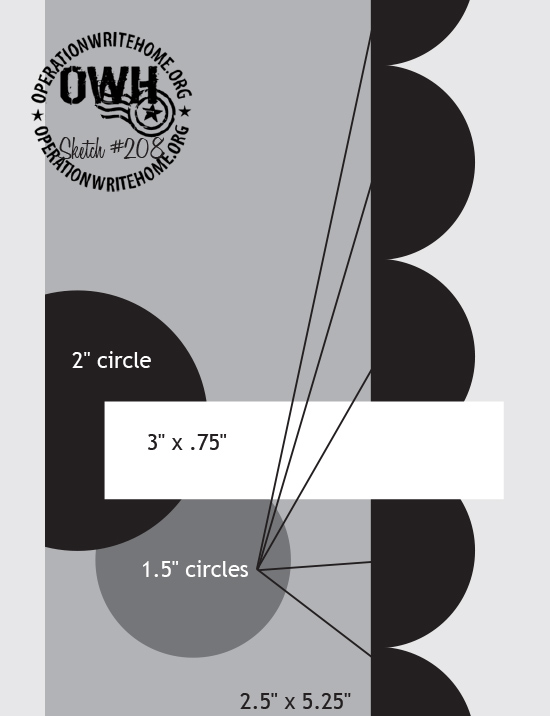
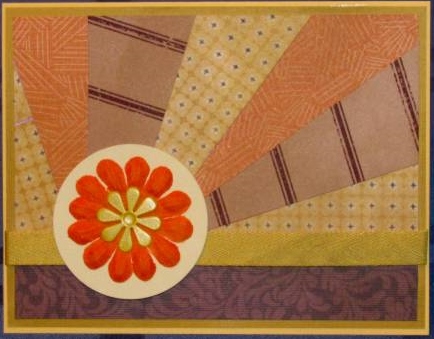
Operation Write Home - sketch 208
Topic: Sketch Challenge

Suddenly an ugly duckling turns into a swan! Here is OWH sketch 208:


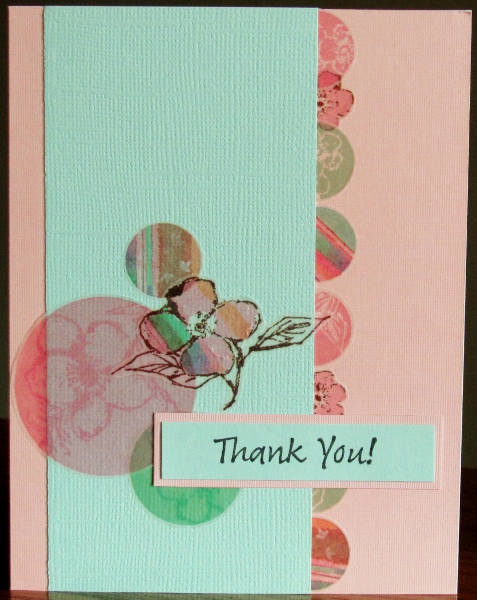
Well, that looked awfully clunky to me. I selected soft colors, stickers in vellum and kept a pretty tight pallette and value scale.

Just shades of pink, aqua and a touch of tan make this a low key card:

This just makes me happy!

Ddd


Posted by studio3d@ccgmail.net at 12:01 AM PDT
Saturday, 18 April 2015
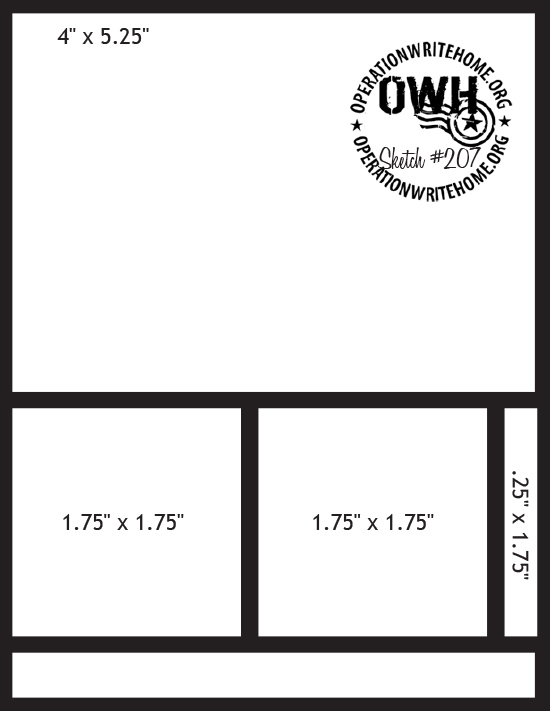
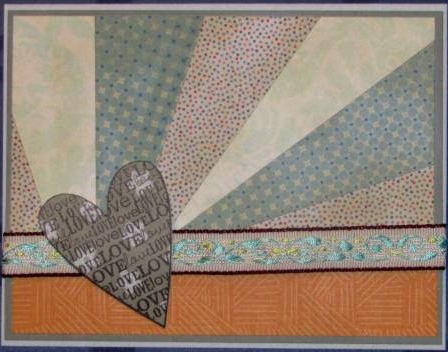
Operation Write Home - sketch 207
Topic: Sketch Challenge

Want something wide open for interpretation? Then you want OWH sketch 207:


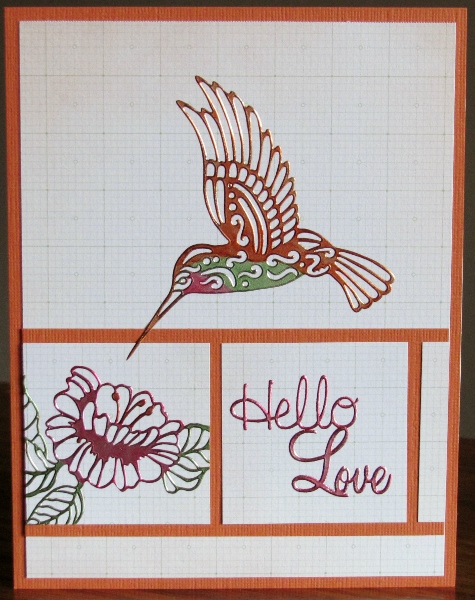
I wanted to tie all of the spaces together so I selected silver peel-off sticker elements for each of them. I colored these with alcohol markers while they were still on their sheets making sure to use the same colors in all the elements.

The bird has green, brown and red - the flower has red, brown and green - the words have red.

To reinforce the hummingbird color I used brown again in the bordering. Then I used the same background paper throughout for unity.

I set up the bird to be eating from the flower and it all came together.

Ddd


Posted by studio3d@ccgmail.net at 12:01 AM PDT
Friday, 17 April 2015
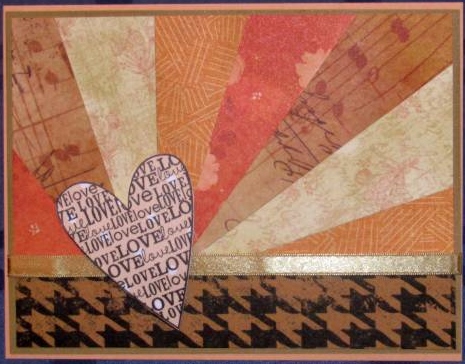
Operation Write Home - sketch 206
Topic: Sketch Challenge

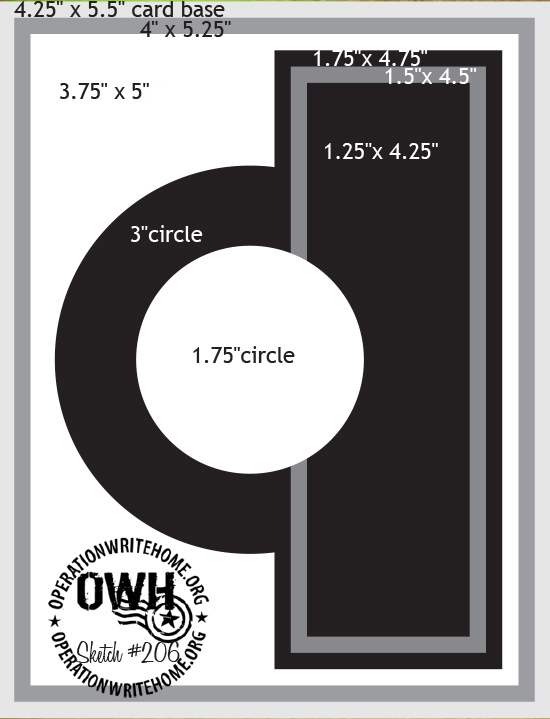
Sorry if the intros for these are getting monotonous. Here is OWH sketch 206:


I was glad to learn any years ago that just because a sketch had a circle, a heart or a flower that did not mean it could not be swapped out or interpreted as another shape or element. That give a lot more freedom to design.

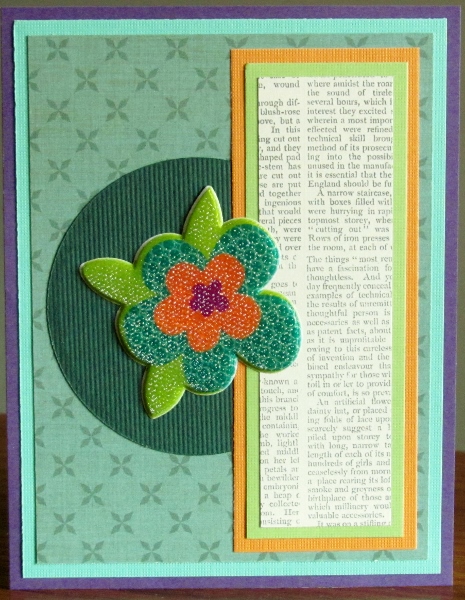
I used that interpretive gift to turn the smaller circle into a flower by selecting one of the textured puffy acrylic blooms.

I chose colors from that flower for layering papers, including some with pattern. I kept the brightest papers in the background as borders.

The camera behaved a little better when photographing this flower but you can tell it is confused by the texture.

Ddd


Posted by studio3d@ccgmail.net at 12:01 AM PDT
Thursday, 16 April 2015
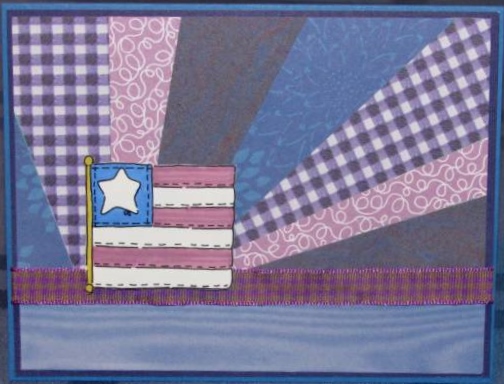
Operation Write Home - sketch 205
Topic: Sketch Challenge

What SHALL I do when I've used all the OWH sketches? I do have a ways to go but I still should be thinking about that!

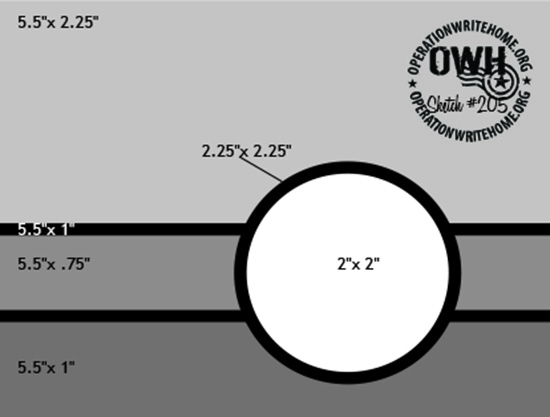
Here's sketch 205:

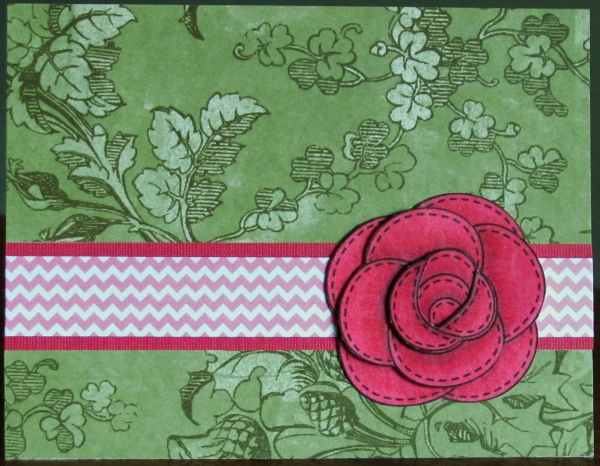
When I had the digital stamps out yesterday I occured to me that this rose digi would work well for the round element on this sketch.

I colored 4 of the images with shading in the petals and then cut away background petals on successive layers and assembled them into one stacked illustration with foam tape. By offsetting the foam behind the layers the image squashes down flat for mailing.

For the main background I used a tone-on tone green floral. Then I selected a small pink chevron for the strip and backed it with a dark coral to match the rose.

I like these digital images because I can easily just print up more of them if I want to and can even resize them if needed.

Ddd


Posted by studio3d@ccgmail.net at 12:01 AM PDT
Wednesday, 15 April 2015
Tribute to Patricia
Topic: Multi-Technique

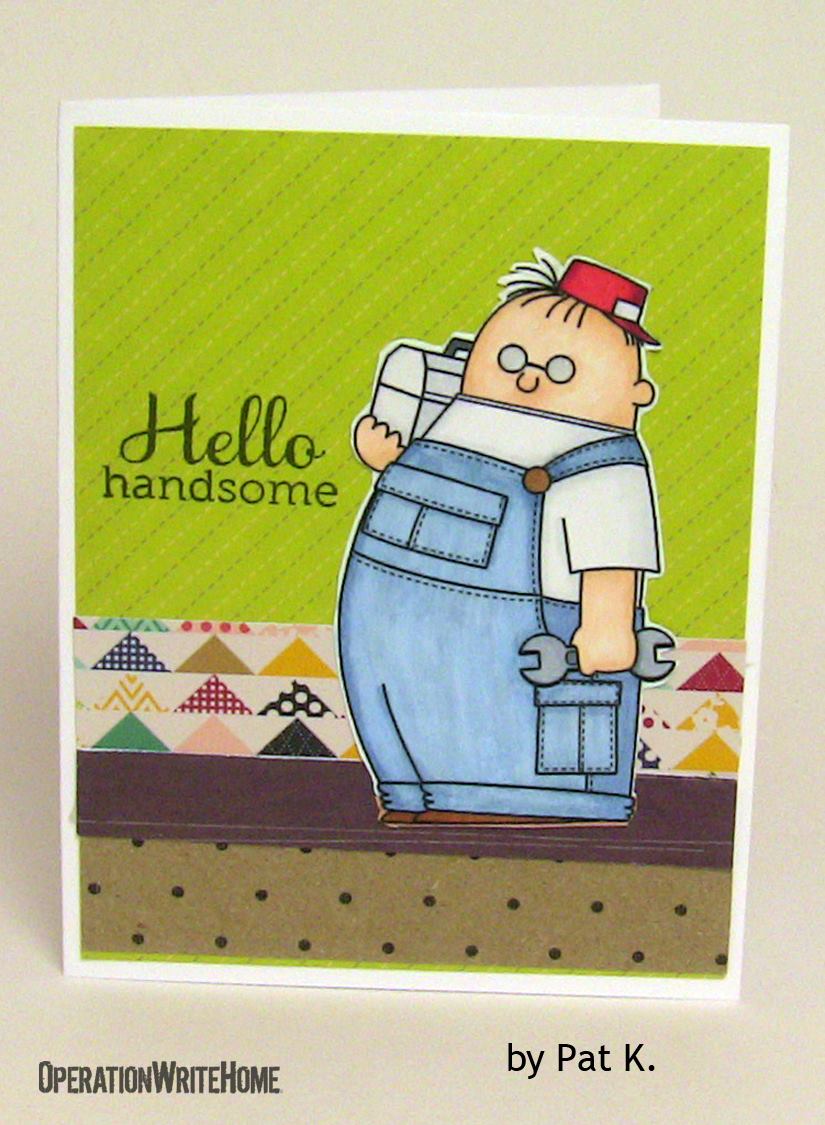
Upon the news of the death of one of Operation Write Home's volunteers we were challenged to make a card cased from one she had made as a tribute to her.

I chose to make one based on this:


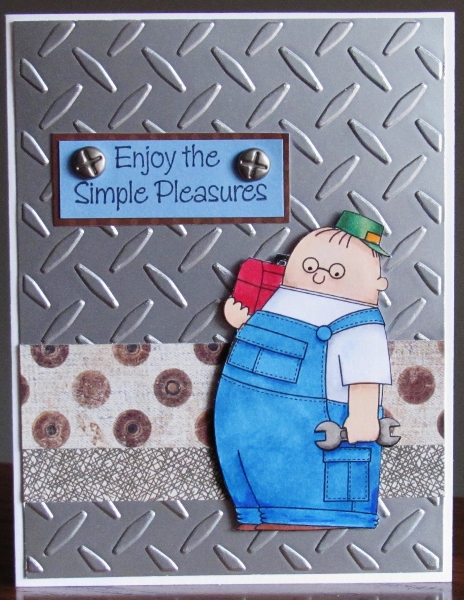
I actually had the same little workman as he is a digital that I downloaded from OWH some time back. I colored him with alcohol markers (three tones of each color) and I fussy cut him to use.

I embossed the background of silver cardstock with the diamond plate Cuttlebug folder and added two strips of 'masculine' papers.

After creating the text block I remembered these brads that look like phillips screws. So cute!


I gave the little guy some eyes inside his blank glasses and popped him up on foam tape.

Ddd


Posted by studio3d@ccgmail.net at 12:01 AM PDT
Tuesday, 14 April 2015
How Do You Like Them Taters?
Topic: How Does Your Garden Grow?

When the conditions are just right you can get some big surprises:

1) very mild winter

2) sunny spring

3) reasonable amount of rain in late spring

4) not being careful in fully turning the soil in the fall

5) somebody ignoring the spring garden weeding

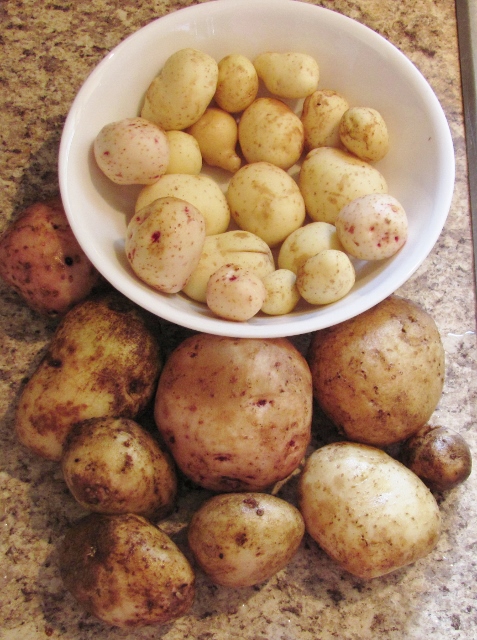
I was using a shovel in damp soil to loosen the weed roots for easier pulling on the 1st of April. What I got from these 'ideal' conditions and action was 4 potato plants about 18 inches tall with a lot of new potatoes and some larger ones.

Now, I haven't planted potatoes for two years! We dug a few volunteers last summer and even won a blue ribbon at the fair with them. Mom dug up more volunteers last fall but apparently not all were discovered.

The missed taters snuggled in for the winter and, due to great weather - no snow and very light frost - these new plants sprung up.

I dug enough of Yukon Gold, Red Potatoes and Russetts to put together a potato salad for Easter. I tossed out 4 small purple potatoes (which I haven't planted for FOUR YEARS) as we never liked them much.

Here's my potato bounty:


There were more of the Russetts but something had nibbled at them and I didn't want to eat their leftovers!

FIRST GARDEN PRODUCE OF 2015

Ddd


Posted by studio3d@ccgmail.net at 12:01 AM PDT
Newer | Latest | Older