« November 2015 »
S M T W T F S
1 2 3 4 5 6 7
8 9 10 11 12 13 14
15 16 17 18 19 20 21
22 23 24 25 26 27 28
29 30
You are not logged in. Log in
Entries by Topic
All topics  «
3D paperwork
A - Z challenge 5
A - Z challenge 7
A - Z challenge round 4
A to Z challenge round 3
A to Z round 2
A to Z round 6
A-Z round 1
Around the House
Art Challenges
Artist Trading Cards
Backgrounds
Beads
Bible Journaling
Books
Boxes
Collage
Color Challenge
Coloring
cookbook
Die Cuts
Digital Projects
Digital Stamps
Drawing
Dry Embossing
Fabric Stuff
Fantastic Folds
Field Trip
Home Decor
How Does Your Garden Grow?
Hymnal Art
In The Kitchen
In the studio
Jewelry
Lettering
Links
Multi-Technique
Music to Work By
Musings
Nail Art
New Work
Online Class
Other Hobbies
Other Projects
Painting
Paper Embroidery
Paper Piecing
Photo
Pretty Paper
Quilting
Random
reading
Scrap Recovery
scrapbooking
Sewing
Sketch Challenge
Some Backlog
Stamping
Stencils
Stickers
Supplies
Teabag Folding
Techniques
Testing
tips and tricks
Tutorial
Web resources
Welcome to my Blog
Work By My Friends
workflow
Writing
Blog Tools
Edit your Blog
Build a Blog
RSS Feed
View Profile
Group One
In & Out of Studio 3D
Friday, 20 November 2015
White on White
Topic: Paper Embroidery

I have been bemoaning the lack of quality in the photos my camera takes but today is a whole nother level. But, then again, trying to photograph white on white is difficult with any camera out there.

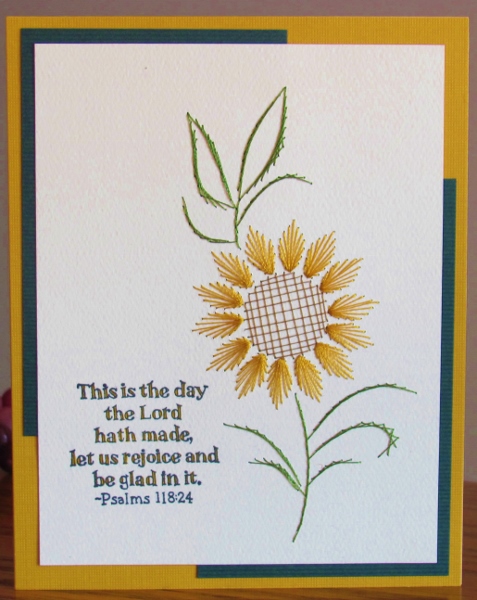
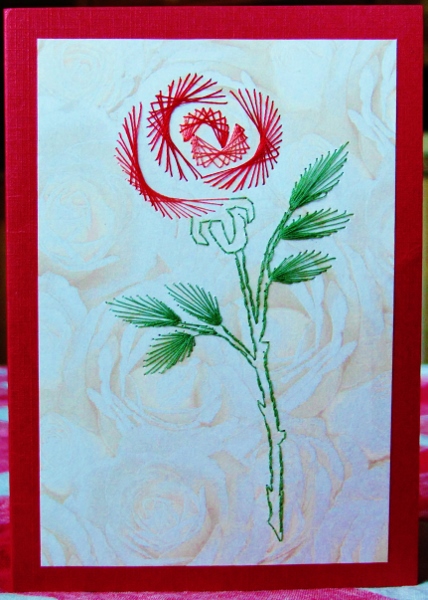
That was the assignment: paper embroidery using only white.

I chose a rose pattern and then edited, adjusted and did my own thing with it before stitching it with white thread on white cardstock.

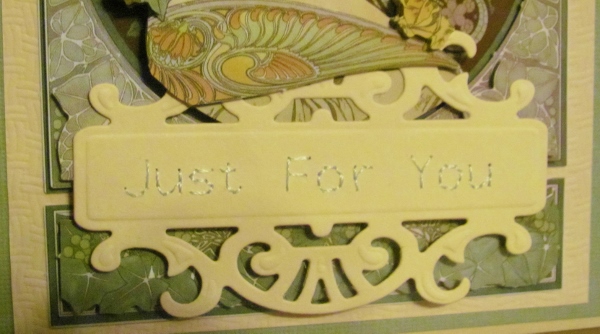
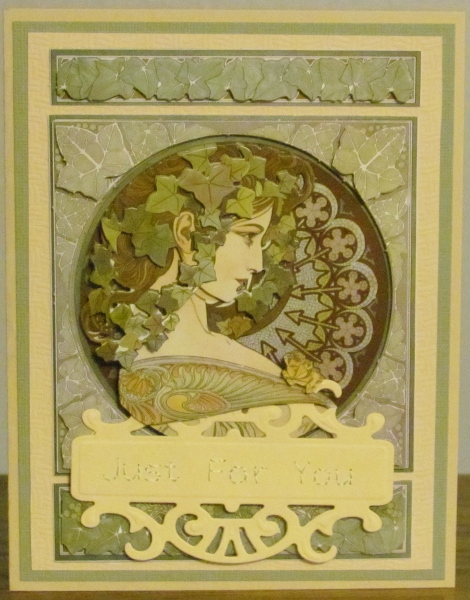
I used the Cuttlebug to diecut some lettering from the panel but then left it in place instead of popping it out.

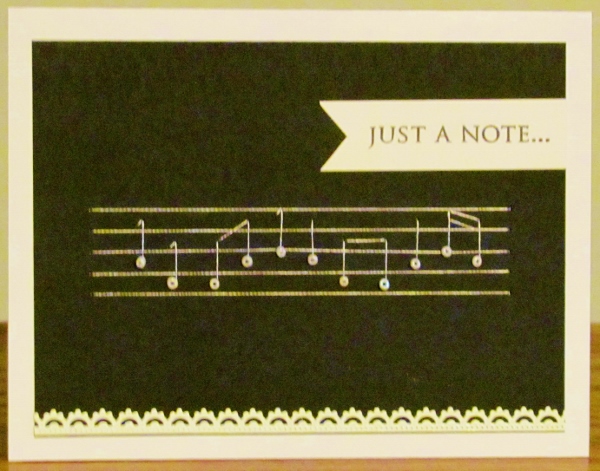
It needed a bit more interest so I added a scalloped edge to the bottom.


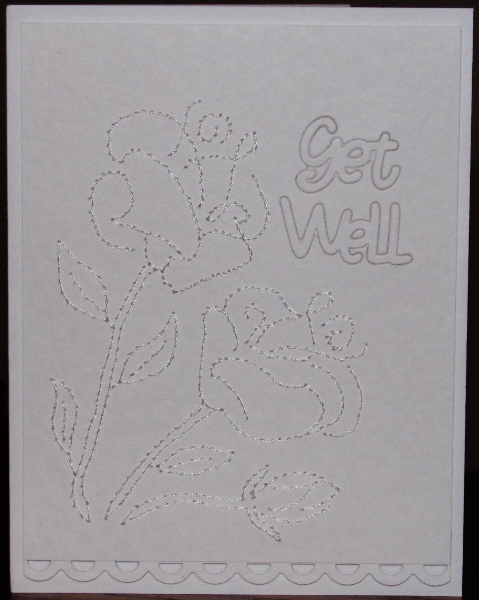
The stitched panel is mounted on a white card base using foam tape.

Ddd


Posted by studio3d@ccgmail.net at 12:01 AM PST
Thursday, 19 November 2015
Round and Round
Topic: Paper Embroidery

Yeah, it's another Christmas card - in paper embroidery. But very soon I will be caught up with these assignments and we can continue with other things for awhile. 

On the other hand, the holidays WILL come in a few weeks time and more cards are still needed. Expect to see them here...

In the meantime, here is the latest. Since the assignment was very generic "make a PE Christmas card" I went with an iconic image, stitching a wreath.

This pattern was stitched in metallic gold and metallic green and then red beads were added for berries.

After it was stitched, I decided I wanted it to be cut into a circle. Well, those beads do not play nicely with the diecutter. I do have a 'B plate' thickness plate with a round aperture in it. It is designed to use with the Cuttlebug folders so only the outer area will make the impression, leaving a blank space in the middle. But I used it to surround the beads while using a scalloped circle die.

I mounted the resulting piece over a red cardstock, then over a green cardstock base.


I added the greeting with a rubon.

Ddd


Posted by studio3d@ccgmail.net at 12:01 AM PST
Wednesday, 18 November 2015
A Little Early
Topic: Paper Embroidery

I know it seems a little early to be posting Christmas stuff, but If swaps are going to be done on time to send to a partner overseas in time for them to use it as one of their personal greeting cards, then I has to be early.

I actually completed this back in October but that WAS to early for me to post it.

The assignment was to make a paper embroidery card with a poinsettia. This pattern is a freebie from so many years ago I don't have any clue who designed it. In fact there are no stitching directions so I just winged it. I stitched with red, green and yellow threads on black cardstock for the contrast.

I mounted the stitched panel on bright yellow cardstock and added the text with rubons.

Ddd


Posted by studio3d@ccgmail.net at 12:01 AM PST
Tuesday, 17 November 2015
Bundled Up
Topic: Paper Embroidery

Next up in the paper embroidery assignment lineup was the theme 'Hats and Scarves'. How fortunate to already have a pattern on hand that incorporates these, plus mittens... on a penguin!

I like penguins anyway so this just called out to me.

I chose a patterned cardstock in blue with white dots as it looked to me like snow falling.

I stitched everything in outlines with the exception of the pompom on the hat (with a poof) and the eyes (french knots). The panel was mounted on a bright pink card base.


I added a prestamped greeting.

Ddd


Posted by studio3d@ccgmail.net at 12:01 AM PST
Monday, 16 November 2015
Diecut Just For You
Topic: Paper Embroidery

Our assignment for the next swap was to use diecuts along with paper embroidery.

Technically, the 3D images I use are all diecut but I'm sure they meant to use the sorts of diecuts that are made with the home cutting machines (like the Cuttlebug). So I did the stitching of the sentiment on a diecut  panel.


I combined this with a card-sized 3D image and layered with colors contained in the image.


Another challenge met...

Ddd


Posted by studio3d@ccgmail.net at 12:01 AM PST
Sunday, 15 November 2015
Music In Black and White
Topic: Paper Embroidery

I went on kind of a paper embroidery spree, getting a lot of cards done for upcoming swaps and challenges. One of these was a swap where we could only use black and white.

I decided to do a reverse on the typical music pattern by stitching in white on black cardstock. I also used white beads on the notes.

I mounted the panel onto a folded white card base and added a strip of peel-off white sticker border across the bottom.


I added a prestamped sentiment with a banner end cut onto it.

Ddd


Posted by studio3d@ccgmail.net at 12:01 AM PST
Saturday, 14 November 2015
Autumn Sunflower
Topic: Paper Embroidery

In October, one of the challenges was to stitch a card with the theme Autumn Flowers. This always means sunflowers to me and I especially like this pattern. However, I never stitch it like the designer shows.

I chose to add two partial panels of dark green behind opposing corners and then mount the whole onto a base card the same color as the flower petals.


The scripture stamp was still on my desk after having used it a few days ago. I stamped that in black and then used Distress Marker in a matching tone to color in the double lines in the letters.

Ddd


Posted by studio3d@ccgmail.net at 12:01 AM PST
Friday, 13 November 2015
P is for Pets
Topic: Paper Embroidery

The embroidery alphabet swap is up to the letter 'P' now and the assignment was to make a card related to Pets.

We don't have any pets at our house - all of the animals around here are wild in the great outdoors. However, both of us love to watch crazy cat videos on YouTube so I decided to stitch cats on a card.

I had a distressed panel from which I had diecut the word 'hello' for another project. I backed it with a different color of distressed panel and added the cutouts from the loops back in their appropriate places.

I pricked out the two cats from one of my own patterns and stitched them using a verigated thread that matched the inset lettering.

The cats blended into the background so much that I used a yellowish marker to color in some parts, adding a little contrast.


I used a cream coloredcard base with a bit of border showing all around.

Ddd


Posted by studio3d@ccgmail.net at 12:01 AM PST
Thursday, 12 November 2015
Liquid Pearl Birdcage
Topic: Stencils

Paper crafting group challenge in October was 'birds and birdhouses'. I guess a birdcage is a bird house so that is what I did.

I have a stencil that includes four birdcages hanging from branches with a couble of birds in the tree.

I used tape to block out all but one of the birdcages and all the birds that were free. I kept the one bird inside the cage.

I used a squeegee to spread Liquid Pearls (color: bisque) through the stencil onto printed cardstock. The stencil was removed and the pattern allowed to dry completely on its own.

I then used Copic markers to color in the bird and the leaves and branches.

I cut the panel to size and stamped a sentiment on the side.


Here you can see the coloring better


I mounted this on shiny gold cardstock, then to a folded card base.

Ddd


Posted by studio3d@ccgmail.net at 12:01 AM PST
Wednesday, 11 November 2015
Blended Butterflies
Topic: Stencils

I liked the use of stencils in overlapping watercolor pencils that I did yesterday so I decided to do it again. This time I used three butterfly diecuts and arranged them in a rising flight design.

Once again, the elements looked too flat, so I used a Sakura glitter pen to draw and color in the patterns that were on the dies.

The effect is great in person but sure does mess up the photography!

I ounted this on a patterned paper with yellow and grey chevrons.

I stamped a greeting on the side and used the glitter pen on the double lines in the lettering.


What am I going to do about this camera?

Ddd


Posted by studio3d@ccgmail.net at 12:01 AM PST
Tuesday, 10 November 2015
Blended Blooms
Topic: Stencils

I saw Sandy Allnock doing a watercolor pencil technique the other day on her blog and decided to give it a try. She was using the blanks left over from diecutting for her outlines but I already had stencils so decided to use that instead.

The stencil (mine were poppies) is laid over watercolor paper and traced partway around (I am using the bloom heads only) with a watercolor pencil. The next bloom is laid overlapping it and another color is used to draw the new bloom head. Where they cross one another an in-between color is used.

When all the flowers are traced the same pencils are used to lightly fill in the blooms with color. The stems and leaves are drawn in with green.

An aquabrush was used to blend the pencil color inside the cross-over areas first, left to right. I then did the same with the stems and leaves and finally I went back to the left and did the blending on the bloom heads (this gave the first pass some time to dry a little before wetting the adjacent areas.

I did go back with some contrasting colors and add a bit to the bottom area of the lighter blooms as a shadow area as they looked too flat.

After drying, I trimmed the panel and stamped a sentiment in black and mounted the piece on a yellow base card. I also added a single doodle line in black to go with the sentiment.


Sandy also did the same with a line of hanging Christmas ornaments and suggested that it would look nice with fall leaves as well.

Ddd


Posted by studio3d@ccgmail.net at 12:01 AM PST
Monday, 9 November 2015
Wide Yellow Bordered Blocks
Topic: Quilting

After making those blocks stretched with white diagonals I still had a pile of the same fabrics cut to 6x6 inches. I decided to make a balanced grid of them with the colors running on the diagonal.

The blocks finished at 5 1/2 inches square which required a wider border to bring the finished top up to 40 inches. I had to cut the border at 4 inches which will finish at 3 1/2.


I was short of all the colors except the yellow to use in the border. It turned out to be the perfect one to use as it brightens this quilt top right up.

Ddd


Posted by studio3d@ccgmail.net at 12:01 AM PST
Sunday, 8 November 2015
I Didn't Do It!
Topic: Work By My Friends

I haven't shared work by my friends for a long time. I participate in swaps year-round on four different lists. Plus, several people send birthday cards and some send RAKs.

I won't try to identify who made these, because you wouldn't know them anyway, but you may be interested to know that they come from the USA, Canada, England, Australia, New Zealand, France, South Africa, The Netherlands, and others I may have forgotten.


These are just the ones received in 2015. We are finding ourselves swapping with the same people over and over as many find the international postage to be a burden.

Thank you to all my friends!

Ddd


Posted by studio3d@ccgmail.net at 12:01 AM PST
Saturday, 7 November 2015
Tow-may-tow / Tow-mah-tow
Topic: In The Kitchen

Mid-October the tomatoes started falling off the vines whether they were ripe or totally green. I picked (and picked up) all of them, washed and sorted them and this is what I ended up with.

First, all the ripe ones:


Then, the ones that were starting to turn. These will ripen in the kitchen window:


Followed by the totally green ones that were larger which I sliced to bread and freeze to make fried green tomatoes. These made three layers on a cookie sheet in the freezer:


Finally, the ends and sides of the sliced ones and chunks of totally green ones that were not large enough to slice. These went through the food processor and got bagged for the freezer to make green tomato bread later:


I ended up with enough chopped tomato to make 20 loaves.

Ddd


Posted by studio3d@ccgmail.net at 12:01 AM PST
Friday, 6 November 2015
Baby Boxes
Topic: Quilting

When I was cutting up fabric scraps I did a stack of them cut at 6 inches square. Then I started making all these quilts and realized the math (not my favorite subject) worked out perfectly with 6 1/2 inch squares so they would be even after the seam allowances were stitched.

Harrumph!

So I cut all of them in half diagonally and added a white fabric strip and squared them up. Still more math problems as they ended up 1/8 inch less than what I had intended.

I went ahead with the construction and then added a 1/2 inch white border and finished with a dark blue border.


With all this math fiddling I only ended up 1/4 inch short overall. I'm calling that good.

Ddd


Posted by studio3d@ccgmail.net at 12:01 AM PST
Thursday, 5 November 2015
Patriotic Stars
Topic: Quilting

I'm still churning out the tops for baby quilts. I pulled out a star-covered white fabric that featured two tones of blue stars plus red ones, all in varying sizes. To this I added a single red and a dark and light blue.

I cut pieces measuring 6 1/2 by 3 1/2 and matched each color to a star. These created square blocks which I arranged to come up with a 36 inch arrangement of diagonal chevrons.


The addition of a 2 inch border brings this up to 40 inches square.

Ddd


Posted by studio3d@ccgmail.net at 12:01 AM PST
Wednesday, 4 November 2015
Spinwheels
Topic: Quilting

I had some large squares of red and green to use for one of these baby quilt tops and wanted to try another arrangement of the disappearing pinwheel.

This one trades the corner pieces for the side pieces and then turns them to make the pinwheel into a large spinner.

I added sashing between the blocks to bring the center up to 36 inches.


I gave the outer border another 1/4 inch to achieve the desired 40 inch measurement.

Ddd


Posted by studio3d@ccgmail.net at 12:01 AM PST
Tuesday, 3 November 2015
Doggies in the Window
Topic: Quilting

I took the same idea used in the monkey quilts and translated it into a quilt with puppies.

Someone had given me a print with crowds of dogs on it. I didn't have much so carefully measured to figure out the maximum size of squares I could cut to get 9 even blocks.

Then I calculated the width of block borders needed to bring them up to 12 1/2 inches. These were cut out of dog paw prints - 5 in black and 4 in brown.

I banded the puppies with the paws and then set them in alternating color blocks.


I used a grey patterned fabric border that pulls color from the big fluffy dog featured in the center column.

Ddd


Posted by studio3d@ccgmail.net at 12:01 AM PST
Monday, 2 November 2015
Wild Baby
Topic: Quilting

Next up in the lineup of baby quilt tops is one created with a variety of patterns in very odd greens and browns. Taken together they give the feeling of wild animal prints although none of them really are!

I used a 36 inch grid to create a variety of block sizes that could be mixed and matched to give a totally random arrangement.


I used a tan 2 inch border to bring this up to 40 inches.

Ddd


Posted by studio3d@ccgmail.net at 12:01 AM PDT
Sunday, 1 November 2015
Tiny Dot Monkeys
Topic: Quilting

The second of the monkey quilt tops uses the same fabric, same layout, same colors... but I used a black fabric with tiny colored dots for the border. The dots are the same size as the eyes on the monkeys so I reinforces their faces.


These are so bright and cheerful.

Ddd


Posted by studio3d@ccgmail.net at 12:01 AM PDT

Newer | Latest | Older