Mini-Distress Redux
Topic: Supplies
Not so long ago I shaared some cards I made with the experimentations using the mini-distress ink pads I had bought. The pads came in sets of four and I used four of them on those experiments without regard to which set the pads originated from.
So I had four new pads left and wanted to do some different experiments. I had a brown, turquoise, purple and dark yellow.
I pulled out a sheet of watercolor paper from a pad and took each of the colors in turn and made a direct-to-paper swipe top to bottom. Then I turned the paper and made stripes with each in turn until I ended up with a plaid.
When the sheet was completely dry (I helped it along with the heat gun), I used a paper cutter to chop the whole page into one-inch squares.
I sorted the squares by their dominant and accent colors as set up for the next steps.
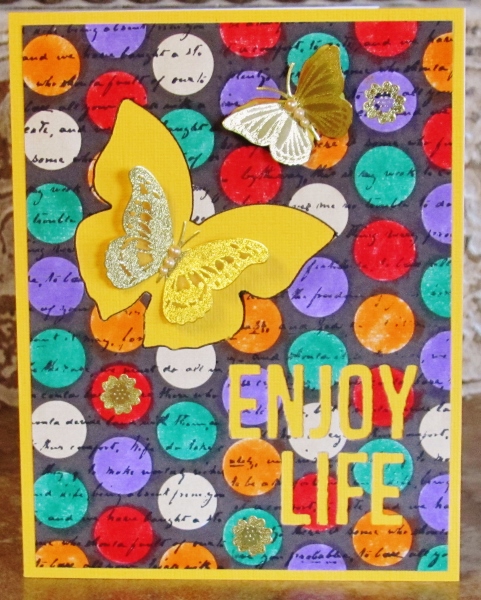
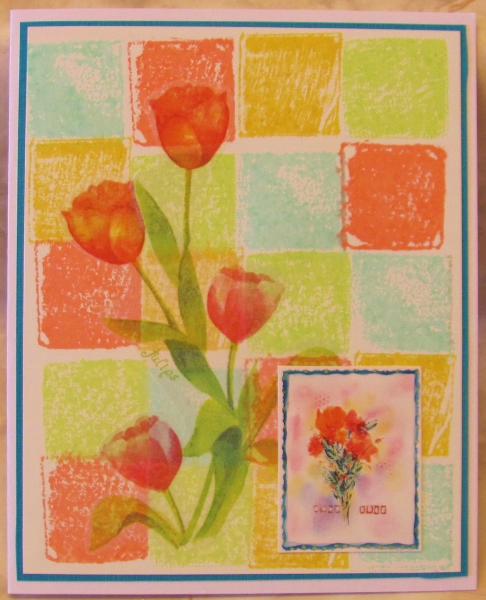
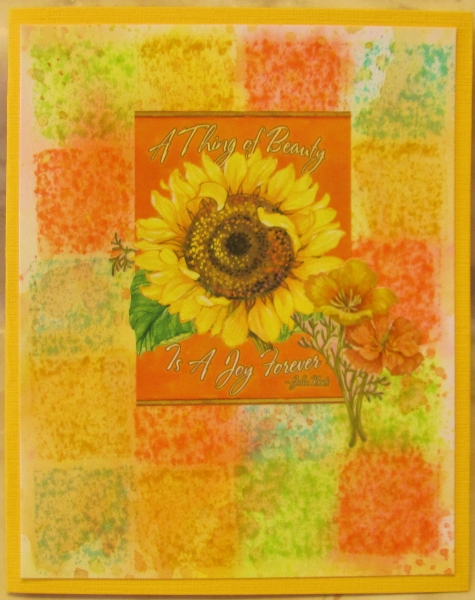
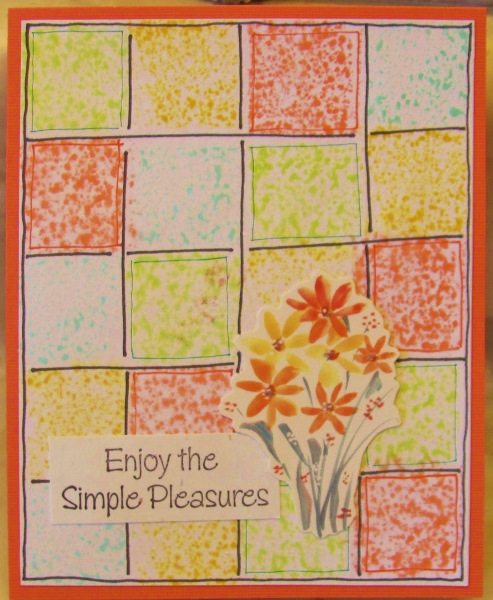
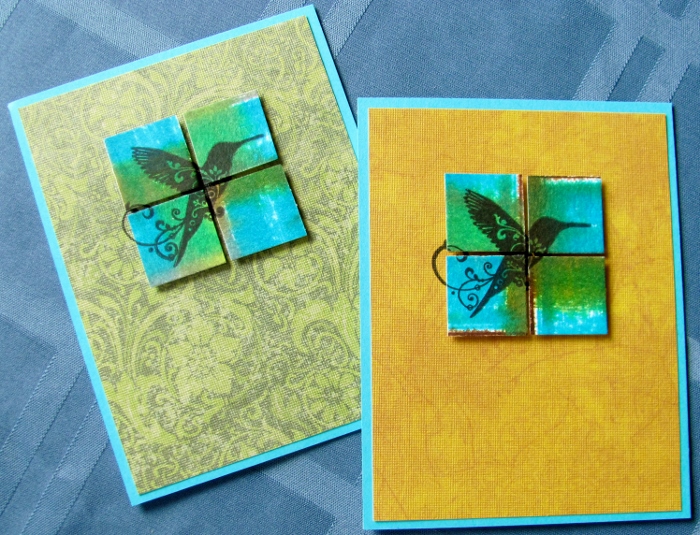
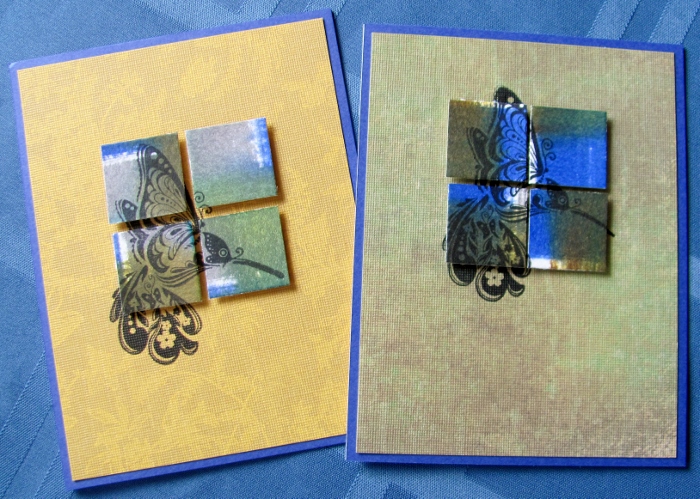
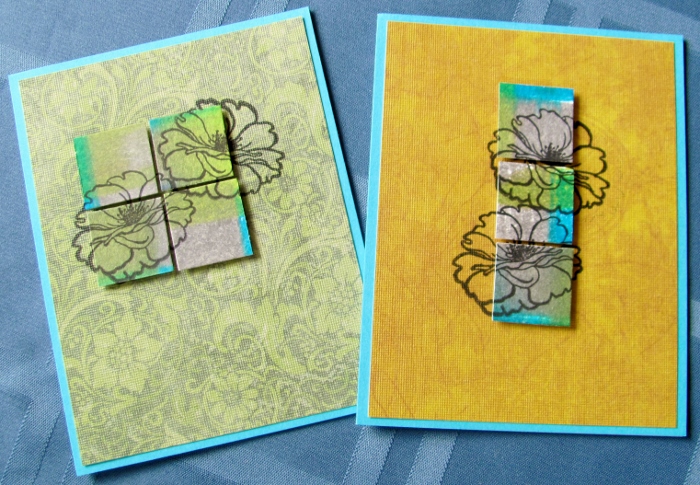
I chose four squares with similar coloring and arranged them on scrap paper in a grid with a small space separating them. Then I used black ink to stamp an image, letting the stamp hang off as needed.
I selected a background (cut to 4 x 5.25) that went with the colors in the square. These papers were new to my stash as I just picked them up in a 12x12 pad at Tuesday Morning. I had cut each of the pages to 6x6 for ease in working with them.
First, I stamped the image onto a stamp positioner. Then I laid the squares on the background where they would be mounted. I placed the stamp positioner with the image lined up on the squares, set the 'L' in place, removed the stamped plate, removed the squares and then stamped the image on the background. PERFECT!
I used foam tape to mount the squares over the stamped background where their perfect alignment allows the image to show in the spaces between and aound the edges.
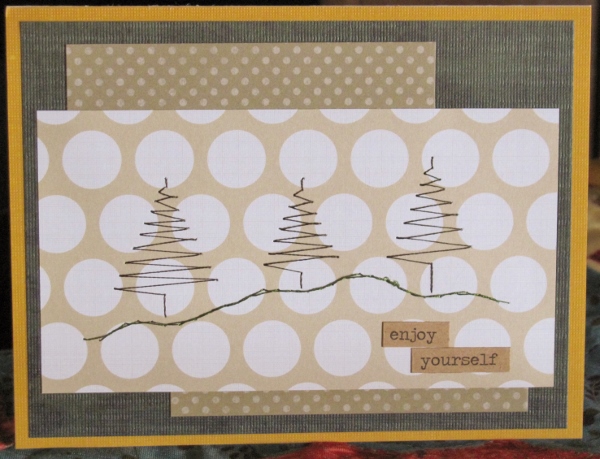
Each card got a bordering piece to enhance the image and became the front on a white card base.
I made 15 cards using 6 stamped images.
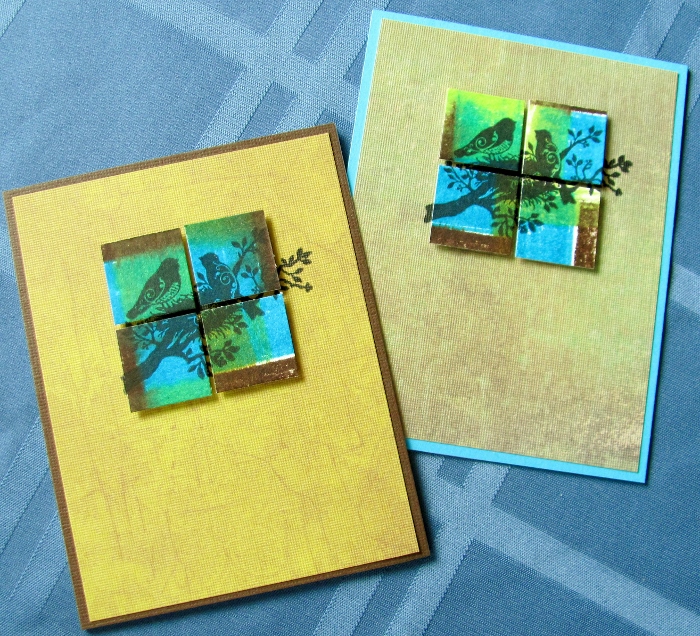
2 cards were made with nesting birds:
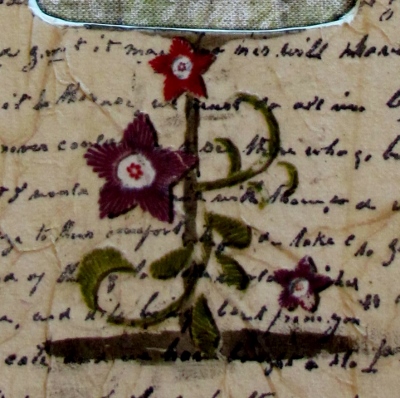
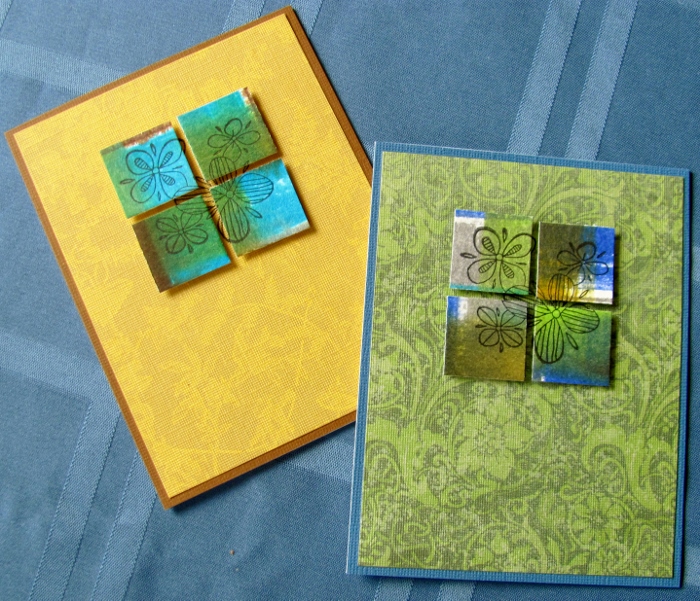
2 cards were made with a floral grouping. The image fit all inside the squares so y9ou only see the stamped portion of the background in the spaces:
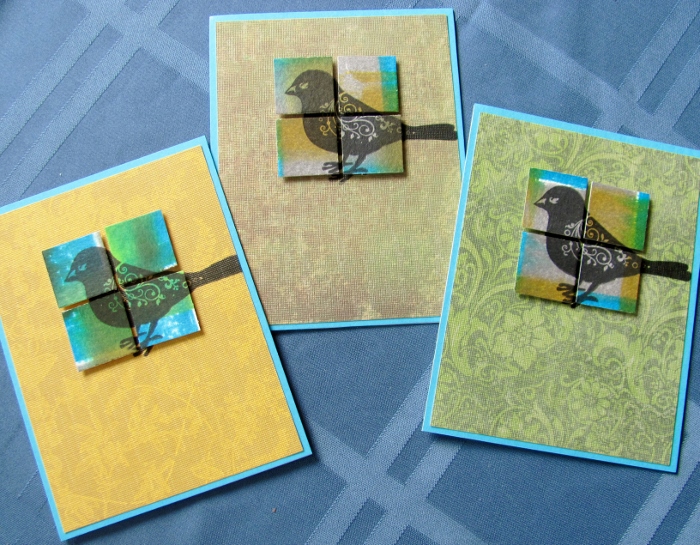
3 cards were made using the large bird image:
2 cards use this small hummingbird stamp:
2 cards use a larger hummingbird:
For these cards with two floral blossoms I had to use the stamp positioner two times to align the images separately. 2 cards are arranged like those shown previously:

I wanted to do something a little different so I arranged the squares to be off center on one card and I used only 3 squares on another:
I'm going to match these with envelopes and give them as a gift set of notecards.
Ddd
Posted by studio3d@ccgmail.net
at 12:01 AM PDT