« November 2016 »
S M T W T F S
1 2 3 4 5
6 7 8 9 10 11 12
13 14 15 16 17 18 19
20 21 22 23 24 25 26
27 28 29 30
You are not logged in. Log in
Entries by Topic
All topics  «
3D paperwork
A - Z challenge 5
A - Z challenge 7
A - Z challenge round 4
A to Z challenge round 3
A to Z round 2
A to Z round 6
A-Z round 1
Around the House
Art Challenges
Artist Trading Cards
Backgrounds
Beads
Bible Journaling
Books
Boxes
Collage
Color Challenge
Coloring
cookbook
Die Cuts
Digital Projects
Digital Stamps
Drawing
Dry Embossing
Fabric Stuff
Fantastic Folds
Field Trip
Home Decor
How Does Your Garden Grow?
Hymnal Art
In The Kitchen
In the studio
Jewelry
Lettering
Links
Multi-Technique
Music to Work By
Musings
Nail Art
New Work
Online Class
Other Hobbies
Other Projects
Painting
Paper Embroidery
Paper Piecing
Photo
Pretty Paper
Quilting
Random
reading
Scrap Recovery
scrapbooking
Sewing
Sketch Challenge
Some Backlog
Stamping
Stencils
Stickers
Supplies
Teabag Folding
Techniques
Testing
tips and tricks
Tutorial
Web resources
Welcome to my Blog
Work By My Friends
workflow
Writing
Blog Tools
Edit your Blog
Build a Blog
RSS Feed
View Profile
Group One
In & Out of Studio 3D
Wednesday, 2 November 2016
Bible Journaling - Isaiah 40:31
Topic: Bible Journaling

I had wanted to do this scripture for some time and then it was the sermon topic last Sunday in our series on 'Promises'. Well, how could I NOT do it now?

I combined two photos, one for the eagle and one for the background, to create the scene. 

The text style is from a book on creative lettering.

I chose to make this a double page spread for more impact as I could make the bird so much larger that way.


Many more to come.

Ddd


Posted by studio3d@ccgmail.net at 9:57 AM PDT
Tuesday, 1 November 2016
Down a Lazy River
Topic: Field Trip

We recently had a new experience - cruising on a river boat. We took a sternwheel steamboat down four rivers - Mississippi, Ohio, Tennessee and Cumberland. Then we followed up with a few days with family.

Along the way we were in St. Louis, Missouri - Alton, Illinois - Grafton, Illinois - Cape Girardeau, Illinois - Dover, Missouri - Paducha, Kentucky - Clarksville, Tennessee -  Nashville, Tennessee - Lynchburg, Tennessee.

The paddlewheeler was fun and not at all like the cruise ships we are used to. VERY tiny towns we stopped in along the rivers.

Here are some of the best views...

Reflection of our hotel in the windows of the hotel next door:


St. Louis Arch:


Three of the six flags mounted on the front of the boat:


The infamous sternwheel:


The boat in Grafton:


Bridges were beautiful. This one is in Cape Girardeau:


Detail from the 'front porch' of the boat:


Early one foggy morning on the river:


Walking in Dover:


Decor on the boat:


Along the riverwalk in Clarksville:


Outside Lynchburg:


With so many days of beautiful weather it was hard to decide what photos would best represent the whole of the trip. I chose these 12 and will turn them into a calendar with the next 'free' offer I get from Shutterfly.

Ddd


Posted by studio3d@ccgmail.net at 12:01 AM PDT
Saturday, 15 October 2016
Bible Journaling - Isaiah 12:3
Topic: Bible Journaling

Today I did journaling artwork in Isaiah 12:3.

For reference, I searched for photos on the internet of wells and chose two to work from. One was used for the buckets and one for the stonework in a generalized sense.

The lettering was inspired by a book on lettering styles.

I really love the fact that my pen does not bleed through the pages. I think I may have mentioned that a time or two!


So hard to get colors right in the photo but there is truly NO green in the stonework!

Ddd


Posted by studio3d@ccgmail.net at 8:11 PM PDT
Monday, 10 October 2016
Journaling Matthew 5:16
Topic: Bible Journaling

I had some time to day to take a little quiet break and work in my journaling Bible.

I've been turning every page in all ov my other Bibles to see what verses I have marked, underlines or highlighted. I compiled a list of references followed by a few key words so I can scan them and choose a verse to work on.

Today I chose Matthew 5:16.

I first illustrated a burning candle and then went over to the margin to illustrate the words.


I had some fun with the 'light' portion of the text, using little light bulbs and some glow.


And then, just for one of my grandkids, I drew an eye for the word 'see'.


I'll admit, she draws eyes much better than I do but this serves the purpose.

Ddd


Posted by studio3d@ccgmail.net at 8:21 PM PDT
Updated: Monday, 10 October 2016 8:22 PM PDT
Sunday, 9 October 2016
Sea Shore Shells
Topic: Quilting

Serendipity!

That's what I call it when I FIND a gift card for fabric from three years ago that got misplaced... I fall in LOVE with a seashell themed jellyroll of fabric when I go with my gift card... I spy the PERFECT pattern to use with the jellyroll... and find out only days later that someone special is buying a BEACH HOUSE. Just like that, all the pieces come together for a wonderful housewarming gift!

I only had to add a few bits of fabric from my stash and they worked perfectly with the colors and theme: a tan with a print that looked like sand, a tan with a stone-like print, a white for the background that has a bright white dot that makes it look like bubbles or seafoam.

I even had a donated fabric for the back that is in the same shade of blue in a watery print with a bit of glitter in it.

I'm telling you, it's serendipity.

Here is the quilt - cut down considerably from the original pattern that takes it from a queen-size to a lap quilt:

Oh, yes - the border was from my stash as well.

I wanted to keep the quilting in the same theme so I downloaded line drawings of seven seashells and enlarged them to each fit on a sheet of 8 1/2 x 11 paper. These were cut out including cutting into them so I could trace all the inner bits of shaping. 

I did that tracing with a Frixion pen ON THE BACK of the quilt so that I would not be distracted by the pattern on the front. I made sure none of the quilting crossed into the dark border since I was going to use a cream thread for all of it. I twisted and turned to fit the shells in, traced a set, moved the patterns and traced some more. I made sure that there would be no two shells the same next to each other.

I stitched in continuous lines, stitching over some areas as needed for 'traveling'. Then the Frixion pen was heated with the iron and 'poof' it vanishes.

Here are each of the shell styles that I used:


I used the backing fabric for the binding. The effect of this is one that allows the quilt to look good from the front OR the back.

Off to deliver it!

Ddd


Posted by studio3d@ccgmail.net at 12:01 AM PDT
Thursday, 6 October 2016
Monster Mash
Topic: In The Kitchen

Today was the day to harvest the butternut squash from the garden. There were 10 of them!

I wanted to have them already cooked when going into the freezer so I decided to go with a whole roast, scoop and mash.

This is one tray out of the three total. The squash were cut top-to-bottom and the seeds scooped out. I brushed olive oil on the cut side and then placed them cut side down on a baking pan. After adding a cup of water to the pan I baked them for 45 minutes at 375 degrees.


After baking, I used a spatula to lift them out and place them cut side up on a board to cool.


When cooled, I scooped the flesh into a big bowl and used a potato masher on it. Since it will be used in a variety of recipes, I did not add anything to the mash.


I measured out one cup portions into sandwich bags and squeezed out all the air. These were then stacked into gallon freezer ziplock bags and marked with date and contents before going off to the freezer.


The final count was 19 cups of butternut squash. Yummy!

Ddd


Posted by studio3d@ccgmail.net at 6:24 PM PDT
Wednesday, 5 October 2016
WHat's For Lunch?
Topic: Sewing

As I am packing up to go to quilting twice a month I keep reminding myself that I should have an insulated lunch bag to keep my food cold instead of just tossing it into a gallon zip-lock bag.

When I was trolling the internet for something else the other day, I came upon a link to a digital pattern for just such a lunch bag and ordered the pattern for download.

I did change up a few supplies along the way but the pattern was useful and got me going in the right direction.

I already had a large piece of fabric on hand that was marked in the selvege as being Scotchguarded. Since it was the only fabric in my stash with this treatment I decided to use it for both the exterior and lining of the bag.

I also already had on hand some of the InsulBrite which is an insulating batting like one would use in making potholders and... lunch bags!

The instructions called for webbing to use as the handle and the binding. I made my own handlle from the fabric and folded it in and in again (to make four layers) and edge stitched it. I used some on-hand double-fold seam binding for the binding edges and I had sew-in velcro on hand for the closure.

Here is a front view of the bag:


This 3/4 view shows how wide the bag is on the sides:


Here is a view of the interior. You can see the velcro closure, the way the sides fold in and the lining:


The base is large enough for my freezer block to lay in the bottom as well as having enough room left for a drink bottle, and all the other lunch foods (plus snacks).

Thanks to the Scorchguard finish, I will be able to swipe out the inside from crumbs and other debris.

I'm looking forward to using it this weekend.

Ddd


Posted by studio3d@ccgmail.net at 5:08 PM PDT
Saturday, 1 October 2016
Gift Wrap Stack
Topic: Other Projects

Ya know, somethimes life don't fit in a box.

I found this to be true when trying to wrap gifts for a wedding. One thing came with a box and that was good.


Then one came in the strangest shaped packaging so I combined a short oval box with some cardboard to make it taller and then placed the lid on before wrapping.


And then there was the stack of soft items with no packaging at all. I rolled each one individually and made one big self-contained oval of them. I used extra layers of wrapping for stability.


So, look what happens when they all get stacked up on the gift table - a little wedding cake!


That explains why the lace and ribbon trims are all at the top and bottom of each package.

I just thought this was fun.

Ddd


Posted by studio3d@ccgmail.net at 12:01 AM PDT
Wednesday, 28 September 2016
Sew Darned Cute
Topic: Sewing

I had an idea for a project for a gift and then couldn't find any pattern for what I wanted to do. You know what that means... gotta make my own pattern - cause I'm not going to let this idea go!

The Idea: Make a set of placemats that look like vintage camp trailers and have a bit of flair. My daughter-in-law is a big fan of 'glamping' (glamour camping) and I thought this would be just the ticket for her birthday.

I started with 6 pieces of paper the same size and did rough sketches of camper bodies in various outlines. Then I drew in the same tire/hub, door and propane tank for each - with variations in exact placements of them.

I then drew over each element with a Sharpie marker, refining the shapes as I went.

Every element was then traced onto the paper of Steam-a-Seam2 and rough-cut outside the lines. I had to remember to reverse the elements that were directional (a swoosh, a shaped window, etc).

Then I laid all the patterns out on the table and started pulling fabrics from my scraps. This was the MOST FUN part! I selected retro-looking, repesentational, and funky fabrics that made me think of campers actually rolling down the road. I selected window fabric, tires, hubs, doors and tanks that were the same for all for consistency.

Where the upper and lower sections were of different fabrics I stitched them together so the background would be all one piece. Then I laid the background over the pattern on the ironing board.

Each piece got the Steam-a-Seam2 pressed onto the back, trimmed up to its outline and the backing peeled off. Working from the background forward each element was placed and then pressed down.

Then began the tedious business of appliqueing every piece in place. I did this with my machine using a small blanket stitch and a taupe thread for everything. Special elements like the lines in the windows and such got a different specialty stitch.

When all the pieces were stitched down, I turned the piece face down. I trimmed out the original pattern to its outline and laid it down over the fabric. By aligning the pattern with the stitching on the tires, door bottom and propane tank I could set it right in place. I traced the outline with a marker that disappears when heated (Frixion).

The placemat was then layered... batting, backing face up, camper face down... and pinned together. The backing fabric is consistent across all 6 mats.

Leaving a gap along the base, I backtacked and then sewed the entire traced outline, backtacking again at the other end of the gap.

I trimmed the batting to 1/16 all around and the seams to 1/4 and I clipped the curves. I also cut out a wedge of batting in the gap and turned back the seam allowances and pressed them along the gap.

Then the whole mat was turned right side out, the curves worked out, and I topstitched 1/8 inch all around, using the topstitching to close the gap.

I used a straight stitch to go around the door and this is usually the only quilting (a couple of windows needed outlined where the door was way off the center).

Then they were done!

Ready to see them?

First up is an aqua glamper featuring a retro diamond print on top and a dot on the bottom. It features curtains of lace seam binding and a shaped window:

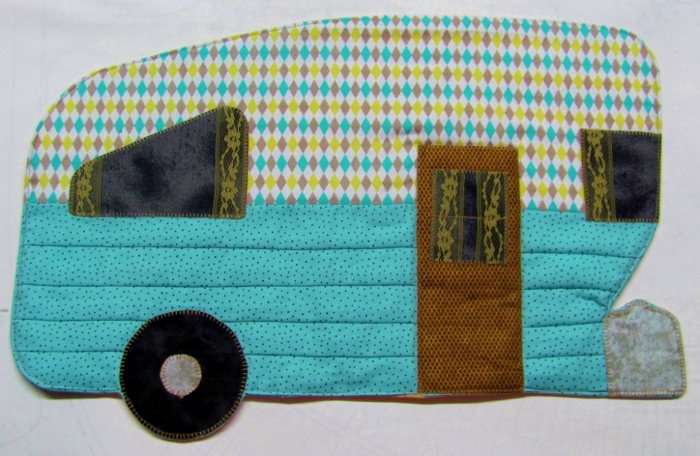
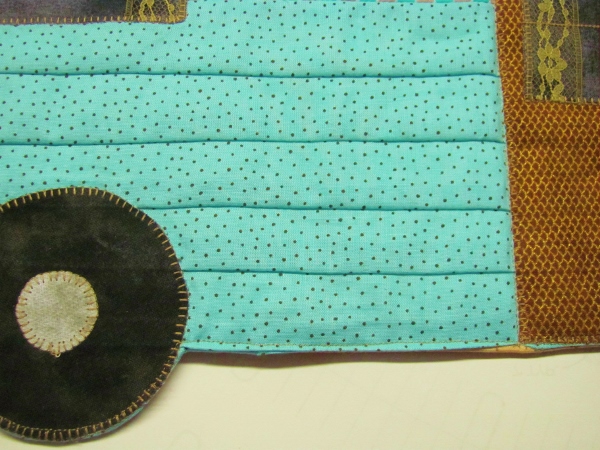
My favorite thing on this (other than the fabric) is the lap siding on the lower half. I did this by stitching tucks before sewing it to the upper part. Then it was treated just as if it were flat for the rest of construction.


Next is the 1970s glamper. Totally weird fabric for the siding! It has a nifty window where the overhead bed would be, too.


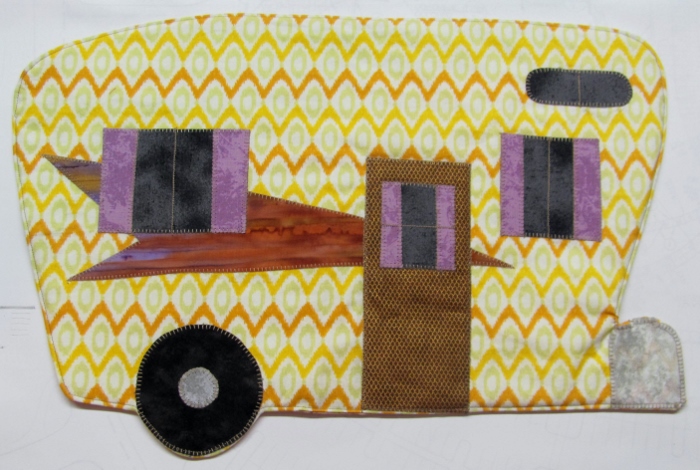
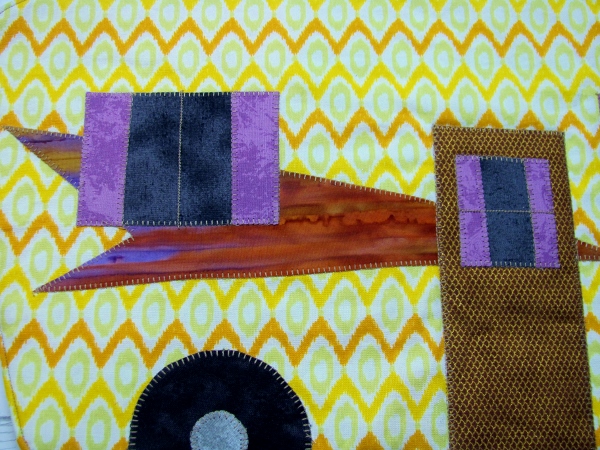
My favorite part of this one is the batik swoosh on the side. This was one of the elements that had to be reversed when cutting its pattern.


And then we have this striped cutie. So far, I think this has been everyone's favorite.

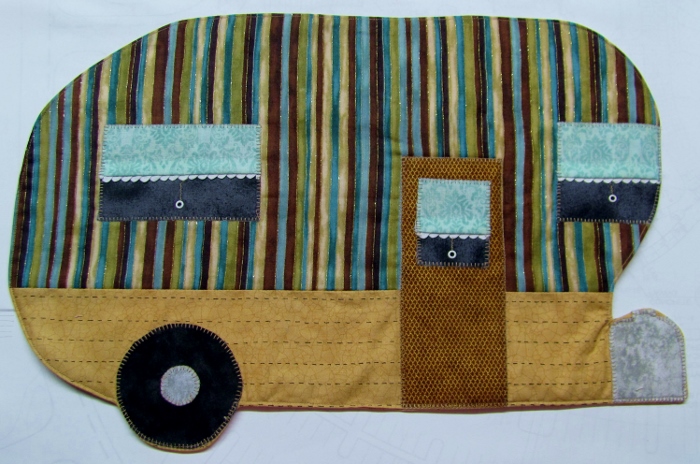
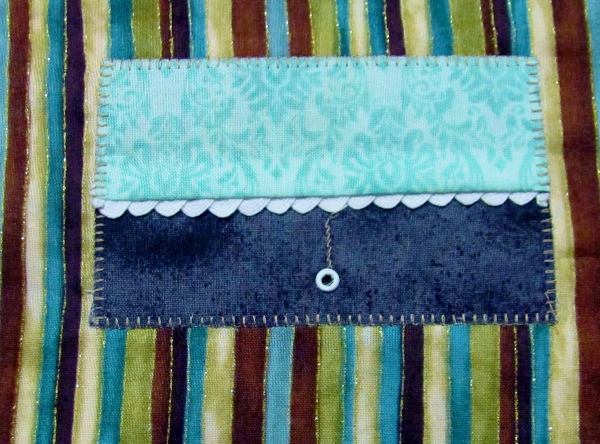
The overwhelmingly favorite element on this glamper is the window shades. They were stitched to the window fabric with a braided rickrack layered between and then the widow was cut out from that. After the blanket stitching was done around the edge I added a heavy line for the string and used my eyelet setter to install the pulls. I did have to iron on a little fabric behind the pulls so the batting would not beard out.


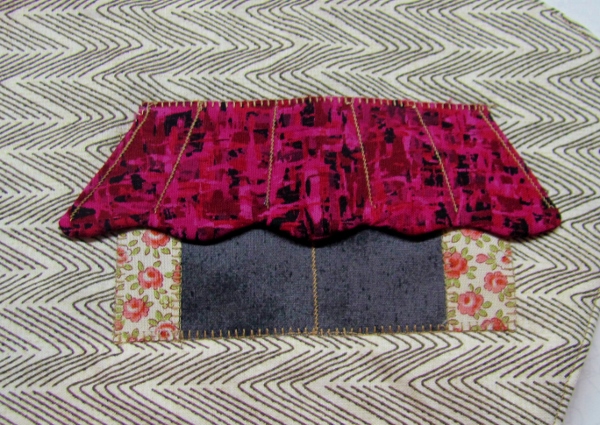
Next up is the purple palace:


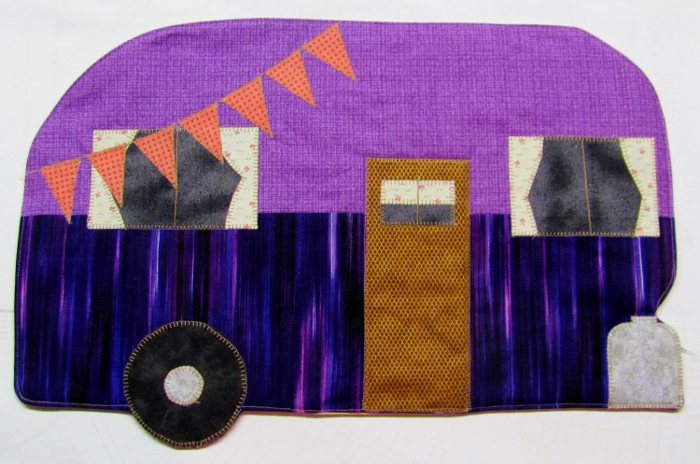
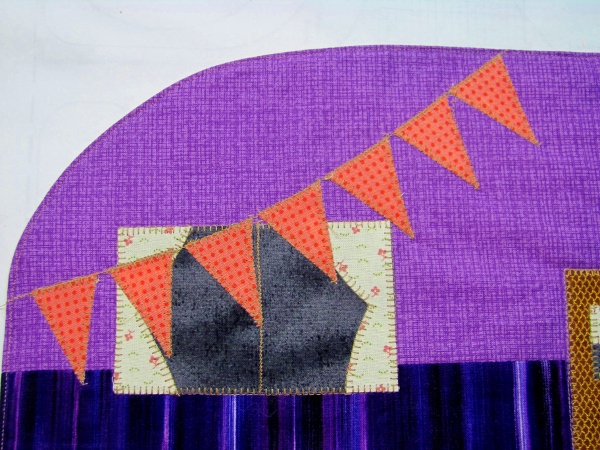
My favorite feature on this one is the bunting hanging on the side. I guess that means this one is parked since you wouldn't want to leave that flapping while going down the road.


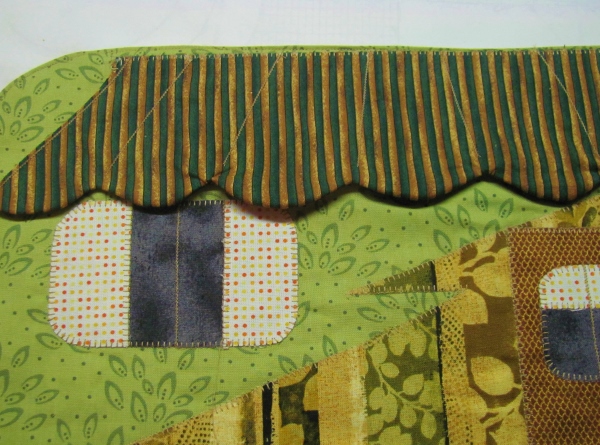
Then we have a semi-camoflage model. this would look good when glamping in the woods instead of in a park.


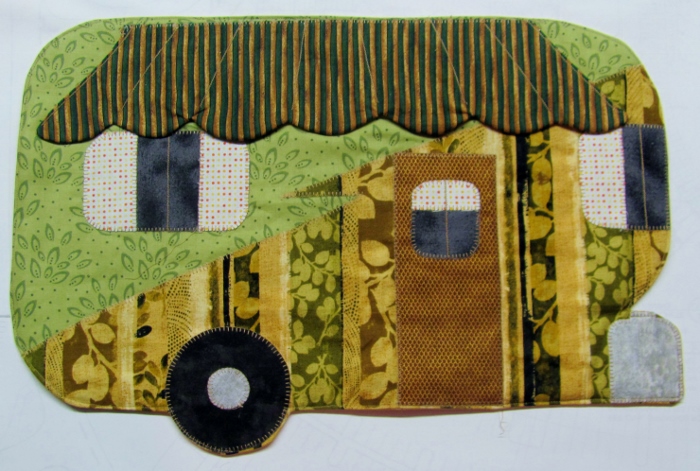
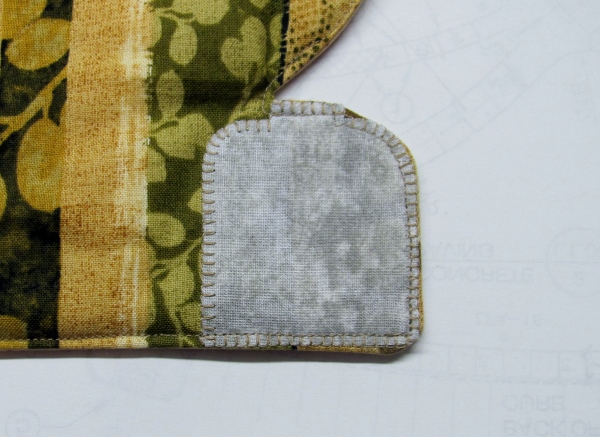
My favorite thing on this is that big roll-out awning. Just perfect for some shade to read or nap. Those stitching lines keep the awning flat while leaving it open on the lower edge.


And last is a zig-zag stripe that looks like it is on the move. The wheel on this one is WAY forward so it really has to go on stabilizers when it is parked:


You can see BOTH my favorite elements in the photo below. 1) the flowered curtains 2) the awning over one window.


One of the cutest things about all of these is the little propane tank on the front. I didn't want a towing hitch sticking out there so this was a way to define the front and have a little fun at the same time.


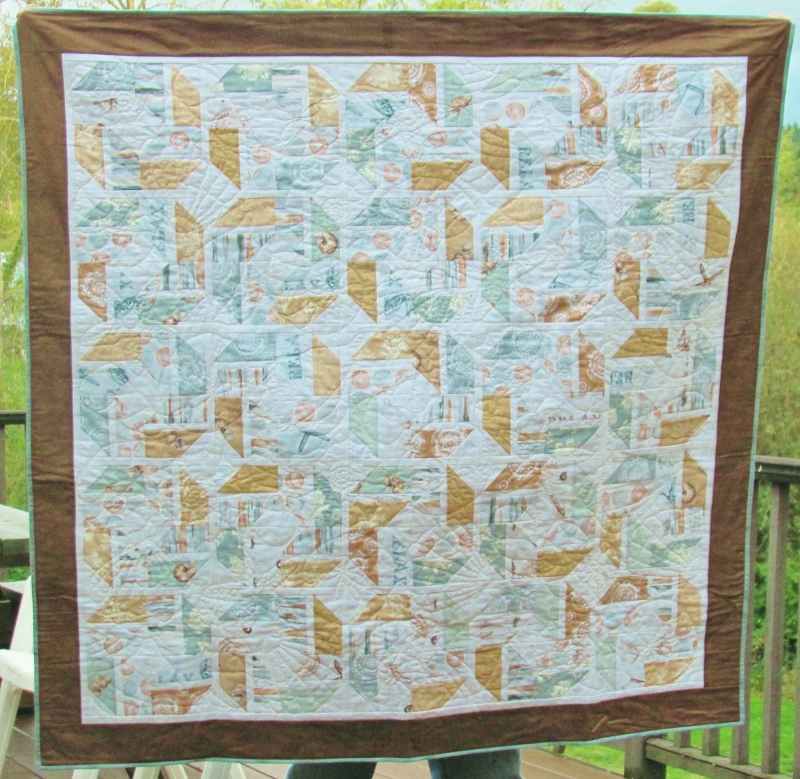
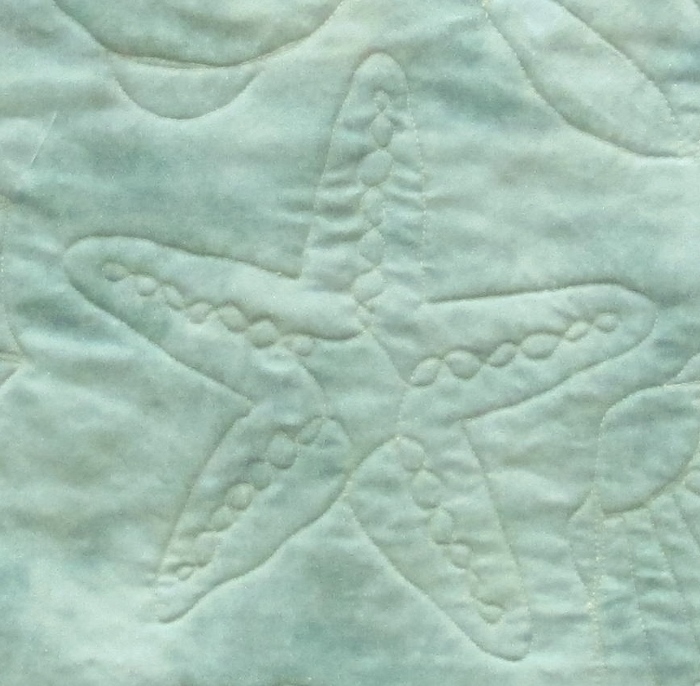
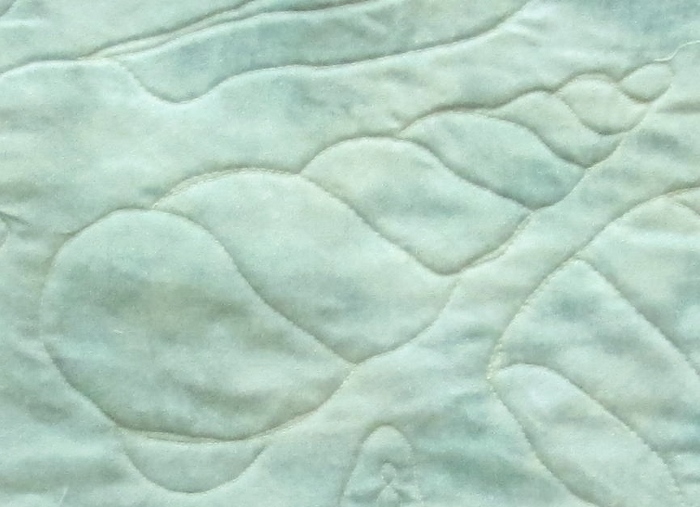
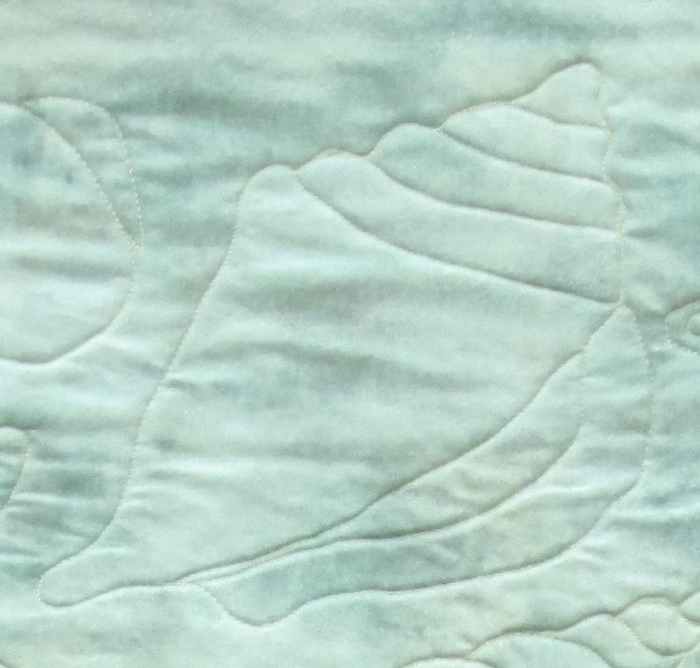
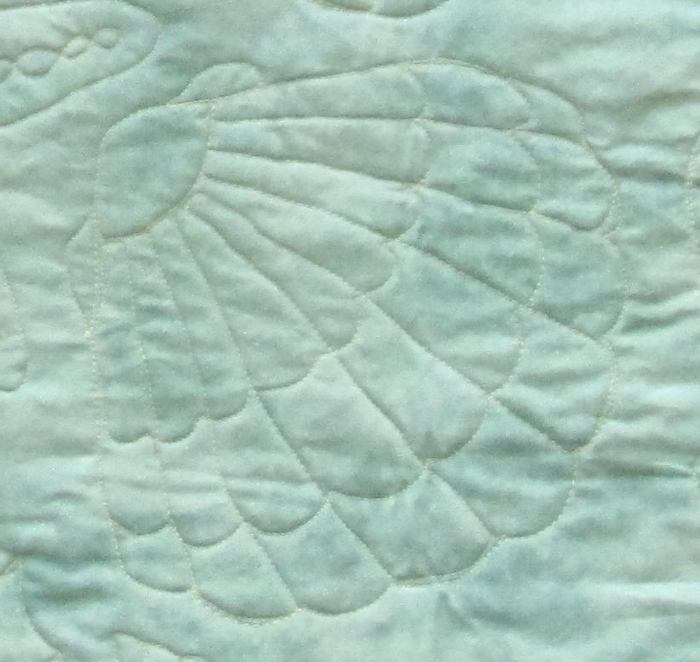
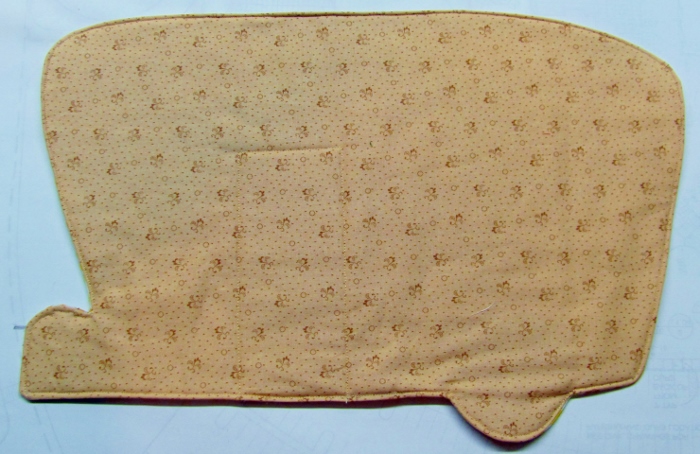
As I mentioned before, all the glampers have the same backing. Here you can also see how little quilting was needed to hold these together because the batting allows for 9-inch spacing.


So there you have it! I am sure my daughter-in-law is going to love these whether she takes them in their camper for use on the road or sets the home table with them when she wishes she were on the road.

Happy Glamping!

Ddd


Posted by studio3d@ccgmail.net at 12:01 AM PDT
Tuesday, 27 September 2016
Way Beyond Cute
Topic: Sewing

I was strolling through Pinterest yesterday and ran across a link to the cutest little cosmetics bag with pleats. It is just adorable so I followed the link and came to a video tutorial here.

The tutorial audio is in German but there are English sub-titles along with measurements in both centimeters and inches, so it was easy to follow.

Today I selected some fabrics from my scraps and made TWO of them, using different colors of zippers. All the photos below are of the version with the gold zipper. The other unit has a light green zipper.

Here is the bag in whole:


In this shot I exposed the inside of the pleats so you can see the fabric there:


And here you get a look at the lining fabric:


Isn't this neat?

The bottom corners are boxed so the bag stands up on its own.

Now I want to adjust the pattern so I can make a bigger bag, add some handles, put some pockets inside...

What fun!

Ddd


Posted by studio3d@ccgmail.net at 6:36 PM PDT
Friday, 23 September 2016
12 Tags of 2016 - September
Topic: Multi-Technique

Well, I must say I started out to follow along with Tim Holtz's tag directions. But he went off on a specialty product that I did not have so I took my own tangent and finished up the project in my own way.

These are the tags that Tim combined for his tag:

And this is the tag he created:


So, here are the steps I used to create my project:

- Select a base cover stock to work on. I chose two so I could experiment with the shiny side and the matte side.

- Shake three Distress Paints and apply to craft sheet

- Shake three coordinating Lumiere paints and apply to craft sheet

- Mist heavily with water

- Swipe base cardstock through paint till covered (repeat with other card)

- Mist with more water to blend

- Dry with heat tool

- Ink over entire tag with various Distress inks using blending tools

- Flick water to activate top layer

- Stand on end to let water drip

- Dry with heat tool (blot excess for contrast)

- Trim matte piece to size and ink edges with walnut Distress Ink

- THIS IS WHERE I DEPARTED WAYS WITH TIM

- Use a small leaf stamp and Archival ink to make a 'second generation' stamped border around the edge

- On glossy piece, stamp realistic leaves using Archival ink

- Cut out leaves

- Use colored pencils to add a bit more color to leaves

- Use a scoring tool to score the major veins

- Bend leaves forward on the scores

- Use bone folder to gently curl the leaf tips back

- Use foam tape to mount leaves to matte base (foam under the raised areas and glue on the center vein and tips)

- Add sticker letters to form text

- Layer vellum over a dark cardstock and trim large enough to leave a border around the matte piece

- Mount matte piece to vellum

- Add gold peel-off corners and borders

- Display

Here is the artwork I created using these steps:


So, what did I skip? the use of a 'paper' called Yupo and a 'negative stamping' technique using alcohol inks. I've done this technique with transparency (long ago) but I don't have access to Yupo and didn't want to buy any just to try this.

I also skipped a technique for creating a patina on plastic letters. This is where I used sticker letters.

I'm happy with my 'tag' though.

Ddd


Posted by studio3d@ccgmail.net at 9:03 AM PDT
Updated: Friday, 23 September 2016 9:04 AM PDT
Thursday, 22 September 2016
Bible Journaling - John 6:35
Topic: Bible Journaling

I am finding that the colored pencil Bible journaling is so relaxing and personally rewarding.

For today, I decided to work in the book of John.

I tried out a different lettering style - tall, skinny, high center - and used a bit of a pictogram as well (little loaf of bread at the top.)

I did more scroll-work than usual amongst the lettering and colored the letters pretty much as before. I used fairly bright colors here since the illustration is monochrome.

The scripture is illustrated with a loaf and a slice of bread.

These small pictures are a great way to get comfortable with my colored pencils, too.

Ddd


Posted by studio3d@ccgmail.net at 4:53 PM PDT
Monday, 19 September 2016
Storming the Castle
Topic: Coloring

I reviewed my colored pencil drawing of the castle from August 27 and I found that the tones across the board were too similar. There just wasn't enough contrast.

So I pulled out the colored pencils again and set to work intensifying and working on shading and shadows.

I'll give you a side by side so you can see the changes:


I'm much happier with it now.

Ddd


Posted by studio3d@ccgmail.net at 12:01 AM PDT
Sunday, 18 September 2016
Fruit Of the Spirit - Bible Journaling
Topic: Bible Journaling

Many years ago I did a devotional called 'The Fruit of the Spirit is bananas' in which each of the fruits is assigned a real fruit to represent it. The only ones I can still remember are bananas=joy, apples=goodness, grapes=self-control, and kiwi=meekness. Also, the basket that holds them all = love.

So, for the fruits of the Spirit scripture (Galations 5:22-23) I created a drawing using these plus other fruits to round out the fruit basket.

These include orange=faithfulness, plum=forbearance, cherries=patience, lemon=peace, and pear=kindness. After the fruits were drawn in ink, I wrote the fruit's word inside the outline and then colored it.

The word LOVE is used as a weaving on the basket.

I colored the outline letters with a color-blending going from turquoise to green to orange to purple.


I grew up on the King James Bible and now use the NIV. The scriptures that I have memorized are in my head in KJV so I am torn, sometimes, on that version to use in the journaling.

So far, I am using NIV since that is the translation of Bible I am working in. I may break out of this occasionally when the KJV is so overwhelmingly 'right' to my brain. More than likely, these will be things like the 23 Psalm and the Lord's Prayer. We'll see.

Ddd


Posted by studio3d@ccgmail.net at 8:32 PM PDT
Saturday, 17 September 2016
More In the Travel Room
Topic: Around the House

I found more things to include in the travel-themed guest room which meant that some of the previous things needed to be moved around.

First in the door you come to the dresser. I didn't change anything on the top display but did take away the butterflies that were on the wall. In their place, I hung a little burlap bag that was a free gift when we bought coffee there.


Next is the corner wall that is on the right side of the window. I moved the single butterfly and a painted feather (both from Costa Rica) here. Below, over the back of the chair, is a blanket from Mexico.

The left side of the window now has the display piece with multiple butterflies we got in St. Martin. It is above the corner shelf on which the contents remain the same.


Above the bed is now a framed display of six quilt blocks. When we went on the quilt cruise last fall, each of the quilters brought a block they had made using the same fabric. The theme was 'life's a beach'. Everyone voted for their favorite (teachers, quilters, crew, people who wandered in...) and the top two quilters got to take home half of the blocks. I came in second! I chose six of these - four with palm trees and two with patchwork blocks - and got 12 x 12 frames to mount them in. (the one in the lower left is mine)


On the left side of the bed, the corner shelf display remains the same.


Did you catch the addition here?

Long ago I painted this watercolor called St. Thos. St. from a photo I took in St Thomas. It never felt finished so I put it away. When I took it out for another look I got out the fine-line black pens and added defining lines and shading to it. I had the brown mat on hand and mounted it in that.


I added a handmade doll made in Africa that I got at an event at a women's event at church.

Not shown (because I forgot to photograph it) is the metal trash can that I covered with scrapbook paper that features old postcards. 

I also have on order an 8x10 of the photo I took as we sailed under the Golden Gate Bridge this spring. It will hang above the switchplate in the door alcove.


THEN the room will be complete - until we travel some more and collect more treasures!

Ddd


Posted by studio3d@ccgmail.net at 9:14 PM PDT
Friday, 16 September 2016
A Whole Lot Of Wonderful
Topic: How Does Your Garden Grow?

I had a good day in the garden earlier this week and then forgot to post the photo!

For the most part production has been good this year. We have a couple of newcomers to the party - patty pan (scallop) squash which has been a raging success, and butternut which are producing well but not ready to harvest yet. 

We also tried out some yellow pear tomatoes - a 'cherry tomato' size - which are a bit mealy for my taste. The other two tomato plants, roma and beefsteak, are very late in ripening and not very good. They, too, are a bit mealy/mushy and some got centipedes eating into them. Harrumph!

Great jub, zucchini! You really outdid yourself. I have made 32 big loaves of bread, umpteen packets of roasted squash for the freezer, eaten lots, given away many, and even threw one away that was too huge and had gotten hard. 

The sweet banana peppers had a much better year than in the past but the green bell peppers were only mildly successful. Great yield from the carrots, beets and green onions.

Cucumbers have more on the vine than previous years but they are supposed to be growing up to 8 inches long and are only getting to about 5. Very sweet though.

So, how about a gander at one day's pick:


I'm thinking that the cukes need to be in the ground instead of in one of the barrels and will try that next year.

Of course, long gone are the green beans and peas. And I have totally given up on radishes as they have been disastrous every year - not worth the agravation.

The corn has tassled and we have some ears forming. Seem to only have one ear per stalk so it's a good thing we planted twice as many. 

Good Eating!

Ddd


Posted by studio3d@ccgmail.net at 9:30 AM PDT
Monday, 12 September 2016
More In the Word
Topic: Bible Journaling

I did another page of Bible journaling today. For this page I selected Proverbs 18:10.

I drew and colored the text down the left side of the page margin.

For the artwork I sketched out a castle (fortress) from an old magazine photo and colored it with my colored pencils.


I had checked out a few books on 'creative lettering' from the library and used some of their ideas for the text, including the addition of flourishes, banners, shaped spaces and texture fills.

Ddd


Posted by studio3d@ccgmail.net at 6:36 PM PDT
Friday, 9 September 2016
Doing Dinner
Topic: In The Kitchen

What a big day!

I gleaned a bunch of recipes via Pinterest for what many are calling 'dump dinners'. They are assembled into gallon ziplock (I used vacuum seal) bags and kept in the freezer. On the night before serving they are thawed in the fridge and then in the morning they are dumped into a crockpot to cook on low heat.

Out of all the recipes I had printed I selected 25 to make and did a comprehensive shopping list (marking off the supplies I had on hand). 

Yay! It was 'geezer day' at the supermarket where there is a discount on store brand products for over 55 shoppers. I also had a fist full of coupons so it was the perfect day to shop.

Back at home I sorted the supplies by type. I had an area for all the produce:


One area for meats:


and an area for all the add-ins:


This essentially took all of my counter space so I had to do all the prep work on the surface of the range!


I chopped, stirred, measured, poured, combined, sealed, and labeled.

Hubby cleaned up after me and transported everything to the freezers until I was finally done - 7 hours later.

Only one recipe was duplicated and I ended up with 26 dinners. 


All of these meals will produce left-overs so I suppose we really have 52 meals.

Next time I will limit myself to 10 recipes for a shorter day.

Ddd


Posted by studio3d@ccgmail.net at 12:01 AM PDT
Thursday, 8 September 2016
The Word and Pictures
Topic: Bible Journaling

I've been seeing the work of some artists on the internet who are doing Bible journaling. It is a combination of artwork, lettering and devotions - working in the pages of an actual Bible.

For my birthday, I asked for a journaling Bible and chose this one (NIV):


It is designed specifically for journaling so it has wide margins on the outer edges which are lightly lined. This edition is called "Journal the Word". A nice blue and brown imitation leather cover provides stability and it lays fairly flat while working in it.


I wanted to try out the pen and the colored pencils for how they react on the page (and to make sure the pen would not bleed through). So I decided to do a very small illustration on the last page. My chance that was the page describing the weights and measures.


The pen I chose is a .005 black permanent marker which does not bleed through the paper. I colored with my new Prismacolor pencils which go in very smoothly and blend nicely on this paper.


For my first journal page I turned to Psalm 100:4.

I used pencil to lightly letter the scripture in the provided margin and draw an illustration over the text of the page.

I used a rainbow of colors to do the text first:


Then I went on to color the 'gate' which is represented by a pillar and railing:


I used a variety of greens to create an impression of foliage in the background.


I added a bit of coloring over an in-text description of the psalm:


This method of devotion encourages one to dwell on the meaning of the scripture while creating art that relates to the words.

I hope to do much more of this as I found it to be relaxing and spiritually uplifting.

Ddd


Posted by studio3d@ccgmail.net at 12:01 AM PDT
Wednesday, 7 September 2016
For Holding More Stuff
Topic: Fabric Stuff

I used the same fabrics to create a second origami fabric box. It was easy because I cut all the parts together.

For this one I turned down the top edge differently so it makes a deeper cuff but without any fabric triangle showing.

This has the effect of making a taller box even though it is the same size on the width of the sides. As a comparison, here is the first one again:


This fold up just like the other one but makes a more compact piece.


I'm wondering about covering a mat board with matching fabric to strengthen the bottom. Of course, it would have to come out to collapse the box but it still might me fun to try.

Ddd


Posted by studio3d@ccgmail.net at 12:01 AM PDT

Newer | Latest | Older