« November 2018 »
S M T W T F S
1 2 3
4 5 6 7 8 9 10
11 12 13 14 15 16 17
18 19 20 21 22 23 24
25 26 27 28 29 30
You are not logged in. Log in
Entries by Topic
All topics  «
3D paperwork
A - Z challenge 5
A - Z challenge 7
A - Z challenge round 4
A to Z challenge round 3
A to Z round 2
A to Z round 6
A-Z round 1
Around the House
Art Challenges
Artist Trading Cards
Backgrounds
Beads
Bible Journaling
Books
Boxes
Collage
Color Challenge
Coloring
cookbook
Die Cuts
Digital Projects
Digital Stamps
Drawing
Dry Embossing
Fabric Stuff
Fantastic Folds
Field Trip
Home Decor
How Does Your Garden Grow?
Hymnal Art
In The Kitchen
In the studio
Jewelry
Lettering
Links
Multi-Technique
Music to Work By
Musings
Nail Art
New Work
Online Class
Other Hobbies
Other Projects
Painting
Paper Embroidery
Paper Piecing
Photo
Pretty Paper
Quilting
Random
reading
Scrap Recovery
scrapbooking
Sewing
Sketch Challenge
Some Backlog
Stamping
Stencils
Stickers
Supplies
Teabag Folding
Techniques
Testing
tips and tricks
Tutorial
Web resources
Welcome to my Blog
Work By My Friends
workflow
Writing
Blog Tools
Edit your Blog
Build a Blog
RSS Feed
View Profile
Group One
In & Out of Studio 3D
Saturday, 10 November 2018
New Bible Art
Topic: Bible Journaling

I got a new bible a while back but have just now done a page of journaling in it. The bible is the ESV interleaved version which has a double-sided print page followed by a blank page all the way through. LOTS of room for art.

I wanted to do some designing using different fonts in different sizes to create interest while maintaining the flow and readaability of a long passage.

I did a LOT of sketching to get the lettering right and then transfered it onto the page with graphite paper.

After I traced the text in ink, I went back and worked on a spray of various flowers and used colored pencils on them.


This bible allows me to use a full paage for art and not cover up any of the text in the scriptures.

Ddd


Posted by studio3d@ccgmail.net at 1:00 PM PST
Wednesday, 7 November 2018
More Gratitude
Topic: Bible Journaling

Three more days here for the prompt #BeThankfulFor:

Be Thankful For Inspiration:

I placed my page in Exodus 28 where the construction and furnishing of the tabernacle were directed to be done by 'skilled craftsmen'. God had given some people specific gifts and they were being called upon to employ those talents in service to Him.

I thought about the talents that God has given me and how He inspires me in using them. I get inspiration from all over. This is my page:


The next prompt was to Be Thankful For Emotions. Well, this was certainly the right week to talk about those but I'm not at all sure that I am thankful to be having these exact emotions. I guess it is enough to understand that our emotions are OK. God understands. Jesus was sad, happy, joyful, angry, compassionate, empathetic - all human emotions.

So I focused on just one: being joyful.


Finally, the next prompt was Be Thankful For Comfort.

Yeah, I kinda needed this right now.


Psalm 34:18 will be my comfort right now.

Ddd


Posted by studio3d@ccgmail.net at 11:27 AM PST
Monday, 5 November 2018
Love Conquers All
Topic: Bible Journaling

#BeThankfulFor Love. How can you NOT be thankful for love?

I used a tulip drawing technique I learned from a Sandy Allnock video, colored them with PrismaColor Premier colored pencils. and did my lettering right over it with a brush pen.


I used the first part of 1 Corinthians 13:8 as the text.

Ddd


Posted by studio3d@ccgmail.net at 12:01 AM PDT
Sunday, 4 November 2018
Home Sweet Homes
Topic: Bible Journaling

I counted up the places (abodes) where I have lived in my 65 years and came up with a total of 23. In each move it was a matter of going along with family - first my parents then my husband.

In celebrating the #BeThankfulFor challenge today the prompt word was 'Home'.

It seemed appropriate to include my Bible journaling for 'home is where the heart is' in the book of Ruth.

I used a waxed paper transfer technique to put an antique map of the Pacific Northwest onto my page. This includes the four states I have lived in: Montana, Idaho, Washington and Oregon.


I colored my text using colors from the map and then wrote the scripture at the bottom.

Ddd


Posted by studio3d@ccgmail.net at 7:31 PM PDT
Saturday, 3 November 2018
Line Of Sight
Topic: Bible Journaling

For the third day of the #BeThankfulFor challenge the prompt was 'Senses'. I chose to focus on 'sight' because I think that is the thing I would miss the most if I were to lose it.

What would I do if I couldn't see to read, write, make art, drive, and take photos? I can't imagine.

So I did a Bible journaling page with this focus.


The verse is actually on the facing page but I had already journaled a different verse over there.

Ddd


Posted by studio3d@ccgmail.net at 12:01 AM PDT
Friday, 2 November 2018
Favorite Foof
Topic: Bible Journaling

Continuing with the #BeThankfulFor challenge, the prompt was 'Food'.

To me there is nothing that beats a Honeycrisp Apple. They are the perfect combination of crunchy, juicy and sweet. I could seriously eat them every day!


I used the prompt to create a Bible journaling page with a quote instead of a scripture even though, on the facing page, it asks God to 'keep me as the apple of your eye'.


Ddd


Posted by studio3d@ccgmail.net at 12:01 AM PDT
Lettering for the Kingdom
Topic: Bible Journaling

We've finished up another week of Lettering lessons with a novelty font and the word Kingdom.

Here are the daily lessons:

KINGDOM FONT - DAY 1 – INTRODUCTION

In the novelty print we are learning this week, there is only an upper-case. But this font is truly regal. This is why we will use it for the word KINGDOM.

The letters are all based on a centrally placed diamond. It will need to remain a constant size and be at a consistent location on the centerline horizontally.

Each of the letters also has triangle-shaped serifs.

To get these letterforms just right, here is my process:

·         Use pencil to sketch in the base letter


  • ·         Draw the diamond
  • ·         Ink the diamond
  • ·         Ink the rest of the base letter
  • ·         Ink the serifs
  • ·         Erase the pencil


KINGDOM FONT - DAY 2 - ALPHABET

The art of this style is in the consistency of the diamonds in size, shape and placement. Further beauty is added with consistent size and shape of the feet. Result? Regal lettering!

I am in love with the O and the Q! I included a number set for this font, as well.

Remember the steps:


  • ·         Use pencil to sketch in the base letter
  • ·         Draw the diamond
  • ·         Ink the diamond
  • ·         Ink the rest of the base letter
  • ·         Ink the serifs
  • ·         Erase the pencil


KINGDOM FONT - DAY 3 – ANAGRAM

This week I created an anagram off the word KINGDOM using words that describe the kingdom of God.

I used color in the diamonds in the initial letters. This helps define the focus word.

Now, do you see my big boo-boo? I used the number 4 in place of the letter Y! I don’t know how I got off on this track but I managed to do it for the rest of this week’s samples! Good grief! But it doesn’t glare too much, does it?


KINGDOM FONT - DAY 4 – SCRIPTURE WRITING

And this page starts with that crazy ‘Y’! Oh well. Now you all know that I am susceptible to messing up, too.

I used the color in all the diamonds throughout and worked on centering all the words to make this piece of scripture a showpiece.

The scripture reference is written with a stripped-down version of the feature font - it has the diamonds left out.

Write a scripture using the new font and the word KINGDOM.


KINGDOM FONT - DAY 5 – TAKE IT TO YOUR BIBLE

This regal font was used in my Bible and the diamonds filled with gold for the majestic feeling.

Some of these letter forms that have complicated lines are harder to do when scaled down for use in the Bible. But I think this one works pretty well.

Don’t forget the steps to success:


  • ·         Use pencil to sketch in the base letter
  • ·         Draw the diamond
  • ·         Ink the diamond
  • ·         Ink the rest of the base letter
  • ·         Ink the serifs
  • ·         Erase the pencil


That's it for the Kingdom Font.

Ddd 


Posted by studio3d@ccgmail.net at 12:01 AM PDT
Thursday, 1 November 2018
Be Thankful For... Memories
Topic: Art Challenges

Occasionally I come across an art challenge that I want to participate in online. Up to now these have been posted under their particular topic based on the medium (watercolors, sketching, etc.) However, the current one can be in any medium as long as it represents the word prompt.

The theme #BeThankfulFor will run for the entire month of November and I will be trying to participate daily if I can manage it.

So here goes:

November 1 - #bethankfulfor Memories

"Growing up we used to take vacations at the Oregon Coast because it was inexpensive on a limited income. I fell in love with lighthouses early on. I have never actually been inside one yet, though.

"I love taking photos of lighthouses and this one in Gibraltar was spotted on our cruise in the Mediterranean last year. Because it is so distinctive with its lattice grid it immediately brings back great memories."

Rendered in Micron Pen.


This is the photo in my travel archives on which the drawing is based:


See you again soon.

Ddd


Posted by studio3d@ccgmail.net at 4:54 PM PDT
Wednesday, 31 October 2018
A Perspective On Drawing
Topic: Drawing

I am SO MUCH enjoying taking this online Drawing 101 class at Art-Classes.com.

I am up to lesson 5 - various shapes and objects in perspective.

These are the exercises and drawings I did:


That train gave me a run for my money!

Ddd


Posted by studio3d@ccgmail.net at 7:24 PM PDT
Saturday, 27 October 2018
Sad To Say
Topic: Multi-Technique

It is always sad when I need to make a sympathy card. This time, our next-door neighbor passed away and sentiments were due to the family.

I had on hand a Dazzles outline floral sticker that I had mounted on a fuscia foil cardstock. This I trimmed down for a starting point. 

I found a piece of white embossed cardstock that I got in a a swap. With a little layering (gold foil cardstock and a white card base) it all came together.

I used a gold Dazzles sticker for the text.


Hope I don't need another for a long time.

Ddd


Posted by studio3d@ccgmail.net at 12:01 AM PDT
Friday, 26 October 2018
The Highs and Lows of Drawing
Topic: Drawing

It didn't take long before I was anxious to move on to the next drawing lesson.

This lesson was on multi-point perspective. Trying to get the angles AND relative sizes correct was hard. The original photo had multiple rooflines below this but I ran too close to the bottom of the page so those partial lines made no sense. The solution - leave them out!

So, here is the drawing for lesson 4:


Done!

Ddd


Posted by studio3d@ccgmail.net at 9:30 PM PDT
Thursday, 25 October 2018
On The Right Path
Topic: Bible Journaling

I put up a new lettering lesson this last week.

This was a strange little novelty print that has the sort of look of a maze. So I named it PATH and that became the focus of the scriptures chosen to work with. Here are the lessons:

PATH FONT - DAY 1 – INTRODUCTION

This week we are going to do a novelty print that, to me, is reminiscent of a maze. So, we are going to use it for the word PATH.

The scale of this is shown in the red guides on the left side. The x-height is 1/2 of the full letter height and the descender is an equal amount. In this example, the scale is 3 units for the ascender, 1 1/2 for the x-height and 1 1/2 for the descender. The path of double lines is 1 unit.

The thing to watch for in forming the letters of this font is consistency in the spacing of the double line tracks. They can be ‘slightly’ narrower on the lower-case than the upper- but within each case they should remain consistent. In my experience, this is harder on the curves, but you’ll get it with practice.


PATH FONT - DAY 2 - ALPHABET

I used the same scale for this alphabet as on the example yesterday.

Some of these letter forms are just so much fun! Some of them look almost like shadow letters and some look a little 3D. This font is unlike any other we have done.

As we studied yesterday, work on keeping the spacings within the letters consistent.


PATH FONT - DAY 3 – CROSSWORD

I used all caps to create a crossword of synonyms for ‘PATH’. The benefit to all caps is that the space taken up by each letter (baseline, height and width) is constant which is needed for a crossword.

You can choose to a different activity but I suggest using all caps, too, so you can get a lot of practice on them. When using standard text-writing layout you get less practice on the upper-case letters.

Have fun composing a project.

PATH FONT - DAY 4 – SCRIPTURE WRITING

Today we are going to write a scripture using the Path font. When writing out blocks of text like this I like to use caps on every word.

It was fun to use the footbridge from the Drawing Room to illustrate my piece. This was inspired by my recent trip to France and a visit to Monet’s Water Garden at Giverny!

What will YOU be inspired to create?


PATH FONT - DAY 5 – TAKE IT TO YOUR BIBLE

In your Bible, choose a verse that uses the word ‘path’ and use the new font to write it out. You can certainly combine it with other fonts if you choose.

As I am posting this, I suddenly see a typo in the word ‘straight’. I find that I can fix these little errors with a bit of Dry-line white out followed by inking the letters over the top.

I used the footbridge again for this page.


I hope you are getting some use from these lettering lessons???

Ddd


Posted by studio3d@ccgmail.net at 9:42 PM PDT
Wednesday, 24 October 2018
Drawing On My Travels
Topic: Drawing

The next lesson in the Drawing 101 class was on one-point perspective.

I know my own tendency, when working from provided photos and teacher sample drawings, is to base my own drawing too much on the derivitave work. I need to work from a photo with a similar concept but one I have not seen drawn. That way I get original work and learn the lessons rather than just duplicating someone else's work.

So I decided to use some of my own travel photos for reference.

This is a courtyard in Barcelona, Spain where we visited on a cruise a couple of years ago.


I took some liberties with the contents of the various floors on the right and left as those in the photo were boring. What isconsistent with the photo is the angle of view, which was the point of the lesson.

Ddd


Posted by studio3d@ccgmail.net at 3:55 PM PDT
Monday, 22 October 2018
Following Along
Topic: Bible Journaling

Another week of lettering lessons - this time with a 'signage' style. What a lot of fun I had with this one. Here are the daily lessons:

FOLLOW FONT - DAY 1 – INTRODUCTION

The font we are learning this week is of a style that might look good in signage.

The letters feature open spaces that can be colored in for more impact. We’ll get to do that later in the week after becoming familiar with the letter forms.

Remember P-I-E? That’s Pencil-Ink-Erase which we use to work toward our best letter forms.

I hope you have a go at this.

FOLLOW FONT - DAY 2 - ALPHABET

The nod to lower-case in this font is mostly to make smaller versions of the upper-case. There are a FEW cases where there is a difference. However, you can treat these as ‘alternative’ forms for the letters and switch them around.

The ‘A’, ‘M’ and ‘X’ have a variation on the length of the tail. The ‘H’ varies in the serif form as does the ‘K’ the ‘N’, the ‘T’, the ‘V’ and the ‘W’. The ‘Q’ varies in the way the tail is designed. The ‘R’ has a different style for the leg. The ‘U’ has two distinct forms as does the ‘Y’.

You can either decide which one you like of each of these or use them as designed for a distinction between upper- and lower-case. But, for this exercise, I recommend writing them ALL out and then you can make your style choices later.


FOLLOW FONT - DAY 3 – SONG LYRICS

Today let’s use our new alphabet to create a display piece and decorate it.

First, draw some slightly curved lines to follow and write your letters along them. You will definitely want to use pencil to sketch in your letters to center the words. Use a mix of sizes for more interest.

Don’t ink until you’ve got everything lined up just as you want. Add dangles, embellishments and color to decorate your piece.

This should be a fun project to complete.


FOLLOW FONT - DAY 4 – SCRIPTURE WRITING

Today we’ll practice the new font by writing a scripture with the word ‘Follow’. For my sample of scripture writing I kept the letter size consistent throughout.

I colored my letters in a gradation of color using colored pencils.

I had fun adding a ‘Baaa-Sheep’ from our Drawing Room lesson from this spring.

Isn’t this a great font for ‘sign-making’?

FOLLOW FONT - DAY 5 – TAKE IT TO YOUR BIBLE

Since the font we are using this week has a lot of ‘presence’ it can stand up to combining with a mix of other fonts. It’s ‘sign-like’ characteristics makes it a natural to make lovely display-pieces.

On this page, I used the curved baselines again, combined with two different print styles and my own handwriting as the script.

I used colored pencils to add a rainbow of color from yellow at the top to purple at the bottom.

I hope you will be inspired to use the FOLLOW font in your own Bible, either by itself or combine with other fonts.

So, that’s it for another week. I hope you find good uses for this font.

Ddd


Posted by studio3d@ccgmail.net at 2:28 PM PDT
Friday, 19 October 2018
Drawn to Drawing More
Topic: Drawing

The next lesson in Drawing 101 was on two-point perspective.

First we set up a horizon line and two points on the outer ends. Then we used those reference poits to draw cubes with a mid- low- and high-horizon.


Then we worked from a variety of photos to learn how to turn those 'cubes' into buildings, maintaining the correct perspective. These were sketched.


Then there was a final photo from which to make a finished drawing.


I am satisfied with the exercises I did with one exception... the one NOT SHOWN. It was a photo of an interior on which I got one whole wall off kilter. No need to expose you to that!

Ddd


Posted by studio3d@ccgmail.net at 7:51 PM PDT
Wednesday, 17 October 2018
More Drawn to Drawing
Topic: Drawing

It took me a couple of days but I did find reference photos and objects to draw for the three final pages for Drawing 101, lesson 1.

The first page was 'CONES':


The next was 'CYLINDERS':


And the final page was 'COMBINED SHAPES':


Now we're on to lesson 2 - perspective.

Ddd


Posted by studio3d@ccgmail.net at 2:44 PM PDT
Monday, 15 October 2018
Drawn to Drawing
Topic: Drawing

I signed up for another art class with Sandy Allnock at Art-Classes.com and I am loving this.

I have only begun lesson one's exercises so far. This is where we practiced drawing simple objects in assigned catefories.

The first category was 'CUBES'


and the second category was 'SPHERES'


Now I have to go draw some CONES and other shapes.

Did I mention I LVOE this class???

Ddd


Posted by studio3d@ccgmail.net at 7:03 AM PDT
Friday, 12 October 2018
Worship in Words
Topic: Bible Journaling

I am back-dating this post to the date the lettering class actually finished. I was away for a while and had no access to my computer or blog to do it at that time.

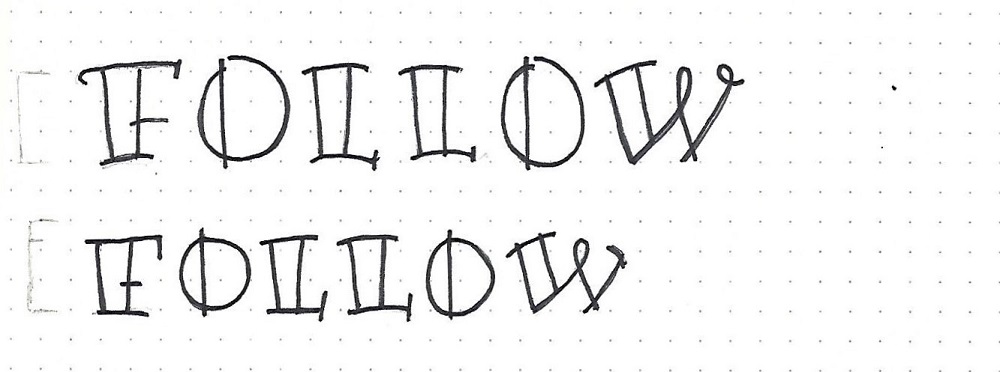
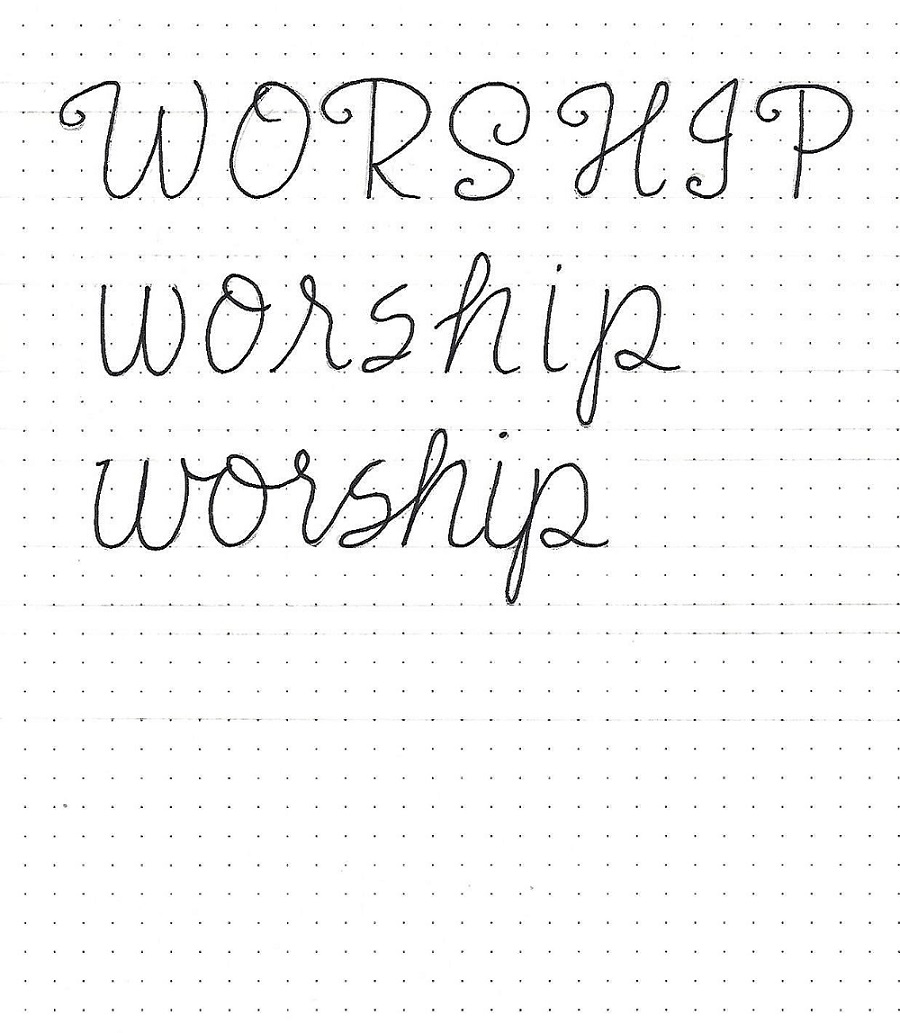
WORSHIP FONT - DAY 1 – INTRODUCTION

I started out this font by incorporating some curls that I liked with letter forms that I have picked up from various alphabets. I just selected my own favorites from across the board and then edited them to include those marks that would make them into a cohesive set.

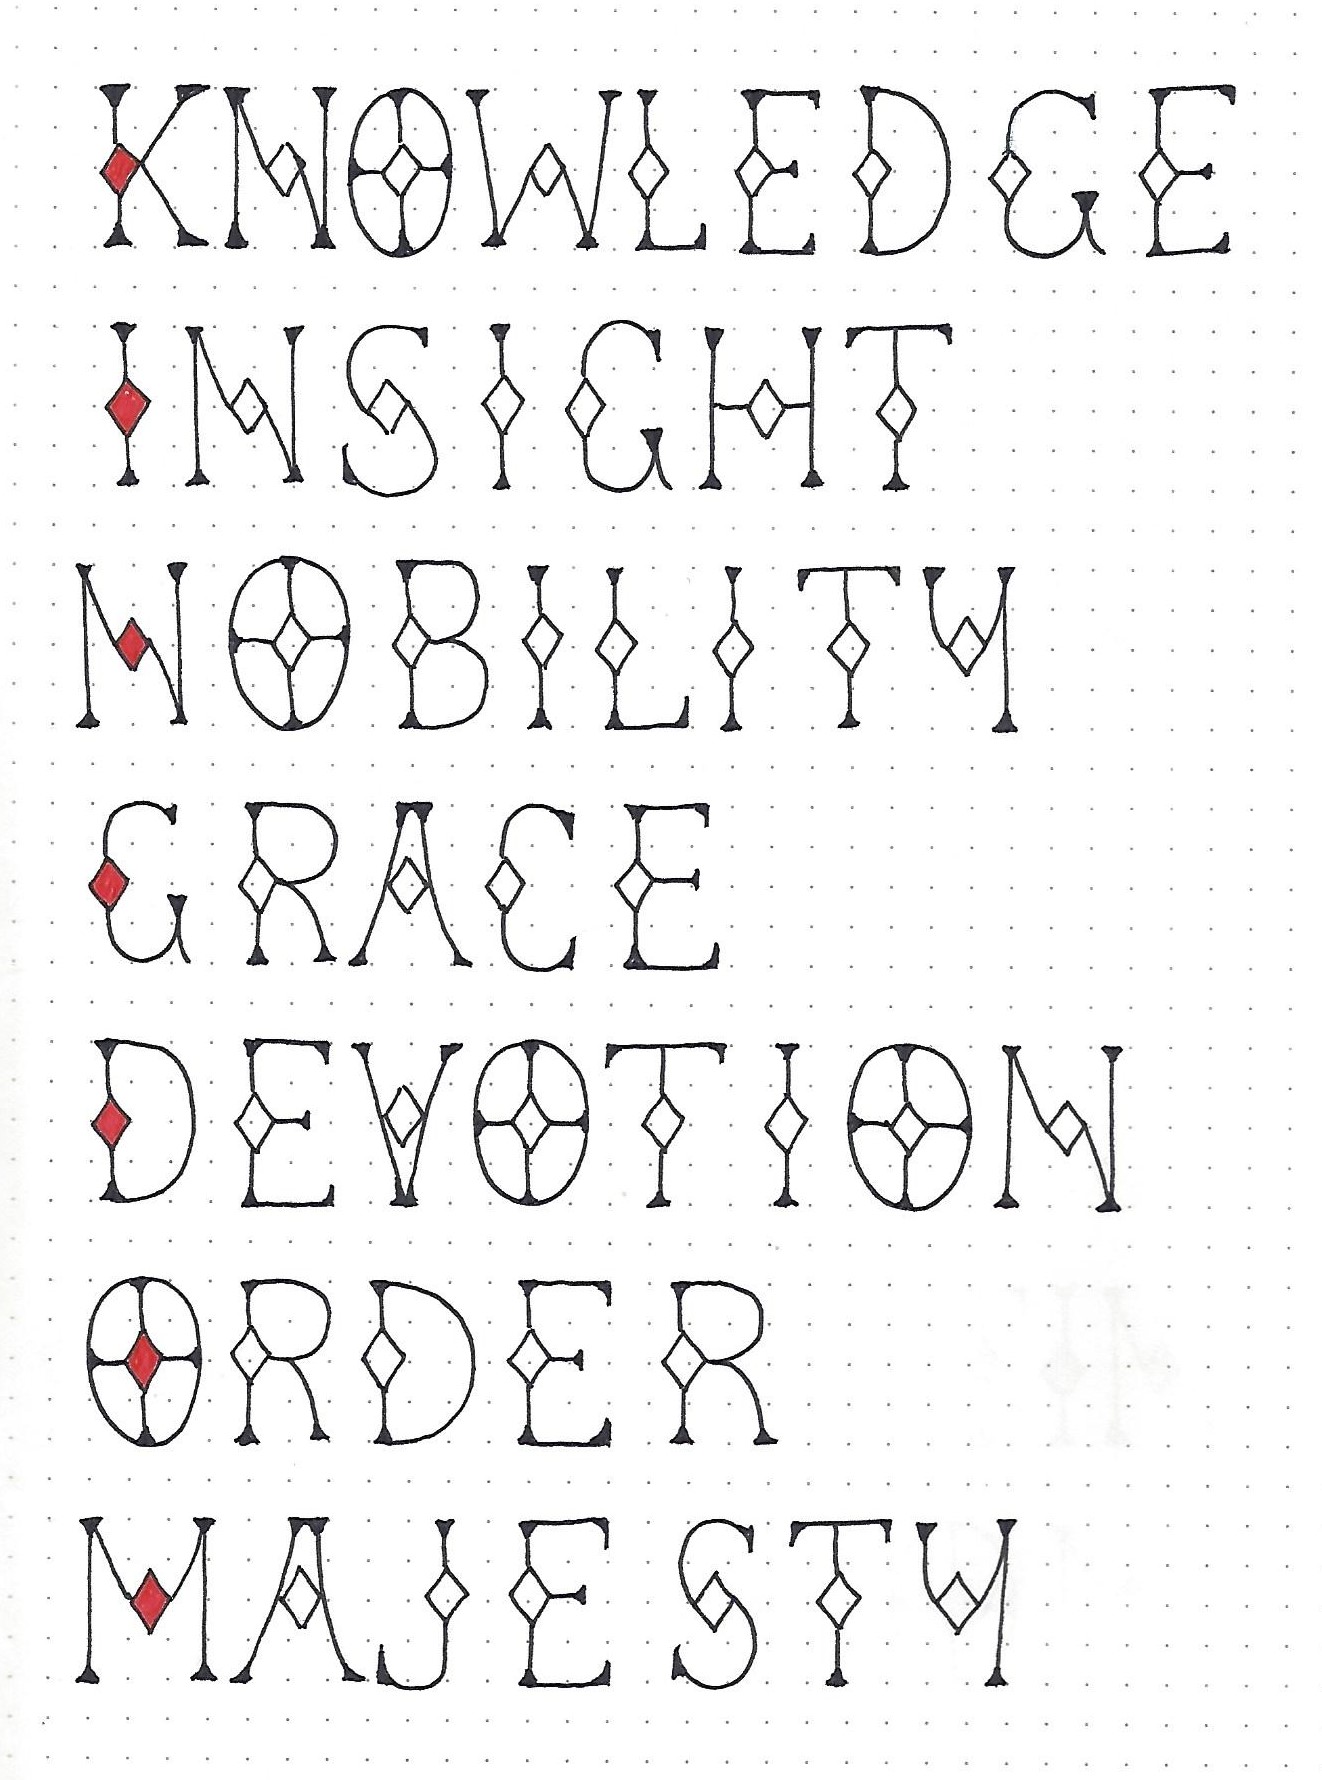
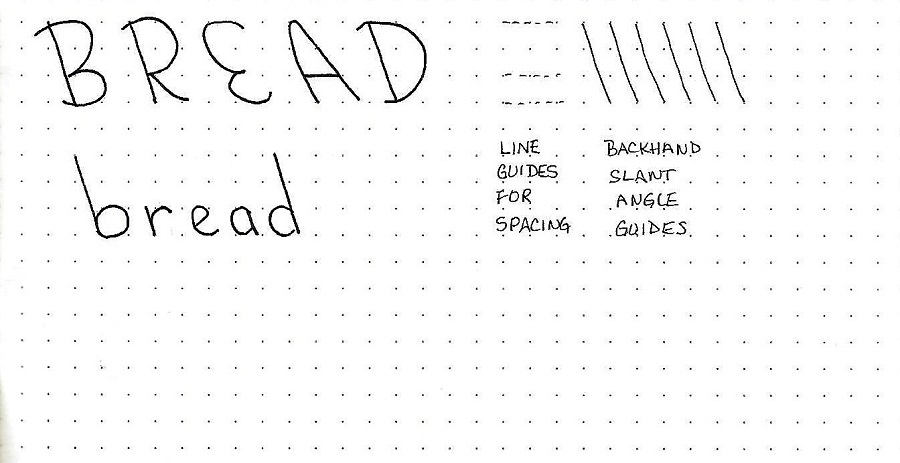
Normally, one would not write up a word in all caps when using a script as it really suffers in legibility. But, I wanted you to have more upper-case to practice with and get familiar with the common elements.

Lines two and three allow you to see and practice the basic letter forms and then begin studying how to connect them. It isn’t a true script if none of the letters are connected.

Remember P-I-E? That’s Pencil-Ink-Erase which we use to work toward our best letter forms.


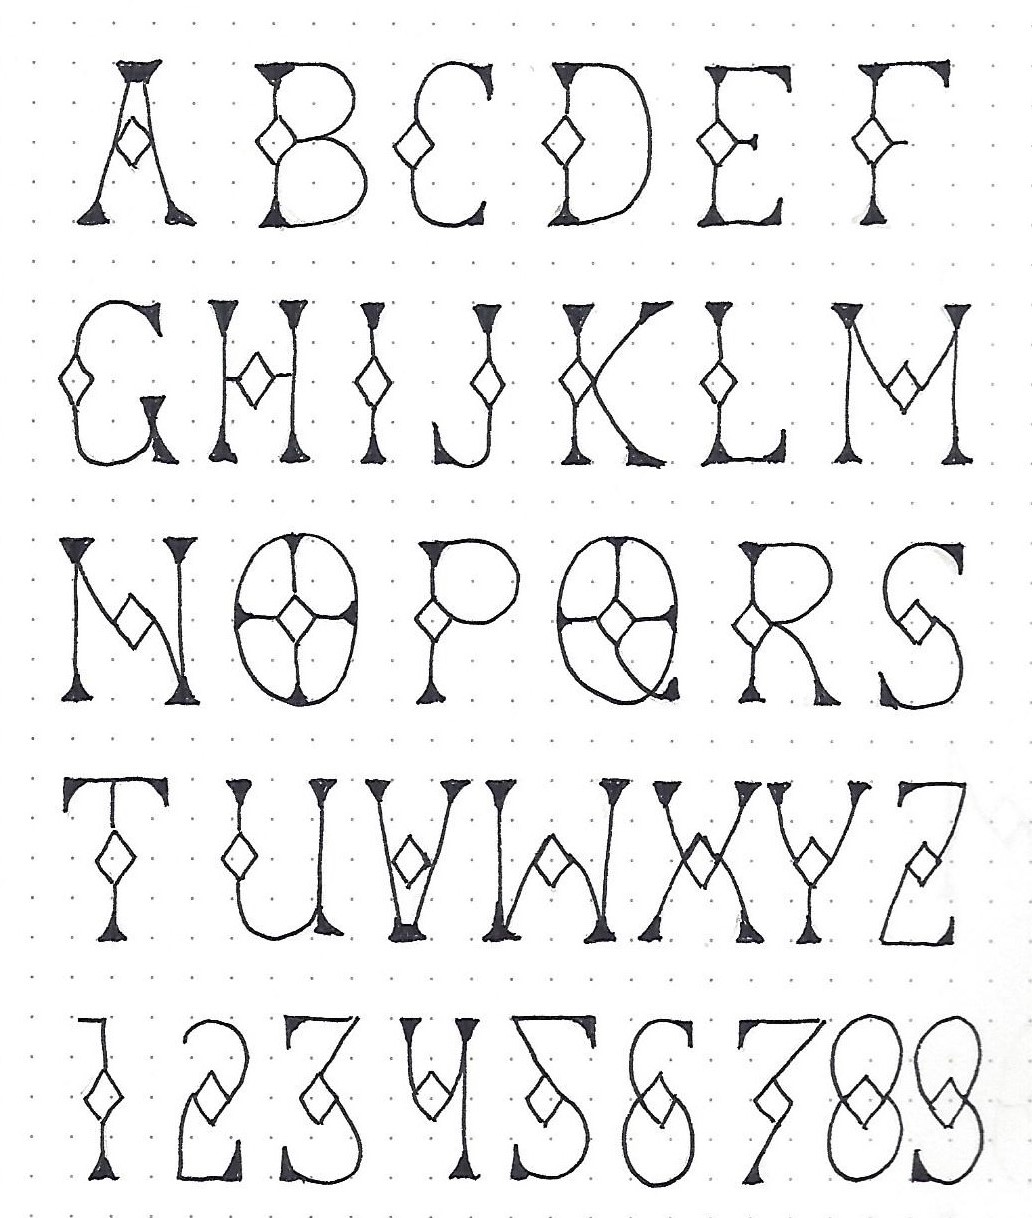
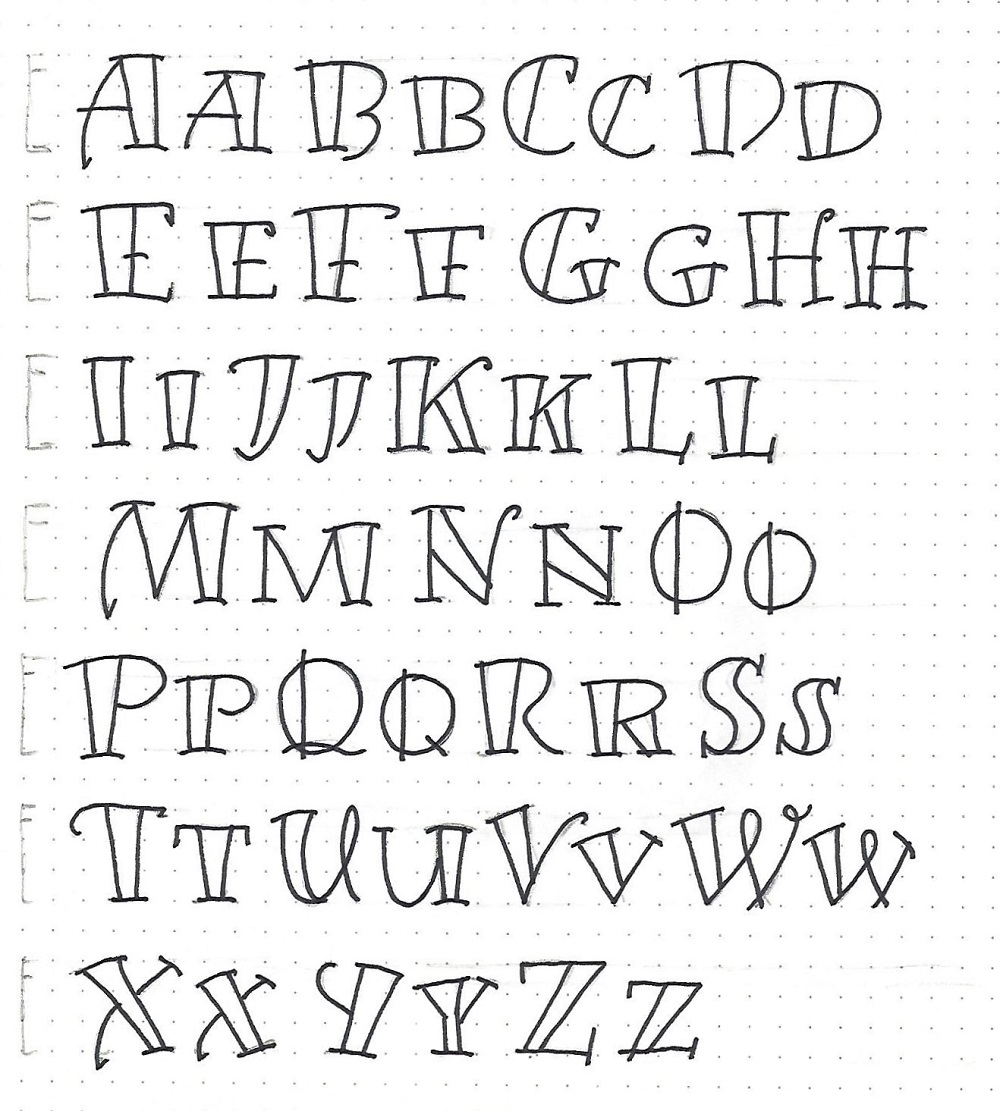
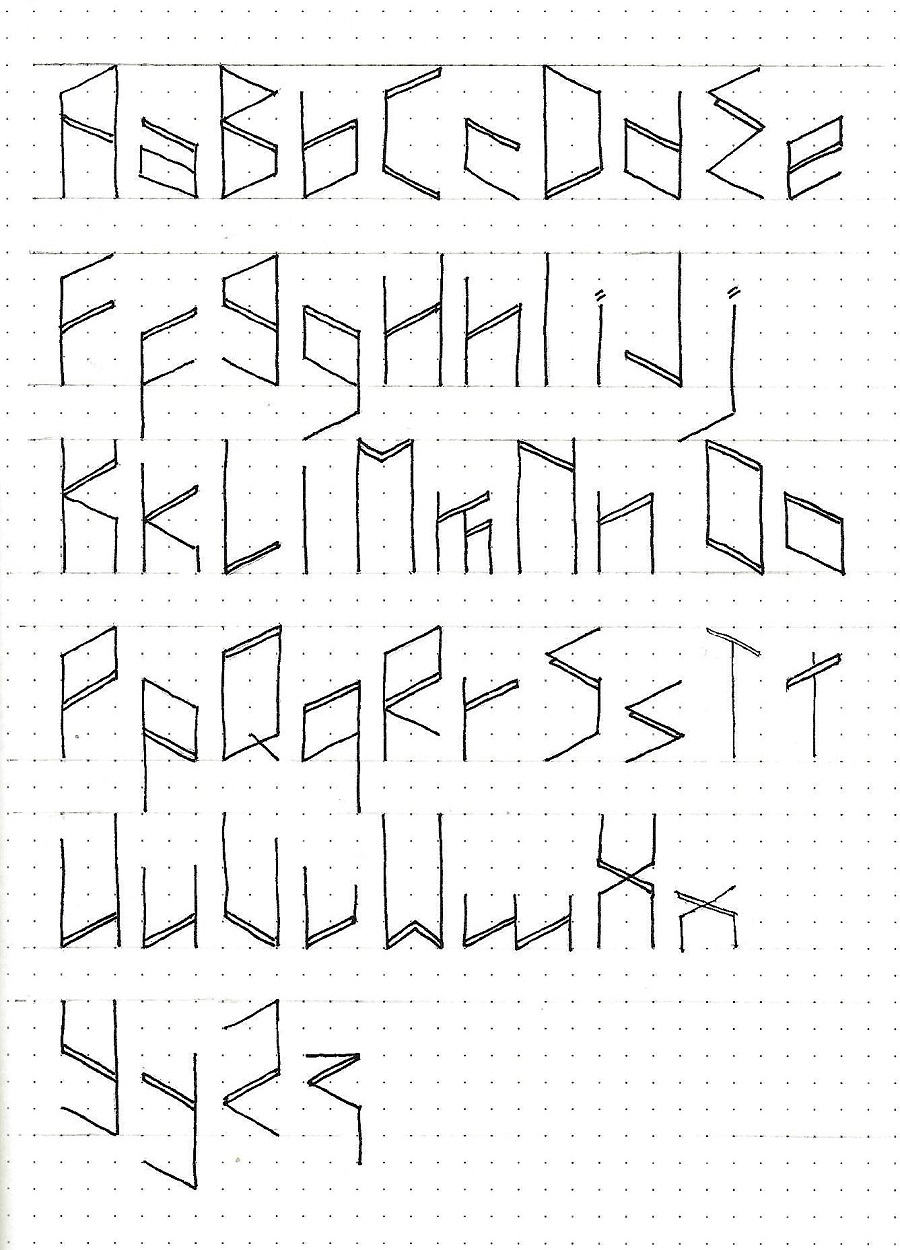
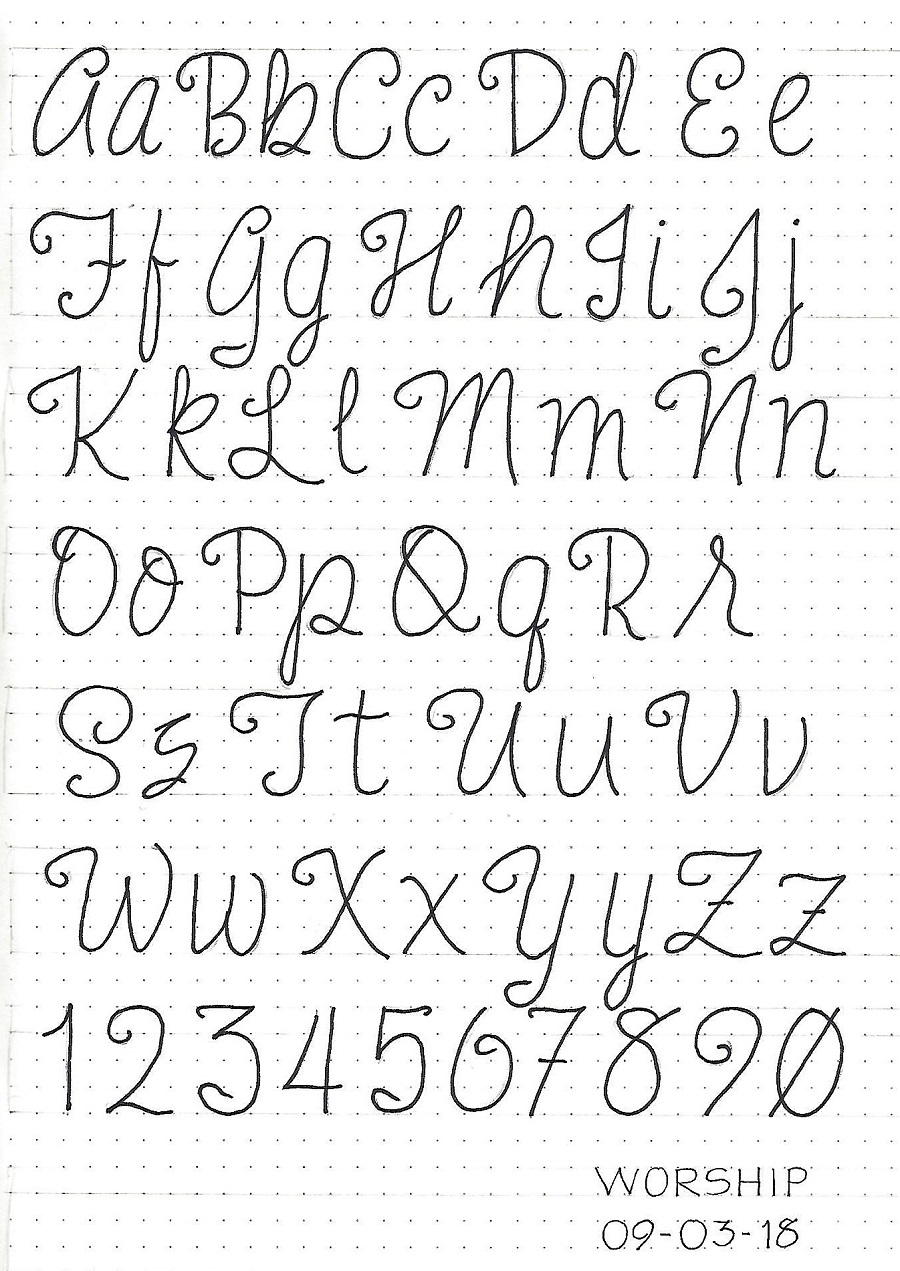
WORSHIP FONT - DAY 2 - ALPHABET

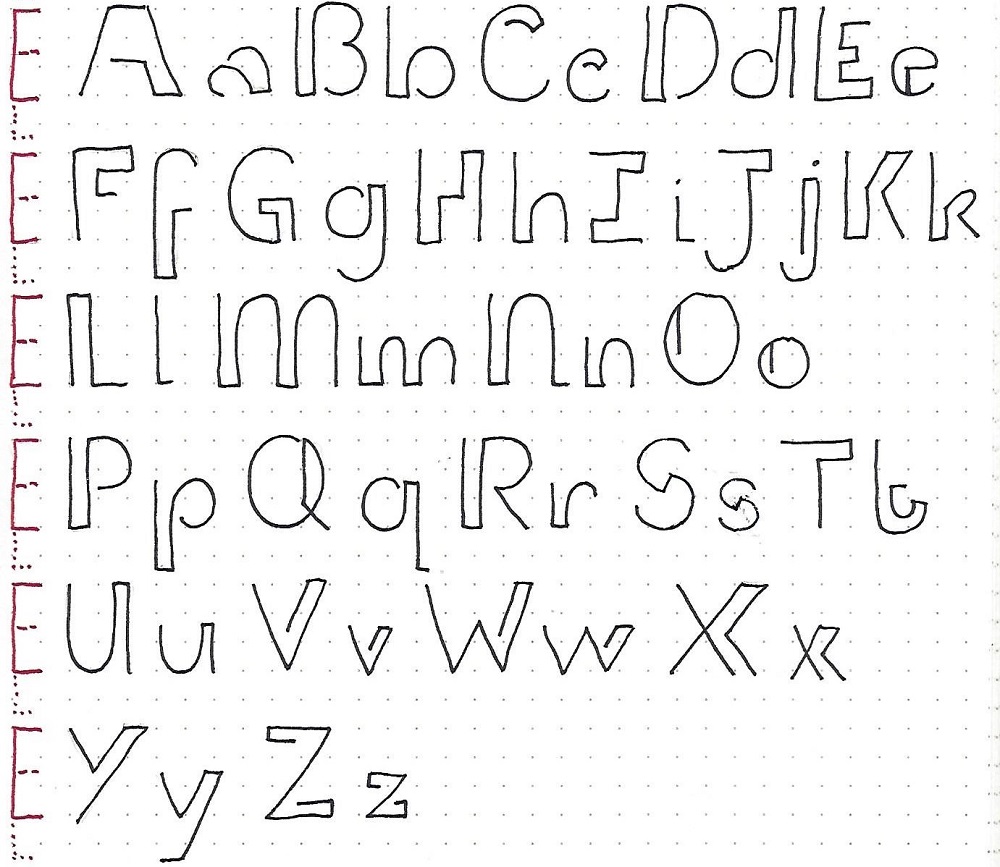
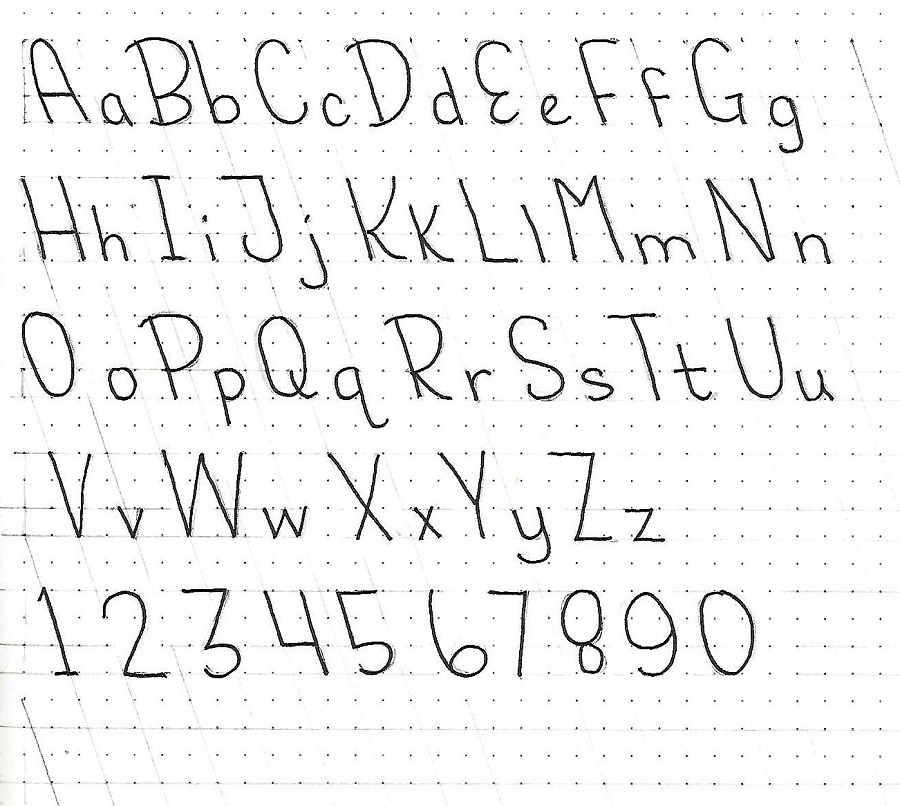
Here is the full alphabet of my favorite script letter forms. I’ve been gradually training myself to write this way. I started by practicing and incorporating the ‘r’, then I added the ‘b’ and the ‘H’. I most recently began using this ‘b’ and ‘s’.

On this alphabet, the x-height is ¾ the height of the capitals. This makes for a full, round word form with a lot of impact.

Practice writing out this alphabet in pencil, then ink over it. Erase the penciled letters while leaving as much of the guidelines as you can. These will be a help when you use your reference sheet for planning projects.

If there are letter forms you prefer, feel free to substitute them, keeping as much of the flourish marks as you can to match the character of the font.


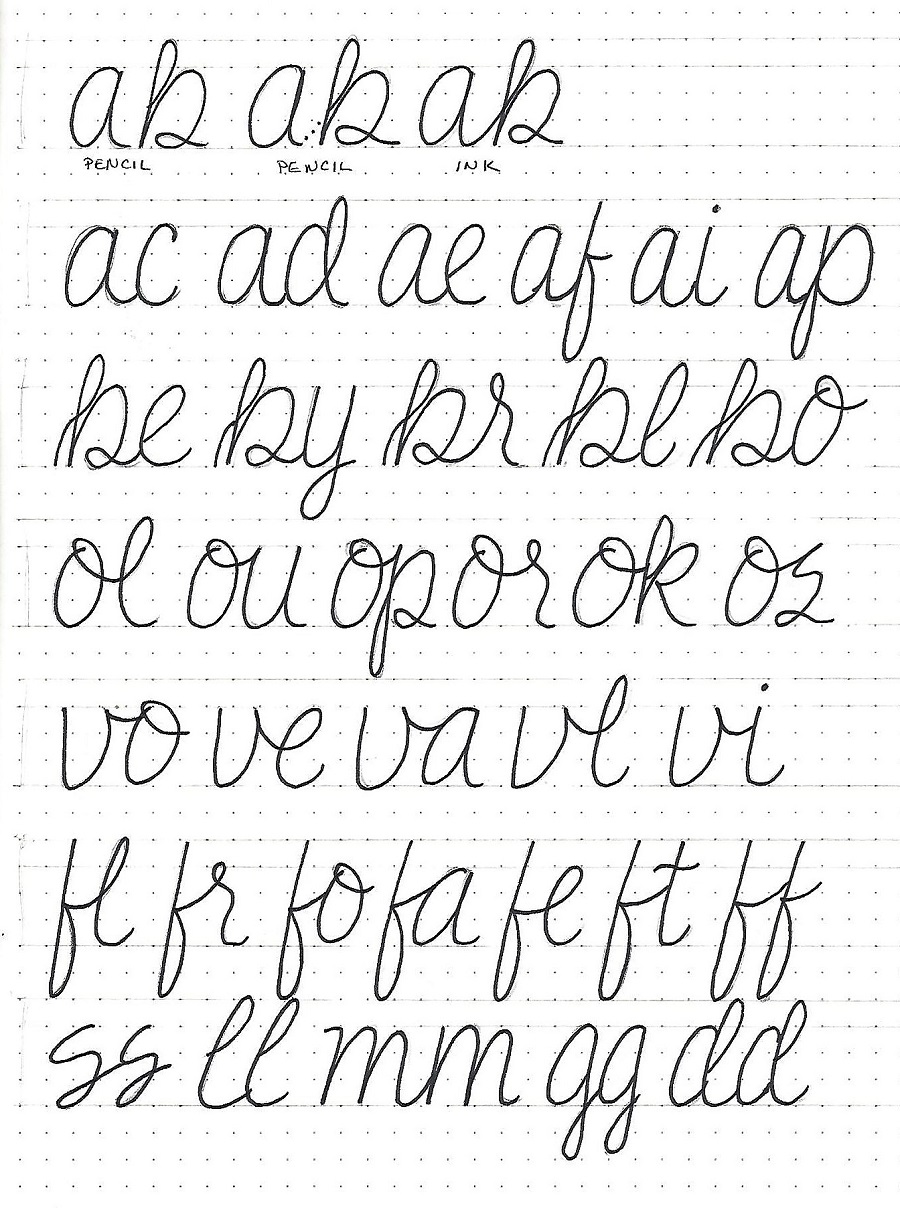
WORSHIP FONT - DAY 3 – CURSIVE CONNECTIONS

Oh, you thought today was going to be a ‘fun day’? Sorry to disappoint!

One of the issues most letterers have when using script is knowing how to join letters. So that is what we will practice today.
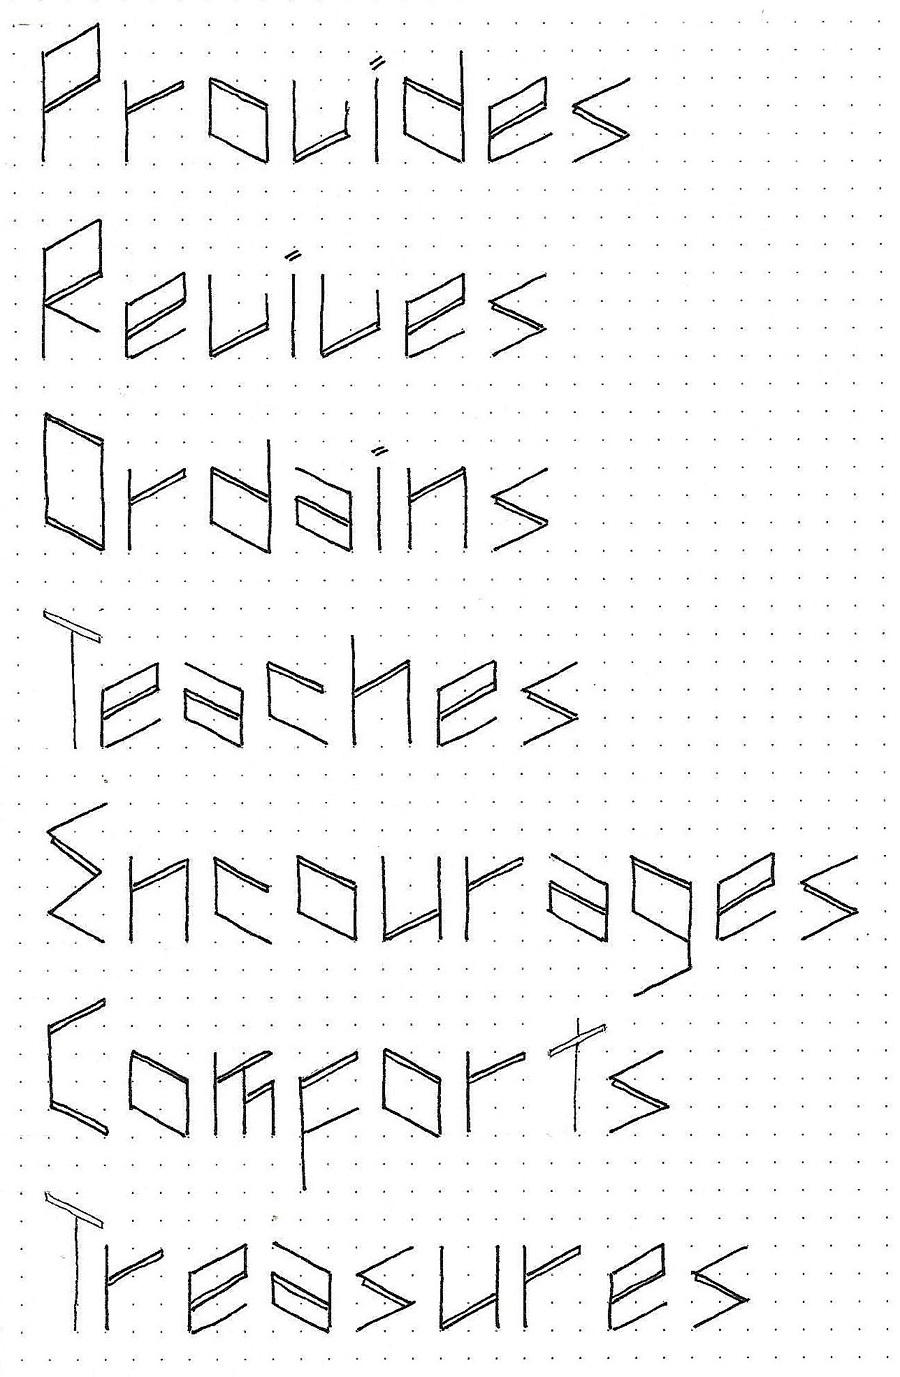
THINGS TO NOTE:

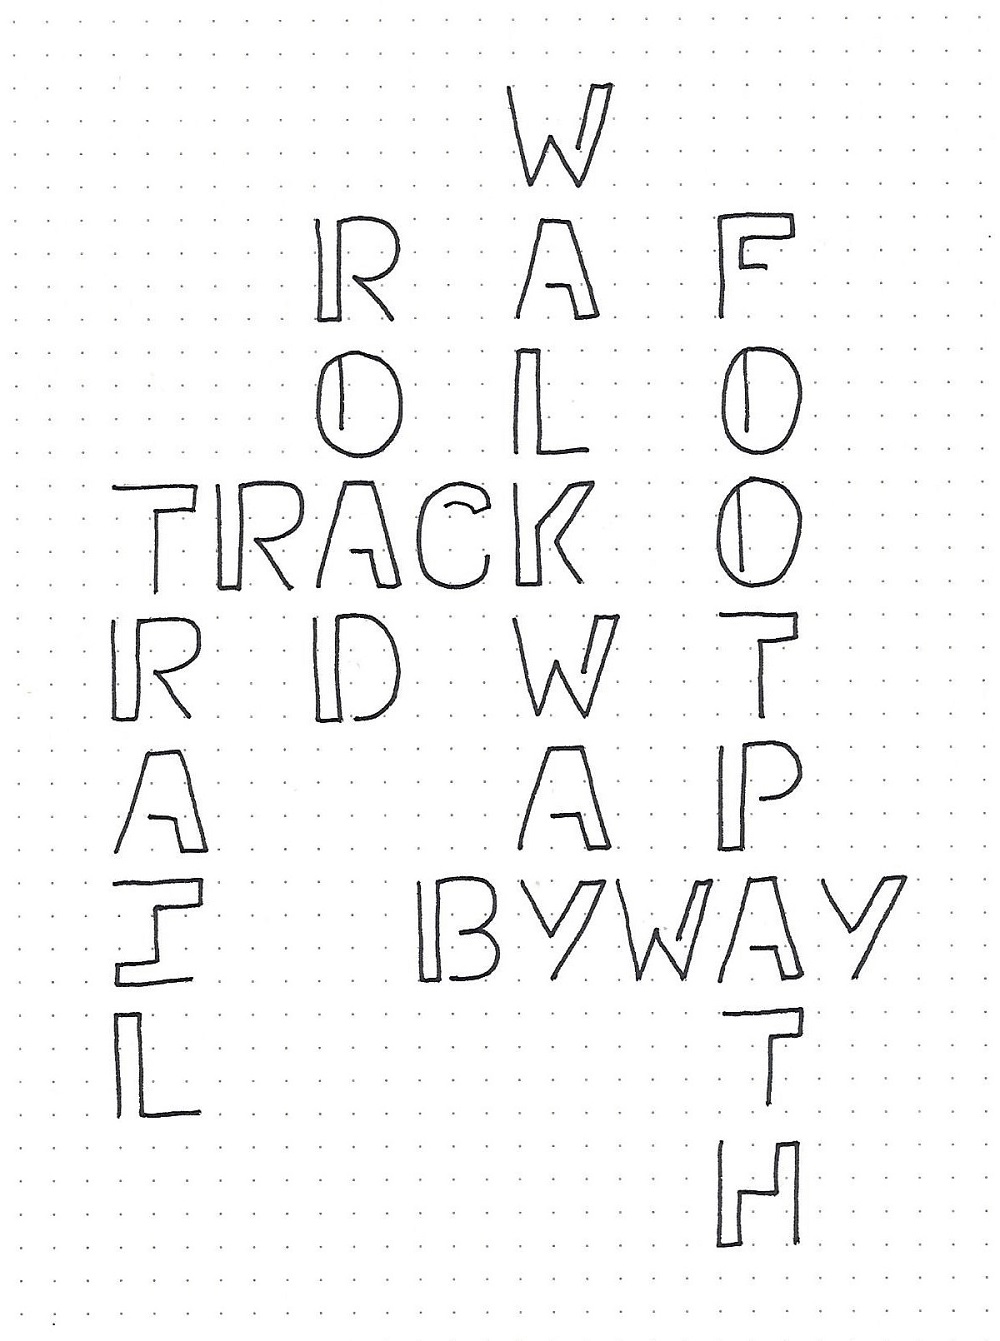
·         Pencil your letters as separate items. Then use pencil to test out various joinings till you find what you like. Ink letter to letter.

·         The joinings will be different for letters that end at the top and those that end at the bottom and each will change by being followed by a letter that starts at the top versus starting at the bottom.

·         It is absolutely OK to lift your pencil or pen between letters. Ink up to where letter 1 stops and then pick up the pen and begin letter 2. As you form letter 2 make sure it touches the end of letter 1.

·         Letters do NOT have to touch where the letter 2 begins. Look how the ‘ac’, ‘ad’ and ‘ae’ combinations join at the bottom, even though letter 2 starts at the top.

·         Practice lots of double letters. The ‘ss’ and ‘rr’ combinations are notoriously difficult to work out but YOU CAN DO IT!

·         Note that some initial letters can benefit from an opening flourish at the beginning of a word (‘b’, ‘h’, ‘k’ and ‘l’ can all be treated like the ‘b’ shown below)


Work on other combinations that you can think of. You may need several sheets of paper to get enough practice on this activity.


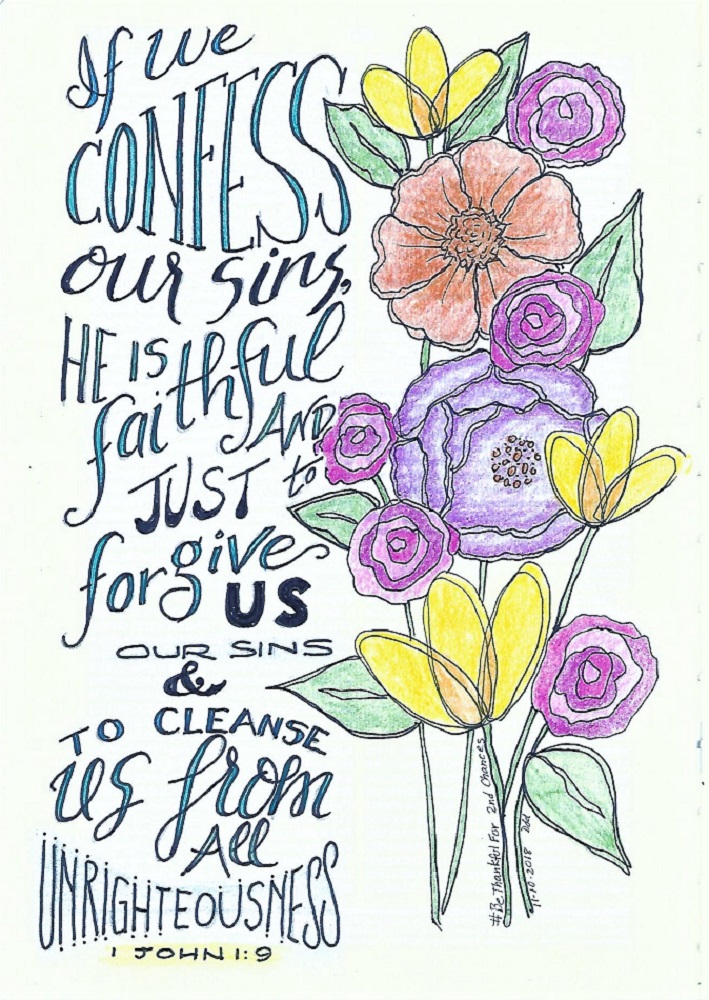
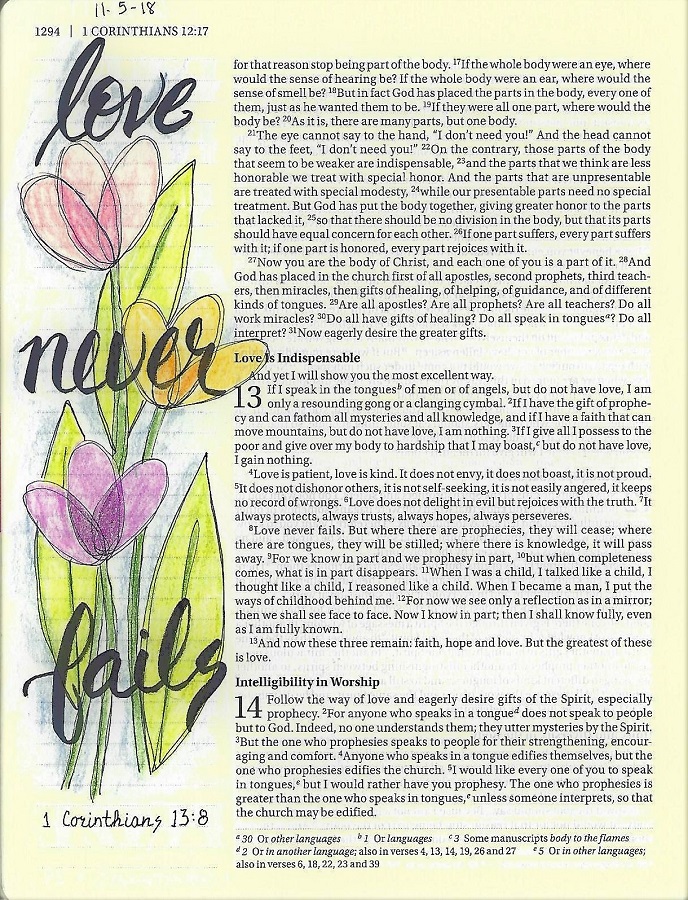
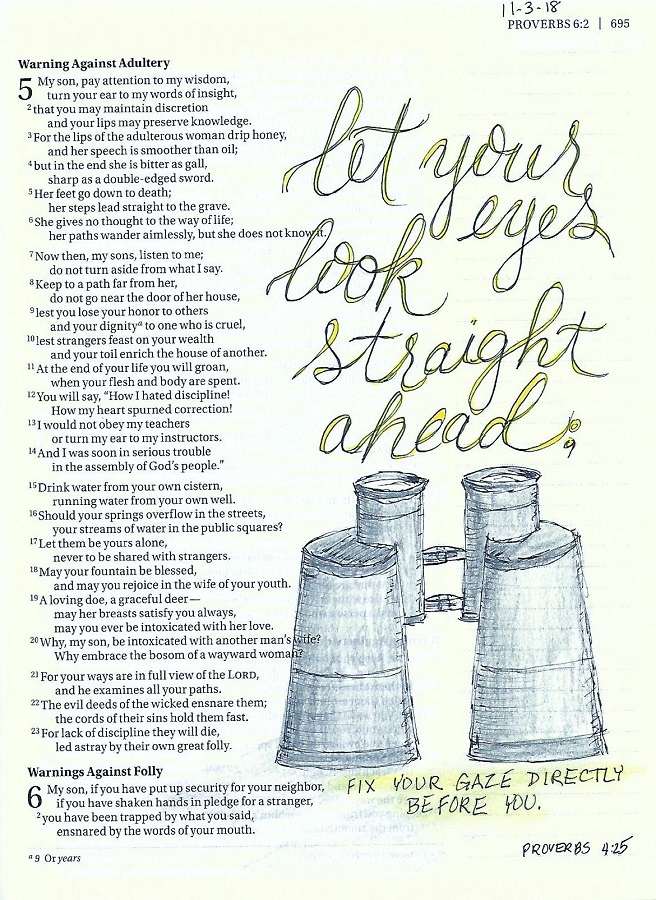
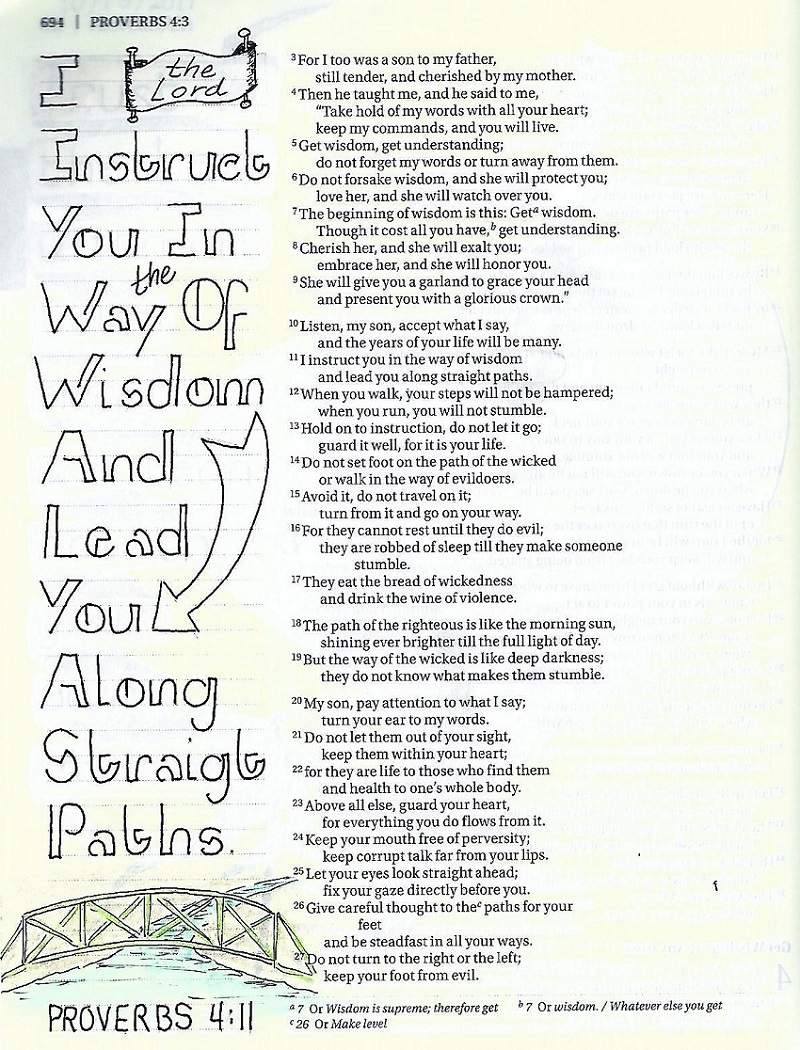
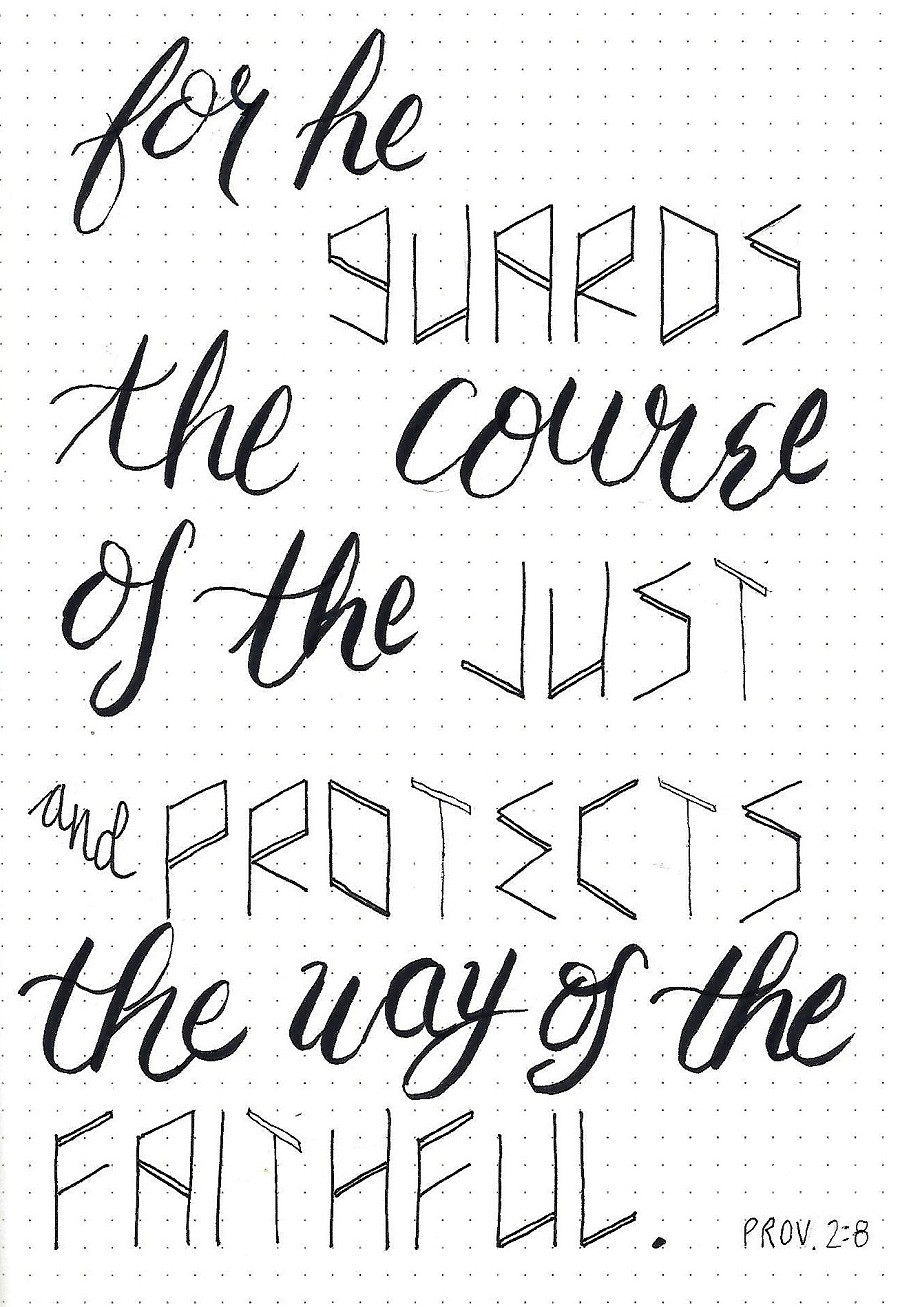
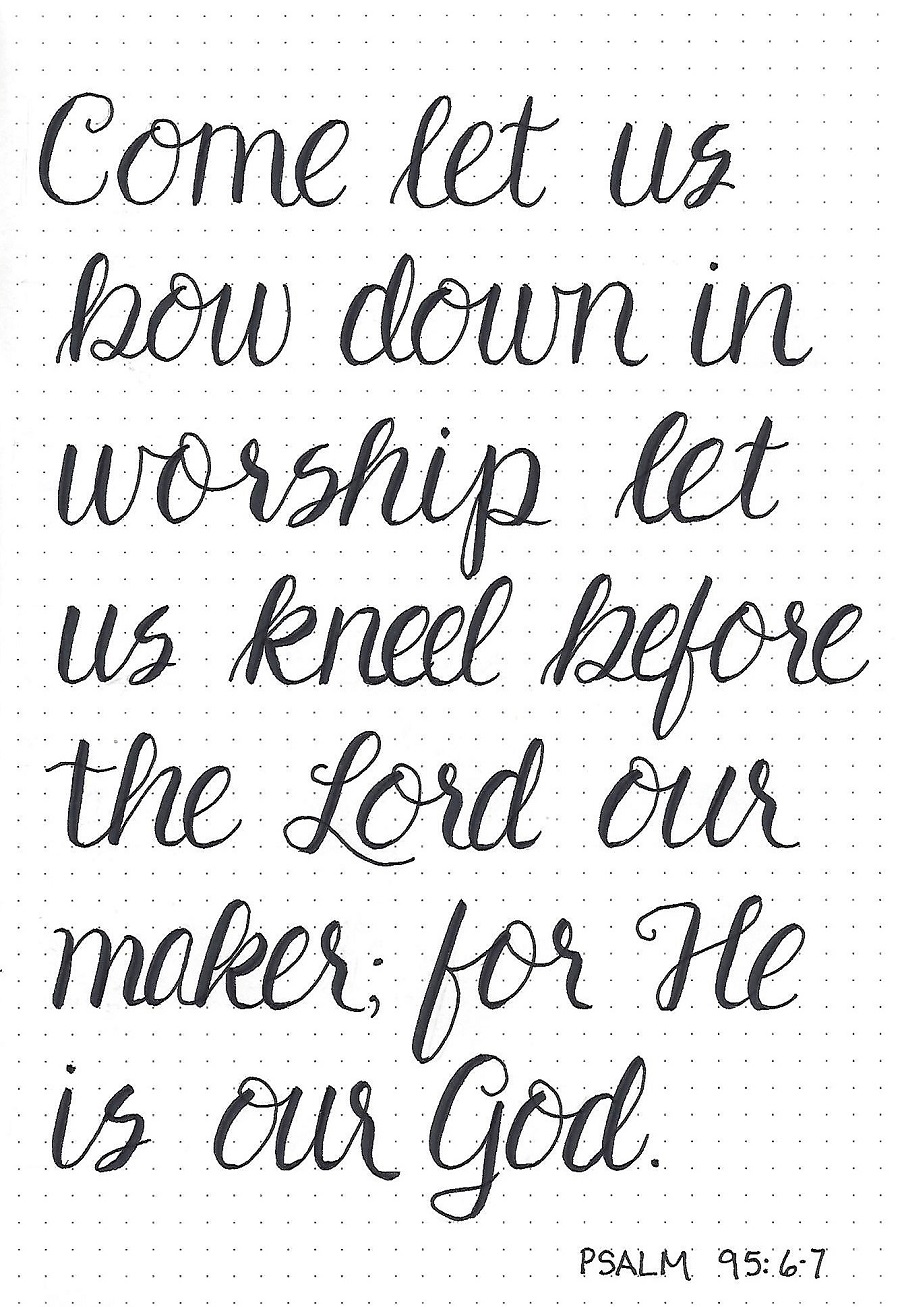
WORSHIP FONT - DAY 4 – SCRIPTURE WRITING

We’re going to take this font one step further today.

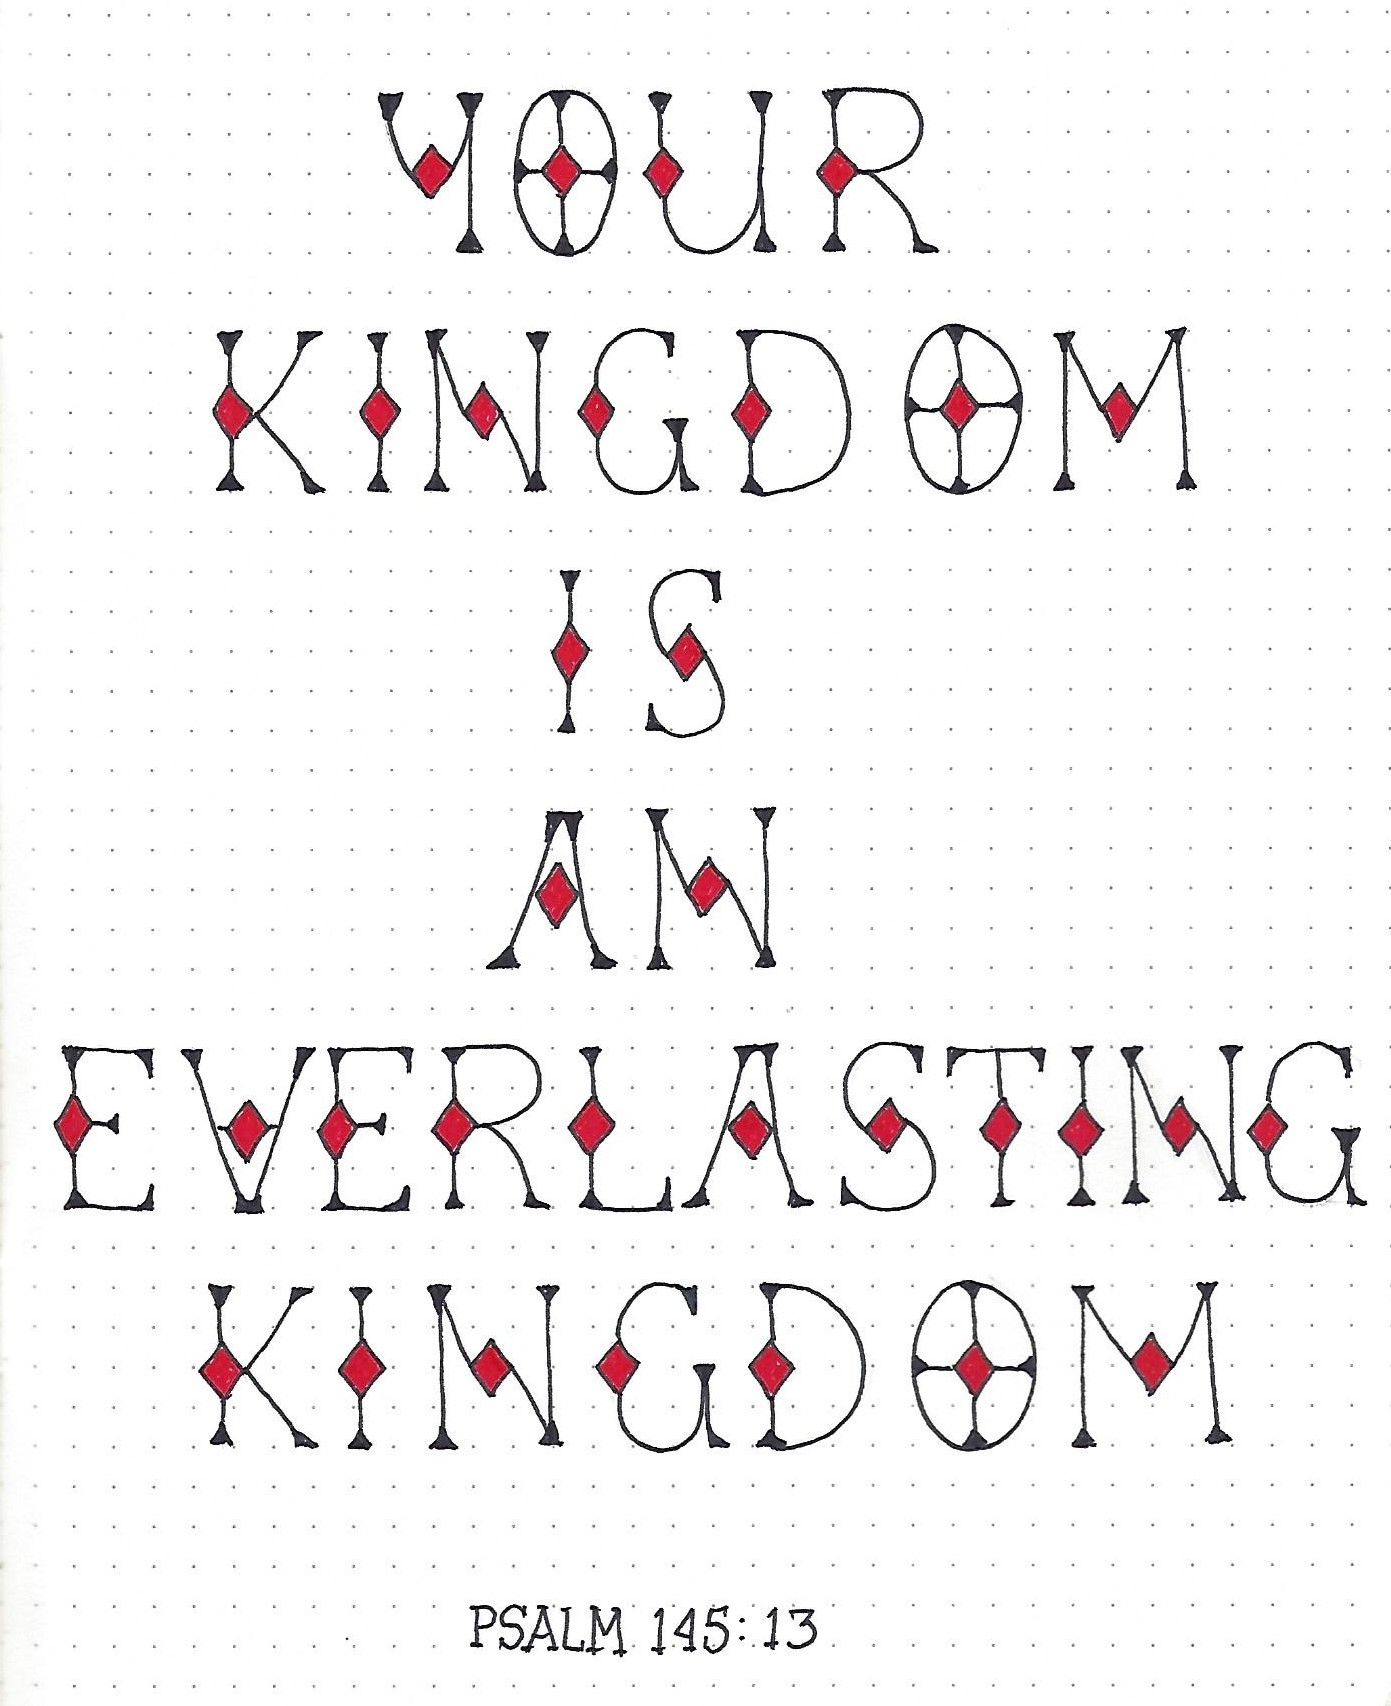
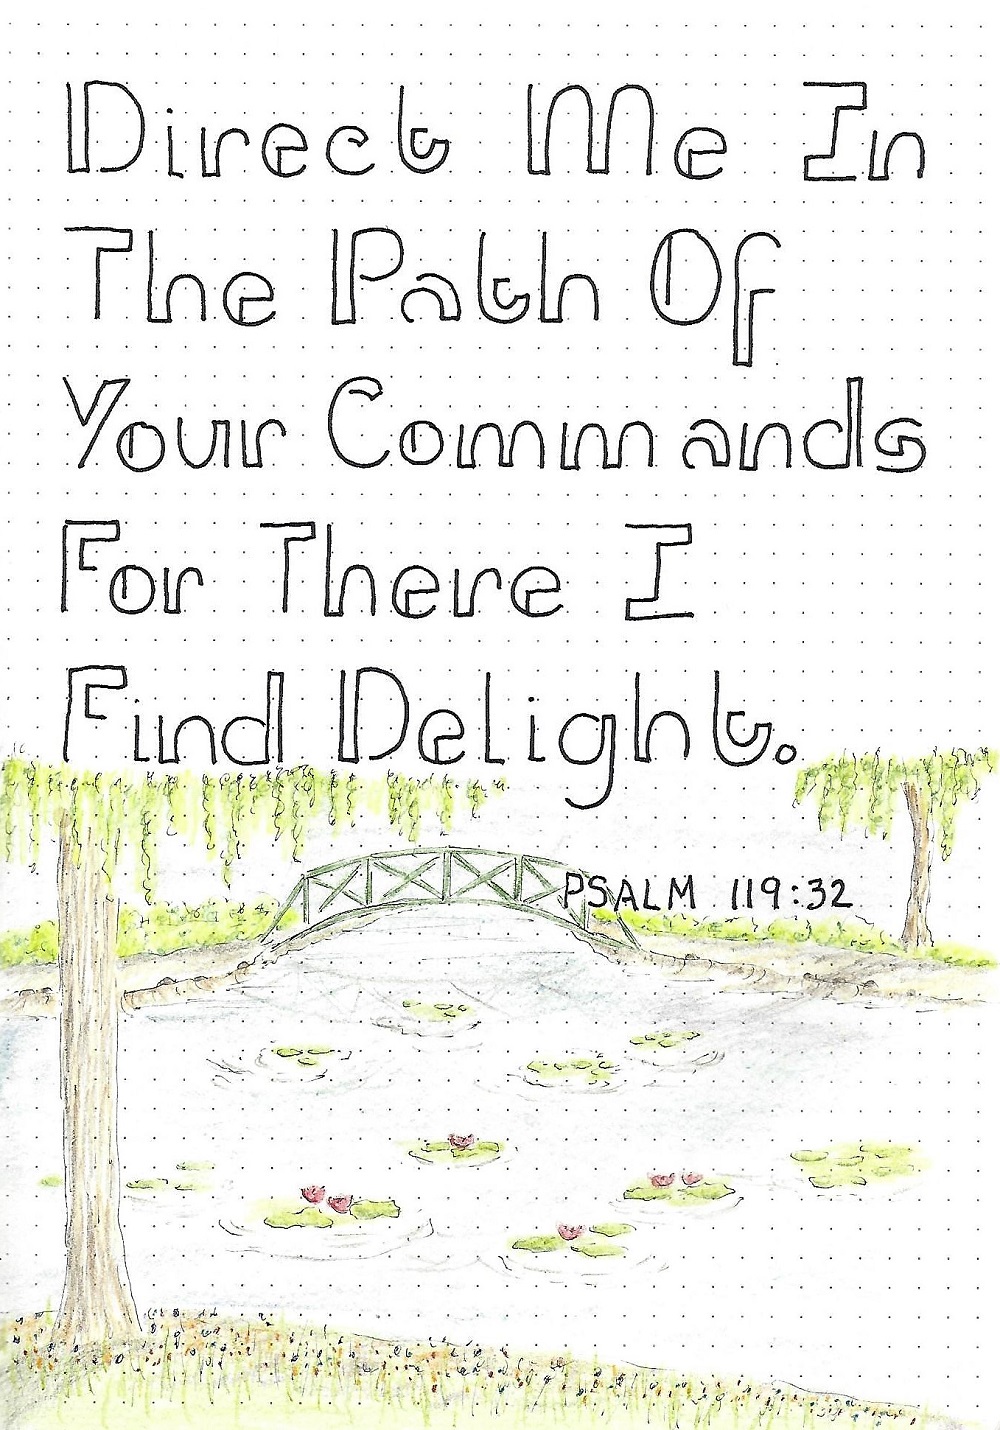
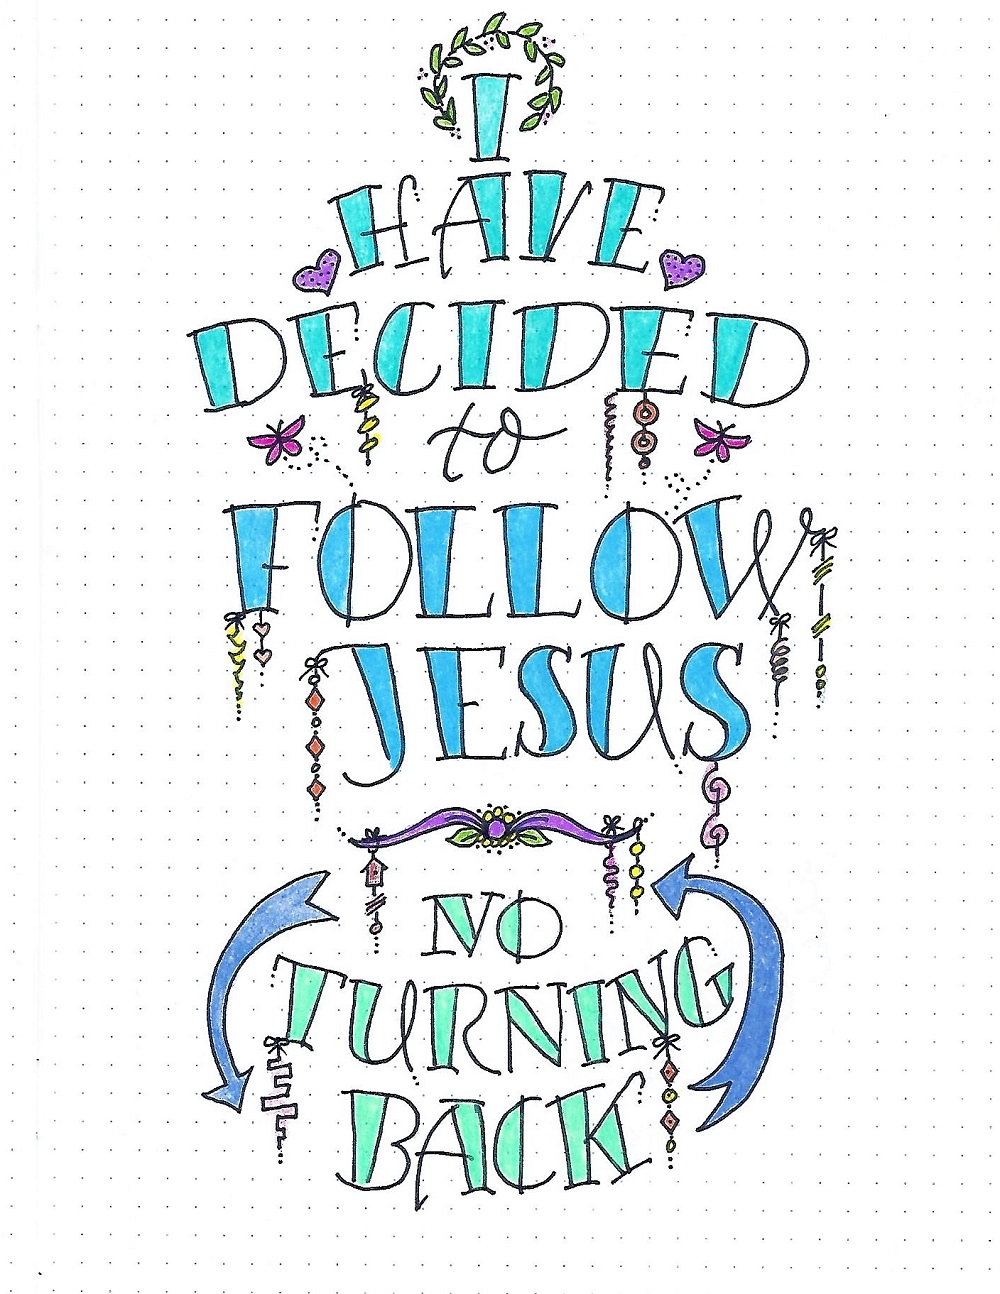
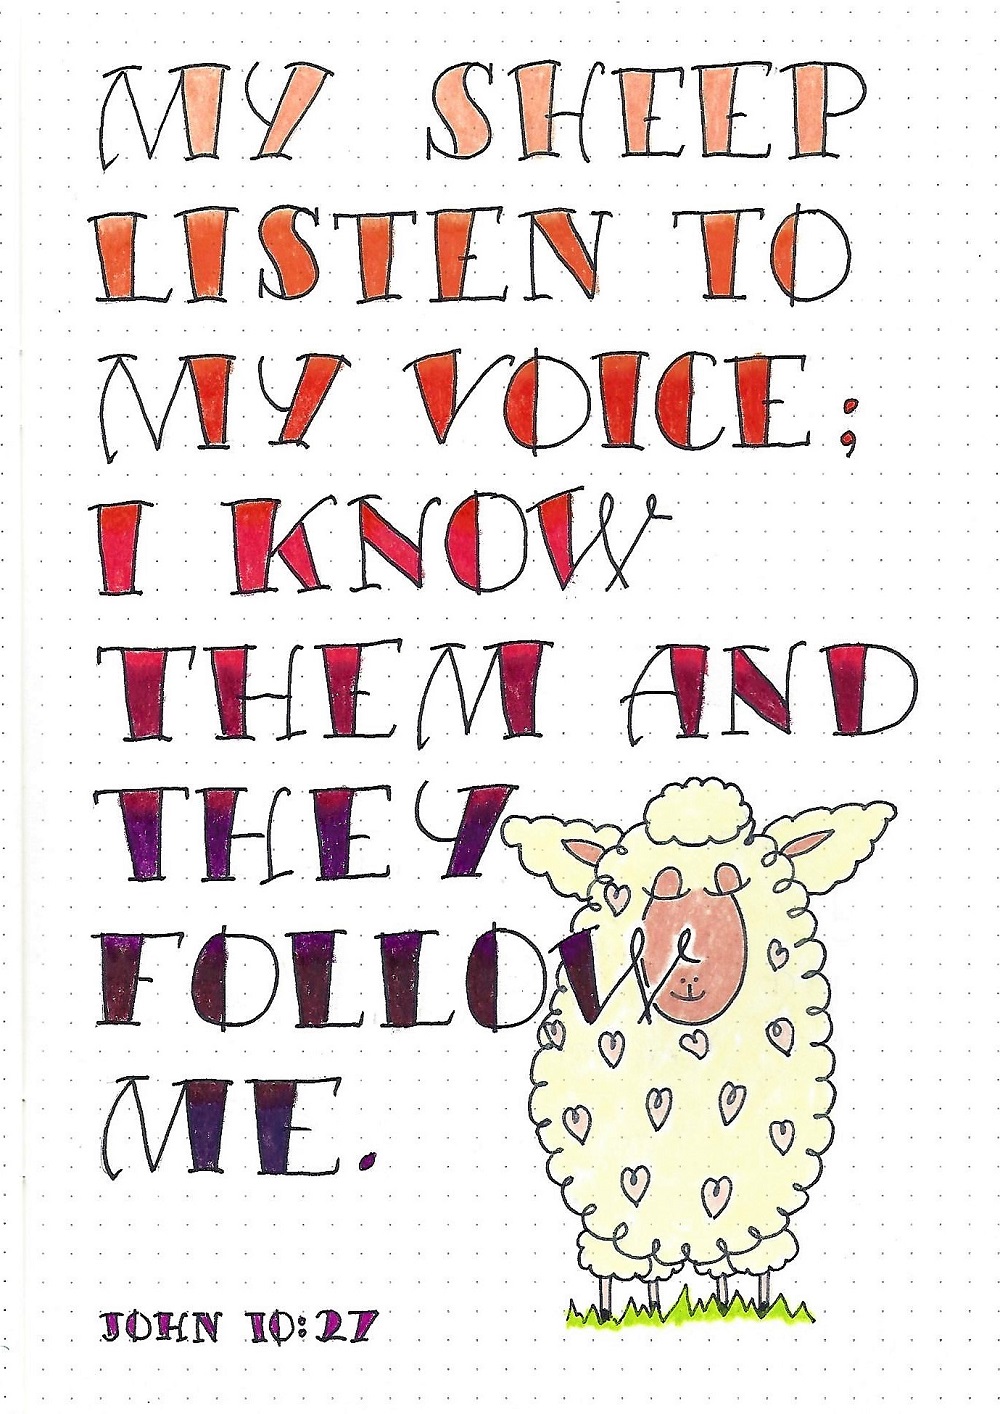
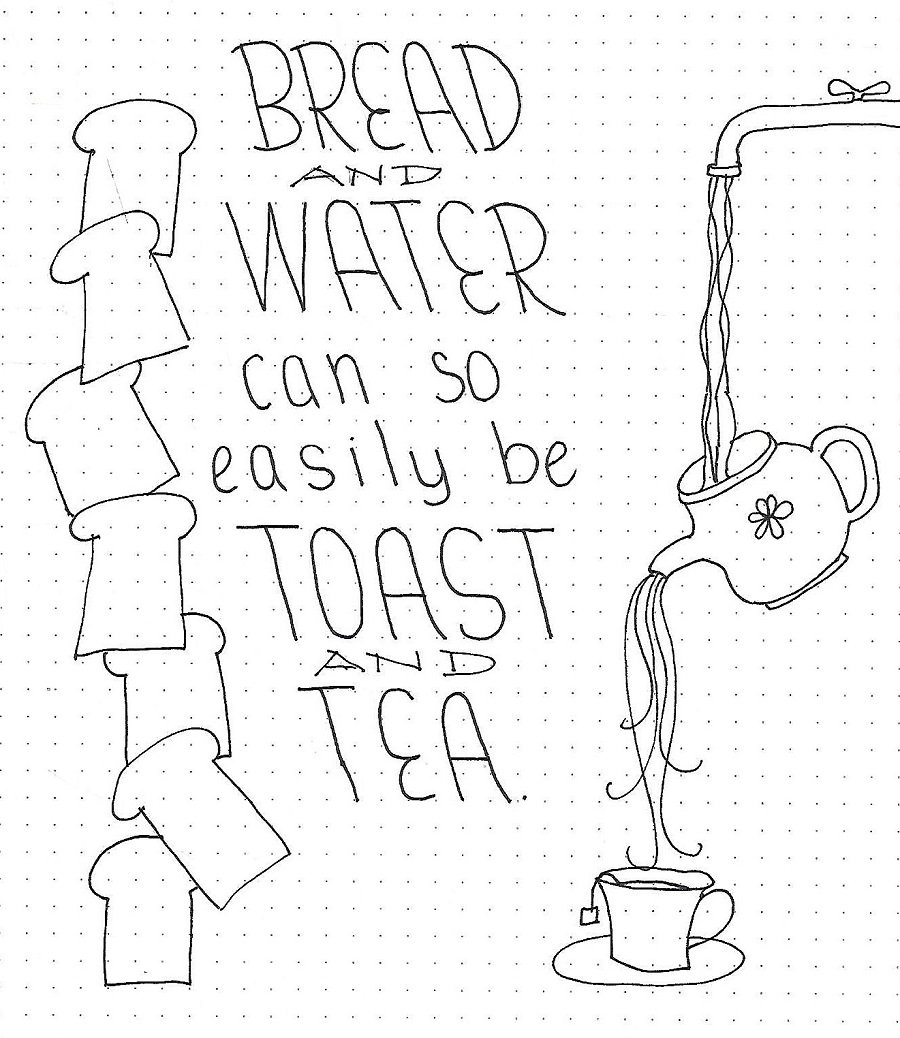
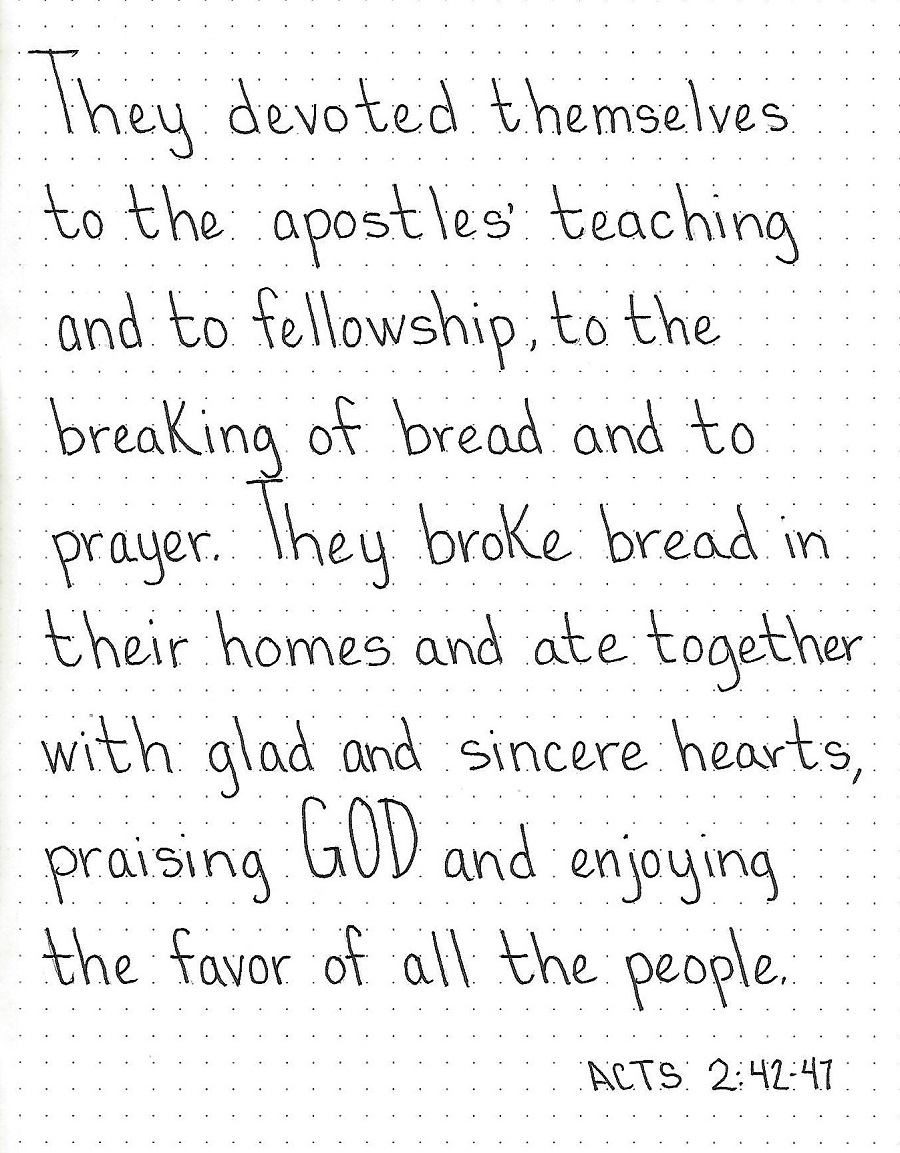
First, choose a scripture with the word ‘Worship’ and letter it in your notebook. Remember to work in pencil first and design beautiful and natural letter connections. Ink your work and erase the pencil.

Second, use pencil to draw a second line next to the MAIN downstrokes (don’t do the flourishing curls). Ink these lines and fill in the space between. It will end up looking like a beautiful brush script.

If you actually HAVE a brush pen, you can just us it on the downstrokes rather than drawing the second line and filling.


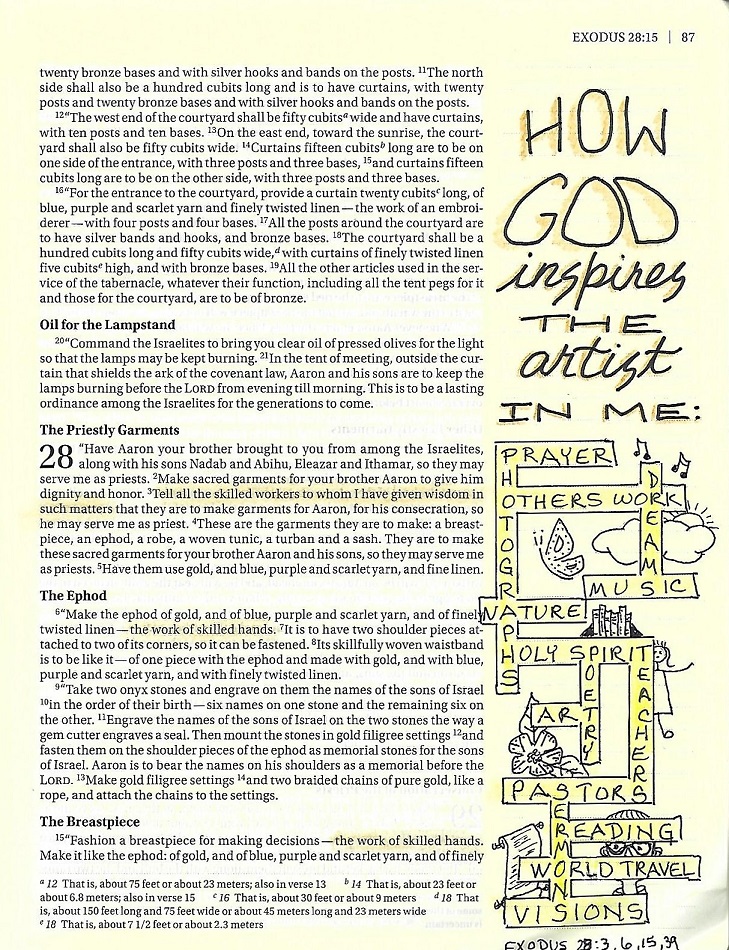
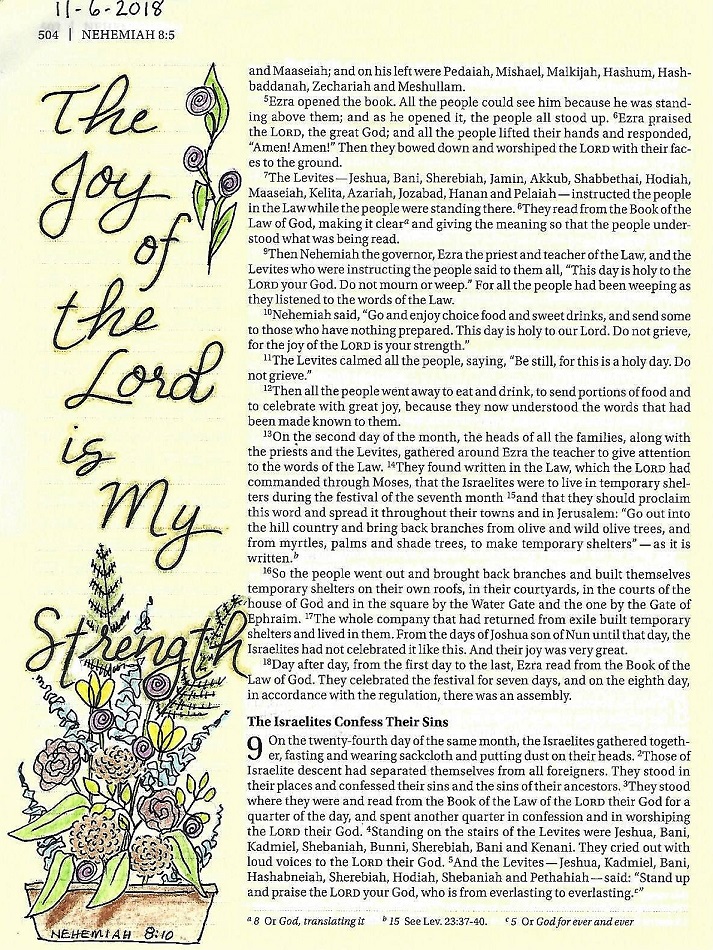
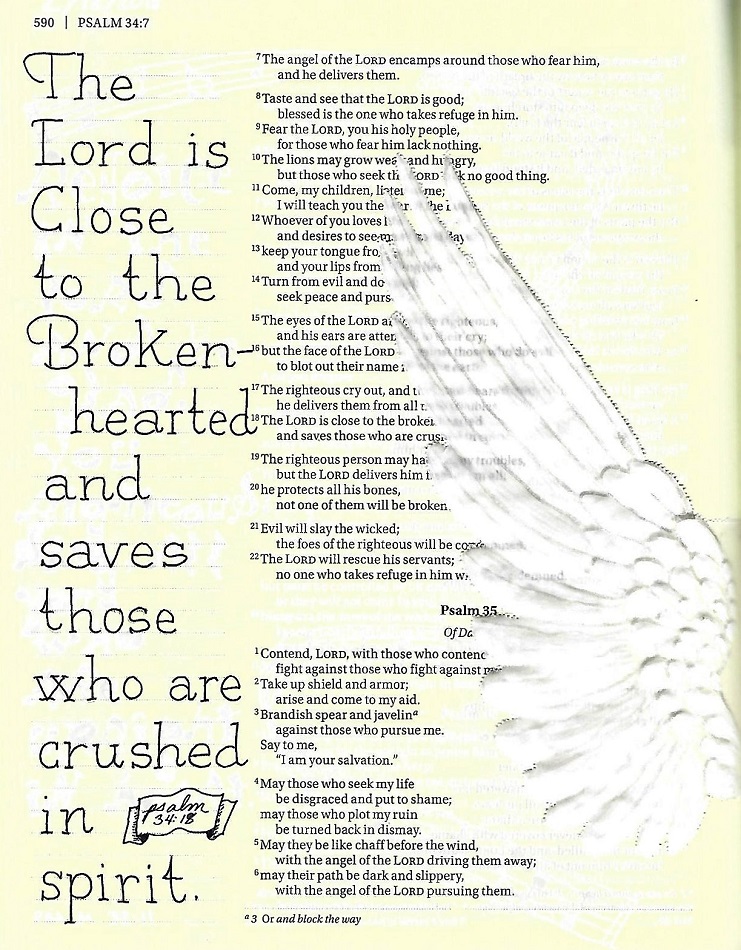
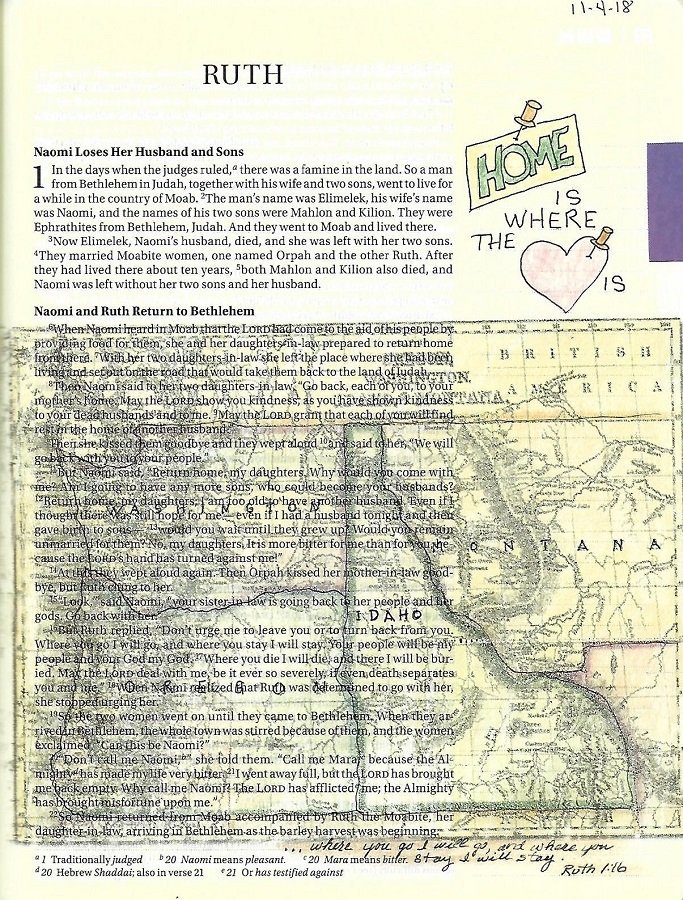
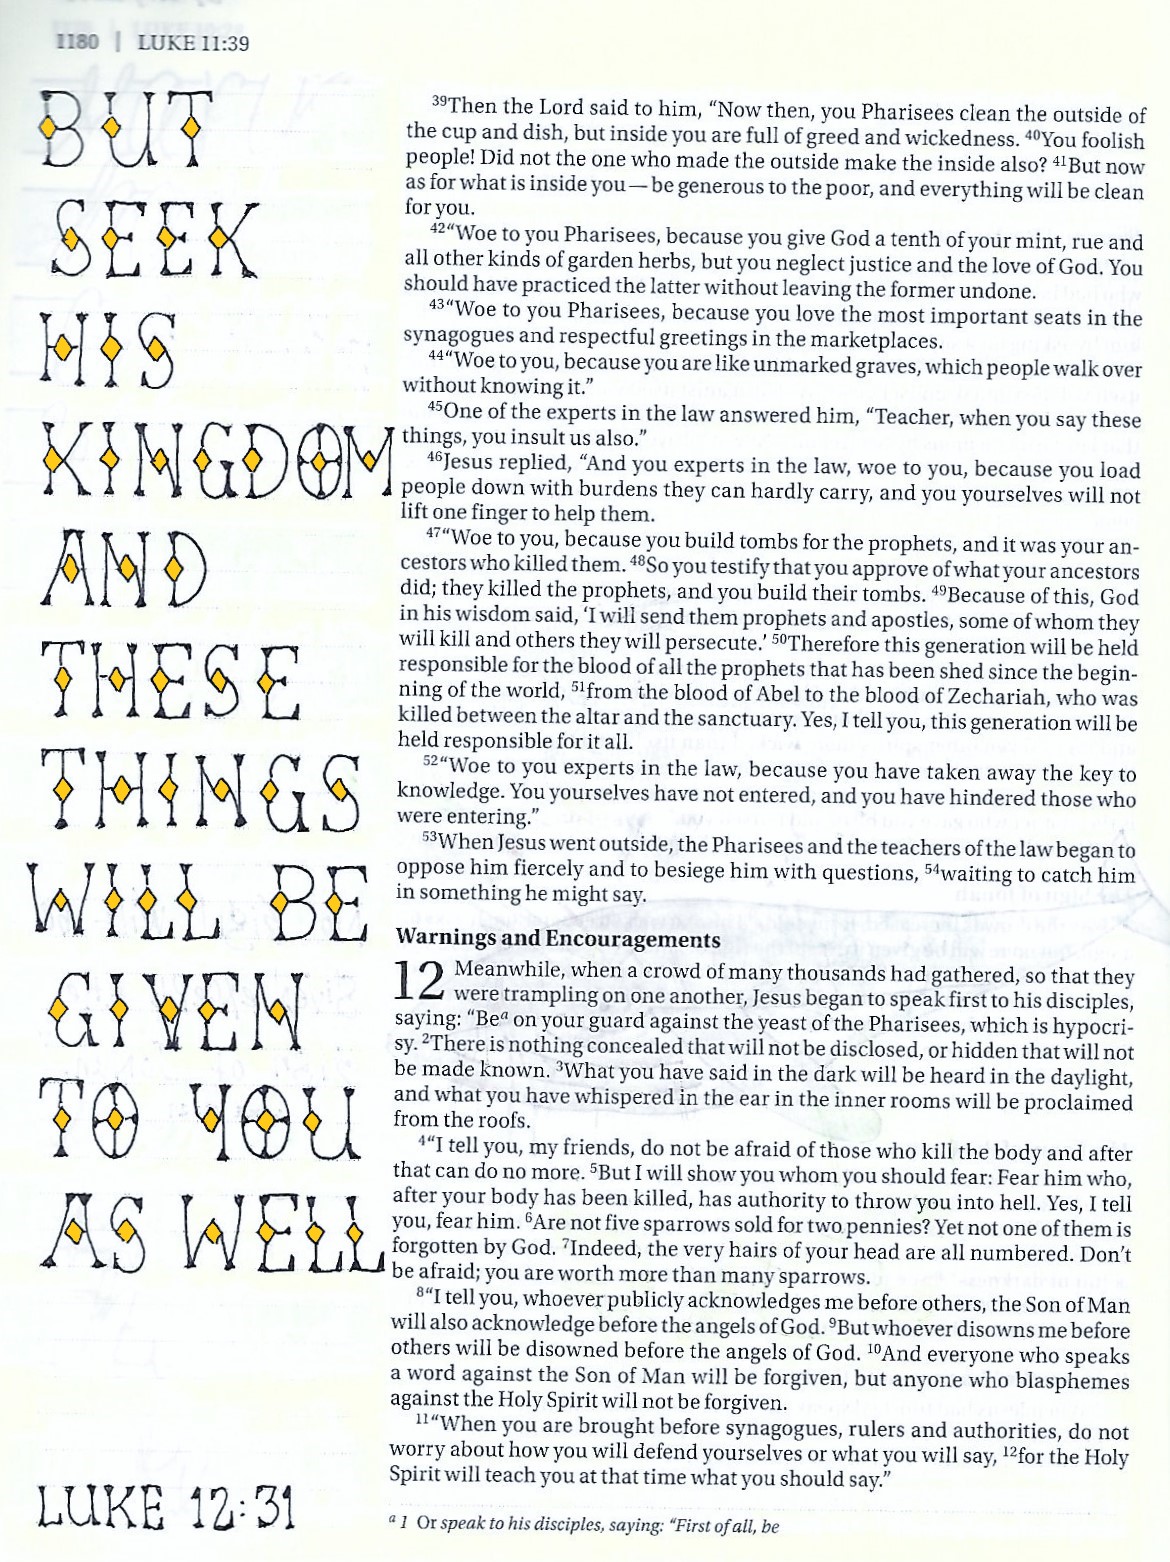
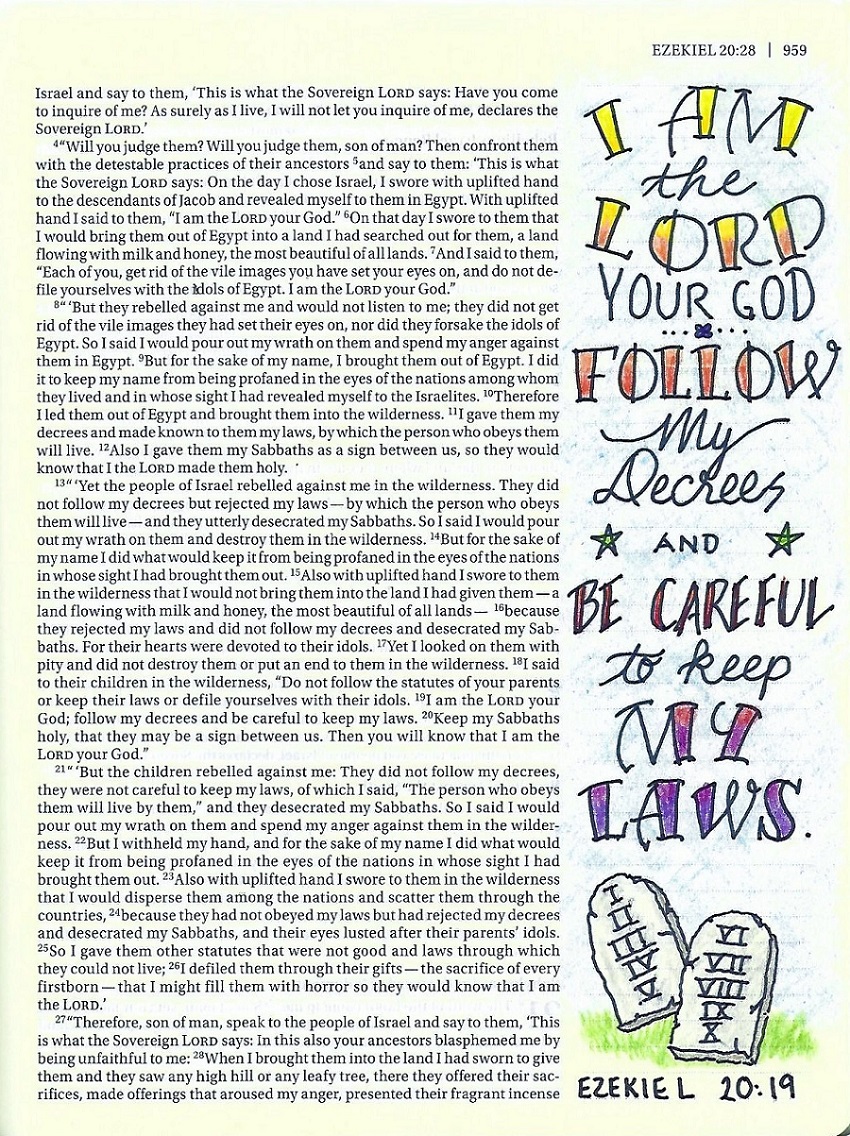
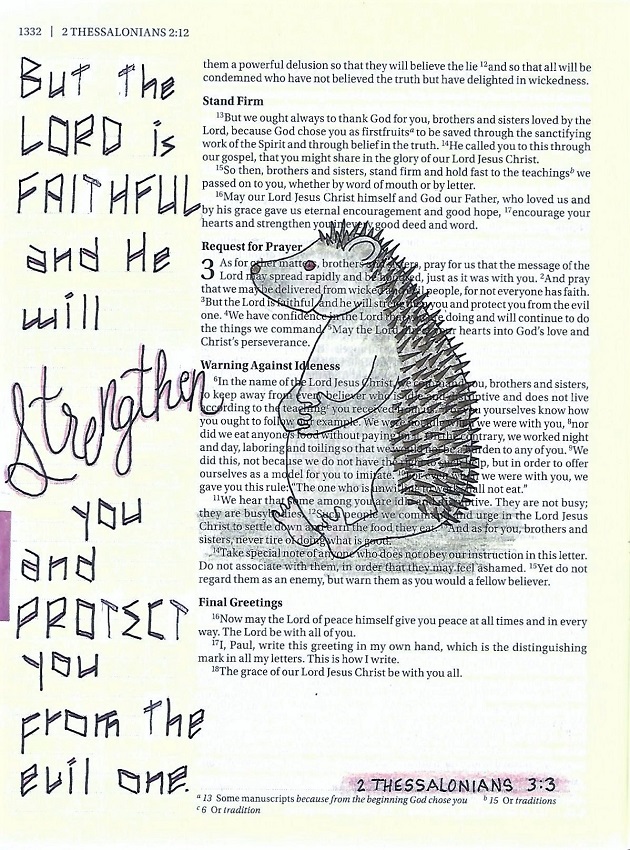
WORSHIP FONT - DAY 5 – TAKE IT TO YOUR BIBLE

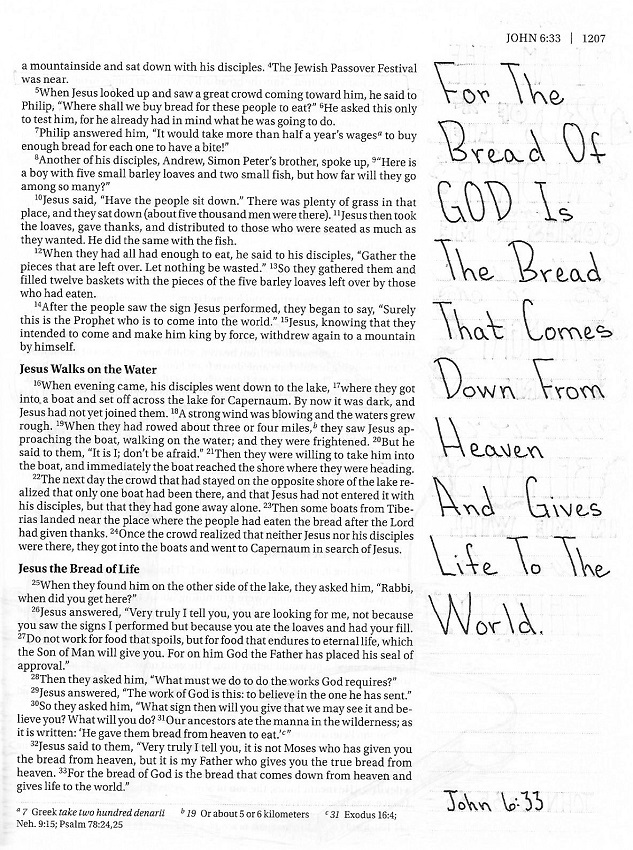
Today, we’re going to combine everything we learned this week to create a lettered scripture in our Bible.

  • ·         Penciling in the letter forms


  • ·         Penciling in the cursive connections


  • ·         Inking the connected letters


  • ·         Erasing all the guides and draft pencil marks


  • ·         Thickening the downstrokes


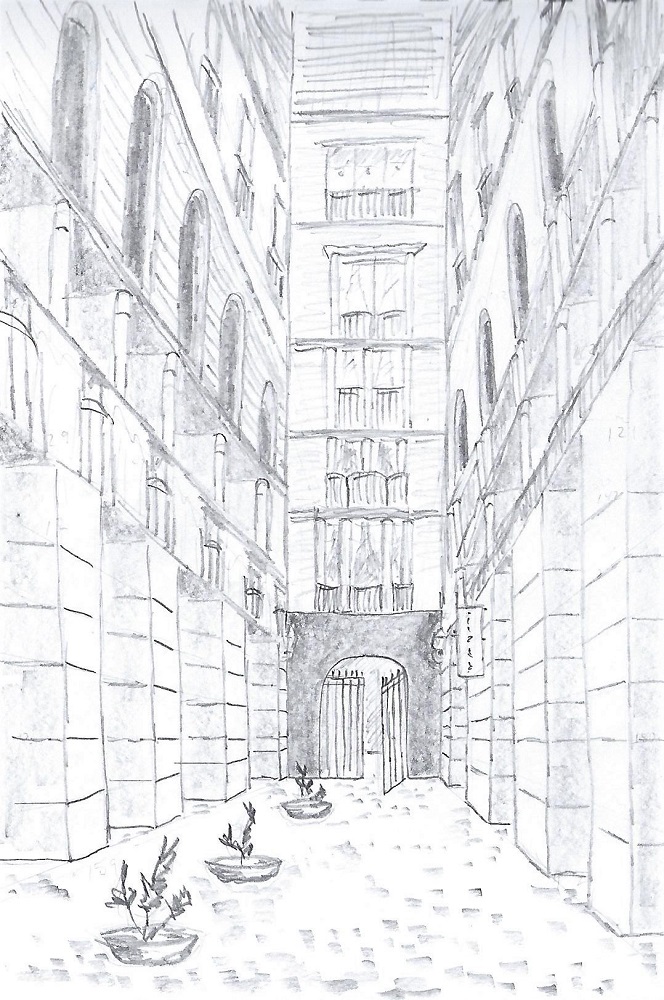
  • ·         (and embellishing the page if you wish)


I hope someone is getting some use from these lettering lessons! I never get any feedback!

Ddd


Posted by studio3d@ccgmail.net at 6:55 AM PDT
Friday, 5 October 2018
Writing On Your Bread
Topic: Bible Journaling

I am back-dating this post to the date the lettering class actually finished. I was away for a while and had no access to my computer or blog to do it at that time.

BREAD FONT - DAY 1 – INTRODUCTION

We often do fonts that are very upright or have a right-side lean to them It is rare to use one (have we ever yet?) with a back-hand. So that’s what we’re going to do this week.

Start with guide marks for the lean which are a 1:3 angle (for every one unit to the right you move three units down). I find it is enough to do these in pencil about every two to three spaces across and just carry them down the page.

Now, draw in the guides for the baseline, the x-height and the ascenders/caps. Total letter height is three units.

Finally, draw your letters using pencil. The uprights need to be right on that angle and the rest of the letter makes natural joins to suit it.

Trace in ink only after full word is penciled in to your satisfaction. Erase pencil.


BREAD FONT - DAY 2 - ALPHABET

You can see on this alphabet sheet how I have drawn in all the back-hand lines as well as the lettering guides in pencil. I usually leave these penciled lines even after I have worked up the whole alphabet and traced it in ink. I don’t erase the lines even when I erase the pencil from the letters as having the lines remain in place is a guide for me when using this alphabet in the future.

This alphabet is made up of fairly standard print forms. It is just the slant that makes it unique.

I included a number set that uses the same back-hand format.


BREAD FONT - DAY 3 – FUN DAY

Today, draw up some back-hand guidelines and practice writing words with both upper- and lower-case letters. I used a little quote I found in Pinterest and added some doodle art.

Use anything you wish for your lettering practice – just get some words on paper while training your hand to write with a left lean.


BREAD FONT - DAY 4 – SCRIPTURE WRITING

I wanted to get a LOT of practice writing with the BREAD font so I chose a very long verse to letter in my notebook.

BREAD FONT - DAY 5 – TAKE IT TO YOUR BIBLE

After all that practice writing back-hand this week, I penciled in the letters in my Bible without drawing guidelines. Remarkably, I didn’t have to make any adjustments before inking my scripture. That is the true value to practicing over and over on a new font.

I hope you will join in by using the BREAD font in your Bible.


Lean back, relax and write some back-leaning letters!

Ddd


Posted by studio3d@ccgmail.net at 6:36 AM PDT
Friday, 28 September 2018
Protection For You
Topic: Bible Journaling

I am back-dating this post to the date the lettering class actually finished. I was away for a while and had no access to my computer or blog to do it at that time.

Another lettering class is in the books over on the Creative-Bible-Journaling Facebook site. This week we worked with a very novel style and the focus word 'protect'. Here are the lessons:

PROTECT FONT – DAY 1 – INTRODUCTION

This week we are learning a novelty print with angles and double lines. There are no curved lines.

The capitals are 2 units wide and 5 units high. The lower case is the same width but the height varies.

There are no truly horizontal lines in this font. The angles on the ‘horizontal’ slanted lines are 2:1 (with an exception for the capital E).

The double line, always on a slant (never a vertical), has a width of 1/4 unit.

Practice the angled lines first, including single and double lines, on both the upward and downward slants. Then go on to construct the letters.

Remember to work in pencil first, then ink your letters and erase the pencil.


PROTECT FONT – DAY 2 - ALPHABET

Even in writing out this alphabet, you can see how context makes the letters make more sense.

All of the double lines are on angles, never on the vertical lines. You will note that the E and Q break the rules of angles slightly.

If YOU have a better idea for how to write a letter that still fits the styling of the rest of the alphabet, please share!


PROTECT FONT – DAY 3 – FUN DAY

Today let’s use an anagram to list some ways that God protects us.

Note that the space between letters is generally 1 unit. However, when a capital is open on the side like the T in Teaches and Treasures a smaller lower-case letter can be tucked in close (in this case an ‘e’ and an ‘r’). The ‘s’ at the end of ‘comforts’ gets to snuggle in, too.


PROTECT FONT – DAY 4 – SCRIPTURE WRITING

For a longer scripture or other project, it is always perfectly permissible to join the new font with something completely different. The context of something easily recognized will assist in the ‘interpretation’ of the odd letter forms through context.

What do you think of this font? Be honest!

Give a try to writing scripture with the word ‘protect’.


PROTECT FONT – DAY 5 – TAKE IT TO YOUR BIBLE

I decided to have a little fun with the focus word and imagined what you might find inhabiting a ‘hedge’ of protection! After I was done with the page, I wondered if someone might think I meant that this hedgehog was ‘the evil one’ referred to in the verse. Sigh…

Actually, there are no scriptures that actually use the term ‘hedge of protection’ in any translation. It’s more of something that has been handed down from one preacher to another. However, if you want a hedgehog of your own, visit the Drawing Room where he is featured this week. I’m kinda thinking the hedgie is the best thing about this page as, truthfully, I am really not sold on the ‘Protect’ font.


And there you have it!

Ddd


Posted by studio3d@ccgmail.net at 6:16 AM PDT

Newer | Latest | Older