« April 2019 »
S M T W T F S
1 2 3 4 5 6
7 8 9 10 11 12 13
14 15 16 17 18 19 20
21 22 23 24 25 26 27
28 29 30
You are not logged in. Log in
Entries by Topic
All topics  «
3D paperwork
A - Z challenge 5
A - Z challenge 7
A - Z challenge round 4
A to Z challenge round 3
A to Z round 2
A to Z round 6
A-Z round 1
Around the House
Art Challenges
Artist Trading Cards
Backgrounds
Beads
Bible Journaling
Books
Boxes
Collage
Color Challenge
Coloring
cookbook
Die Cuts
Digital Projects
Digital Stamps
Drawing
Dry Embossing
Fabric Stuff
Fantastic Folds
Field Trip
Home Decor
How Does Your Garden Grow?
Hymnal Art
In The Kitchen
In the studio
Jewelry
Lettering
Links
Multi-Technique
Music to Work By
Musings
Nail Art
New Work
Online Class
Other Hobbies
Other Projects
Painting
Paper Embroidery
Paper Piecing
Photo
Pretty Paper
Quilting
Random
reading
Scrap Recovery
scrapbooking
Sewing
Sketch Challenge
Some Backlog
Stamping
Stencils
Stickers
Supplies
Teabag Folding
Techniques
Testing
tips and tricks
Tutorial
Web resources
Welcome to my Blog
Work By My Friends
workflow
Writing
Blog Tools
Edit your Blog
Build a Blog
RSS Feed
View Profile
Group One
In & Out of Studio 3D
Friday, 19 April 2019
Continuing a Month of Bible Lettering
Topic: Lettering

Now, for the Typography class, the projects wre to feature 'word stacking'. My prompts continue to be from the 30 Days of Bible Lettering challenge.

April 16 - 1 John 4:18 - There is no fear in love. But perfect love drives out fear, because fear has to do with punishment. The one who fears is not made perfect in love.


April 17 - Psalm 139:24 - See if there is any offensive way in me, and lead me in the way everlasting.


April 18 - Matthew 19:26 - Jesus looked at them and said, “With man this is impossible, but with God all things are possible.”


You can see from the text I have highlighted for each date, they do not sometimes match what the art says. That is because I highlighted in red the text I thought I would use foe each day. But then, as I progressed on the art, sometimes I changed my mind. I did not go back to change my original worksheet though.

More in three days!

Ddd


Posted by studio3d@ccgmail.net at 7:53 AM PDT
Monday, 15 April 2019
Three More Days of Bible Lettering
Topic: Lettering

This post is to show the next three days of the 30 Days Of Bible Lettering challenge.

In the class Typography for Bible Journaling, the lesson was on Line Weights. 

These are the samples I made:

April 13 - Philippians 4:6 - Do not be anxious about anything, but in every situation, by prayer and petition, with thanksgiving, present your requests to God.


April 14 - Psalm 84:10 - Better is one day in your courts than a thousand elsewhere; I would rather be a doorkeeper in the house of my God than dwell in the tents of the wicked.


April 15 - 2 Corinthians 1:4 - who comforts us in all our troubles, so that we can comfort those in any trouble with the comfort we ourselves receive from God.


I'll be ack in three days with more of this project.

Ddd


Posted by studio3d@ccgmail.net at 12:00 AM PDT
Sunday, 14 April 2019
He Lives - Decorated Hymnal
Topic: Hymnal Art

I am sticking with the Easter themed songs this month and it was time for another old favorite... 'He Lives'.

I gave my page a stylized figure, singing praises to accompany some handwritten lyrics.


I have a couple ore ideas on this theme to complete the month.

Ddd


Posted by studio3d@ccgmail.net at 11:36 PM PDT
Saturday, 13 April 2019
Lettering in the Books of Kings
Topic: Bible Journaling

Here we are up to week 15 in the series on lettering progression from basic to advanced. We are now starting the transformations leading from print to script - not all at once but in small, incremental steps.

Let's begin.

1 & 2 KINGS: Day #1 – Architect – Introduction

Now that we’ve mastered the basic oval print, we’re going to start morphing it into more styled letters. This page introduces a font called Architect. This is the type of print you would find on blueprints and building designs, but generally only using upper-case.

It is very readable and every letter is distinct so it cannot be mistaken for something else. The slants on the letter forms make it very natural to write quickly.

Today, just practice on these few letters introducing the books of Kings.


1 & 2 KINGS: Day #2 – Architect – Alphabet

Now we have the full alphabet in both upper- and lowercase for the architect font.

Note that the tops of letters as well as the horizontal crossbars are on an angle. The bowls of the letters are based on a slanted oval and the left and right posts of letters are staggered in height.

I think this has become my favorite lettering style to default to, especially for lettering things accompanied with a drawing.


1 & 2 KINGS: Day #3 – Italics Oval Print – Alphabet

We’re going to drop back to the basic oval print again today but turn it into an italic font. Rather than just tipping the bowls, like the architect print did, this sets all the uprights on a slant and the bowls follow them. However, the horizontal marks remain square to the baseline.


1 & 2 KINGS: Day #4 – Italic Architect – Block of Text

Let’s combine the Architect and the Italic today and use them to write up a block of text. Do this by using the letter forms for the architect style but with the uprights on a slant.

I selected a scripture from 1 Kings for my sample.


1 & 2 KINGS: Day #5 – Architect/Italic – Bible Page

Choose with the architect font or the italic oval font or a combination of architect/italic and use it to write a scripture in your bible. I chose 1 Kings for my scripture reference again.

I have added some gems from this week’s Drawing Room lesson.


Keep joining me here every week for the continuation of this series.

Ddd


Posted by studio3d@ccgmail.net at 8:23 PM PDT
Friday, 12 April 2019
Still Making Typography Scriptures
Topic: Lettering

The next 3 lessons in the Typography For Bible Journaling class were on combining fonts. I had already been doing this so basically continued with what I was doing.

April 10 -

10 - Micah 5:5 - And he will be our peace when the Assyrians invade our land and march through our fortresses. We will raise against them seven shepherds, even eight commanders


April 11 -

11 - Psalm 107:9 - for he satisfies the thirsty and fills the hungry with good things.


April 12 -

12 - 1 Thessalonians 5:11 - Therefore encourage one another and build each other up, just as in fact you are doing.


More to come!

Ddd


Posted by studio3d@ccgmail.net at 9:02 AM PDT
Tuesday, 9 April 2019
Three More Typography Scriptures
Topic: Lettering

The next set of samples in the Typography For Bible Journaling class were to practice 'casual script', using our own handwriting.  We practiced using script beforehand and explored letterforms that we might want to incorporate. 

I have already been doing this in my bible lettering and have changed, for 'art lettering' the way I make h, r, s, o and others. I have also worked on letter connecting. So this was not a problem for me.

As before, I am using the prompts for the 30 Days Of Bible Lettering challenge for my class homework. I used a combination of regular markers and brush markers in my script.


April 7 - Isaiah 40:31 - but those who hope in the Lord will renew their strength. They will soar on wings like eagles; they will run and not grow weary, they will walk and not be faint.


April 8 -1 Corinthians 13:13 - And now these three remain: faith, hope and love. But the greatest of these is love.


April 9 -John 14:1 - Do not let your hearts be troubled. You believe in God; believe also in me.


You can see, because of the dots, that I did this whole series of lettering designs in a notebook. This way I can later choose which ones I want to transfer to my journaling bible.

Ddd


Posted by studio3d@ccgmail.net at 10:22 AM PDT
Monday, 8 April 2019
We All Sing Again
Topic: Hymnal Art

This week the decorated hymn assigned was 'Because He Lives'.

First, let me say that I was stunned to find that this hymn was NOT in my book! WHAT?!?!? I had to find the sheet music online, resize it and cut it out to tip in. When I do this, I put it where the page number says it should go and then I add it to my hymnal index.

I went with a straight-up resurrection theme for my drawing and did all the coloring in markers.

I took some of what I learned in the class Typography For Bible Journaling and applied those principles for the lettering.


I did the tipin with just a fine line of glue at the inner edge and closed the book to dry.

Ddd


Posted by studio3d@ccgmail.net at 12:01 AM PDT
Saturday, 6 April 2019
30 Day ChallengeOn Bible Lettering
Topic: Lettering

The next series of lessons for Typography class were related to Serif letters. Again, I used scriptures from the 30 Days of Bible Lettering challenge for my homework.

April 4 - Psalm 103:2 - Praise the Lord, my soul, and forget not all his benefits


April 5 - Proverbs 16:24 - Gracious words are a honeycomb, sweet to the soul and healing to the bones.


April 6 - Nehemiah 8:10 - Nehemiah said, “Go and enjoy choice food and sweet drinks, and send some to those who have nothing prepared. This day is holy to our Lord. Do not grieve, for the joy of the Lord is your strength.”


Lesson 2 complete.

Ddd


Posted by studio3d@ccgmail.net at 12:00 AM PDT
Friday, 5 April 2019
Lettering James
Topic: Bible Journaling

The lettering lessons continue - this week in the book of James.

Here are the daily lessons:

JAMES: Day #1 – Bouncing Letters – Introductions

I tend to like my lettering all lined up in neat rows, showing off their symmetry and consistency. But every now and then it is good to let them loose to play a little.

We’re going to concentrate on that aspect this week while using the basic oval letters.

To begin, letter the word ‘James’ in a couple of bouncing styles. On one, twist the letters this way and that while allowing them to float at varying distances above the base line. On the next, Only allow the bounce to be vertical without any tilt to the letters.


JAMES: Day #2 – Bouncing Letters – Alphabet

I think the hardest part of bouncing letters is keeping the sizes consistent when you don’t have that baseline and other guidelines to key off of. So it is especially important to draw out the letters first in pencil and make any edits in conformity before inking.

Practice bounding your basic oval lettering on a full alphabet. Include some of your alternative letter forms as well.

While you’re at it, you might toss in a set of numbers for future reference.


JAMES: Day #3 – Bouncing With Options – Style Page

Today we will practice writing words with bounced print lettering. There are so many options (not all of them are listed) that I included the samples and pointers right in the practice piece.

I did all of my lettering in pencil and then drew them with colored markers. Try this out for fun!


JAMES: Day #4 – Bounced – Writing Text

For more practice, choose your favorite technique from yesterday’s practice and write a block of text using it. You’ll notice how much less frantic it appears when you confine yourself to only a few options.

I used vertical bouncing with slant serifs and no color.


JAMES: Day #5 – Bounced/Colored – In Your Bible

For my Bible page I used vertical bouncing with shadow lines and added a rainbow of color to the letters.

Like yesterday, I want you to choose a favorite style from Day 3 and use it in your bible in the book of James. I combined mine with the Drawing Room lesson on ‘Gears’.

More to come.

Ddd


Posted by studio3d@ccgmail.net at 1:00 AM PDT
Wednesday, 3 April 2019
New Class and a Challenge
Topic: Lettering

I signed up for a new class called Typography For Bible Journaling in which the instructor teaches how to use your own handwriting to letter scriptures attractively.

There are 10 lessons and each lesson contains 3 challenges using the same design principles.

So, when I heard about a challenge - 30 Days of Bible Lettering - I decided to combine the two activities. The numbers work out perfectly. I use theinformation in the lessons but use the scriptures from the challenge in the place of those shown in the class videos.

I will post these in sets of three... the three that represent a single lesson theme.

So here are the three lettered scriptures that go with the lesson for Sans Serif Letters.

April 1 - Psalm 23:3 - he refreshes my soul. He guides me along the right paths for his name’s sake.

April 2 - Joshua 1:9 - Have I not commanded you? Be strong and courageous. Do not be afraid; do not be discouraged, for the Lord your God will be with you wherever you go.

April 3 - 2 Corinthians 5:7 - For we live by faith, not by sight.

I'll be back with more in a few days - all month long.

Ddd


Posted by studio3d@ccgmail.net at 1:00 AM PDT
Sunday, 31 March 2019
A Favorite Hymn
Topic: Hymnal Art

This is reported to be the hymn that the largest percentage of people list as their favorite.

The concept for this crown of thorns is one I developed a couple of years ago and used in my Bible. But I like this version much more than the original.

The use of the nails to form crosses and to stand in for the thorns says so much.

I used the same technique for the wood on the cross that I usually do - draw in the wavy lines with a medium dark colored pencil. Then color over everything with a medium light colored pencil. 


I used a script lettering for the lyrics up the left edge.

Ddd


Posted by studio3d@ccgmail.net at 1:00 AM PDT
Friday, 29 March 2019
1 & 2 Samuel - Lettering
Topic: Bible Journaling

Time for the weekly post of another lettering lesson. This week we cover 1 and 2 Samuel.

Here are the weekly lessons:

1 & 2 SAMUEL: Day #1 – Basic Oval Lettering – Intro

Having spent so much time on block letters we are now going to move on to another simple print style and then explore variations on it. The style we are starting with is called a basic oval print.

The general letter construction is very similar to the basic round but the letters are narrower and, where there are ‘bowls’ on the letters they become an oval that sits at an angle, tipped to the right.

You don’t see much evidence of this in the all caps version of the sample below but it does show up more in the lower-case ‘a’ and ‘e’ in the second line.

Practice drawing these letter forms. Remember to work first in pencil, correcting your letters as you go. Only ink when the letter is exactly how you want it, then erase the pencil.


1 & 2 SAMUEL: Day #2 – Basic Oval Letters – Alphabet

This is the full alphabet for the basic oval print style. Note that the ‘bowls’ of the letters are oval in shape and have a slight lean to the right. The uprights, however do NOT lean.

The letters are narrower than the basic round print. The x-height is still ½ the full letter height.

Sketch out the letters lightly in pencil, correct until they are exactly as you want them, trace over the pencil with pen and then, when the ink is dry, erase the pencil.


1 & 2 SAMUEL: Day #3 – Oval Style & Dot Serifs – Alpha

Creating the dot serif style is very simple. First, write out another copy of the basic oval style alphabet. Then draw a small dot on all of the line ends and intersections.

It is fun to let these letters bounce off the baseline and use a mix of colors in your text. For my sample page, though, I toe the line so I can make sure the relative sizes and shapes are correct. The play can come into use when using the alphabet on a project.


1 & 2 SAMUEL: Day #4 – Numbers w/ Dot Serifs

To make numerals that fit with the basic oval and dot serif styles you really have a lot of leeway. The keys will be: make the numbers as tall as your upper-case, keep them upright, make narrow like your letters. Other than that, you have the choice of how your digits are shaped. Do you like a 9 with a straight stem? Boom! You got it. How about a 4 with an enclosed top? Your choice.

For the dot serif numbers, just add that dot at all line ends and intersections.


1 & 2 SAMUEL: Day #5 – Dot Serifs – Bible Page

For my Bible page in 2 Samuel, I used the dot serif style in a very straightforward manner.

This style is easy to scale up or down – see the reference at the bottom of the page – while remaining very clear and readable. Note that the smaller the lettering, the more prominent the dots become.

I combined my text with the simple illustration of the fish hook from the Drawing Room tutorial.


Great stuff, huh?

Ddd


Posted by studio3d@ccgmail.net at 1:00 AM PDT
Thursday, 28 March 2019
Final Whimsy
Topic: Drawing

And now, I have finished my Whimsical Drawing class, too. Whew!

The final idea was to create an underwater scene. These are all my orn original fishes, corals and seaweeds.


As with the other whimsical drawings I was able to find an appropriate scripture to accompany it in my interleaved bible.


So, two classes completed? Now I can get back to the Colored Pencil Jumpstart class and start a new class (April 1) on Typography for Bible Journaling.

Ddd


Posted by studio3d@ccgmail.net at 1:00 AM PDT
Wednesday, 27 March 2019
Grand Finale - Drawing 101
Topic: Drawing

The final lesson in this class was on rendering metal and glass. I worked from the photo provided and I think I got a good result.


I reduced a scan of this one for my interleaved bible and lettered scripture to surround the lantern.


I think I might have to find some photos to use the techniques I learned in this class.

Oh, for more time!

Ddd


Posted by studio3d@ccgmail.net at 1:00 AM PDT
Monday, 25 March 2019
Crazy Birds
Topic: Drawing

The instructor for Whimsical Drawing designed some crazy little birds in various positions perched on branches.

I paid more attention to the original artwork when drawing this because of the need to get the birds right. Mine are moved around a bit as they did not fit with the sizes I made them. I also did more preliminary sketching on this one than with the previous drawings.


This whimsical drawing was also reduced and colored with markers to go in my interleaved bible.


I added a block of hand-written scripture at the bottom of the page.

Ddd


Posted by studio3d@ccgmail.net at 1:00 AM PDT
Sunday, 24 March 2019
Silhouette People
Topic: Hymnal Art

I'm not sure I've done anything like this artwork since I started with Bible journaling. In my Bible it would block out the words and I do not want to work like that.

But in my hymnal, that is just fine with me.

This week we are working with 'Just A Closer Walk With Thee'.

I kept the illustration very simple and interspersed an appropriate scripture in the spaces between the musical staves.


When the written words blended in too mush, I went over them with a light pink marker to give them just a bit of contrast.

Ddd


Posted by studio3d@ccgmail.net at 1:00 AM PDT
Friday, 22 March 2019
Lettering in Ruth
Topic: Bible Journaling

Wow, we are up to week 12 in the year and this series of lettering instruction. This week we are working in Ruth.

Here are the daily lessons:

RUTH: Day #1 – Editing Block Letter Shapes – Intro

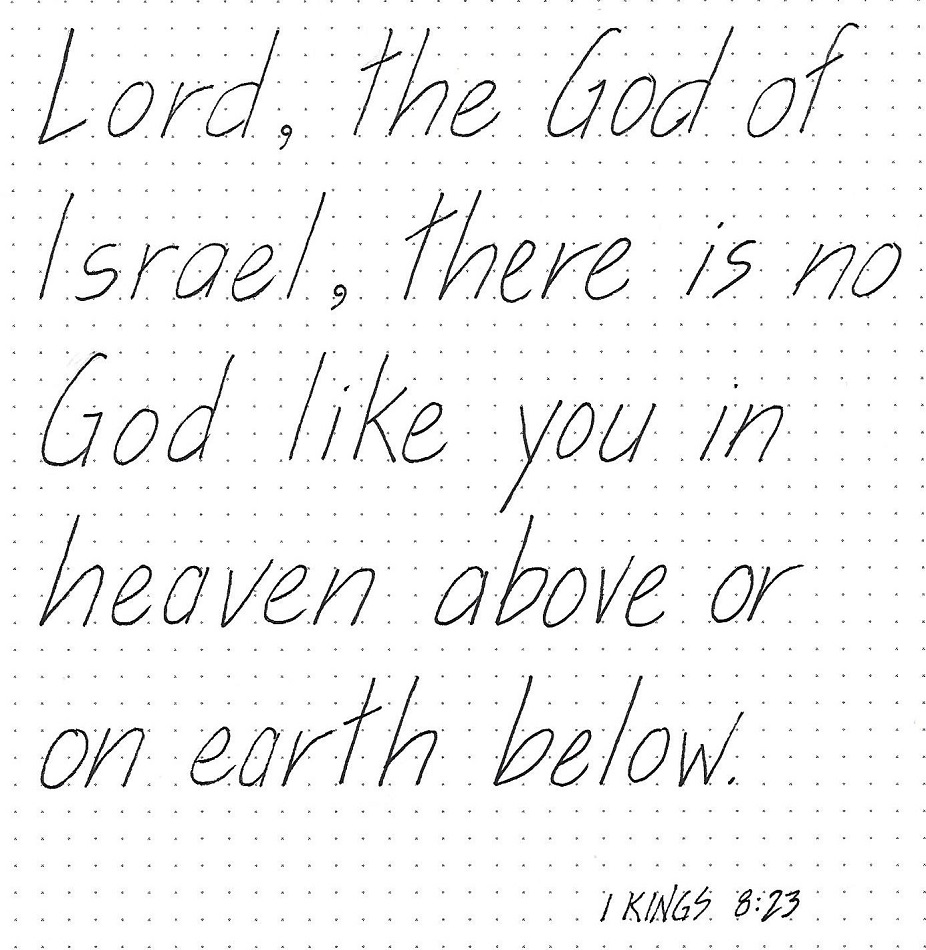
Having done a lot of work with basic block letters, it’s time to show you more ways to make changes to the form.

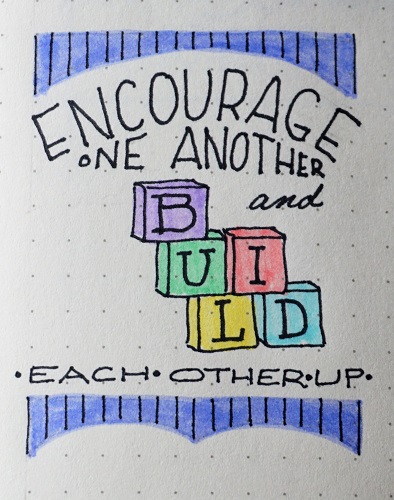
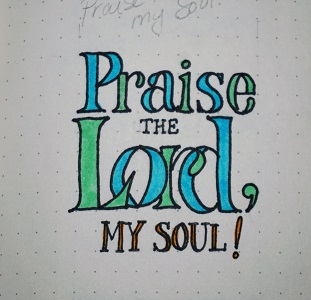
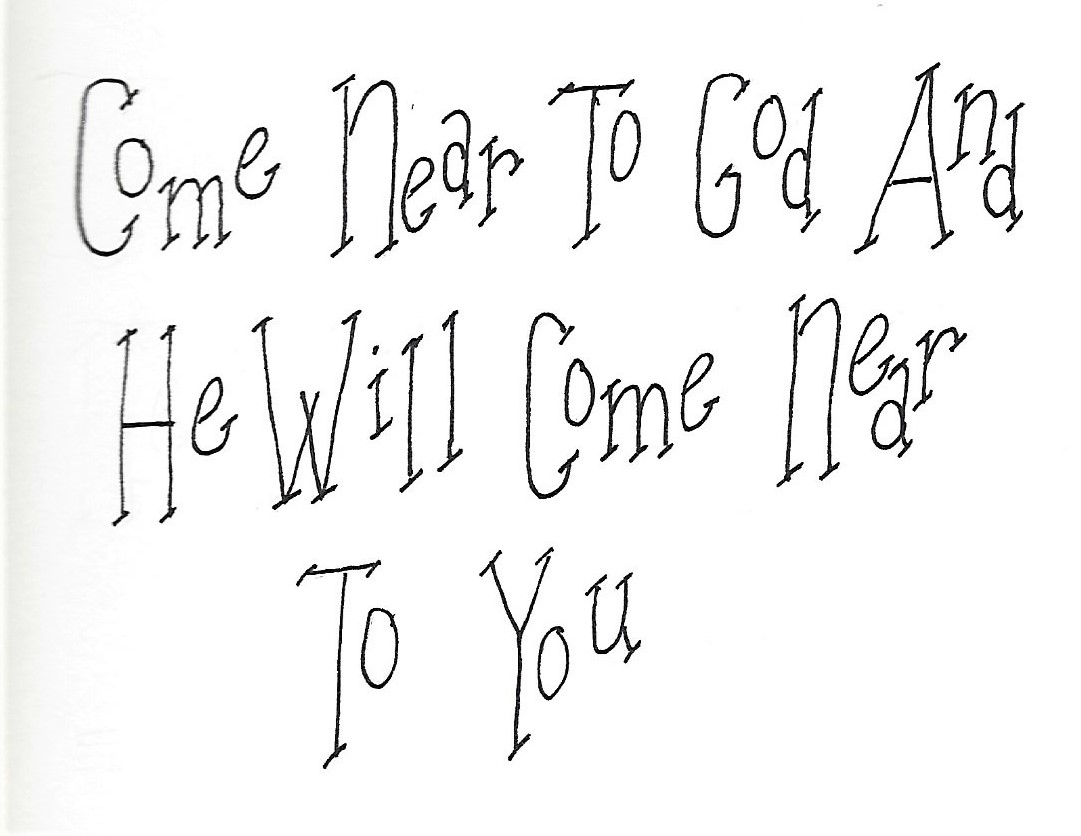
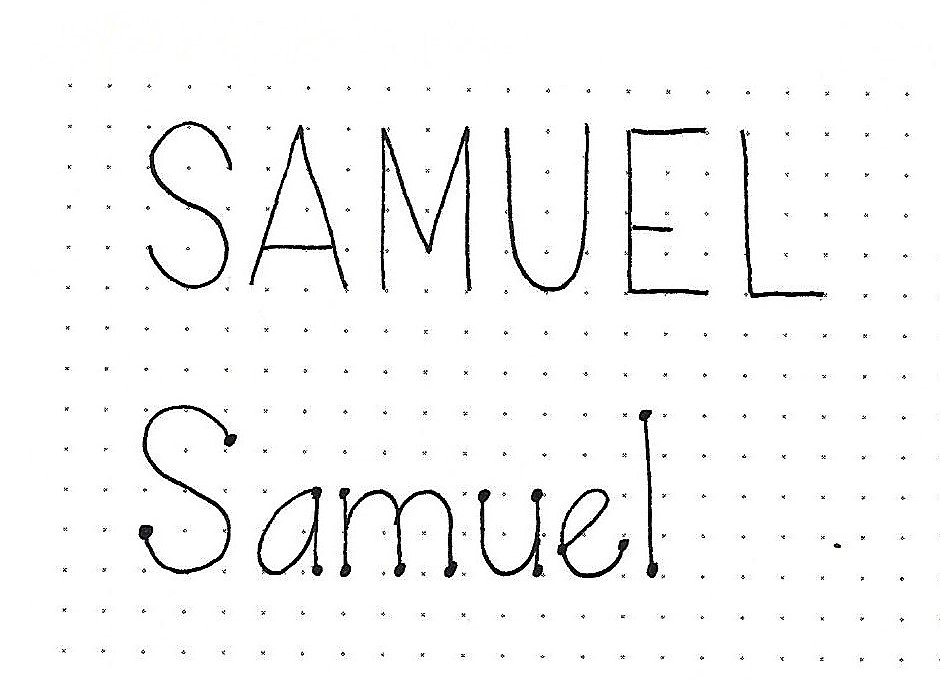
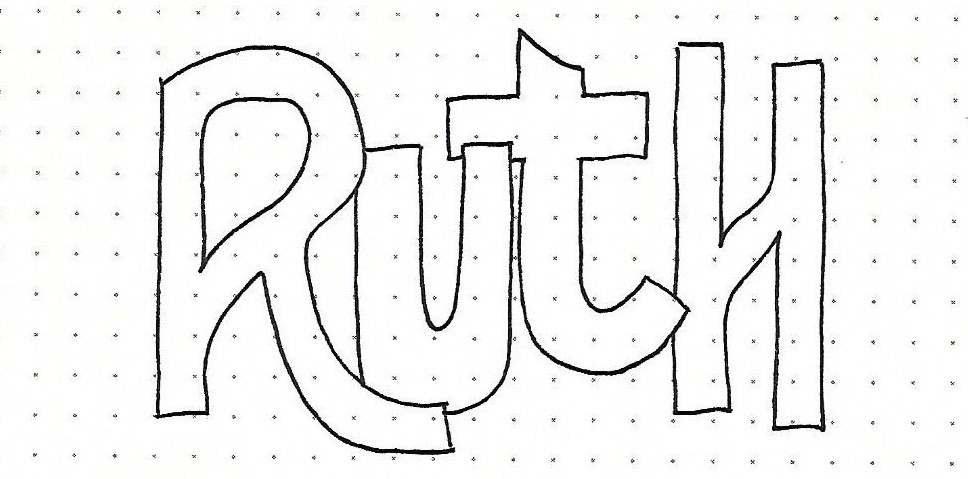
For the sample introduction I started by penciling the basic forms and then bounced some up off the baseline, changed some to lower-case, loosened up the tails and crossbars, and overlapped letters. Somewhere along the line they stopped looking like basic block letters at all!

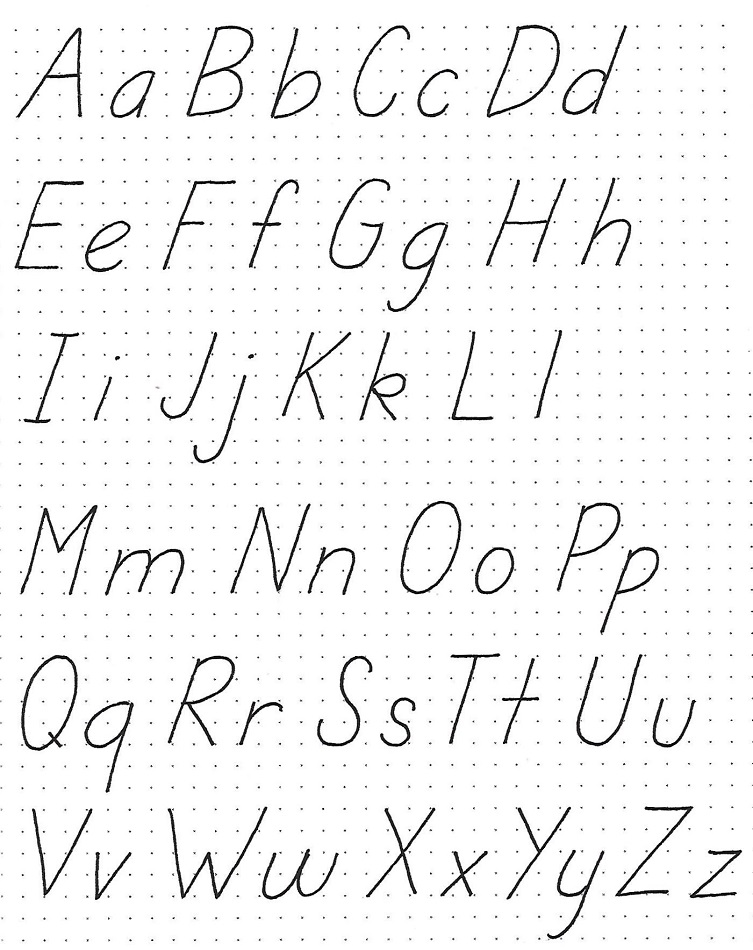
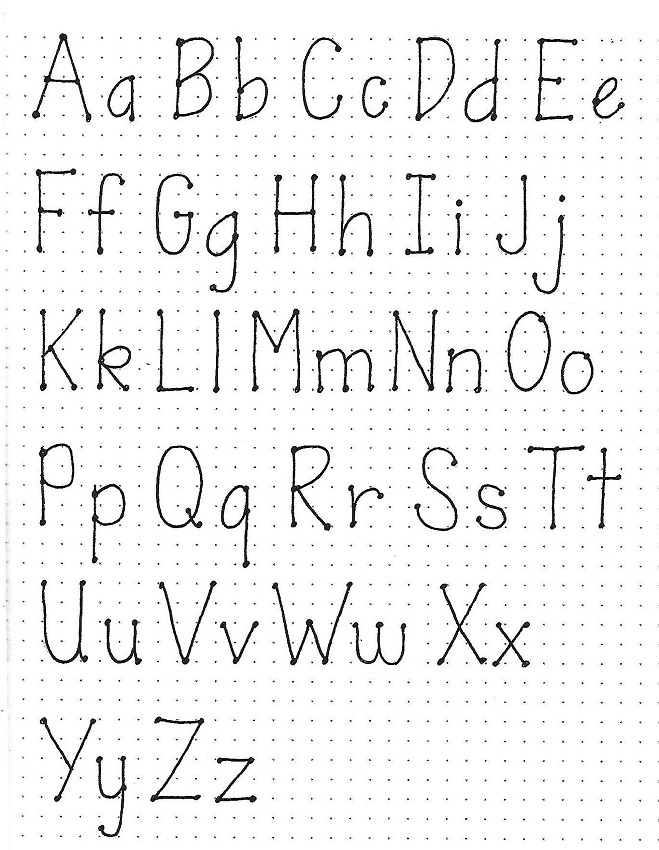
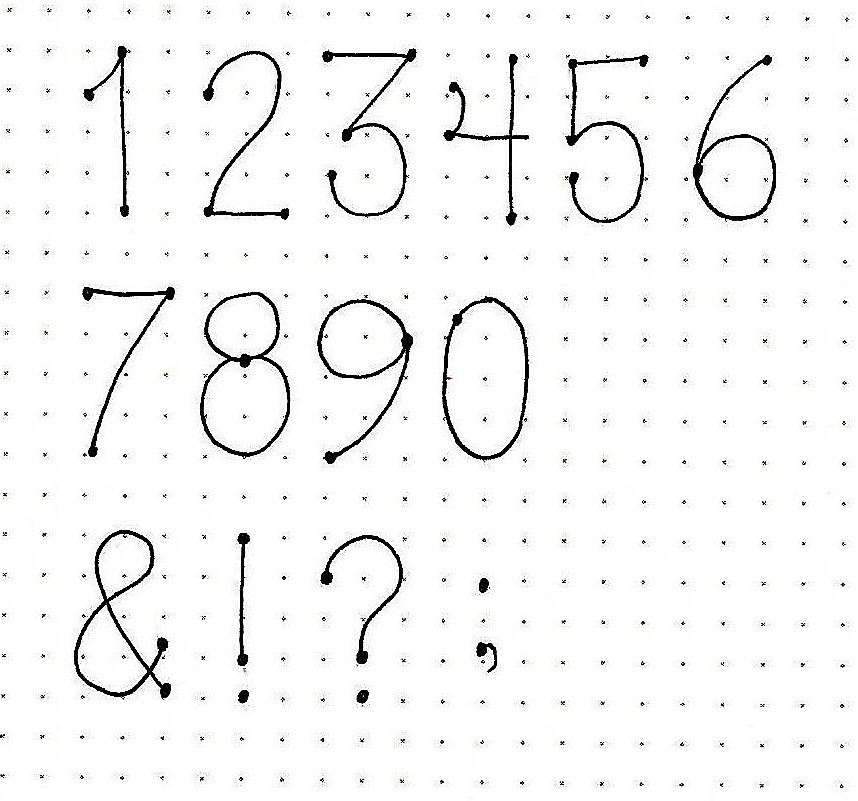
This week we will work on making three entirely new alphabets just by varying height and the width of the elements of the letters.

For now, let’s just start with this one word – but, make up your own version of edited letter forms.


RUTH: Day #2 – Editing Block Shapes – Alpha A-E

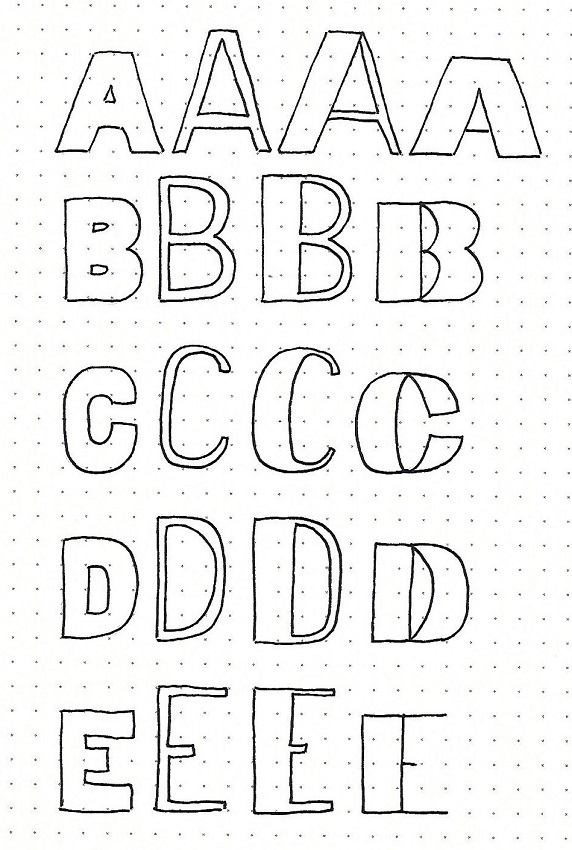
Rather than working all the way through one alphabet style and then another and another, we are going to work on making all the style variations on a letter by letter basis.

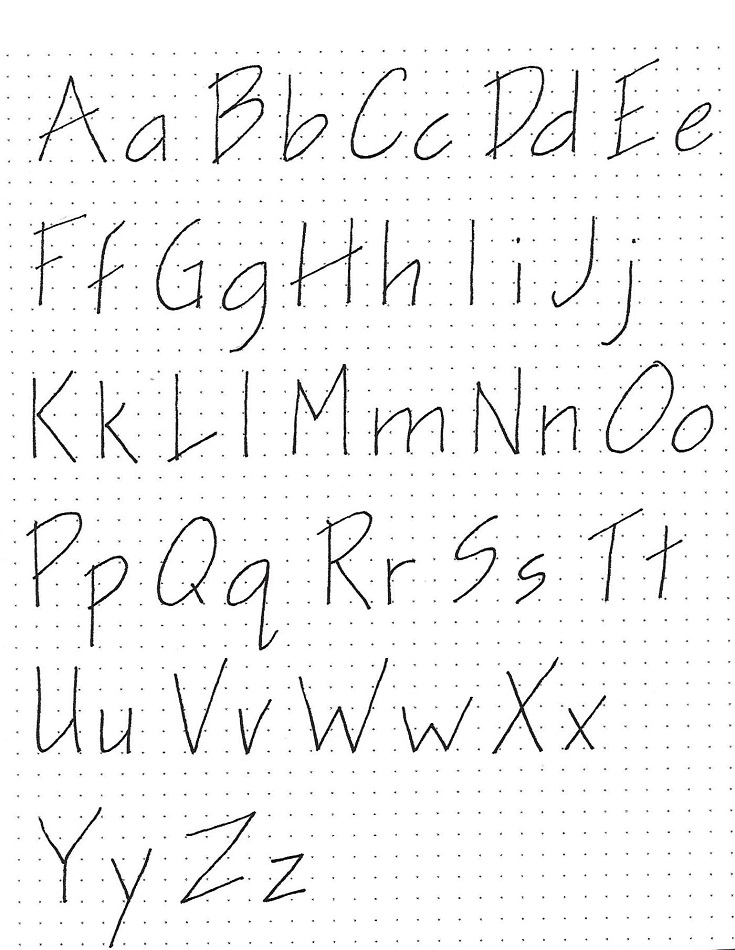
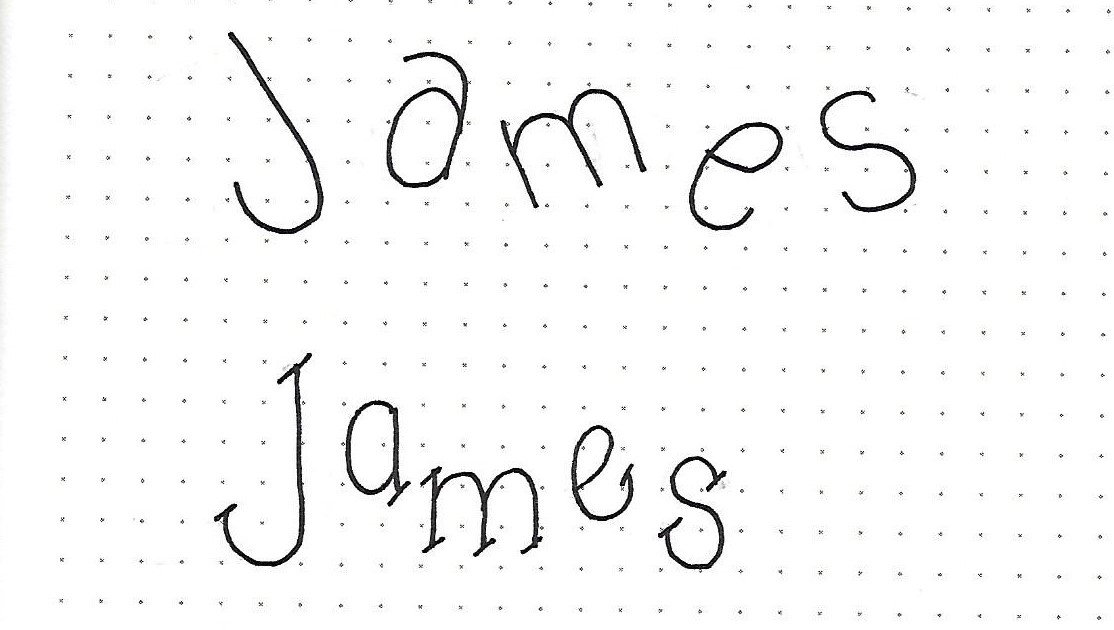
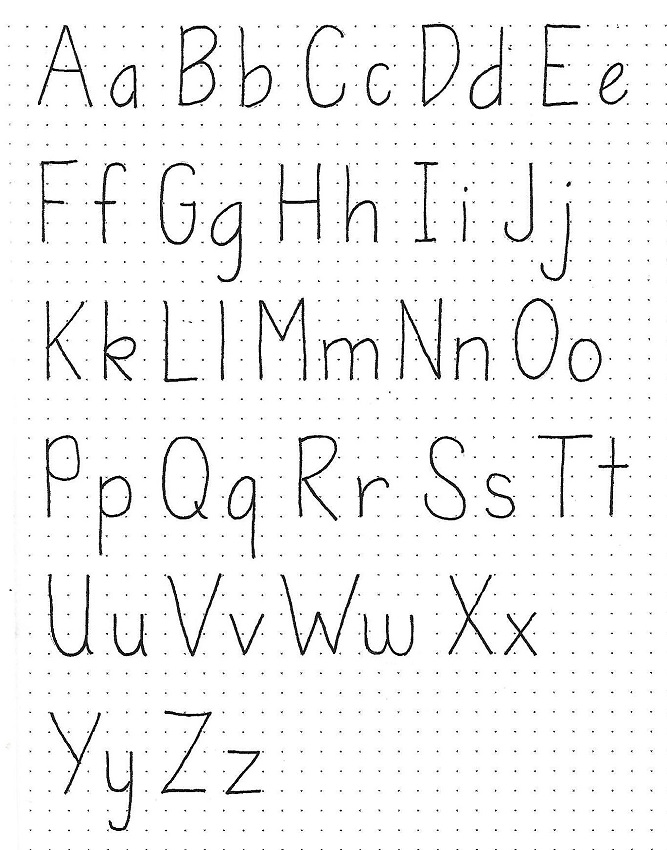
The first letter is the basic block letter we originally learned – 4 units tall, about 3 units wide, elements 1 unit wide. We draw it here to serve as a reference point.

The next letter is 5 units tall, about the same width, and the elements are ½ unit wide. WOW! What a difference that makes. The third version is the same but the left element is widened to 1 ½ units. And the fourth style is back to the 4-unit height, vertical elements are 1 ½ units wide and horizontal elements are a single line.

So different, aren’t they? There are many more ways to change these up. If you want to explore other ideas, just add your new forms on the right.

Today, we are just doing the letters A through E. The rest of the alphabet will be done on days 3 and 4.


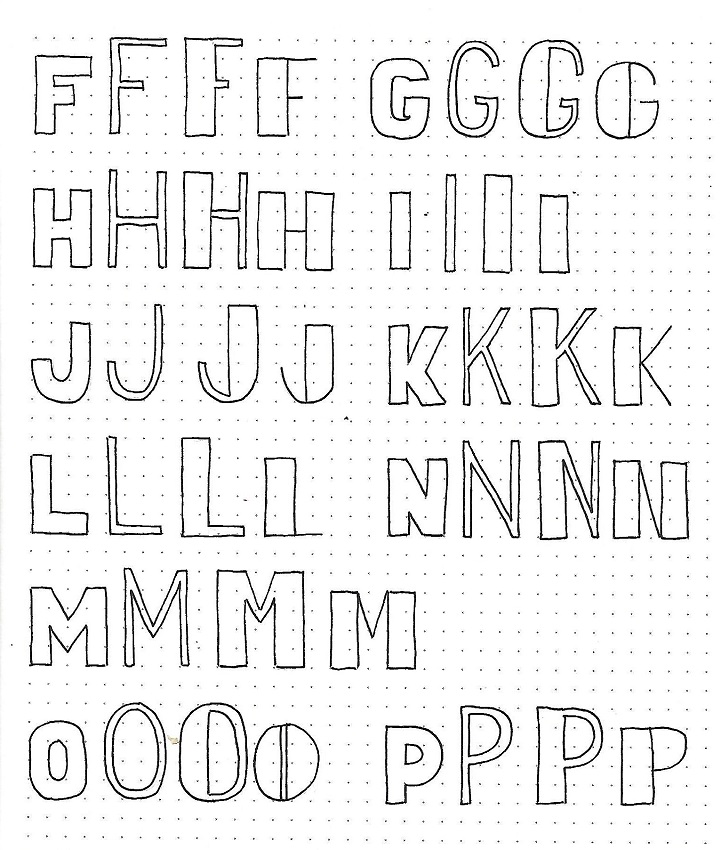
RUTH: Day #3 – Editing Block Shapes – Alpha F-P

We’re back with the next series of letters in edited block letters.

Just as yesterday, the first letter is the basic block letter we originally learned – 4 units tall, about 3 units wide, elements 1 unit wide. We draw it here to serve as a reference point.

The next letter is 5 units tall, about the same width, and the elements are ½ unit wide. WOW! What a difference that makes. The third version is the same but the left element is widened to 1 ½ units. And the fourth style is back to the 4-unit height, vertical elements are 1 ½ units wide and horizontal elements are a single line.

We will finish this project tomorrow.


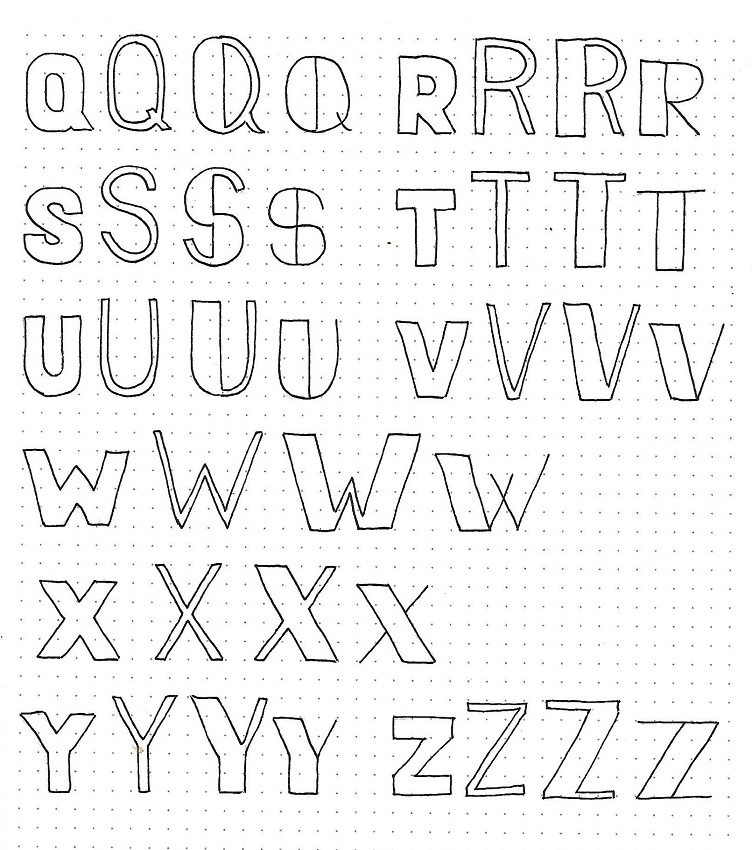
RUTH: Day #4 – Editing Block Shapes – Alpha Q-Z

And today we have the final series of letters in edited block letters.

Once again, the first letter is the basic block letter we originally learned – 4 units tall, about 3 units wide, elements 1 unit wide. We draw it here to serve as a reference point.

The next letter is 5 units tall, about the same width, and the elements are ½ unit wide. WOW! What a difference that makes. The third version is the same but the left element is widened to 1 ½ units. And the fourth style is back to the 4-unit height, vertical elements are 1 ½ units wide and horizontal elements are a single line.

Have you been adding any other forms?


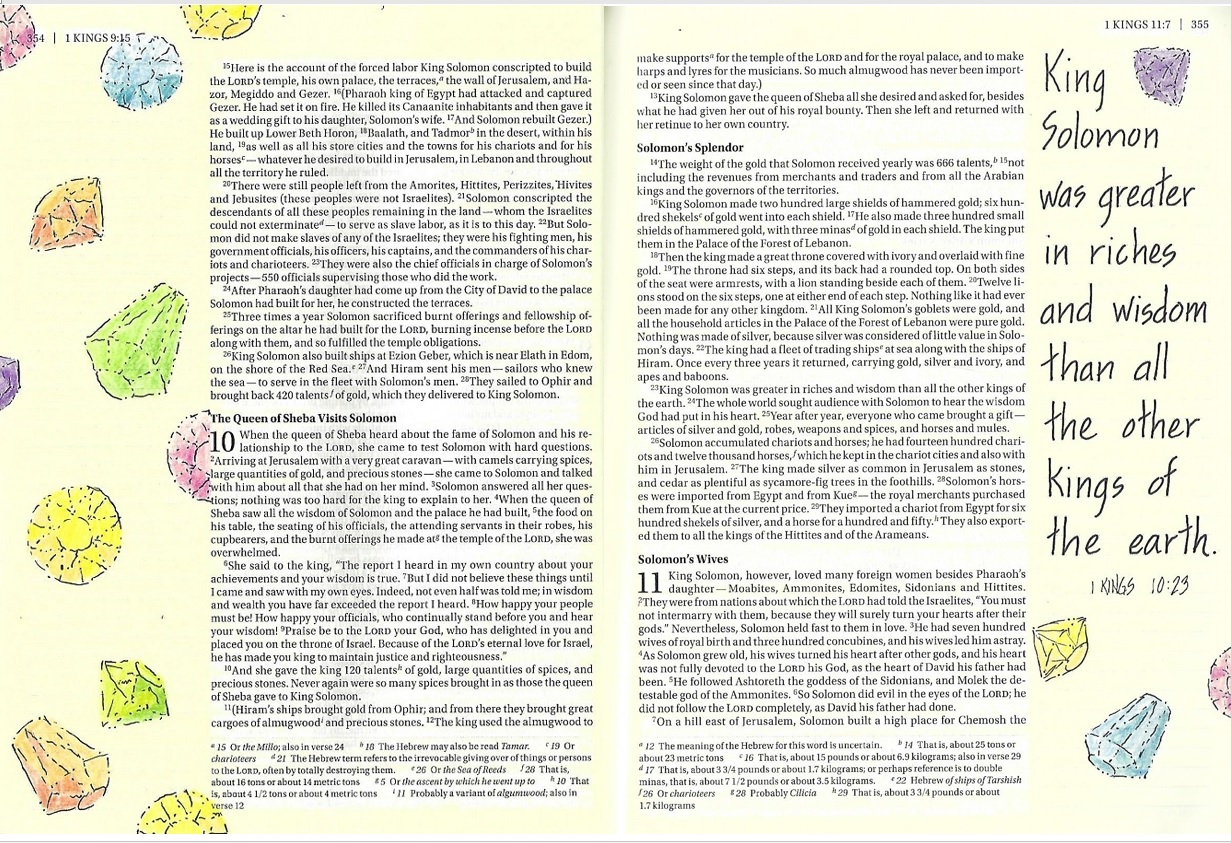
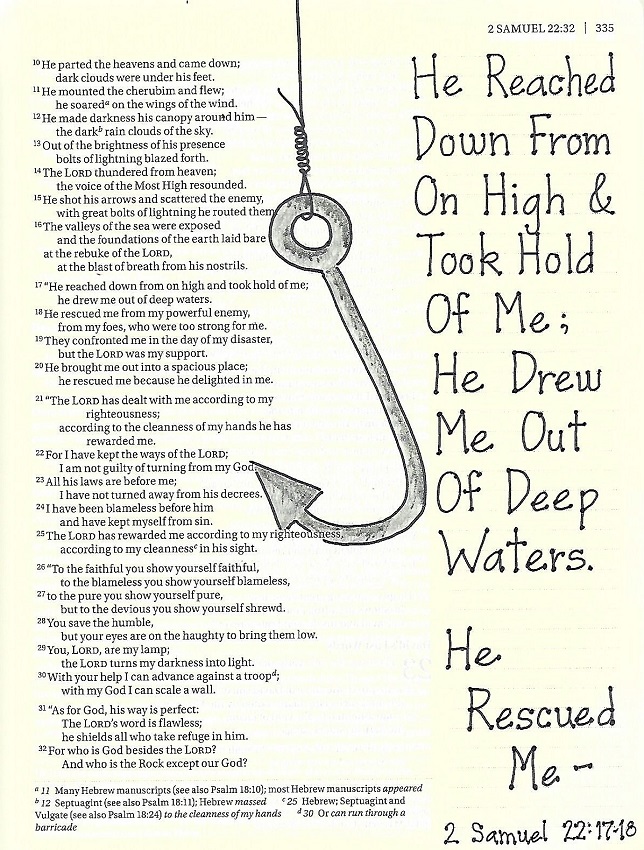
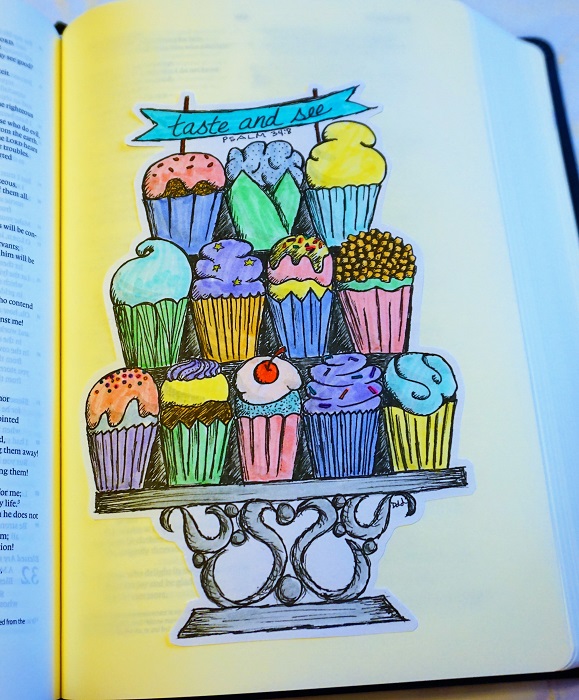
RUTH: Day #5 – Edited Block Shapes – Bible Page

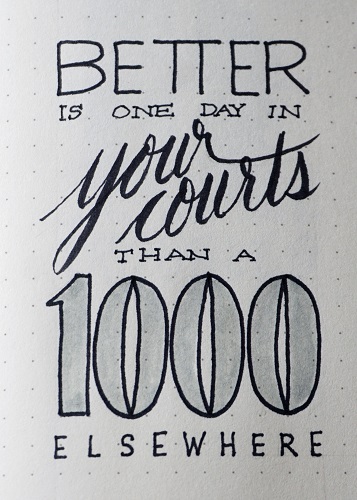
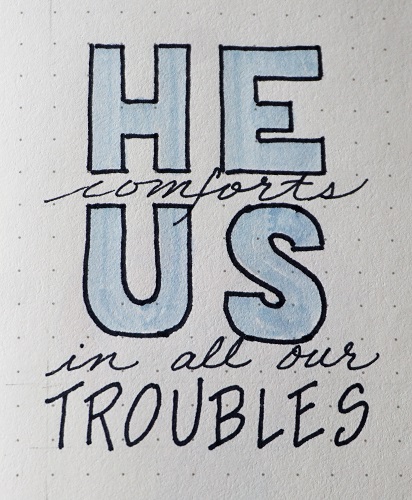
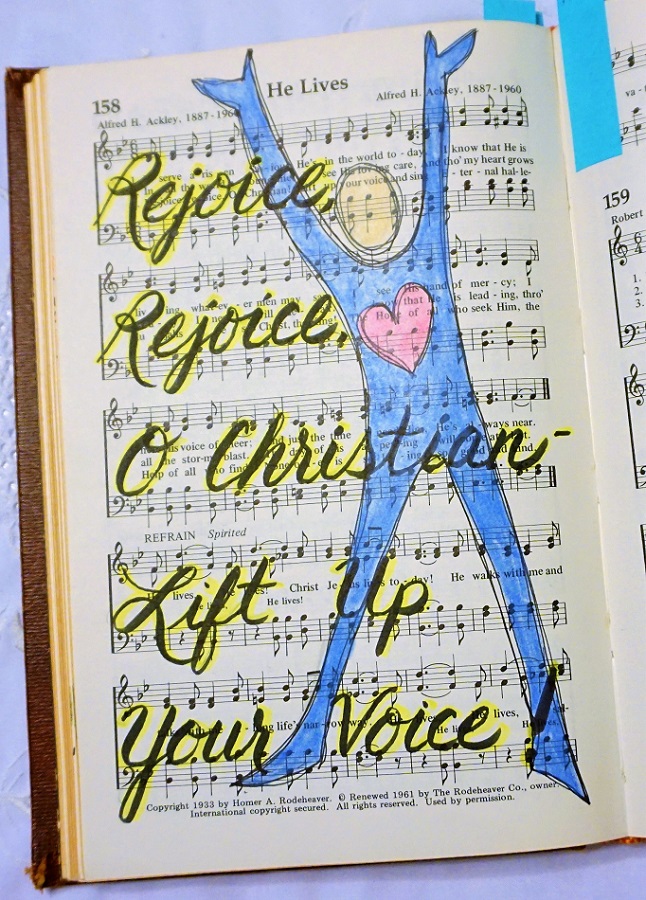
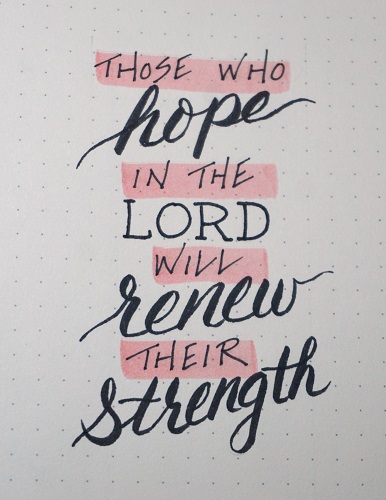
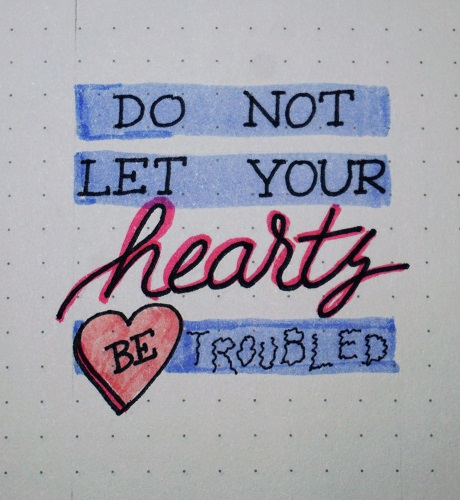
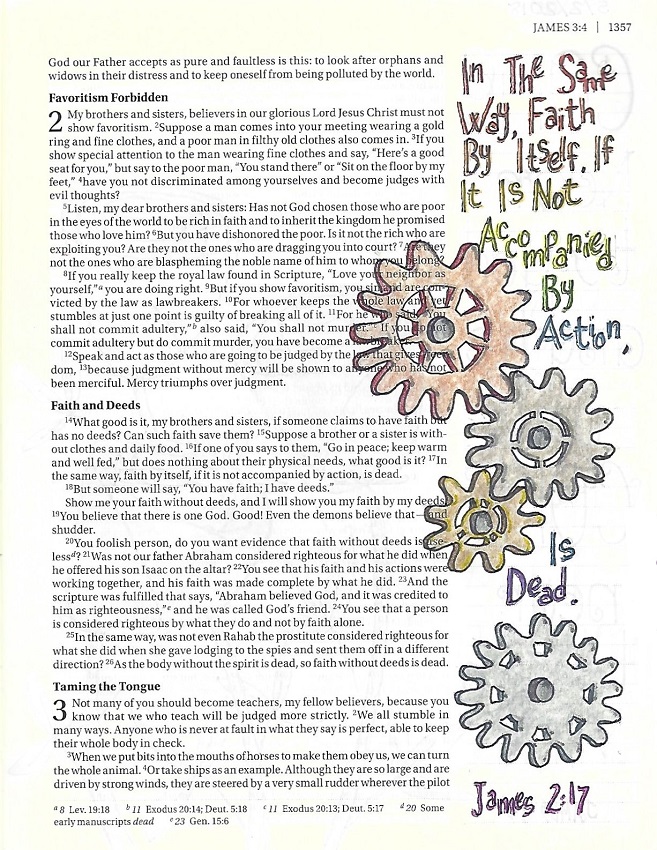
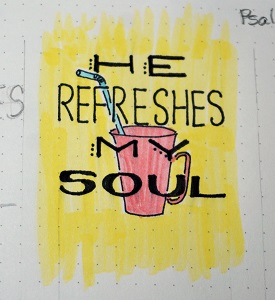
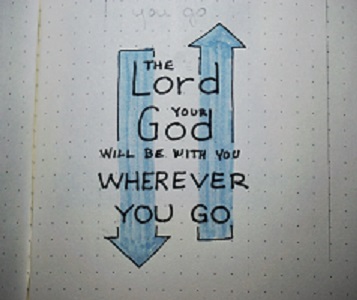
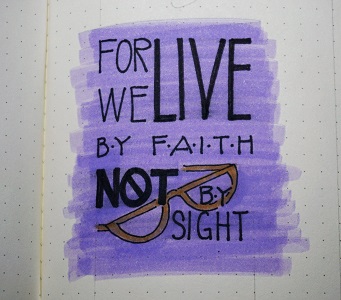
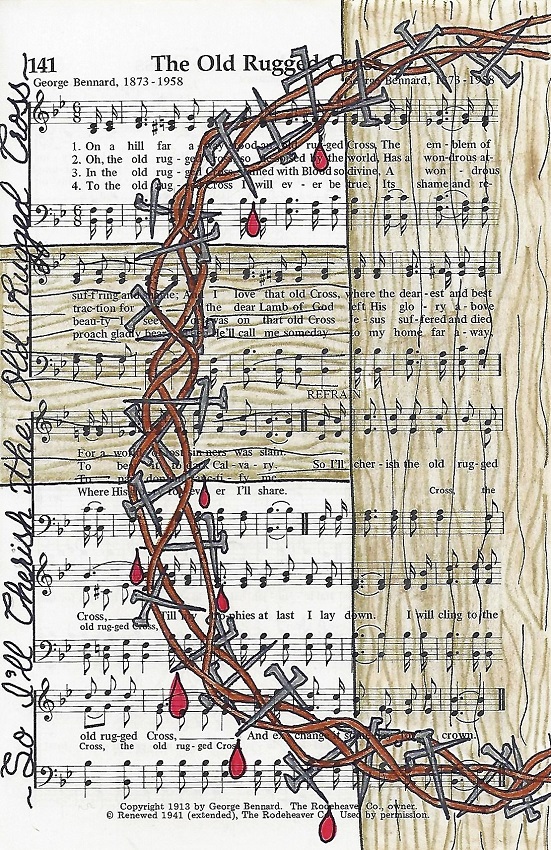
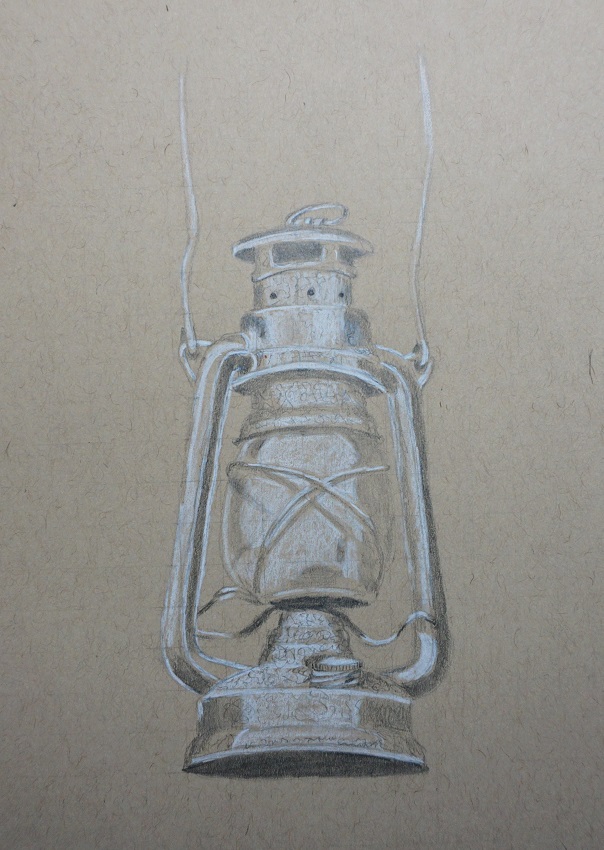
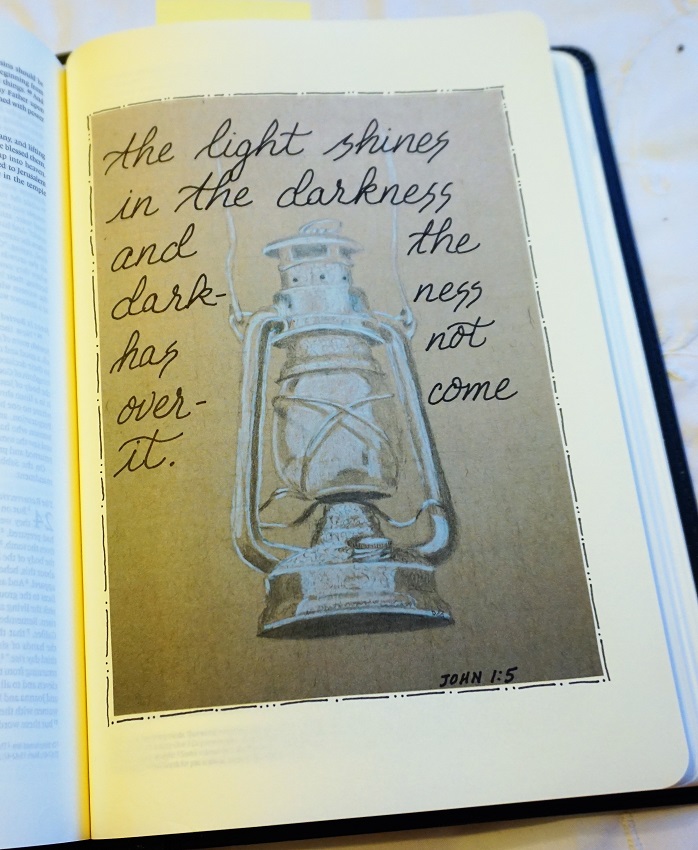
In your Bible today, working in the book of Ruth, combine several versions of the edited block letters. I did some skinny, some wide, and even brought in those with slashed edges from prior lessons. Also, in the mix are some basic round letters and a bit of script handwriting. Use whatever mix of styles YOU are comfortable with.


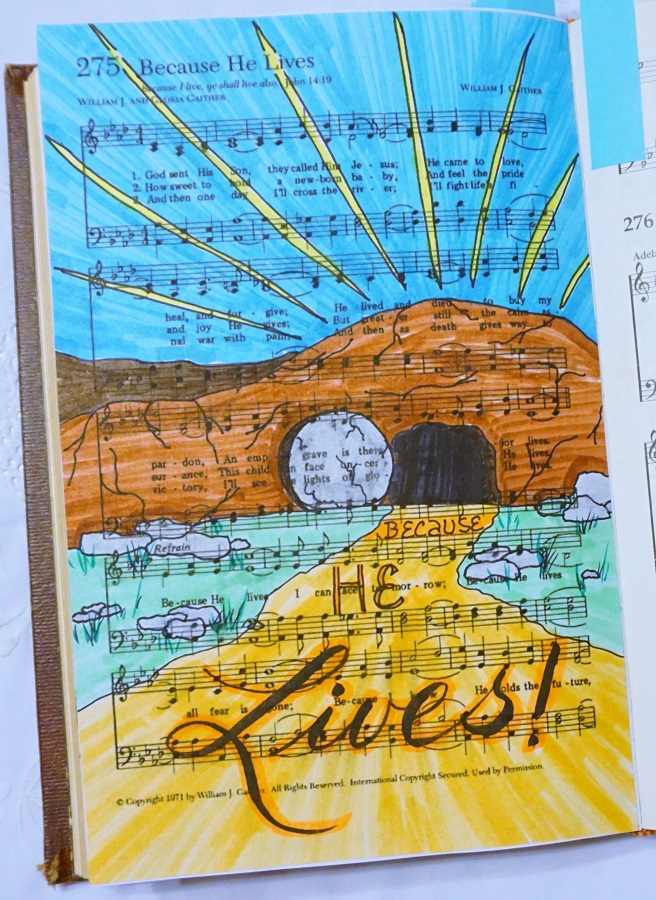
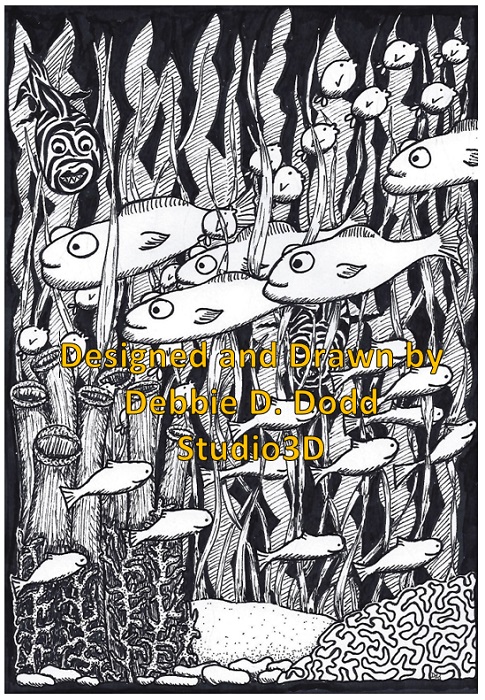
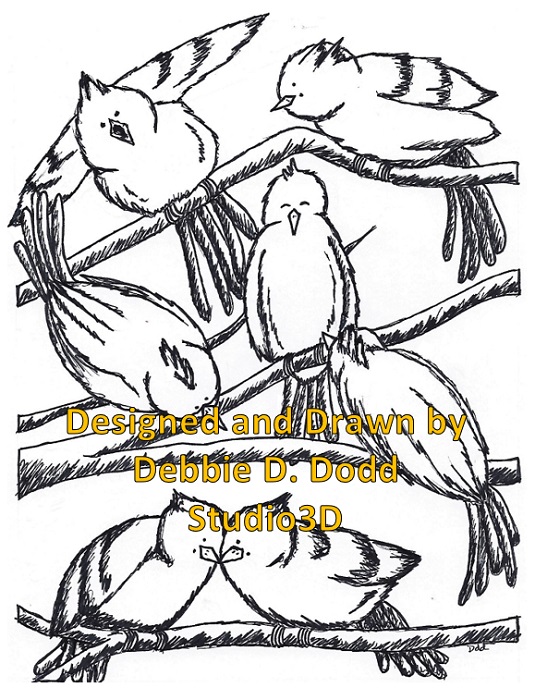
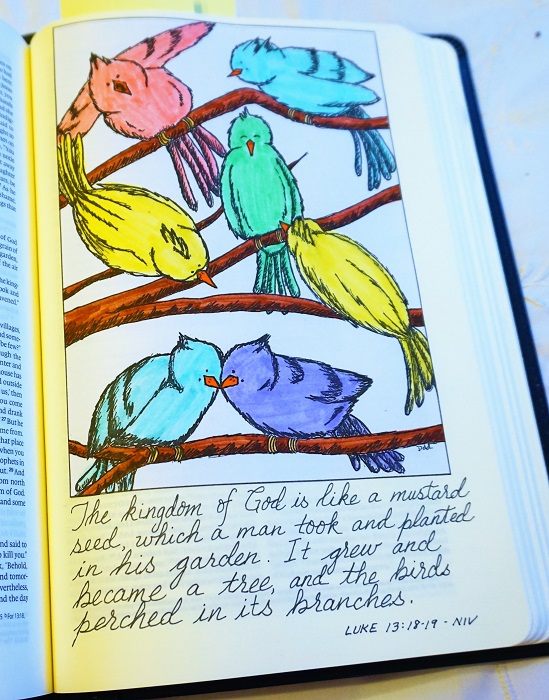
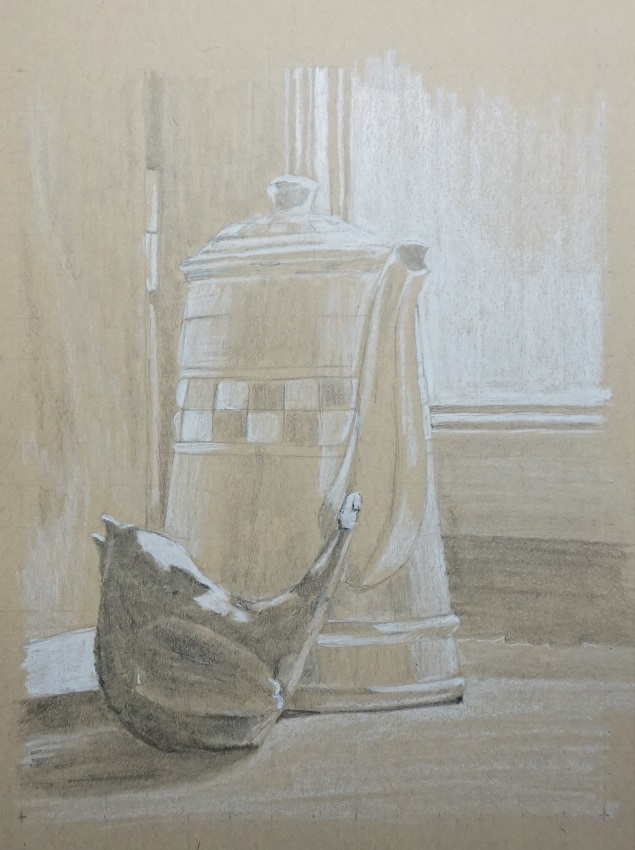
So what ties it all together? The way the words interlock together and the consistent colors throughout. I combined my text block with the peacock from the Drawing Room lesson for this week in the same colors.


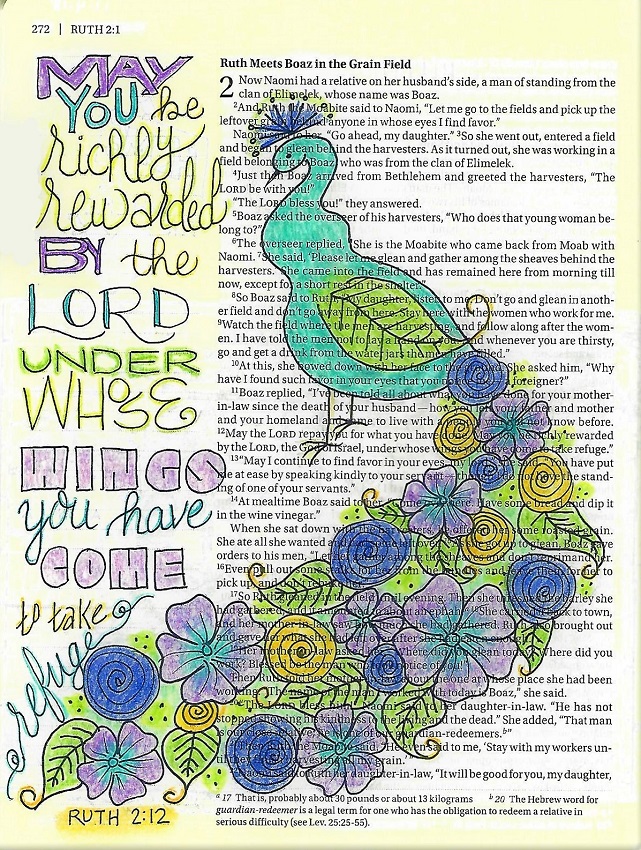
Oh, how I love that peacock!

Ddd


Posted by studio3d@ccgmail.net at 1:00 AM PDT
Wednesday, 20 March 2019
The Whimsy Is Back
Topic: Drawing

Skipping back and forth between different types of projects is sure keeping me on my toes!

In the Whimsical Drawing class the next assignment was a tiered plate of sweets. I turned mine into cupcakes with a blank banner at the top so I can print it out and fill the banner with a sentiment for whatever the occasion will be (if used on card fronts).


This is another one that I reduced to fit in my interleaved bible. I colored with markers and added a short scripture snippet in the banner.


This is a really fun class!

Ddd


Posted by studio3d@ccgmail.net at 1:00 AM PDT
Monday, 18 March 2019
Lesson 9 In Drawing 101
Topic: Drawing

This is anoth in the lessons that uses toned paper. The highlights in the original photo were totally blown out so I reduced the contrast in mine. The original shows the bird as pretty much a black blob with a few stark white highlights along the top. In many drawings I couldn't even figure out what it was supposed to be!

I like my version better.


I think there is only one more lesson to go in this class.

Ddd


Posted by studio3d@ccgmail.net at 1:00 AM PDT
Sunday, 17 March 2019
Continuing the Sing-Along
Topic: Hymnal Art

I know many people would say this is their favorite hymn.

I am working again in my hymnal to create art that reflect the theme of the song. This week it is 'HowGreat Thou Art'.

I used fine-line markers and colored pencils to create the scene with elements mentioned in the lyrics.


I really like how this one turned out, too.

Ddd


Posted by studio3d@ccgmail.net at 1:00 AM PDT

Newer | Latest | Older