« January 2008 »
S M T W T F S
1 2 3 4 5
6 7 8 9 10 11 12
13 14 15 16 17 18 19
20 21 22 23 24 25 26
27 28 29 30 31
You are not logged in. Log in
Entries by Topic
All topics  «
3D paperwork
A - Z challenge 5
A - Z challenge 7
A - Z challenge round 4
A to Z challenge round 3
A to Z round 2
A to Z round 6
A-Z round 1
Around the House
Art Challenges
Artist Trading Cards
Backgrounds
Beads
Bible Journaling
Books
Boxes
Collage
Color Challenge
Coloring
cookbook
Die Cuts
Digital Projects
Digital Stamps
Drawing
Dry Embossing
Fabric Stuff
Fantastic Folds
Field Trip
Home Decor
How Does Your Garden Grow?
Hymnal Art
In The Kitchen
In the studio
Jewelry
Lettering
Links
Multi-Technique
Music to Work By
Musings
Nail Art
New Work
Online Class
Other Hobbies
Other Projects
Painting
Paper Embroidery
Paper Piecing
Photo
Pretty Paper
Quilting
Random
reading
Scrap Recovery
scrapbooking
Sewing
Sketch Challenge
Some Backlog
Stamping
Stencils
Stickers
Supplies
Teabag Folding
Techniques
Testing
tips and tricks
Tutorial
Web resources
Welcome to my Blog
Work By My Friends
workflow
Writing
Blog Tools
Edit your Blog
Build a Blog
RSS Feed
View Profile
Group One
In & Out of Studio 3D
Monday, 28 January 2008
B is for Boxes
Topic: A to Z round 2

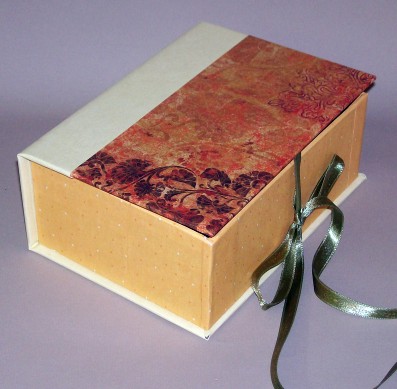
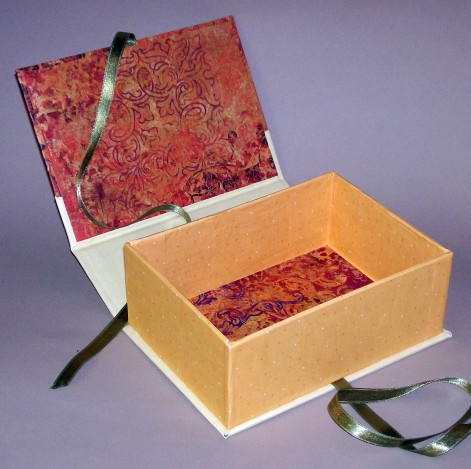
I made this box following the instructions from a lesson on Craft TV Weekly. I first fell in love with the cover paper which is a set of scrapbook papers from the dollar store!


All of the instructions on Craft TV Weekly are clear and shown on a video. Some also give written guides. Although they are usually showing projects that use specific projects, in many they will give measurements for making your own 'kit' instead of buying theirs.

Ddd studio3d@ccwebster.net


Posted by studio3d@ccgmail.net at 6:00 AM PST
Sunday, 27 January 2008
A is for Aperture
Topic: A to Z round 2

I am making about 40 of these valentine cards so needed something simple but elegant. The text and the large heart are printed on the center panel of a cardstock divided into thirds. Then with the right panel folded inside the red large red heart is cut out of both layers with a craft knife. 
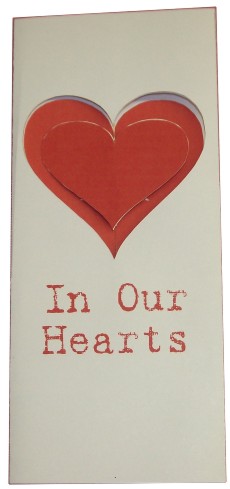
With the card completely folded, the removed red heart is then glued to the inside, aligning carefully with the aperture.

Before gluing the two aperture parts together a strand of stretchy nylon beading cord is glued in place at the top and bottom. Closing the glued parts sandwiches the ends, thus hiding them.

Two smaller red hearts are glued back to back on either side of this stretchy cord.

Before mailing the card the suspended hearts are twisted round and round on their cord and the card closed.

When the recipient gets the card and reads the front "In Our Hearts" they open the card which sets the hearts spinning in the aperture and they read the larger inside heart "You Are Loved".

Ddd studio3d@ccwebster.net


Posted by studio3d@ccgmail.net at 6:00 AM PST
Saturday, 26 January 2008
Z is for Zen
Topic: A-Z round 1

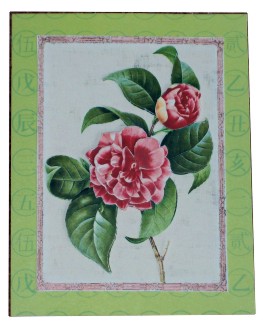
This 3D cutting of camelias has its own distressed background and a oriental style pink border. So I backed it with scrapbook paper with Kanji characters in repeating circles. 

The final result is very restful, so I'm calling it Zen.

Ddd studio3d@ccwebster.net


Posted by studio3d@ccgmail.net at 6:00 AM PST
Friday, 25 January 2008
Y is for Yellow
Topic: A-Z round 1

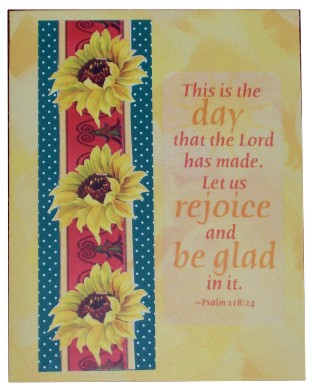
This strip of sunflowers (including the red band) were part of a 3D sheet I printed. I mounted it on the green dotted scrapbook paper and then on a yellow scrapbook paper with a brush-stroke look.  

To finish it I added the vellum text sticker on the right.

Ddd studio3d@ccwebster.net


Posted by studio3d@ccgmail.net at 6:00 AM PST
Thursday, 24 January 2008
X is for XOXOX
Topic: A-Z round 1

I turned the Xs and Os into a game of tic tac toe with sticker strips for the lines and punchout letters. I added dimensional broken lines around the letters in the opposite color to the letter (green on peach, raspberry on green). I used watercolor marker in grey to add a drop shadow to all the elements for some dimension. 

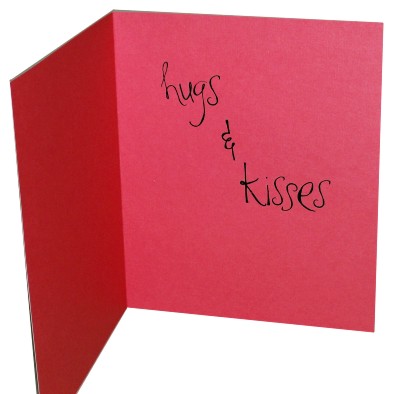
On the inside I went back to the 'expected' theme of the Xs and Os and added "hugs and kisses" using rub-on letters.


Ddd studio3d@ccwebster.net


Posted by studio3d@ccgmail.net at 6:00 AM PST
Wednesday, 23 January 2008
W is for White
Topic: A-Z round 1

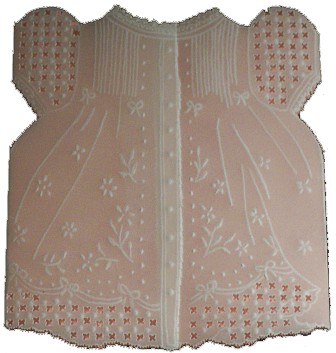
White on white parchment work is my absolute favorite. This little dress is a free pattern I got online. 

Since none of the embossing shows up if the liner is also white I added a pink one.

Ddd studio3d@ccwebster.net


Posted by studio3d@ccgmail.net at 6:00 AM PST
Tuesday, 22 January 2008
V is vor Valentine
Topic: A-Z round 1

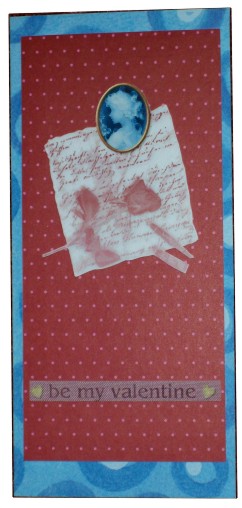
One of the 3D sheets I printed came with this graphic which is NOT a 3D. So I clipped it out and mounted on two layers of scrapbook paper. I occastionally like to use an oblong card shape. 

I added a printed fabric sticker for the greeting.

Ddd studio3d@ccwebster.net


Posted by studio3d@ccgmail.net at 6:00 AM PST
Monday, 21 January 2008
U is for Underwear
Topic: A-Z round 1

I wondered how I was going to work 'underwear' into a decent card. Then I found that I had these 'corset' peel-off stickers that were given to me in a swap.

I mounted one on a blue glossy card and cut it out. It is mounted with silicone on the card front and 4 blue feathers are tucked under and glued to form the skirt. 

Peel-offs and a fabric sticker are the finishing touches.

Ddd studio3d@ccwebster.net


Posted by studio3d@ccgmail.net at 6:00 AM PST
Sunday, 20 January 2008
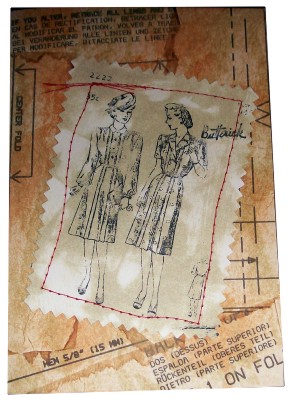
T is for Transfer
Topic: A-Z round 1

I bought myself a little tool that heats up and has different attachments for the hot end. One of these is a disk for making transfers.

So I used a printer to print out the antique pattern envelope in mirror image and then used a photocopier to make a fresh toner print. When the print is placed face down and the little heat tool applied to the back the toner transfers to the cardstock. Cool! I cut it out with pinking shears for the 'sewing theme.'

I folded a cardstock and ran it through the Xyron to apply adhesive to the front. Then I applied torn bits of tissue dress pattern to cover the surface.  After staining both pieces with Ranger discressing ink pads ('old paper' for the small piece and 'tea dye' for the tissue covered piece.)

I used my sewing machine to stitch the transfer piece to the card and pulled all loose ends to the front to tie a knot.

Ddd studio3d@ccwebster.net


Posted by studio3d@ccgmail.net at 6:00 AM PST
Saturday, 19 January 2008
S is for Stencils
Topic: A-Z round 1

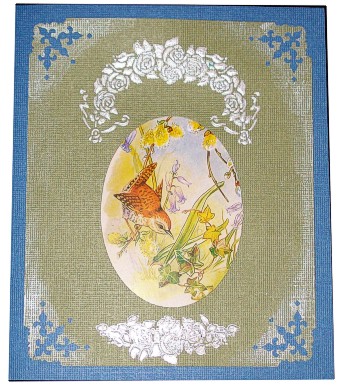
This is the first time I have used a stencil like this. I taped it to the cardstock and used an old plastic card to apply dimensional paint and scrape it level. The stencil was removed immediately so the paint dried with soft edges.

The paint was irridescent so I applied it to the card corners with a fingertip, then punched with a corner punch and a corner inset punch. The oval was cut out with my Coluzzle and a picture affixed before mounting on blue cardstock.

Ddd studio3d@ccwebster.net


Posted by studio3d@ccgmail.net at 6:00 AM PST
Friday, 18 January 2008
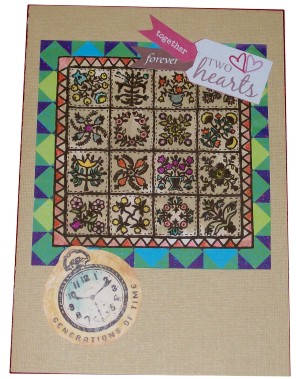
R is for Rubber Stamping
Topic: A-Z round 1

I stamped the little quilt using Adriondack in a brown tone. I colored it with colored pencils and it was a little too stark on the white cardstock. So I brayered Ranger's Distressing ink pad in "Old Paper" over the whole surface and cut it out. The colorful green/blue border is scrapbook paper. 

Mounting this on tan cardstock I then placed stickers at the top and bottom.

Ddd studio3d@ccwebster.net


Posted by studio3d@ccgmail.net at 6:00 AM PST
Thursday, 17 January 2008
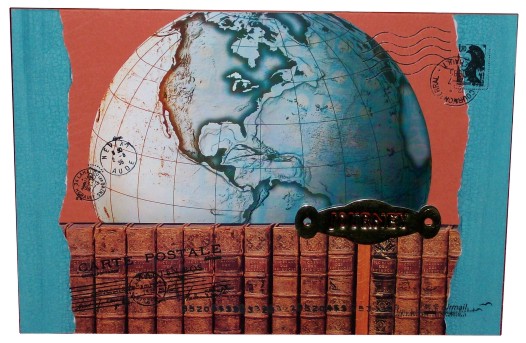
Q is for Quick
Topic: A-Z round 1

This quick card is made from two advertising elements (globe and books) on folded brown cardstock. Two strips of torn  scrapbook paper frame the sides. Then I used some 'postal' rub-ons from 7gypsies. The label that looks like metal is actually  foam-mounted plastic. It says "journey".

Ddd studio3d@ccwebster.net


Posted by studio3d@ccgmail.net at 6:00 AM PST
Wednesday, 16 January 2008
P is for Pockets
Topic: A-Z round 1

I used a stitching sticker for the front of this card and the fabric text stickers give a hint as to what one might find inside. 

The center folder is stitched inside the card which is folded with a double wide spine. The folder is made from a single sheet of double-sided 12 x 12 scrapbook paper. The folder instructions were gleaned from a Tim Holtz DVD.


These are only two of the four pockets that the folder presents. The intent would be to fill them with gift cards, lottery tickets, cash or anything else one might wish to present as a gift.

Ddd studio3d@ccwebster.net


Posted by studio3d@ccgmail.net at 6:00 AM PST
Tuesday, 15 January 2008
O is for Oval
Topic: A-Z round 1

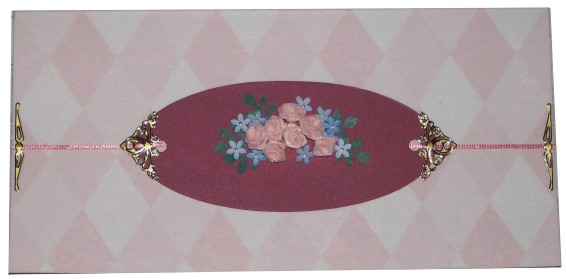
Although you will recognize the diamond printed vellum from yesterday's napkin card, this card started with an oval tag. With the tag in hand I went around the studio, finding an item and adding it then looking for the next. When I work this way, without gathing all the elements first, I am as surprised by the outcome as anyone.

This is the order in which I found and added elements: oval, ribbon roses, punched leaves, blue fabric flowers, gold flower centers, vellum, ribbon, outer brackets, inner brackets.

Ddd studio3d@ccwebster.net


Posted by studio3d@ccgmail.net at 6:00 AM PST
Monday, 14 January 2008
N is for Napkins
Topic: A-Z round 1

I used my Xyron to apply a layer of adhesive to the already-folded card front. Then I applied just the top layer of a dinner napkin and trimmed it up.

The image was just too bright so I found the light weight vellum with a very faint diamond  print and cut it to fit. I ran this through the Xyron for adhesive and sealed directly to the surface of the napkin. I burnished it well to seal.

Because of the elegant and subdued feel of this card I make it a sympathy card with a peel-off.

Ddd studio3d@ccwebster.net


Posted by studio3d@ccgmail.net at 6:00 AM PST
Sunday, 13 January 2008
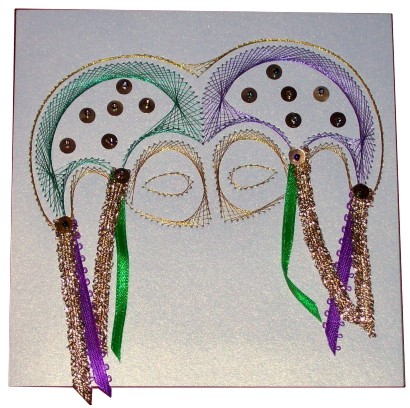
M is for Mask
Topic: A-Z round 1

I had an idea to make a Mardi Gras mask and this is the result. I designed a stitching pattern using CorelDraw and stitched it out using metallic Sulky threads in green, purple and gold.  

I added sequins with green/purple beads and then stitched on coordinating ribbons with the same sequind and beads.

Ddd studio3d@ccwebster.net


Posted by studio3d@ccgmail.net at 6:00 AM PST
Saturday, 12 January 2008
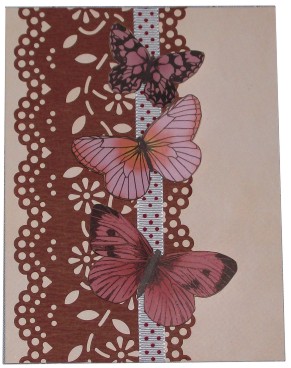
L is for Lace
Topic: A-Z round 1

Brown paper lace on a light rose paper sets the tone for this card. I added a cream ribbon with brown dots and three printed die-cut butterflies. The butterflies are mounted with the bodies glued down and the wings held aloft by silicone glue underneath. 

Ddd studio3d@ccwebster.net


Posted by studio3d@ccgmail.net at 6:00 AM PST
Friday, 11 January 2008
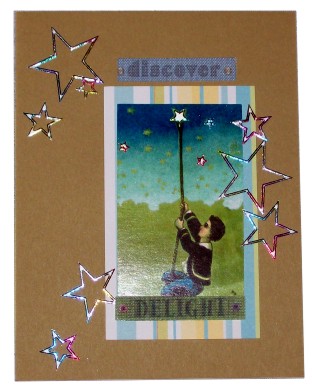
K is for Kids
Topic: A-Z round 1

This illistration began as a French laundry soap ad on a collage sheet. The off-center mat is really a moss green and is backed with a blue/gree/yellow striped scrapbook paper. I added peel-off stars to mimic those in the graphic and then a few tiny ones in the boy's sky. 

The final touch was two fabric text stickers.

Ddd studio3d@ccwebster.net


Posted by studio3d@ccgmail.net at 6:00 AM PST
Thursday, 10 January 2008
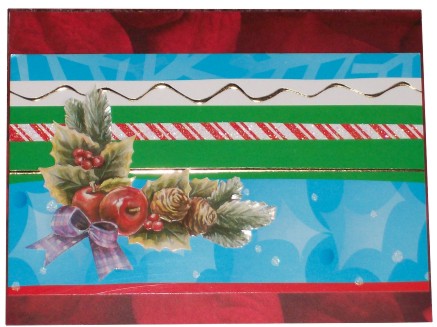
J is for Junk
Topic: A-Z round 1

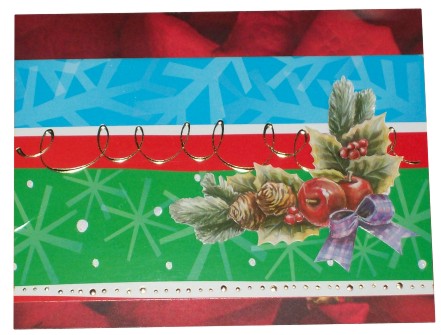
I cut apart an old Christmas card that had these great graphic bands printed on it. I mounted on a printed scrapbook paper and then Topped off with a 3D element. 


Ddd studio3d@ccwebster.net


Posted by studio3d@ccgmail.net at 6:00 AM PST
Wednesday, 9 January 2008
I is for Icicles
Topic: A-Z round 1

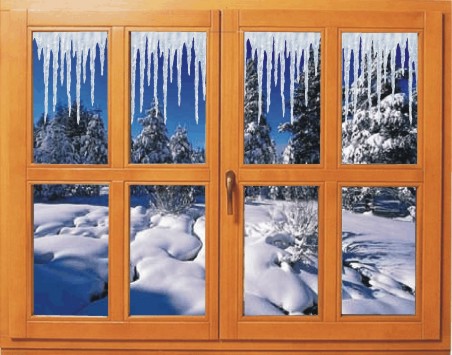
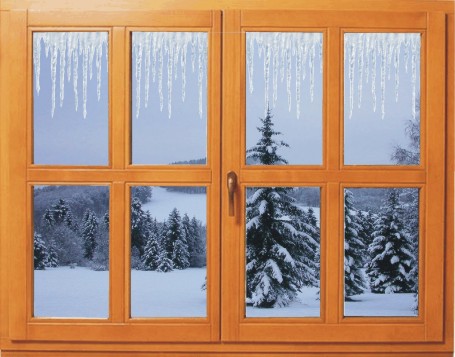
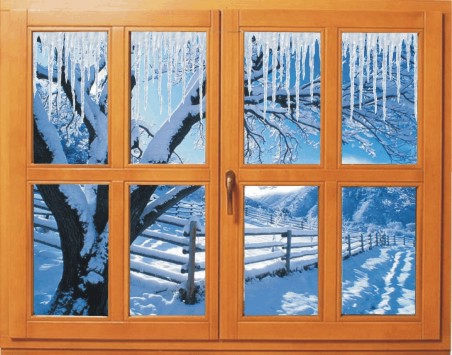
Today I decided to create some digital art. These window scenes are created in three layers: the winter scene, the icicles, and the window frame.


I think the thrid one is my favorite.

They will be printed directly onto cardstock, creased at the top of the window and trimmed to make cards.

Ddd studio3d@ccwebster.net


Posted by studio3d@ccgmail.net at 6:00 AM PST
Newer | Latest | Older