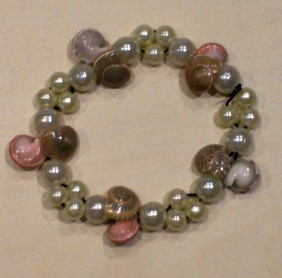
Topic: A to Z challenge round 3
This is my first try at encaustic. I used regular crayons and my regular iron (covered with aluminum foil) and just winged it.
I call this "Sunset on the Lake".
« | March 2008 | » | ||||
S | M | T | W | T | F | S |
1 | ||||||
2 | 3 | 4 | 5 | 6 | 7 | 8 |
9 | 10 | 11 | 12 | 13 | 14 | 15 |
16 | 17 | 18 | 19 | 20 | 21 | 22 |
23 | 24 | 25 | 26 | 27 | 28 | 29 |
30 | 31 |
This is my first try at encaustic. I used regular crayons and my regular iron (covered with aluminum foil) and just winged it.
I call this "Sunset on the Lake".
Here is another all-digital creation using CorelDraw. Nothing is sweeter than honey and a friend!This could be used as a general greeting or as a 'thank you' note.
Ddd studio3d@ccwebster.net
Glitter tapestry is created by covering cardstock with adhesive and laying a piece of lace down over it. The exposed adhesive then gets glitter poured over it and pressed down. Shake off the glitter and remove the lace. The rest of the adhesive is now exposed and a contrasting glitter is sprinked over it, pressed down and shaken off.
And the result - not my cup of tea. But it meets the criteria of the theme!
On a photograph of my favorite waterfall, which was run through the Xyron for adhesive, I recreated the scene in fibers. Matching thread was used in the sewing machine to overstitch the fibers, therby flattening them and holding them permanently in place.
Ddd studio3d@ccwebster.net
How long have I been holding on to these little basket stickers? Just long enough! I stuck them to an irridescent sheet and applied Easter egg eyelets in and around them. The holes looked a little naked so after mounting onto the base card I glued a little rhinestone in the center hole of each egg.
Ddd studio3d@ccwebster.net
I painted this ceramic frame on my cruise in January. I designed it myself and painted using brushes. I used a fine-tip squeeze bottle to add black outline to everything to mimic the look of pen-and-ink.
Ddd studio3d@ccwebster.net
I designed this new cross for paper embroidery. First is the pricking layout for the holes:
Then the guide for stitching between the holes:
I'd love to see the results of your use of this pattern.
I learned how to do bandana print from another art blog. I used glossy cardstock and applied a polished stone background sans the metallics. I spritzed with rubbing alcohol and then dried to get a washed red background. Over this I stamped images in black Staz-On. When this was dry I used a white paint pen to sketch details on the stamped images.
The background of the card is denim printed tissue paper. The pocket is a sticker that has a fold-in flap to make the pocket useable. Into it I tucked a tag with a greeting and I glued rhinestones where the rivets would be.
You want a new alphabet? Here it is! I designed this as a sketch on paper and then did the final rendition digitally in CorelDraw.
Nothing specific in mind for it - just wanted to design my own font.
The magazine photo of zebras was too much to resist. I colored them with watercolor markers. Since I had the stripes I used squares for the background with colorful scrapbook paper.
The lettering is diecut paper letters (they came in little stacks) and the dots and multiple colors made the package come together.
Torncalendar pages, with inked edges, are the centerpiece of this 'missing you' card. The choice of paper for the backgrounds lends a feeling of nostalgia.
Lettering is individual clear letter stickers.
Ever since I saw this letter combination on a license plate I have thought it appropriate for belated birthday greetings. It is a great way to use up the strange letters in your sets, too.
For this card I want the appology to be overstated, so I used large glittered chipboard letters. The birthday greeting is a sticker set.
Black-on-black scrapbook paper and silver cardstock extend the feeling of class without looking too matchy-matchy.
I'm sure the craft teacher on my cruise had no idea she was feeding right into my A to Z challenge, but everything fit nicely into my pre-selected themes.
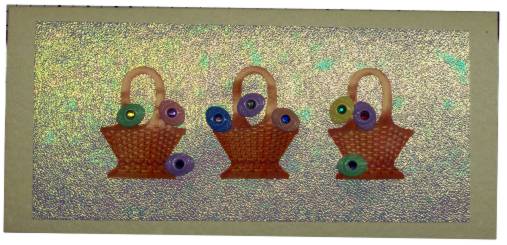
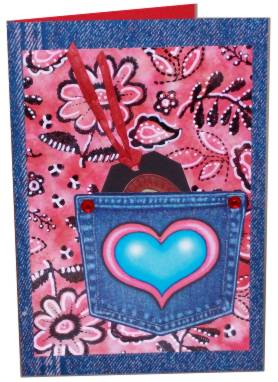
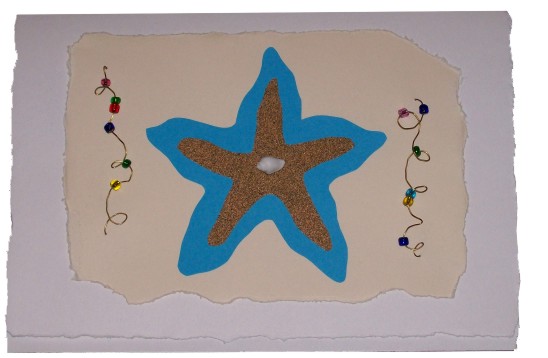
For this card we tore the edges of a piece of colored cardstock, added a cut shape of blue followed by a starfish cut of sandpaper. We used wire, twisted it around a pencil, and threaded on beads before poking the wires to the back and taping them down. We folded a card and tore the edges and mounted the prepared pieces to the face of it. The finishing touch was a seashell glued to the center of the starfish.
I got these values from paint strips! On top of floral scrpabook paper I mounted a branch cut from a strip in brown tones. Sharpie marker was used to draw in bark. A bird from a calendar illustration found a home on the branch to which I added leaves cut from a green paint strip. Sharpie was used for the leaf veins.
Base card is green cardstock selected to match the green leaves and the bird.
Back to crafts from the cruise. I actually followed the directions to the letter on this one and came away with a beautiful stretchy bracelet of seashells and faux pearls.
If I were to do this again I would use a cord of taupe or even clear, but we used waht we were given which was black.
Once I added a ribbon bowtie to this little penguin (one of my handcarved stamps) he was suddenly ready for a party. I found scrapbook paper with clocks all over and knew it was New Year's Eve!
All I had to do was frame him out in red and stamp the greeting.
These too-cute pictures of my grand-daughters were perfect to be framed by pastel slide mounts. The organza ribbon is also snapped into the frame behind each photo. All mounting (on scrpabook paper over cardstock) is done with silicone glue.
Why shouldn't a Grammie be proud of these little beauties?
This 3D card centers around one of the icons of American history - Route 66. I printed a map and the gas pump from Google Images and added the caption digitally. After printing I scuffed the map to antique it a bit, added the 3D corvette androunded the corners.
I mounted on black cardstock, rounded those corners and gave the border a 'center line' to turn it into a road. Yellow cardstock echoes the gas pump.
My hubby says it is too vague a reference but, hey, its my challenge so I do what I want!
Did you get it? It's the French Quarter!
A scrapbook paper was sliced around it's scrolls to allow the photo of the carriage to tuck under them. A sticker adds the text.
Photos must mean vacation! These brown pelicans were snapped in the port of Cabo san Lucas, Mexico. It is just happenstance that the composition of this photo came out as well as it did as I was photographing 'on the run' to keep up with hubby!
Ddd studio3d@ccwebster.net