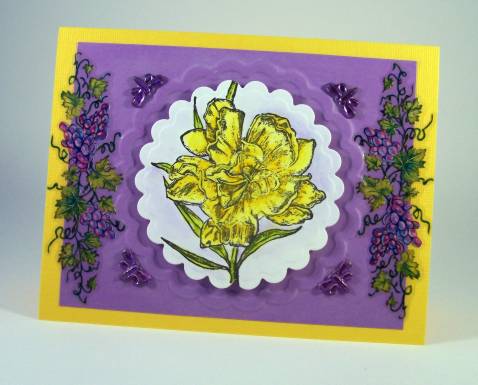
« August 2009 »
S M T W T F S
1
2 3 4 5 6 7 8
9 10 11 12 13 14 15
16 17 18 19 20 21 22
23 24 25 26 27 28 29
30 31
You are not logged in. Log in
Entries by Topic
All topics  «
3D paperwork
A - Z challenge 5
A - Z challenge 7
A - Z challenge round 4
A to Z challenge round 3
A to Z round 2
A to Z round 6
A-Z round 1
Around the House
Art Challenges
Artist Trading Cards
Backgrounds
Beads
Bible Journaling
Books
Boxes
Collage
Color Challenge
Coloring
cookbook
Die Cuts
Digital Projects
Digital Stamps
Drawing
Dry Embossing
Fabric Stuff
Fantastic Folds
Field Trip
Home Decor
How Does Your Garden Grow?
Hymnal Art
In The Kitchen
In the studio
Jewelry
Lettering
Links
Multi-Technique
Music to Work By
Musings
Nail Art
New Work
Online Class
Other Hobbies
Other Projects
Painting
Paper Embroidery
Paper Piecing
Photo
Pretty Paper
Quilting
Random
reading
Scrap Recovery
scrapbooking
Sewing
Sketch Challenge
Some Backlog
Stamping
Stencils
Stickers
Supplies
Teabag Folding
Techniques
Testing
tips and tricks
Tutorial
Web resources
Welcome to my Blog
Work By My Friends
workflow
Writing
Blog Tools
Edit your Blog
Build a Blog
RSS Feed
View Profile
Group One
In & Out of Studio 3D
Saturday, 8 August 2009
Hello, Iris!
Topic: New Work

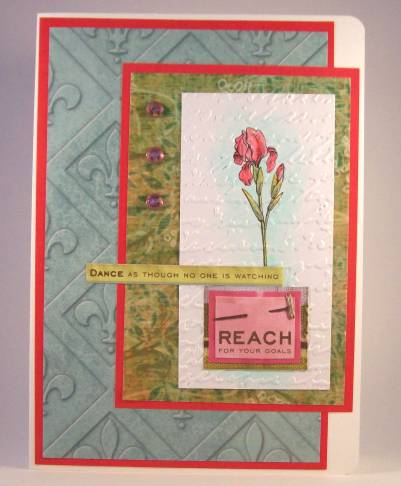
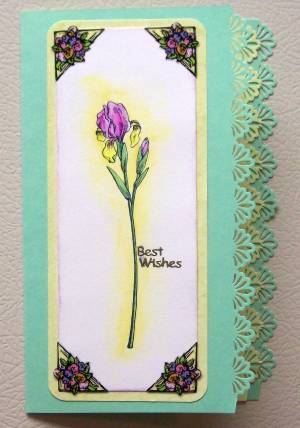
I liked the texturing of the stamped and colored iris from a couple of days ago so I did it again. Different paint job and differeint embossing folder, though. I used Weathered Wood for this one.

In keeping with the distressed look of the stripes, I tore the side edges and then backed with purple card to bring out the flower's color. Two scraps of green card were embossed with the Swiss Dots folder and I used a Cuttlebug die to cut out the greeting. 

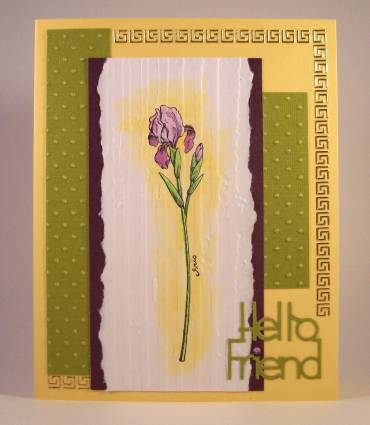
The greeting fot a rhinestone to dot the 'i' and I bordered the open areas with some gold peel-off sticker.

Ddd


Posted by studio3d@ccgmail.net at 6:00 AM PDT
Texture and Color
Topic: New Work

Yep, more watercolor pencils on rubber stamped images. This one I put through the Cuttlebug script folder and then went nuts creating lots of white layers with different folders. On each I used just a hint of color on the raised portions to create depth and coordinate with the image.

I  cut a couple of butterflies with Spellbinders dies and embossed those, too. Then they are mounted with pop-dots to raise the wings up. I punched the corners of the one colored layer (purple). 

No text is added so it stays simple and clean.

Ddd


Posted by studio3d@ccgmail.net at 6:00 AM PDT
White Out
Topic: New Work

No color on this one. Just many layers of white embossed with various Cuttlebug folders and a couple of die cuts. The butterfly is mounted 3D and I went to town with the clear rhinestones for embellishment. 

Ddd


Posted by studio3d@ccgmail.net at 6:00 AM PDT
Friday, 7 August 2009
Blue Pear
Topic: New Work

You really can't see very well that I embossed the pear with the Swirls folder. It is raised on pop-dots over the Swiss Dots background. The text is two layers of cutting from a Cuttlebug die. 

I used three rhinestones - obviously to dot the 'i's' and one in the center of the bloom on the pear.

Ddd


Posted by studio3d@ccgmail.net at 6:00 AM PDT
Wednesday, 5 August 2009
Crispy Pear
Topic: New Work

To me there are two things that always make me thing 'crisp': the color white and Swiss Dots. So, white dots surrounding a green pear must be really crisp! 

What I want to know is "where is all the green in this card?" Trust me - this card is NOT brown and gold as it appears here. It is lime green (pear and cardstock rectangle) and moss green (dotted paper)

I placed some snippets of grosgrain ribbon at the right edge of the focal piece and then added lime green floral brads as accent.

After adhering all together I added a green tag with white rubons and placed white round brads as accents.

Ddd


Posted by studio3d@ccgmail.net at 6:00 AM PDT
Monday, 3 August 2009
How About a Round of Tulips?
Topic: New Work

These 'stained glass' stamps look especially nice when you blend the colors. I think it makes them look more radiant.

I wanted to add more 'interest' to this piece so I selected a green corrugated cardstock, a piece of paste paper, and a purple scallop. The scallop is set up on pop-dots to add some dimension.

One long clear sticker was mounted on pink card and cut into three. Then I backed each with more of the purple and attached to the card front with rhinestone dragonflies for 'bullets'.

Ddd


Posted by studio3d@ccgmail.net at 6:00 AM PDT
Updated: Saturday, 18 July 2009 6:47 PM PDT
Sunday, 2 August 2009
Dancing With Iris
Topic: New Work

After stamping and coloring this iris I ran it through the Cuttlebug folder with Script. WOW! I love this!

I pulled out three scrapbook papers that matched the colors of the center piece and used one of my stock of personal sketches for layout. The red was pretty bright so that was used for framing. 

Three rhinestones pull out the pink from the flower and two text stickers were combined for the message.

Ddd


Posted by studio3d@ccgmail.net at 6:00 AM PDT
Saturday, 1 August 2009
Textured Fruit
Topic: New Work

Stamped and colored with pencils, this pear was then cut with scalloped nestabilities and embossed with the Argyle Cuttlebug folder.  I backed this with the larger scalloped oval and then cut a bunch of embossed elements to put together.

The light green rectangle is embossed with Swiss Dots, and three colors of cardstock have a border folder embossed and then cut along the raised edges. 

The dotted backing paper and all the rest of the elements were selected to reflect the colors in the pear. Then I added a white rub-on greeting and finally I used Glossy Accents over the fruit to shine it up.

Ddd


Posted by studio3d@ccgmail.net at 6:00 AM PDT
Friday, 31 July 2009
Noel Nativity
Topic: New Work

I stitched up my pattern with metallic green Sulke thread and added Stickled halos to both mother and child. I cut shimmery red cardstock and punched the corners to tuck the stitching into.

This printed cardstock has ultrafile glitter on the berries and parts of the branches so it fit well with the parts I had already put together. I just folded it, cut to fit, added the art, and then finished with a 3D sticker. 

Ddd


Posted by studio3d@ccgmail.net at 6:00 AM PDT
Thursday, 30 July 2009
Bachelor Buttons
Topic: New Work

This card was planned almost to the last detail before I ever stamped the flowers! That NEVER happens! I usually just 'go with the flow' and I'm as surprised as anyone else how things turn out.

But when I picked up this stamp I visualized it stamped as a bouquet and with buttons for the centers. I 'scribbled' colored pencils loosely following the lines of the stamp and brushed over them with a water brush. The panel was trimmed and mounted on cardstock with a top fold.

I found three buttons of the same style and color but of different sizes. I decided to do the size variation to keep with the casual feel. Then I tied ribbon through the holes and applied them with sticky dots. 

Clear corner stickers echo the colors and the greeting is a clear puffy acrylic sticker.

A 'dream' come true!

Ddd


Posted by studio3d@ccgmail.net at 6:00 AM PDT
Wednesday, 29 July 2009
Row Upon Row Border Punch
Topic: New Work

Well, I really 'went to town' with the frills for this card. The back layer was border punched, then a liner which was inset from the back, then the front which was inset from that. When it is closed it forms three layers of border in contrastinc colors.

Then I layered the focal piece on the same paper as the card liner and rounded the corners. 

I added clear floral corner stickers to frame up the image. There was not enough contrast between the image and its backing paper so I ran a line of colored pencil around it and then wet it to blend.

Here in the closeup you can see that border better as well as how the punched edges line up when the card is closed.

I added the greeting with small gold peel-off stickers.

Ddd


Posted by studio3d@ccgmail.net at 6:00 AM PDT
Tuesday, 28 July 2009
I Know What She's Thinking
Topic: New Work

...she's thinking of you!

Just a few thread color changes and new necklace beads make this stitching different from the one a few days ago. I decided to make this less casual than the last so gave it a fancy purple backing paper over a very dark pink cardstock. 

I added a rub-on greeting up the side.

Ddd


Posted by studio3d@ccgmail.net at 6:00 AM PDT
Monday, 27 July 2009
Branching Out in Orange
Topic: New Work

When I cropped a stamped image from a previous project it left behind this portion of a blooming branch. I used colored pencils and water to color it  and then covered all the blooms with Stickles.

I found a piece of orange cardstock to fold for a base and used a different flowering branch (solid image) and stamped it repeatedly with 'terra cotta' ink to make a background. 

I added a text sticker and then trimmed with abandon using sticker waste from some asian borders.

Ddd


Posted by studio3d@ccgmail.net at 6:00 AM PDT
Sunday, 26 July 2009
Serving Up Leftovers
Topic: New Work

Recent previous projects used scallops and I ended up with these two 'frames' hanging out on the work table. I layered them to surround this floral image colored up with pencils and water brush.

The mounting is simple - round the corners and use pop-dots over a folded irridescent purple cardstock.

The text is peel-offs - silver colored with a light purple Sharpie marker. I stuck it on with a bit of a flourish to keep it casual.

Ddd


Posted by studio3d@ccgmail.net at 6:00 AM PDT
Saturday, 25 July 2009
Fractured Fruit
Topic: New Work

After coloring up this image I cut it into random strips and assembled them by offsetting the vertical alignment. I trimmed the resulting block evenly at the top and bottom. Then I created a background for it using strips of green cardstock. But for this I left the uneven top and bottom edges.

I found a text sticker and mounted it on green to match the ragged one above it. All was then attached to folded burgundy cardstock.

Ddd


Posted by studio3d@ccgmail.net at 6:00 AM PDT
Friday, 24 July 2009
Ribbon Rose
Topic: New Work

This collage stamp was colored with the colored pencils and water brush technique. It only goes as far out as the double border in white. The blue behind that is scrapbook paper and the outside yellow border is the folded cardstock base. 

The stamp actually has a text block under the rose. I cut two slits and threaded a riboon through to create a fake bow. Then the two side ribbons were adhered under the ends to wrap around to the back.

Ddd


Posted by studio3d@ccgmail.net at 6:00 AM PDT
Thursday, 23 July 2009
Angled Poppy
Topic: New Work

Another colored stamp. For this one I used a sketch I had done up last year and never used. This follows that sketch exactly with only two differences; the elements have a colored border around them and the brads are ON the tags instead of being used as 'bullet points' off to the left of them.

I pulled out some bubble printed background paper from long ago and an orange folded card base.  

The text is a clear sticker that I cut into pieces to place on the individual tags. I added stickles to the brads and to the center of the flower.

Ddd


Posted by studio3d@ccgmail.net at 6:00 AM PDT
Wednesday, 22 July 2009
Lady With Stripes
Topic: New Work

One of my long-neglected stitching patterns. It is usually done up with a red hat and purple feather. This time I went with a general color theme and backed it with a striped mat with mitred corners.

I used some brads to anchor the corners and added a rubon greeting. A blue folded card base pulls it all together.

Ddd


Posted by studio3d@ccgmail.net at 6:00 AM PDT
Tuesday, 21 July 2009
Hope Lily
Topic: New Work

Hand-colored lilies with watercolor pencils. Cut into a simple panel and mounted offset on a kraft cardstock. Trimmed with a satin ribbon. Texted with an acrylic sticker.

Mounted on a folded blue cardstock.

Ddd


Posted by studio3d@ccgmail.net at 6:00 AM PDT
Monday, 20 July 2009
Yellow Ruffled Flower
Topic: New Work

I used that technique again of embossing only with the Nestabilities die. Then the illustration was cut and embossed with the next smaller size.

I used borders of clear stickers and found a good us for 4 rhinestone dragonflies. 

Ddd


Posted by studio3d@ccgmail.net at 6:00 AM PDT

Newer | Latest | Older