« November 2009 »
S M T W T F S
1 2 3 4 5 6 7
8 9 10 11 12 13 14
15 16 17 18 19 20 21
22 23 24 25 26 27 28
29 30
You are not logged in. Log in
Entries by Topic
All topics  «
3D paperwork
A - Z challenge 5
A - Z challenge 7
A - Z challenge round 4
A to Z challenge round 3
A to Z round 2
A to Z round 6
A-Z round 1
Around the House
Art Challenges
Artist Trading Cards
Backgrounds
Beads
Bible Journaling
Books
Boxes
Collage
Color Challenge
Coloring
cookbook
Die Cuts
Digital Projects
Digital Stamps
Drawing
Dry Embossing
Fabric Stuff
Fantastic Folds
Field Trip
Home Decor
How Does Your Garden Grow?
Hymnal Art
In The Kitchen
In the studio
Jewelry
Lettering
Links
Multi-Technique
Music to Work By
Musings
Nail Art
New Work
Online Class
Other Hobbies
Other Projects
Painting
Paper Embroidery
Paper Piecing
Photo
Pretty Paper
Quilting
Random
reading
Scrap Recovery
scrapbooking
Sewing
Sketch Challenge
Some Backlog
Stamping
Stencils
Stickers
Supplies
Teabag Folding
Techniques
Testing
tips and tricks
Tutorial
Web resources
Welcome to my Blog
Work By My Friends
workflow
Writing
Blog Tools
Edit your Blog
Build a Blog
RSS Feed
View Profile
Group One
In & Out of Studio 3D
Tuesday, 3 November 2009
Pale Shell
Topic: Paper Embroidery

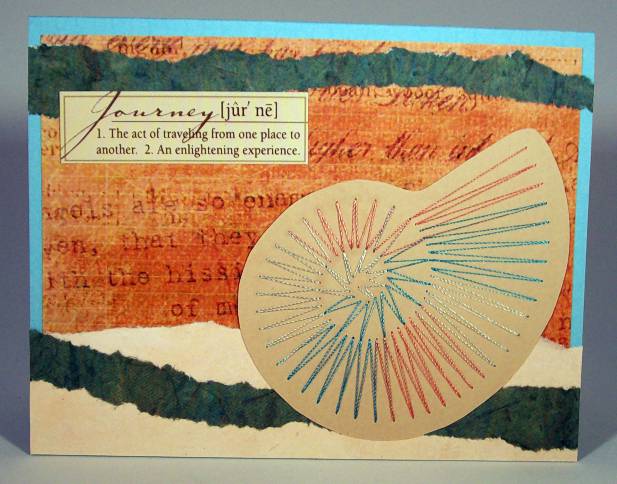
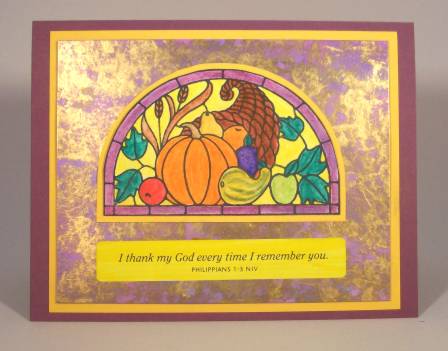
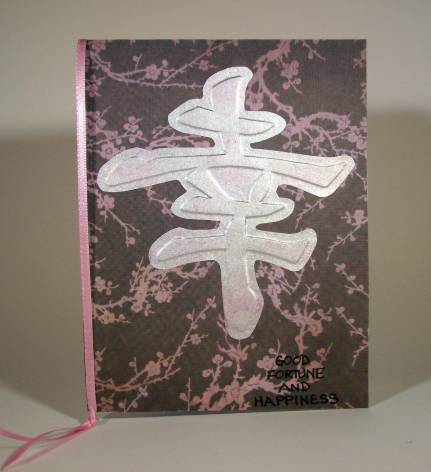
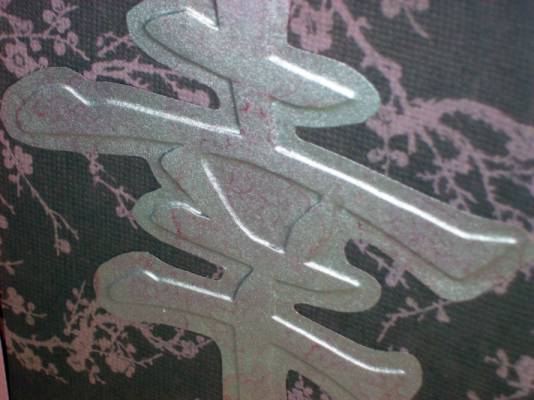
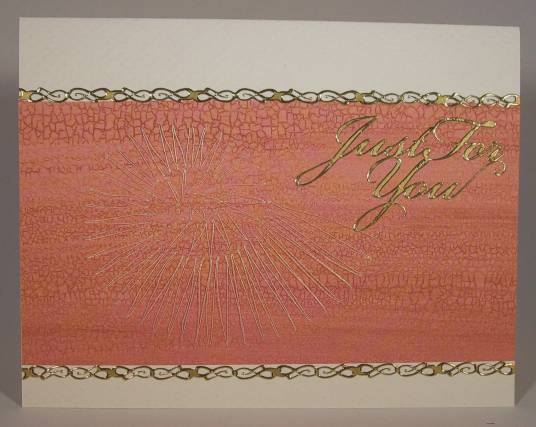
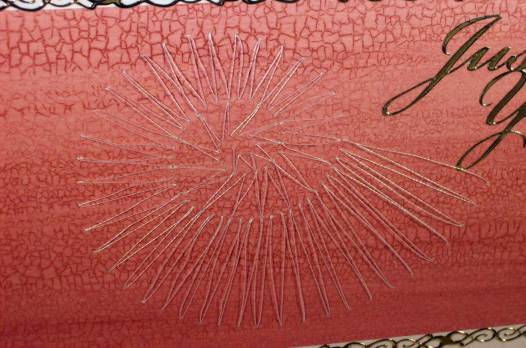
The irridescent threads used to stitch this shell don't show up in photos but in real life they look fabulous. The crackle-finish scrapbook paper is mounted over a cream cardstock base and trimmed out with gold peel-off borders and a gold peel-off greeting.

Here is a different angle on the shell that shows the threads better.


Ddd


Posted by studio3d@ccgmail.net at 6:00 AM PST
Monday, 2 November 2009
There You Are
Topic: Stamping

For this stamp I used one of the Nestabilities label dies to cut and emboss its edges. Then I distressed the edges with Broken China distressing ink. Th backing piece is more of my paste paper and it overlays a blue folded card base, also distressed with Broken China ink. 

The circle text is a cardstock sticker.

Ddd


Posted by studio3d@ccgmail.net at 6:00 AM PST
Sunday, 1 November 2009
Friends
Topic: Stamping

Srarting with a stamped image, colored with watercolor pencils, I then cut it to shape and mounted on scrapbook paper over a purple folded cardstock base. 

Bands of rubons frame the sides and provide the text.

Ddd


Posted by studio3d@ccgmail.net at 7:00 AM PDT
Saturday, 31 October 2009
Happiness With You
Topic: Stamping

The framing piece for this stamping, colored with watercolor pencils, is a piece of paste paper I made a long time ago. I punched the corners and cut an aperture with a Nestabilities die. Orange floral brads adorn the corners and an orange folded card serves as the base. 

Two cardstock stickers furnish the text.

Ddd


Posted by studio3d@ccgmail.net at 6:00 AM PDT
Friday, 30 October 2009
Journey
Topic: Paper Embroidery

This stitched shell with verigated threads was cut to shape and placed on a background collaged with a variety of scrapbook papers. All are mounted on a blue folded card base. 

The text is a cardstock sticker.

Ddd


Posted by studio3d@ccgmail.net at 6:00 AM PDT
Thursday, 29 October 2009
Doodles Here, Doodles There
Topic: Stamping

I love junk mail. That's where I got this beautiful purple/blue background cardstock. I used Nestabilities round to cut the hole for the watercolor penciled floral to be mounted behind and then cut both together with the scallop die. I used a smaller scallop die for the text circle. The text is a stamp.

After mounting to white folded cardstock, with foam dots, the card was too plain so I started doodling with a fine-line marker. Dots, dashes, squiggles, and lines brought it all together.

Ddd


Posted by studio3d@ccgmail.net at 6:00 AM PDT
Wednesday, 28 October 2009
Glamorous Iris
Topic: Stamping

Choosing to color the iris stamp pink was the set-up for this card. I had some shiny pink paper that I embossed with a Fiskars texture plate in the Cuttlebug and cut both panels with square scallop Nestabilities dies. 

These are mounted to a pink folded card base along with a glossy text sticker.

Ddd


Posted by studio3d@ccgmail.net at 6:00 AM PDT
Tuesday, 27 October 2009
Pink Partridge
Topic: Stamping

Not your traditional Christmas colors, but pretty, I think. I colored with watercolor pencils and blended with a water brush. Handmade paper was crumpled and torn as a backing with button brads at the corners.

Kraft cardstock is folded as a base and a round thick acrylic sticker was centered over the tree trunk.

Ddd


Posted by studio3d@ccgmail.net at 6:00 AM PDT
Monday, 26 October 2009
A Blessing
Topic: Stamping

I colored this fall stamp with colored pencils and backed it with a plaid scrapbook paper and a green paper with a subtle stripe. 

This is mounted over an orange folded cardstock base.

The text (again) is a clear sticker.

Ddd


Posted by studio3d@ccgmail.net at 6:00 AM PDT
Sunday, 25 October 2009
Peace Arch
Topic: Stamping

I had a great background paper to use with this stamped image and decided to use it as a shape to look like more glass. I drew in some random lines to simulate leading. Then I used yellow distress ink to brush the edges.

I cut the yellow folded card base to an echoing shape. 


The text is a clear sticker.

Ddd


Posted by studio3d@ccgmail.net at 6:00 AM PDT
Saturday, 24 October 2009
Glowing Thanks
Topic: Stamping

This stamp was colored with watercolor pencils and blended with a water brush. A yellow border sets it off from the background made with alcohol ink and metallic marker on glossy cardstock. Another yellow layer borders this over the purple folded card base. 

I used a yellow Sharpie on a glossy sticker and applied that to the finished card.

Ddd


Posted by studio3d@ccgmail.net at 6:00 AM PDT
Friday, 23 October 2009
How to Stay Alive
Topic: Dry Embossing

Another brass stencil impression in the Cuttlebug results in this panel, kept square this time. I did use a corner punch for a bit of interest and then used purple heart brads to hold it to scrapbook paper.

I distressed the edges with purple and then with a rough edge. 

The text is a clear sticker and all is placed on a white folded card base.

Ddd


Posted by studio3d@ccgmail.net at 6:00 AM PDT
Thursday, 22 October 2009
Do What You Love
Topic: Stamping

I used a Fiskars texture plate in the Cuttlebug to make an overall pattern on the shiny paper, then a Spellbinders die to cut the aperture and a punch for the decorative corners. This was all mounted over a stamped image colored with watercolor pencils.

I used a Sharpie marker to doodle around the circle and the outside.

The text is a cardstock sticker.

Ddd


Posted by studio3d@ccgmail.net at 6:00 AM PDT
Wednesday, 21 October 2009
Soft Flight
Topic: Dry Embossing

I used a brass stencil in the Cuttlebug to emboss the butterfly panel. I used Fiskars border punch on more of the same material. These were placed over and under the striped scrapbook paper.

Some of those new Fiskars zings were placed along the side and two sizes of stickon rhinestones added.

Ribbon with tripple knots is tied at the spine of the folded card base.

Ddd


Posted by studio3d@ccgmail.net at 6:00 AM PDT
Tuesday, 20 October 2009
Double Dragonfly
Topic: Stamping

Two stamped dragonflies were colored with watercolor marker and grey drop-shadows were added. three sides trimmed up with deckle edge scissors - asme used on one edge of green scrapbook paper. Black ribbon tied on, papers layered, three brads added. 

Mounted to folded card base. Thick acrylic sticker with text.

Tah Dah!

Ddd


Posted by studio3d@ccgmail.net at 6:00 AM PDT
Monday, 19 October 2009
Cherishing Hearts
Topic: Dry Embossing

Silver metallic paper was dry embossed with a brass stencil in the Cuttlebug. Then I used a Spellbinders label die to cut it out and mounted it on a red scrapbook paper cut with another die. I got some new Fiskars stickons called zings and used three sizes of red hearts on the embossed hearts. Then I added some red stickon rhinestones.

After attaching to a pink folded card base I added a thick clear sticker with text.

Ddd


Posted by studio3d@ccgmail.net at 6:00 AM PDT
Sunday, 18 October 2009
Silver Fortune
Topic: Dry Embossing

I used my hand cut brass stencil in the Cuttlebug to emboss on this metallic silver paper. After cutting around it I used two tones of pink alcohol ink on a felt pad to add interest. The background is a printed cardstock from a small pad of them and I liked the asian feel that it added to the Kanji. 

I tied a thin ribbon at the spine of the folded card base and hand lettered the text. "Good Fortune and Happiness" are the two meanings for the character.

Here you can see the effect of the alcohol inks.


Ddd


Posted by studio3d@ccgmail.net at 6:00 AM PDT
Saturday, 17 October 2009
Round About
Topic: Paper Embroidery

The challenge on one of my groups was to make a card of a different shape. I guess 'round' is not too original, but I've never made a round card before and I already had the bib stitching done. The fold of the round card base is under the bow which overhangs it. 

At the last I decided to cut out the neckline to create a little aperture and I stamped the text on the bib front.

Ddd


Posted by studio3d@ccgmail.net at 6:00 AM PDT
Friday, 16 October 2009
Ins and Outs
Topic: Paper Embroidery

I've been seeing a lot of people using this card structure (Tri-Shutter Fold) and wanted to give it a try for myself. In response to an assignment on group to combine paper embroidery with folding on a card, it seemed like the perfect opportunity.

This is the card folded up as it fits into the envelope.

Here is a view with it opened as it would be when on display.

And this is the view with the card fully opened.


Ddd


Posted by studio3d@ccgmail.net at 6:00 AM PDT
Thursday, 15 October 2009
On Display
Topic: Field Trip

After that long string of making card with each of my hand-carved rubber stamps this is the result. I built a display out of foam-core board and poster board using straightpins to hold it all together. It comes apart into two side-by-side sections for transport. 

Each shelf has multiple cards, each with its stamp in front of it. This was to show the viewers the beginning and the end of the project.

I did a little presentation talking about the basic process - tools, transfers, materials, and uses. It was well received.

Ddd


Posted by studio3d@ccgmail.net at 6:00 AM PDT

Newer | Latest | Older