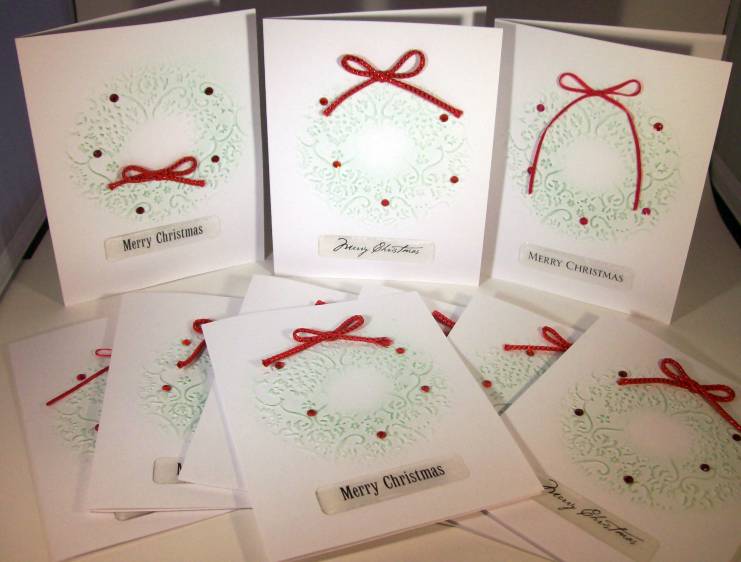
« January 2010 »
S M T W T F S
1 2
3 4 5 6 7 8 9
10 11 12 13 14 15 16
17 18 19 20 21 22 23
24 25 26 27 28 29 30
31
You are not logged in. Log in
Entries by Topic
All topics  «
3D paperwork
A - Z challenge 5
A - Z challenge 7
A - Z challenge round 4
A to Z challenge round 3
A to Z round 2
A to Z round 6
A-Z round 1
Around the House
Art Challenges
Artist Trading Cards
Backgrounds
Beads
Bible Journaling
Books
Boxes
Collage
Color Challenge
Coloring
cookbook
Die Cuts
Digital Projects
Digital Stamps
Drawing
Dry Embossing
Fabric Stuff
Fantastic Folds
Field Trip
Home Decor
How Does Your Garden Grow?
Hymnal Art
In The Kitchen
In the studio
Jewelry
Lettering
Links
Multi-Technique
Music to Work By
Musings
Nail Art
New Work
Online Class
Other Hobbies
Other Projects
Painting
Paper Embroidery
Paper Piecing
Photo
Pretty Paper
Quilting
Random
reading
Scrap Recovery
scrapbooking
Sewing
Sketch Challenge
Some Backlog
Stamping
Stencils
Stickers
Supplies
Teabag Folding
Techniques
Testing
tips and tricks
Tutorial
Web resources
Welcome to my Blog
Work By My Friends
workflow
Writing
Blog Tools
Edit your Blog
Build a Blog
RSS Feed
View Profile
Group One
In & Out of Studio 3D
Saturday, 9 January 2010
Plaid Poinsettia
Topic: Collage

I promise I will NOT be showing Christmas cards ALL year long. But I'n not done yet...

I used a scalloped Nestability die to cut this poinsettia from an old Christmas card and mounted on plaid scrapbook paper. Did I mention this paper has a shimmer to the surface? NO? Okay now you know. 

The greeting is a thich acrylic sticker.

Ddd


Posted by studio3d@ccgmail.net at 6:00 AM PST
Friday, 8 January 2010
Teal Tree
Topic: Collage

One panel from an old Christmas card was cut with a shaped rectangle Nestabilities die and a sticker star was added to the top. Simply mounted on silver cardstock and trimmed with silver peel-off borders. 

To echo the white trunk I mounted on glossy white folded cardstock.

No greeting - keeping the look clean.

Ddd


Posted by studio3d@ccgmail.net at 6:00 AM PST
Thursday, 7 January 2010
Santa Mail
Topic: Collage

You probably saw this ad for a famous large department store chain in one of YOUR magazines but I bet nobody else tore it out to make a Christmas card! I covered their logo with the acrylic sticker sporting the red stripes and reindeer and cut out the illustration using a Nestabilities label die. 

I used layers of black and red and added a gold peel-off greeting.

Ddd


Posted by studio3d@ccgmail.net at 6:00 AM PST
Wednesday, 6 January 2010
Plaid Tree
Topic: Collage

This tree was harvested from an old Christmas card and mounted on this yummy plaid paper. A burgundy folded cardstock creates the base. 

Three printed acrylic stickers were applied for a greeting.

Ddd


Posted by studio3d@ccgmail.net at 6:00 AM PST
Tuesday, 5 January 2010
Joy Peace Love
Topic: Collage

Scraps from an old Christmas card are mounted on red, cream, and blue layers. Not much to add to that! 

Ddd


Posted by studio3d@ccgmail.net at 6:00 AM PST
Monday, 4 January 2010
Noel
Topic: Collage

The centerpieces of these tags are photographs of collaged tags. I added a real tag behond each and tied on real strings. On the red folded card base I arranged the tags and added three silk flowers and gave them button centers. 

Ddd


Posted by studio3d@ccgmail.net at 6:00 AM PST
Sunday, 3 January 2010
Cozy Ornaments
Topic: Collage

This plaid background makes for a cozy setting for three ornaments and branches from old Christmas cards. The ornaments were cut with a Cuttlebug die tag shape and the top colored with a gold metallic marker. Little loops of gold cord connect them to their branches and they are raised on foam tape. 

The clear acrylic sticker greeting was applied to cream cardstock to match the folded card base.

Ddd


Posted by studio3d@ccgmail.net at 6:00 AM PST
Saturday, 2 January 2010
Ten Wreaths
Topic: Dry Embossing

For these ten wreath cards I used the shaped embossing technique, the brocade folder and a donut shaped chipboard. I also did not do any direct-to-paper coloring but only used the shaving brush and applied Whispers ink in a circular motion. 

Each has five red rhinestones, a red bow and a clear acrylic sticker. Here's a close-up of one of them.

Aren't these elegant?

Ddd


Posted by studio3d@ccgmail.net at 6:00 AM PST
Friday, 1 January 2010
Golden Tree
Topic: Dry Embossing

Before I figured out the shaped embossing I did a standard one onto this ridged gold cardstock and cut out the tree. The rhinestones in a single size makes this a little more formal than the others, too. 

This is mounted on a irridescent green cardstock and I added gold and silver peel-off packages, topper, and greeting.

Ddd

Yes, yes I know it's the new year - but I'm NOT done showing Christmas cards yet. Think of them as imspiration for NEXT year!


Posted by studio3d@ccgmail.net at 6:00 AM PST
Thursday, 31 December 2009
Brocade Trees
Topic: Dry Embossing

Oooooh! I LOVE this technique! For these four I switched to the brocade folder but kept the same triangle cutout. The coloring is done exactly the same way and I switched out the colors of the rhinestones and backing cardstocks. 

Here's a closeup of the one I like best.


Ddd


Posted by studio3d@ccgmail.net at 6:00 AM PST
Wednesday, 30 December 2009
Rhinestone Tree
Topic: Dry Embossing

OK, moving along... Oh, we're still on Christmas cards - just moving on to different techniques!

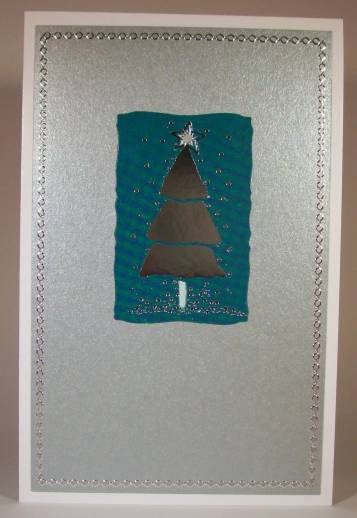
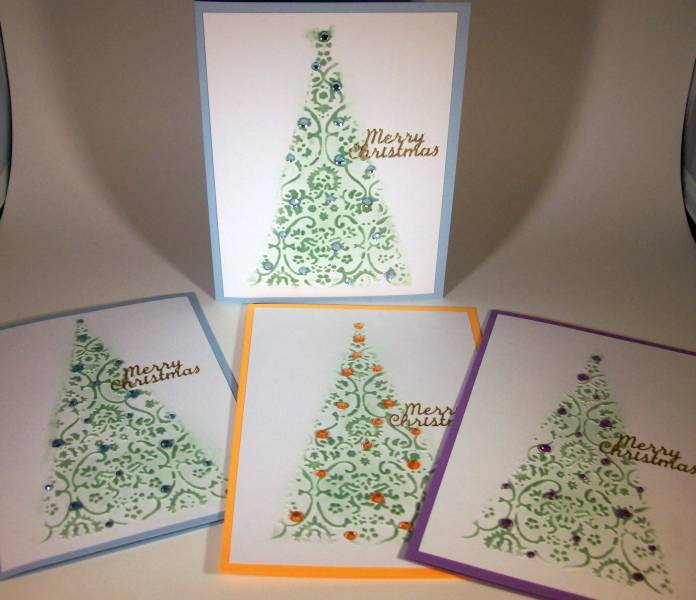
I saw on a cuople of blogs that I could change the shape of the impression of a plate in the Cuttlebug by cutting that shape from thisk chipboard and using it on top of the folder instead of the B plate. SO COOL!

I cut a tall triangle and made the 'sandwich' of (bottom up) A plate, folder with cardstock inside, cut chipboard, C plate. This is run through the Cuttlebug and this is the result! 

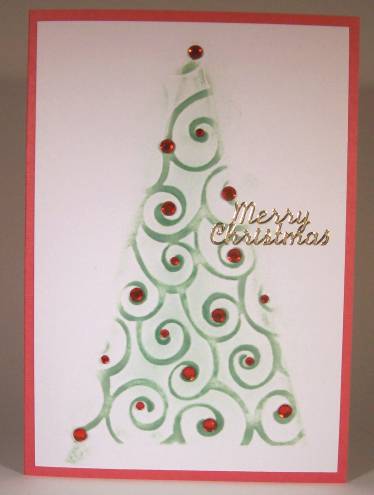
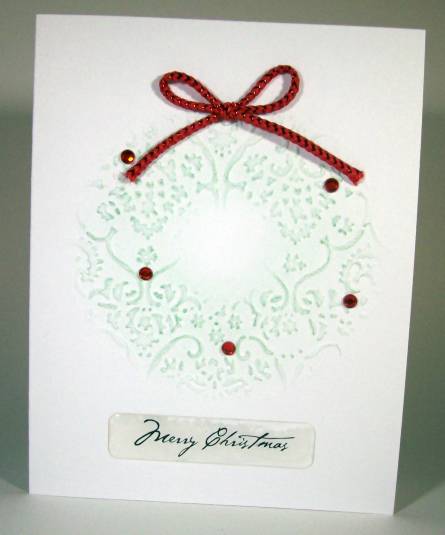
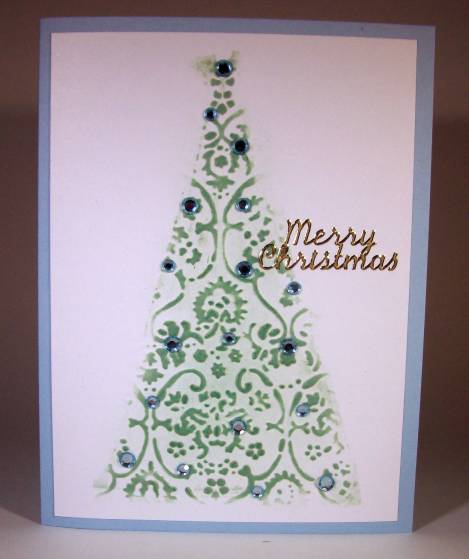
I used a Whispers ink pad direct-to-paper to color the raised portions. Then I used a 'shaving brush' style tool to apply a shading of a slightly different green.

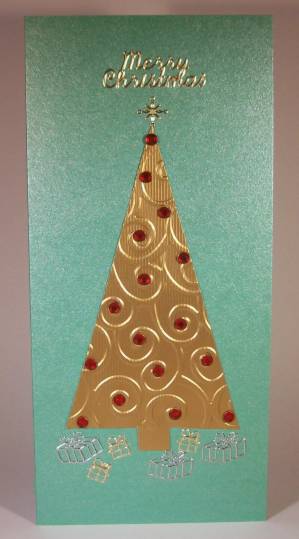
The last step was to adhere red rhinestones to the swirls in two different sizes.

Ddd


Posted by studio3d@ccgmail.net at 6:00 AM PST
Tuesday, 29 December 2009
Big Glitter Flakes
Topic: Backgrounds

One more of the alcohol ink backgrounds. These flakes were cut from glittery bits of old Christmas cards using the MS punch and a Cuttlebug die. The large flakes are mounted with snowflake brads and the smaller ones with gold star brads. 

Silver folded cardstock is the base and a clear acrylic sticker with a blue backing.

Ddd


Posted by studio3d@ccgmail.net at 6:00 AM PST
Monday, 28 December 2009
Triple Glitter
Topic: Backgrounds

I made this background by cleaning off an alcohol ink application pad with three tones of blue and silver mixatives.

These snowflakes were punched out from glossy cardstock, stuck to a transparency and colored with alcohol inks. When dry I applied Glossy Accents and sprinkled with Martha Stewart tinsel glitter. I added one teal rhinestone to the center of each. 

The folded cardstock for this card is silver and I added a clear acrylic sticker greeting with a blue background.

Ddd


Posted by studio3d@ccgmail.net at 6:00 AM PST
Sunday, 27 December 2009
Three Tall Flakes
Topic: Stamping

Yep, back to the swoosh of flakes stamp! This time, stamped twice onto tall panels and graced with two punched flakes mounted with brads.

Since I had, by now, run out of gold brads I used silver on all of these and then used thick acrylic stickers for the greetings. One is applied directly to the card and two were stuck to more of the teal background card color and trimmed out for mounting.

Ddd


Posted by studio3d@ccgmail.net at 6:00 AM PST
Saturday, 26 December 2009
Five Triple Flakes
Topic: Backgrounds

Hey, It's MY blog and you'll look at CHristmas cards till I tell you to stop!

In this group, background of the upper center one is done with alcohol inks and silver mixatives, cleaning off the applicator by streaking across the glossy cardstock. The other four use a Whispers ink pad dragged across the cardstock to leave streaks.

All have teal punched snowflakes, showflake brads and sticker greetings. If you look closely you can see that some of the brads are gold, some silver, and one white. I used some gold snowflake stickers in each center to tie in the gold of the greeting stickers.

Ddd


Posted by studio3d@ccgmail.net at 6:00 AM PST
Friday, 25 December 2009
Two Flaky Swooshes
Topic: Stamping

Are you saying to yourself, "Hey, I saw these already!"? Think again! THOSE were gold flakes and these are teal, THOSE had scrapbook paper mats and these do not, THOSE had a single gold brad and these have THREE! 

See? Totally different!

MERRY CHRISTMAS!

Ddd


Posted by studio3d@ccgmail.net at 6:00 AM PST
Thursday, 24 December 2009
Flaky Background
Topic: Stamping

I used another panel with the snowflake stamped background but this time added a gold panel to the center. Over this I adhered a teal snowflake fromt he MS punch using a gold snowflake brad. 

I, again, used a peel-off greeting.

Ddd


Posted by studio3d@ccgmail.net at 6:00 AM PST
Wednesday, 23 December 2009
Golden Flakes
Topic: Stamping

This swirl of flakes is from the same clear acrylic set of stamps as the large ones stamped yesterday.  I stamped on a glossy panel and then used the MS punch to make golden flakes from a portion of a foiled Christmas card from last year. These I attached using gold snowflake brads.

Scrapbook paper was used to create the mat and these are mounted to teal folded cardstock. The greeting is a gold peel-off sticker.

Ddd


Posted by studio3d@ccgmail.net at 6:00 AM PST
Tuesday, 22 December 2009
Metallic Flakes
Topic: Stamping

I recently bought a snowflake stamp set of clear acrylics and have put them to good use. I folded a glossy cardstock and stamped an overall pattern of flakes using Whispers ink.

Then I used another recent purchase - a Martha Stewart snowflake punch and make these four by punching over foiled imprints from an old Christmas card. I love how the different foil snowflakes make every punch look like a different tool was used! The foild were of magenta, teal, silver and gold. 

Each flake was mounted using only a glue dot in the middle to leave dimension in the edges. Then a rhinestone was adhered to the center of each and the greeting - a gold peel-off - added to the card.

Ddd


Posted by studio3d@ccgmail.net at 6:00 AM PST
Monday, 21 December 2009
Pink Snow
Topic: Backgrounds

Technically, this could come under the heading of 'collage' cards but I really wanted to point out the background technique instead. I made this background with three tones of alcohol ink and silver mixatives. This was near the end, when I had little left on the applicator and the colors were pretty well blended. I used a slide-and-twist motion to clean off the applicator on the glossy cardstock and this was the result. I used a fancy corner punch on the background. 

The center panel is the front off an old Christmas card, cut with a Nestabilities label die. I raised it on foam tape for dimension. I mounted on a folded pink cardstock base with the corners rounded and then added a thick acrylic sticker to more of the pink and trimmed around before adhering to the card.

---------------------------------------------------

I feel free showing all my Christmas cards now because 1) they've been in the mail long enough that most should have been received by now and 2) I haven't had a comment on my blog for so long I don't think anyone is out there anymore. It's not like someone is going to see this and 'spoil the surprise'.

Ddd


Posted by studio3d@ccgmail.net at 6:00 AM PST

Newer | Latest | Older