Topic: Photo
(because it's a 'trumpet flower')
This is a vine in our back yard, which climbs 10 feet tall up the end of the deck on lattice. The hummingbirds LOVE it, but I got tired of waiting for one to come along to photograph.
Ddd
« | September 2010 | » | ||||
S | M | T | W | T | F | S |
1 | 2 | 3 | 4 | |||
5 | 6 | 7 | 8 | 9 | 10 | 11 |
12 | 13 | 14 | 15 | 16 | 17 | 18 |
19 | 20 | 21 | 22 | 23 | 24 | 25 |
26 | 27 | 28 | 29 | 30 |
(because it's a 'trumpet flower')
This is a vine in our back yard, which climbs 10 feet tall up the end of the deck on lattice. The hummingbirds LOVE it, but I got tired of waiting for one to come along to photograph.
Ddd
I've used flowers quite a bit on projects lately and wanted to share the source. I went to the wedding section at Michaels and found this package. I mixes white and cream, fabric and paper, plain and glittered, multiple styles and sizes.
I have colored these with alcohol ink, watercolor pencils, markers and plan to try out some air-brushing on them. I have stacked them, put in rhinestone centers, attached with brads and glue dots.
Cost for 225 pieces? $4.99. REALLY! And they are so versatile that this is a super bargain.
Ddd
Another challenge: make a folded paper frame and use it on a card, box, etc. I chose to use mine on a card. I already had the image stamped and circle-cut and had the scalloped circle to borker it already selected.
So I made the frame and mounted this on two patterned cardstocks. I added corner stickers, a ribbon bow, and a tag upon which I used a burgundy rub-on, hand lettering, and a brad.
I chose the folded cardstock base using a light peach from the pink pattened card.
Ddd
I colored up this little girl stamped image and combined her with table scraps to create this fall card. The background is more of the calendar photo, the wall is some Cuttlebugged and distressed cardstock, and there are three strips of designer paper scraps.
I used a piece of raffia to tie the bow, added a gold peel-off sticker and hand lettered the remainder of the greeting. The pumpkin beside her is a clear sticker.
Ddd
I've been seeing handmade flowers everywhere on the net and some of them look like a rosette. I had a brilliant notion to try using the paper crimper on strips of paper to see if I could replicate some. This is what I came up with.
I think it went pretty well. I did find that you have to go back over the entire strip and sharpen the creases do it will flatten into a medallion. But using the crimper to set those creases to begin with is a giant head start.
I used scraps from the paper weaving projects and then combined them to make a card.
I think I will change out the text sticker to something else as this doesn't seem to resonate with these images.
Ddd
This card is under the heading 'fantastic folds' but it really is simply a tri-fold card.
The top layer (chocolate+ice cream) swings open on a left hinge and the craft stick is encased in the ice cream of the right side and the back. These two layers do not open.
The chocolate layer is textured cardstock which I cut with a deckle nestabilities die on one edge. I folded and cut the rounded corners on the ice cream layers and then glued on the chocolate and trimmed to match on all sides.
The text is a clear thick acrylic sticker that I mounted on matching white cardstock and trimmed around.
Ddd
Not so long ago I shared two cards using a text-filled heart stamp. Here's another.
For this one, I cut the hearts in half and reversed the halves to create dragonfly wings. A little scrap of white mulberry paper anchors it on the page while the bordering doodle lines give it a little motion.
I cut apart a silk flower and used the single and double petals to enchace the wings. Each is graced with a rhinestone, which also define the head and body.
The white text is a rub-on and that above it is hand-written in black ink.
Ddd
This stamped image is from my stash of ones sent me in a swap. I colored it up with my new Copic markers and fussy cut it.
Background is done with two Cuttlebug folders and inked with distress inks. Girl is glued directly to background (after I gave her a nose and mouth, because I think she looks creepy without them).
I used the same color to mat the layers as is in the wall, and tied a checked ribbon around the top layers. The green dot layer echoes the dots in the vines behind the image in shape and color.
More red is introduced by the selection of the text sticker.
Ddd
Today we're back to the paper weaving. This time I worked in a monochrome palette with a light plaid and a floral - still with 1 cm strips in plain weave. I used a deep green paper as a mat and layered this over an antique print. Both the antique print and the woven layer have been run through a texture folder and the text layer was sanded for distressing and torn around the edges.
I pulled the original plaid back in as background corners, added it all to a deep green folded cardstock base and then did some pen 'stitching' around several elements.
Text is a long sticker that I cut into sections. Then I put mini 'button' brads through flower centers (layering some) and attached them with glue dots.
Ddd
Another challenge - use a photograph to make a card.
For this I chose a portion of a calendar photo. I added 'vines' with stamping and used a black pen to add details to the pumpkins. A stamp was used for the greeting as well.
I used yellow card for the folded base, a photo mat, and the corner scrolls which were cut with a Cuttlebug die. A background paper of antique printed matter adds another layer of interest.
Ddd
New assignment - make a card using paper-weaving.
I used a striped paper and a tiny floral, both cut into 1 cm strips and did a standard over/under weave. I framed it with layers of complementary papers on foam dots. Because it reminded me of a quilt I added an overlay of old sheet music and a text sticker, double-matted.
I found the rounded corners on the main panel complemented those made by the nestabilities label dies I used for the 'window'.
The folded card base pulls more colors from the woven piece.
Ddd
And finally.....
... the end of the remodel project was to replace an ugly wall-mounted air conditioner with a fabulous new 4-foot round window. That was accomplished and the wall repainted to match the rest of the room (very light blue).
Here is the diningroom before the window (the air conditioner is behind the painting):
and here is the final result:
Brilliant!
Ddd
And the foil is back! I used gold outline stickers of daisies and leaves to create this feature and raised the center on foam dots. A blue rhinestone in the center echoes the shimmery blue cardstock base.
The white layer is mulberry paper and over this is layered a textured cardstock with swirls. The text is a gold peel-off sticker to match the focal image.
Ddd
One of the groups I am on issued a sketch challenge. This is my entry.
I used more of the stamped hearts but this time they are on a floral paper in 4 colors. The sketch called for the item in the 3rd position to be the front layer of the 4 so I added a border to it and raised it on foam dots.
The background is a printed scrapbook paper (isn't this beautiful?). I added a piece of organza ribbon and tied metal letter tags on with 1/8" ribbon. The text block is a clear thick acrylic sticker which I placed on cardstock to match the background and the border on the heart.
As a final touch I added a doodle border in green Sharpie around the card and dots around the feature heart.
Ddd
I have been trying to decide how to use this heart stamp filled with text. I finally stamped it 4 times on pink plaid and 4 times on blue plaid and cut each of them out.
The pink were aranged with the rounded tops interlinked. I put a bit of wadded up glue dot under the bumps to raise them up. Then I cut a scalloped square of the same paper with the Cuttlebug and a Nestability die. On the square I arranged the blue hearts with the tops facing out.
Now the layering starts... blue folded cardstock base with rounded corners, black cardstock square with rounded corners, scalloped pink square, blue hearts, pink hearts, flower, brad.
Thats it!
Ddd
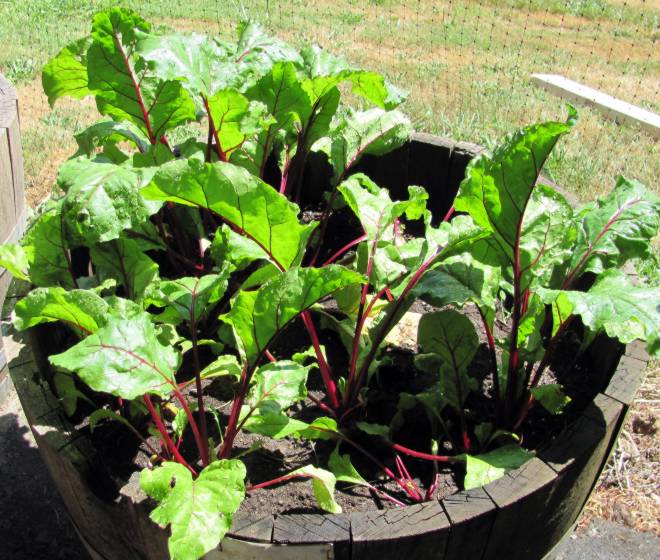
Sometimes, when I would unreel the hose to water the garden barrels, a little green frog would exit the reel housing and hop away for a bit. We never got to see where he would go, though.
Then when we were painting the house we spied his hiding place. Can you see him?
This is under the deck, looking up from the patio (top of a window is at the bottom of the photo). Find him? No?
OK, how about I zooooo-o-o-o-m-m-m in real close?
There's his little face! When we would get too close, and he realized he had been found out, he would ease out and walk across the wall to hang out in the climbing vines for a while. After a bit we'd find him back in place - not quite as invisible as he imagined.Ddd
Through the magic of technology this entry has delayed posting of a full month. The photos below were actually taken August 3.
The garden this year met with limited success. Some things did very well (carrots, beans, beets) some did just OK (onions, lettuce, radishes) and some did horribly (tomatoes, spinach, cucumbers). Here are some photos of the successes:
24 Carrot (or more)
So, How 'Ya Bean?
You Can't Beet That
Don't Cry For Me
Someday My Tomatoes Will Come
(yes, August 3rd and the tomatoes are just now blooming)
Ddd
More of the foil with gold outline stickers...
For this one I used 4 butterfly stickers and mounted on navy shimmer cardstock along with a strip of holographic crinkled paper and a sheer ribbon, knotted.
The greeting text is written with white gel pen.
Ddd
Challenge from the group - a paper embroidery card with the theme 'hats'. Well, we brainstormed a bit over this and wanted to do something original - so here you go...
This is the outside of the card: (black cardstock, white gel pen)
and this is the inside: (paper embroidery on white cardstock, white gel pen.)Original, at least!
Ddd