« March 2011 »
S M T W T F S
1 2 3 4 5
6 7 8 9 10 11 12
13 14 15 16 17 18 19
20 21 22 23 24 25 26
27 28 29 30 31
You are not logged in. Log in
Entries by Topic
All topics  «
3D paperwork
A - Z challenge 5
A - Z challenge 7
A - Z challenge round 4
A to Z challenge round 3
A to Z round 2
A to Z round 6
A-Z round 1
Around the House
Art Challenges
Artist Trading Cards
Backgrounds
Beads
Bible Journaling
Books
Boxes
Collage
Color Challenge
Coloring
cookbook
Die Cuts
Digital Projects
Digital Stamps
Drawing
Dry Embossing
Fabric Stuff
Fantastic Folds
Field Trip
Home Decor
How Does Your Garden Grow?
Hymnal Art
In The Kitchen
In the studio
Jewelry
Lettering
Links
Multi-Technique
Music to Work By
Musings
Nail Art
New Work
Online Class
Other Hobbies
Other Projects
Painting
Paper Embroidery
Paper Piecing
Photo
Pretty Paper
Quilting
Random
reading
Scrap Recovery
scrapbooking
Sewing
Sketch Challenge
Some Backlog
Stamping
Stencils
Stickers
Supplies
Teabag Folding
Techniques
Testing
tips and tricks
Tutorial
Web resources
Welcome to my Blog
Work By My Friends
workflow
Writing
Blog Tools
Edit your Blog
Build a Blog
RSS Feed
View Profile
Group One
In & Out of Studio 3D
Wednesday, 9 March 2011
Pop Up Words
Topic: Multi-Technique

ASSIGNMENT: make a card with a word pop-up inside

Never done that before! Let's try it!

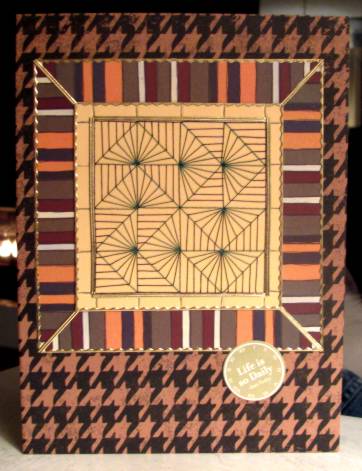
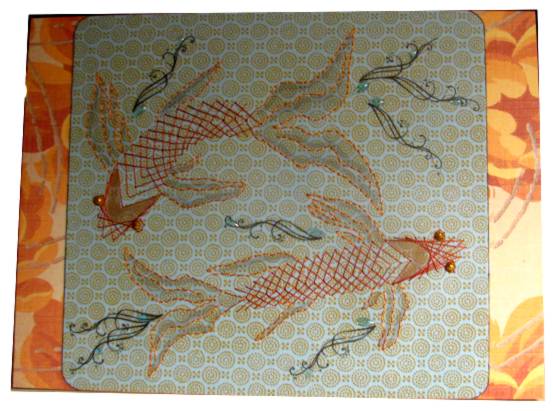
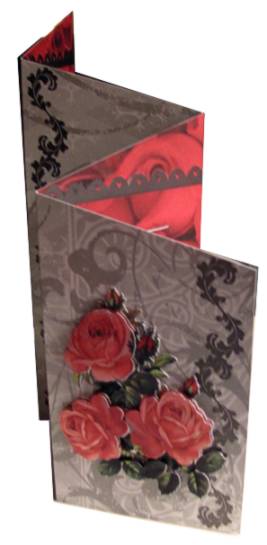
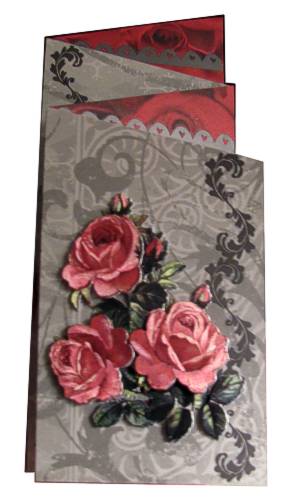
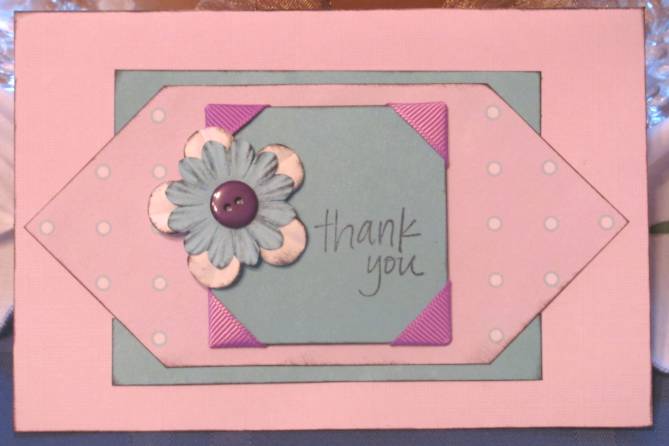
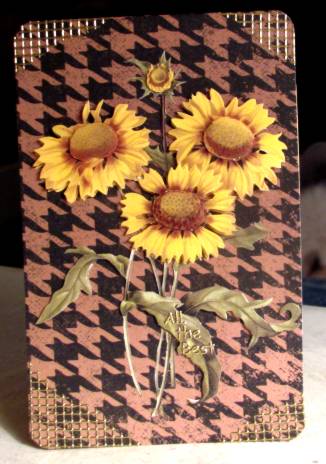
First you have to look at the outside. Pretty simple really, 3D sunflowers mounted on a houndstooth printed cardstock. I added gold peel-off text to one of the leaves. Then I added some peel-off 'mesh' to the rounded corners.

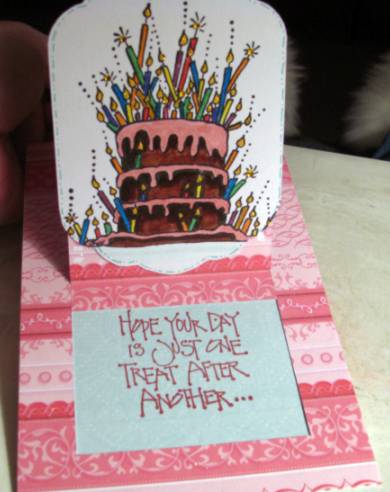
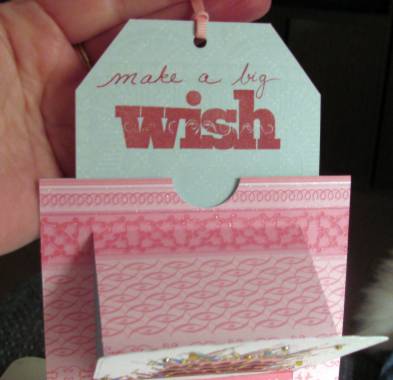
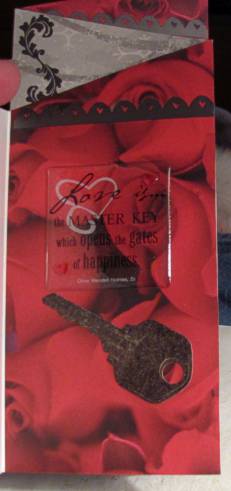
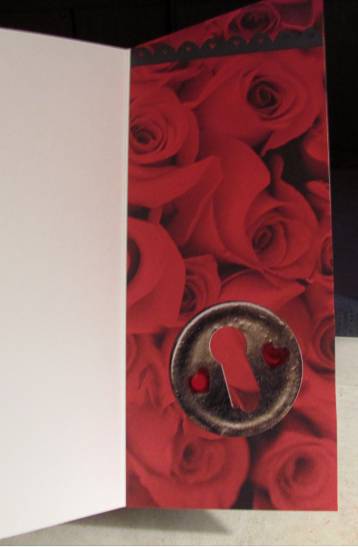
Now for the intended feature. I sketched the words out on paper until they were arranged so that there would be no 'dangling' parts at the center fold. The letters were then cut and a crease added at the top, bottom and center of the words.

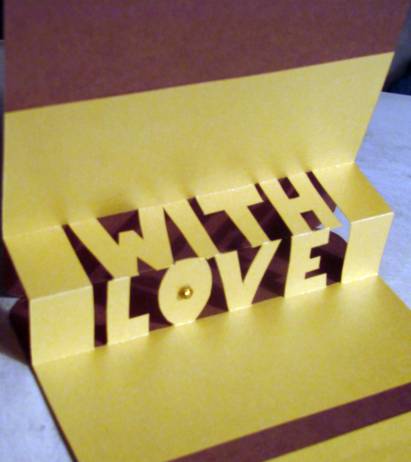
The top and bottom panels are glued inside the card and a panel was added for writing a greeting. I also added a golden orb to the center of the 'O'.

Ddd


Posted by studio3d@ccgmail.net at 6:00 AM PST
Tuesday, 8 March 2011
C is for Cupcake
Topic: Paper Embroidery

Have you figured out yet that I'm working my way through the alphabet in paper embroidery? Not in order, though!

For this image I stitched it in and then colored with pencils. I used a round stamp to fill in the background, masking where needed. Then I used a grey marker to shade around the cupcake.

I had a printed cardstock panel with built in swirls. I razored around the swirls and then tucked the cupcake panel behind them.

All that was left was to round the corners and mount to pink cardstock.

Ddd


Posted by studio3d@ccgmail.net at 6:00 AM PST
Monday, 7 March 2011
Q is for Quilt
Topic: Paper Embroidery

An online friend designed three 'quilt' patterns for paper embroidery. I stitched this one up with dark blue and dark green.

Mounting is really simple - striped scrapbook paper with mitered corners, trimming with gold peel-off borders, a printed cardstock background and one round text circle "Life is so Daily".

Ddd


Posted by studio3d@ccgmail.net at 6:00 AM PST
Sunday, 6 March 2011
F is for Fish
Topic: Paper Embroidery

I chose to stitch my goldfish pattern on an asian background. After stitching in two tones of golden thread I used Copic markers to shade the fish.

I used rubons to make some 'moving water' behind the fins and tails then attached some blue water droplets stickers to them. Glittery gold orbs were added for the eyes.

I rounded the corners of the panel and attached to a printed folded cardstock base.

Ddd


Posted by studio3d@ccgmail.net at 6:00 AM PST
Saturday, 5 March 2011
Tah-Dah!
Topic: Fantastic Folds

ASSIGNMENT: Make a surprise pop-up card (we were given directions)

I had never done this structure before but it went together nicely. I started with a stamped image that I had colored with markers and glittered. This was cut out with a Nestabilities labels die and used as the focal peice.

The card is constructed of a back panel, a sliding insert, and a split/folded front panel. The bottom of the open part of the front panel is attached to the sliding insert so pulling up on the ribbon collapses the front to reveal a stamped greeting inside.

An additional greeting is revealed on the panel top that is pulled up.

Ddd


Posted by studio3d@ccgmail.net at 6:00 AM PST
Friday, 4 March 2011
Oregon Ocean
Topic: Stamping

For a swap I needed to create a card with stamping on the theme 'Oregon Ocean'.

I stamped my sketch stamp of seashells and colored using watercolor pencils and an aqua brush.

I used a Cuttlebug frame empossing folder around the image and applied distress ink to enhance the lines. Punched swirls in blue are glued on to emulate waves. I rounded the corners and mounted on coral base.

Finally, I applied Stickles in appropriate colors to the wave caps, some of the frame and three of the shells.

Ddd


Posted by studio3d@ccgmail.net at 6:00 AM PST
Thursday, 3 March 2011
Playing With The Accordion
Topic: Fantastic Folds

Assignment: Make an accordion fold card


I already had the cardstock cut and folded - leftover from the skateboard card. I lined this one with rose-printed scrapbook paper and added 3D foil roses to the front panel.


Rubons make up the borders and flourishes

I used a thick acrylic text sticker andkey sticker on the first inside panel

The back panel has a keyhole anchored with two heart stickers


Ddd


Posted by studio3d@ccgmail.net at 6:00 AM PST
Wednesday, 2 March 2011
Weather Report
Topic: Photo

After our travel in the tropics we awoke our first morning home to a regular foggy daybreak. Here are a few views from the deck:


Awesome!

Ddd


Posted by studio3d@ccgmail.net at 6:00 AM PST
Tuesday, 1 March 2011
PORT: Aruba
Topic: Photo

City view from the ship: 


Love the architecture here:


Ddd


Posted by studio3d@ccgmail.net at 6:00 AM PST
Monday, 28 February 2011
PORT: Bonaire
Topic: Photo

View of the island from the ship:


You'd think this paint would be so loud it would keep you up at night! 

Again - lots of beautiful foliage and flowers:


Ddd


Posted by studio3d@ccgmail.net at 6:00 AM PST
Sunday, 27 February 2011
PORT: Grenada
Topic: Photo

The water views were spectacular. I found nothing in town to recommend it.


The flowers are beautiful wherever you go, though:


Ddd


Posted by studio3d@ccgmail.net at 6:00 AM PST
Saturday, 26 February 2011
PORT: Dominica
Topic: Photo

The most remarkable thing about Dominica is the lush greenery and the mist covered mountains.


The architecture ranges from grand to squalid - side by side.


Ddd


Posted by studio3d@ccgmail.net at 6:00 AM PST
Friday, 25 February 2011
Rock Stars
Topic: Paper Embroidery

IF YOU DO NOT LIKE IGUANAS,

DO NOT READ THIS POST!

THIS IS YOUR LAST WARNING!


Where the ship docks in St Thomas there is a sweeping curve of rocks lining the bay. The iguanas turn out in force to sunbathe on the rocks and to strike a pose for photographers.

Here are a few I found amusing:


They all think they're ROCK STARS!

Ddd


Posted by studio3d@ccgmail.net at 6:00 AM PST
Updated: Friday, 25 February 2011 11:15 PM PST
Thursday, 24 February 2011
PORT: St Thomas
Topic: Photo

The port of St Thomas is old and very crowded. It is also quite colorful.

LOVE the hair!


Ddd

Posted by studio3d@ccgmail.net at 6:00 AM PST
Wednesday, 23 February 2011
PORT: Puerto Rico
Topic: Photo

These are some random photos taken while we were in Puerto Rico:

These guys came SO close to tipping their sailboat over. It was a nailbiting display of seamanship - or folly.

I didn't realize until I reviewed my photos that I had taken pictures of churches in every port. I just love the architecture down there.

Ddd


Posted by studio3d@ccgmail.net at 6:00 AM PST
Tuesday, 22 February 2011
Goldfish Dish
Topic: Other Projects

The cruise ship has a ceramics painting station that they open for use 2-3 days for a couple of hours. You purchase the greenware and paint with glazes with your own design. They fire it and return it to you on the last day.

This time I chose to do a square dish and I painted it with goldfish. There are three tones of orange for the fish and two of blue for the water. White and black are used for accents.

Surprisingly, the dish only cost $1 more than the kit for making the cards. A much better value, I think.

Ddd


Posted by studio3d@ccgmail.net at 6:00 AM PST
Monday, 21 February 2011
Thinking Out of the Box
Topic: Fantastic Folds

Well, really nothing fantastic about this at all. One of the cruise activities was to learn to make a box... been there, done that. But with no cost involved I thought I'd go check it out.

Came in late, sat down and started folding away. "Wait," she says, "you'll need me to show you what to do." (Ummm, no!) So I kept on folding and she kept on instructing the rest of the group how to do it her way. She used the method where you cut the sides before folding the box and only provided decorative edge scissors! AAAAKKKKK!

When we were done I realized the top and bottom could not be nested without squashing the sides of the base. SOOOOO tacky.

Anyway, I ended up showing the instructor three things:

1) make the base paper 1/4 inch smaller in each direction so the lid will slide on.

2) Don't make those first folds across the middle, but rather MARK the middle. This way you dont have big creases across the center of your box.

3) Angle fold the 4 corners instead of cutting them and you have a box with all finished edges rather than cut corners that are weakened.

Here is the box I made:

Nothing special to look at but a good teaching tool and I had something to carry a few trinkets home in.

Ddd


Posted by studio3d@ccgmail.net at 6:00 AM PST
Sunday, 20 February 2011
Cruise Card 2
Topic: New Work

The second of my cards made from the kit of supplies:

I also inked all the edges of the pieces used for this card. My original touched on this one was the shape of the scrapbook paper (because of the corners I cut off for yesterday's card) and using bits of ribbon as 'photo corners' on the front panel.

I can't believe I PAID for these cheeseball supplies! It cost me $3.50 apiece to make these two cards.

Ddd


Posted by studio3d@ccgmail.net at 6:00 AM PST
Saturday, 19 February 2011
Cruise Card 1
Topic: New Work

The second project the cruiseline had available was making cards. Basically, we got a packet with 2 folded card bases, 2 buttons, 4 rhinestones, 2 scrapbook paper bits, 4 paper flowers, 2 rubons for the card back, a length of ribbon, and the use of two rubberstamps.

For my first card I cut corners off one of the scrapbook papers, inked the edges of everything with the black inkpad and layered it all with glue dots. For the front panel I stamped the greeting on it and then cut my popsicle stick (for applying rubons) into bits and used glue dots to make dimensional spacers for lifing the panel away from the backing.

I used three pieces of the ribbon to make 'leaves' for my flower.

Ddd


Posted by studio3d@ccgmail.net at 6:00 AM PST
Friday, 18 February 2011
Write This Down
Topic: Books

One of the cruiseline's craft projects offered is to decorate a blank journal. You get the journal, three sheets of cardstock, stickers, tags, ribbon, photo corners, and the use of a few rubber stamps.

I chose to be unconventional and used the photo corners on the cardstock and mounted it to the covers of the journal. Then I attached ribbon 'handles' to the unbound edge on both front and back. I tore out sections of the third piece of cardstock to use as travel labels, and attached tags to the handles.

The result was a 'suitcase' style journal.


I applied stickers and stamps to both sides for a bit more decoration, and a few of their paper-clips at the top edge.

Ddd


Posted by studio3d@ccgmail.net at 6:00 AM PST

Newer | Latest | Older