« February 2012 »
S M T W T F S
1 2 3 4
5 6 7 8 9 10 11
12 13 14 15 16 17 18
19 20 21 22 23 24 25
26 27 28 29
You are not logged in. Log in
Entries by Topic
All topics  «
3D paperwork
A - Z challenge 5
A - Z challenge 7
A - Z challenge round 4
A to Z challenge round 3
A to Z round 2
A to Z round 6
A-Z round 1
Around the House
Art Challenges
Artist Trading Cards
Backgrounds
Beads
Bible Journaling
Books
Boxes
Collage
Color Challenge
Coloring
cookbook
Die Cuts
Digital Projects
Digital Stamps
Drawing
Dry Embossing
Fabric Stuff
Fantastic Folds
Field Trip
Home Decor
How Does Your Garden Grow?
Hymnal Art
In The Kitchen
In the studio
Jewelry
Lettering
Links
Multi-Technique
Music to Work By
Musings
Nail Art
New Work
Online Class
Other Hobbies
Other Projects
Painting
Paper Embroidery
Paper Piecing
Photo
Pretty Paper
Quilting
Random
reading
Scrap Recovery
scrapbooking
Sewing
Sketch Challenge
Some Backlog
Stamping
Stencils
Stickers
Supplies
Teabag Folding
Techniques
Testing
tips and tricks
Tutorial
Web resources
Welcome to my Blog
Work By My Friends
workflow
Writing
Blog Tools
Edit your Blog
Build a Blog
RSS Feed
View Profile
Group One
In & Out of Studio 3D
Monday, 27 February 2012
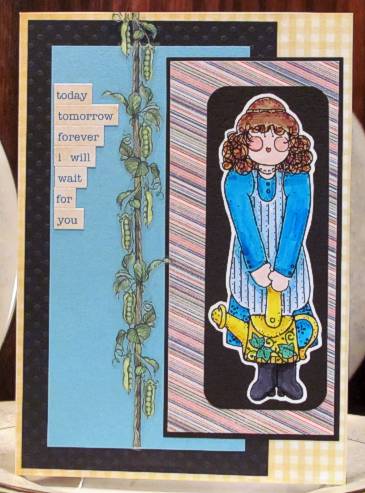
Today Tomorrow Forever
Topic: Stamping

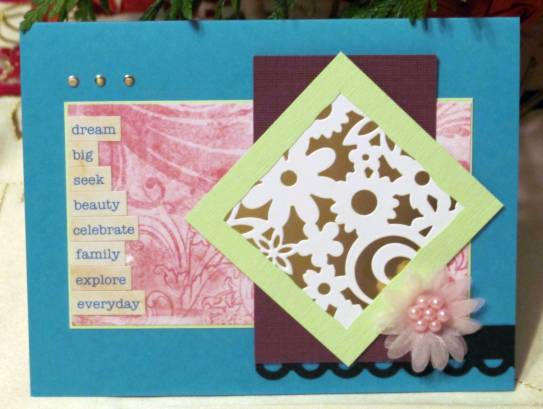
Another image from the stamp catalog colored with Copics. I love the shading I achieved on this one, don't you?

It is layered up with table scraps and black borders. By mounting it off center it allowed room for the 'beanstalk' clear sticker.


I used more of the cardstock stickers to create the phrase.

Ddd


Posted by studio3d@ccgmail.net at 12:01 AM PST
Sunday, 26 February 2012
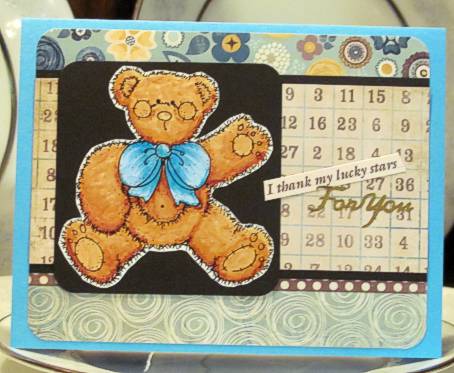
Lucky Bear
Topic: Stamping

Lots of table scraps form a striped background for this bear from the stamp catalog. I colored him with Copics and cut with a narrow border.


The text is a combination of a cardstock sticker and some peel-offs.

Ddd


Posted by studio3d@ccgmail.net at 12:01 AM PST
Saturday, 25 February 2012
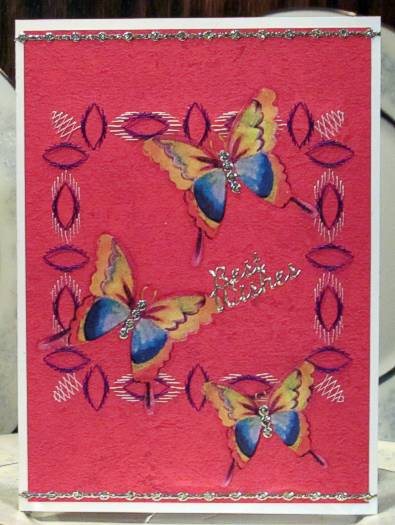
Threaded Frame
Topic: Paper Embroidery

I stitched up this border for a swap and then forgot to enter my name on the swap database! DUH! So now I get to keep it and add it to my collection of cards to use myself.

With a bonanza of new free pattern resources I collected from recommendations and internet searching I selected this one to create a border. I did NOT stitch it like the directions (as usual).

I decorated the border frame with three clear butterfly stickers and a couple of peel-off borders.


More of the peel-offs were added as the butterfly borders and a text greeting.

Ddd


Posted by studio3d@ccgmail.net at 12:01 AM PST
Friday, 24 February 2012
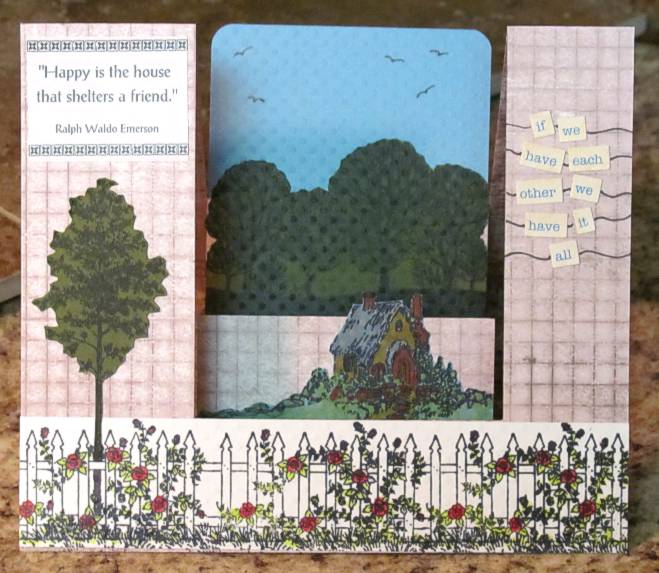
Step Into My House
Topic: Fantastic Folds

Challenge: Create a 'center step' card.

I have made these cards before and wanted this one to be something different. I started with rather plain cardstock with a rustic print, not too much detail. Then I went to town stamping elements for a scene I wanted to create. All the parts of the scene are stamped on the dot textured cardstock, colored and cut out for mounting.

For the front panel I stamped a rose-covered picket fence and grass on white and an evergreen tree on green.

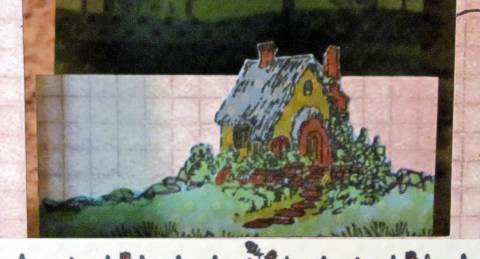
For the center panel I stamped a cottage on blue and added some more details to the right and left with a marker to make the scene the full width of the area of mounting. It also got some grass stamped at the base. When I mounted it, I let it extend above the fold of the card.

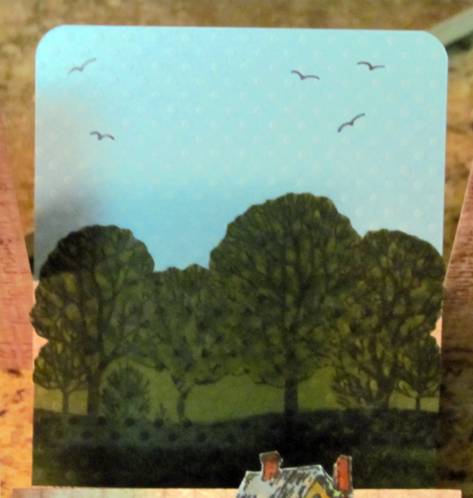
For the back panel I stamped the trees on green and colored them with more green I trimmed out the top along the tree line and added a blue panel behind it, rounded the corners, and drew in some birds with a marker.


Back on the front of the card I finished off with a text sticker on the left and more of the mix-a-phrase stickers on the right. These words were tied together with lines of marker.

Ddd


Posted by studio3d@ccgmail.net at 12:01 AM PST
Thursday, 23 February 2012
There In the Background
Topic: Stamping

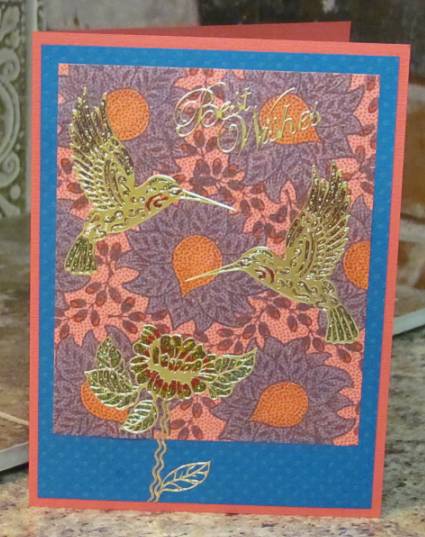
Challenge: Create a card with a stamped background.

I started with a piece of coral cardstock with micro-dots all over it. I stamped this with a flower and a branch in an over-all pattern and colored the stamping with Copic markers.

To this I added large gold peel-off stickers (these are 'Dazzles' I bought from Paper Wishes). I filled in the open areas of the stickers with Stickles.


After mounting to a blue dotted cardstock and a coral card base I added more peel-offs to the bottom to create a stem and leaf for the flower.

Ddd


Posted by studio3d@ccgmail.net at 12:01 AM PST
Wednesday, 22 February 2012
Lucky in Love
Topic: Fantastic Folds

Challenge: Create a Criss-Cross card

The whole design for this card popped right into my head so I just had to try and see if it would work like I imagined it. Success!

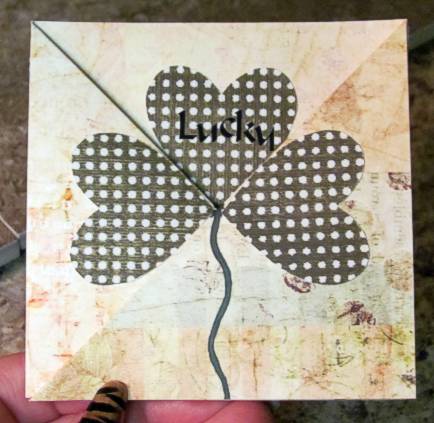
The goal was to create one view with the card closed that would magically transform when the card was opened. I started by folding a 12 x 4 strip of cardstock into thirds and then folding the two end panels on a 45 degree angle to create the criss-cross. Then I stamped and cut out three hearts in green and glued them each on a separate panel with the card closed to create a shamrock. The center one got a rub-on that says 'Lucky'. I also drew in a stem,refolded the card with the other panel on top and drew in a stem again. This way it is complete no matter which panel gets folded in first.
Here is where the magic happens... by pulling on those two angle folds the card opens to its original dimension and all three hearts are now upright! I stamped more of the same hearts, using red ink, making sure to keep them in the area that would be hidden when the card is closed.

I extended the 'stems' that appear on the front cover across the whole card so they now form a horizon line. Then I drew stems for all the hearts and drew and colored leaves as well. Finally, in the spaces around the center green heart I added rub-on words 'in' and 'love'.

So, with the card closed it is a shamrock that says 'Lucky' and when opened it is a garden of hearts that says 'Lucky in love'.
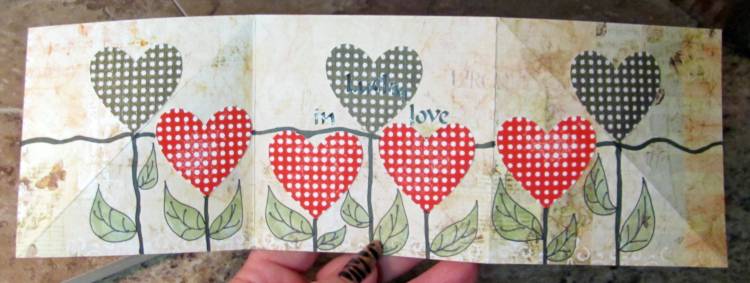

This was one of those stamps from the dollar bin at my local craft store.

Ddd


Posted by studio3d@ccgmail.net at 12:01 AM PST
Tuesday, 21 February 2012
Gate Fold Dream
Topic: Fantastic Folds

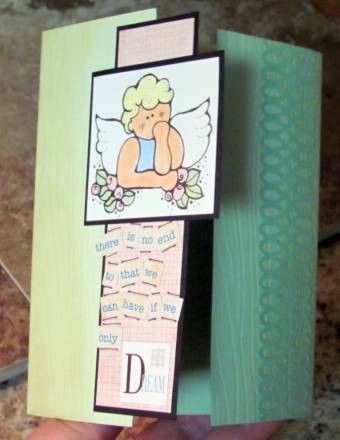
Challenge: Create a card with a Gate Fold. For those 'not in the know' this is a card which folds in equal amounts from each side so the edges meet in the center of the card.

I started with a green cardstock with a woodgrain texture and folded my card base. Then I used 'old paper' distress ink to bring out the woodgrain a bit. I bordered a piece of designer paper and a stamped/colored image each with a thin black border and layered them. These were adhered ONLY to the left panel so they swing away when the card is opened. I added a punched green border to the right panel.


The text is made up of tiny word stickers. These come on a sheet and can be mixed and matched to create phrases. It's kind of like playing with refrigerator magnet poetry. I added a few marker lines to tie the phrase together and finished with a single sticker from another set.

Here's a view showing the card opening.


Ddd


Posted by studio3d@ccgmail.net at 12:01 AM PST
Monday, 20 February 2012
Christmas Flake
Topic: Paper Embroidery

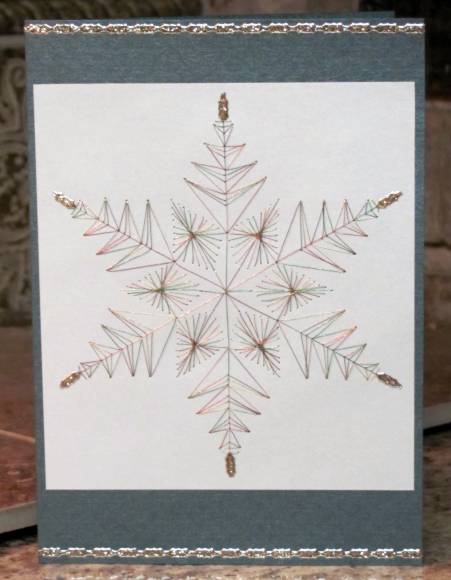
Another entry for the 2 Christmas cards a month challenge. This time I used a snowflake pattern pricked out on a shimmery teal paper. I found I had a spool of metallic thread in Christmas colors (red, green and gold) but was afraid it would be too bright on the pastel paper. Luckily, not so! The red comes off being more pink and the green is very soft as well.

I think the verigated thread adds more sparkle to the snowflake than a solid color would.


I mounted it on a green shimmer cardstock base and added 'diamond' peel-off borders to the top and bottom. Then, as a finishing touch, I snipped some of the border elements and added them as finials to the tips of the snowflake branches.

Ddd


Posted by studio3d@ccgmail.net at 12:01 AM PST
Sunday, 19 February 2012
Fancy Fingers
Topic: Other Projects

This is WAY off the normal project posting!

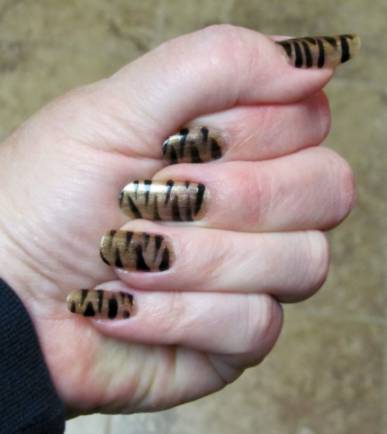
When I was on a recent cruise I treated myself to a manicure while in Costa Rica. I watched what products she was using and the techniques for painting fine details. It was a long-lasting product and I didn't need to re-do my nails for about 2 weeks. 

I have always done my own nails, one solid color. I decided to try to duplicate what she had done and was successful. Not only that but my manicure lasted another two weeks.

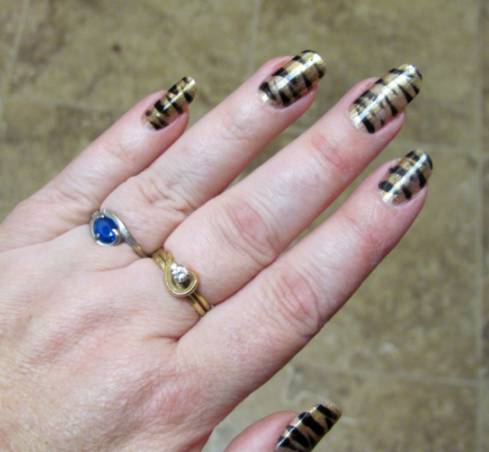
When It came time to do them again I remembered some nail painting I had seen on Dollar Store Crafts blog and decided to try out one of their projects. This is the result:

Yes, these are my own nails.


I used a clear base coat, a shimery bronze coat, a gold glitter coat, black with an ultra-fine brush, and a clear top coat.

Pretty bizarre, but OK for a short time.

Ddd


Posted by studio3d@ccgmail.net at 12:01 AM PST
Saturday, 18 February 2012
Itty-Bitty Ornaments
Topic: Paper Embroidery

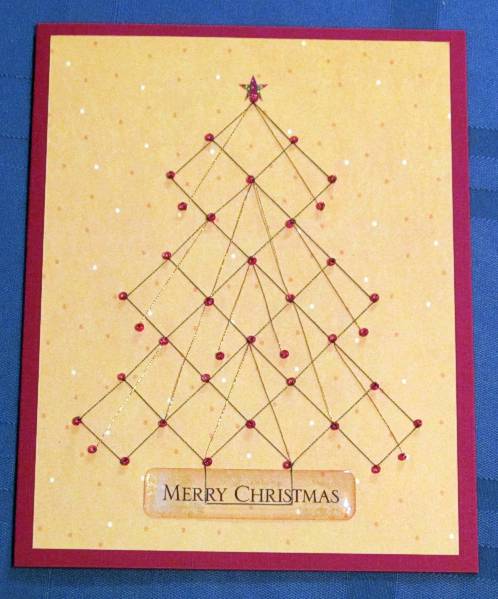
One of the groups I belong to has challenged us to make two Christmas cards (paper embroidery) every month so by the holiday season we will have 24 cards done. I started with this one from one of my patterns. I stitched on tiny red beads at each of the thread intersections and added a star sticker to the top.


I added a thick acrylic clear sticker to the bottom, over the stitched trunk.

One down, 23 to go.

Ddd


Posted by studio3d@ccgmail.net at 12:01 AM PST
Friday, 17 February 2012
In Sympathy
Topic: Paper Embroidery

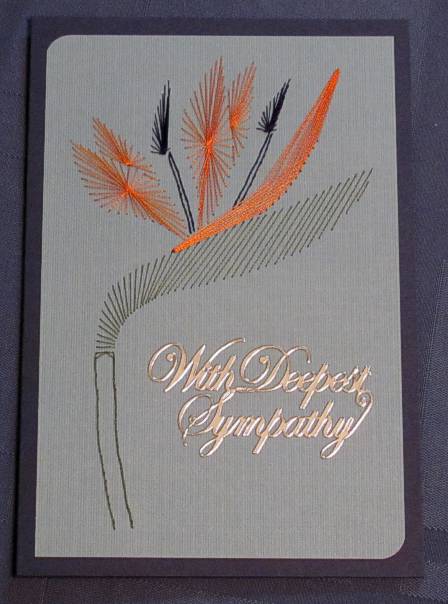
Challenge: Make a stitching to be used as a sympathy card.

What I don't like about making sympathy cards is that invariably I need one as soon as I make one. That was true of this one that went in the mail the day after I finished it. Sigh.

This is made from one of my own patterns and I added a large silver peel-off text sticker.

Ddd


Posted by studio3d@ccgmail.net at 12:01 AM PST
Thursday, 16 February 2012
Hummingbird Joy
Topic: Stamping

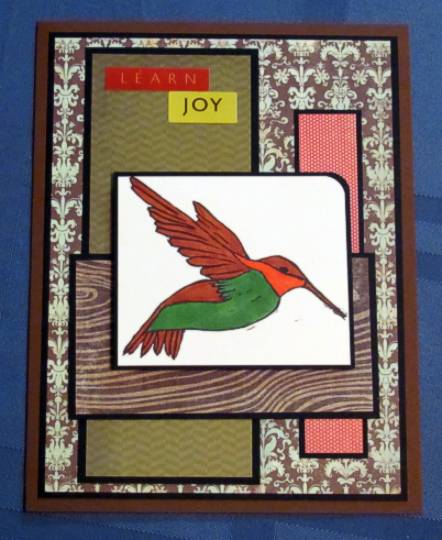
I had this hummingbird stamped and colored up for awhile and it had been set aside. I gathered up some pieces from table scraps and put black borders on all of the pieces.

The text is a couple of cardstock sticker from my stash.

Ddd


Posted by studio3d@ccgmail.net at 12:01 AM PST
Wednesday, 15 February 2012
Crowning Touch
Topic: Paper Embroidery

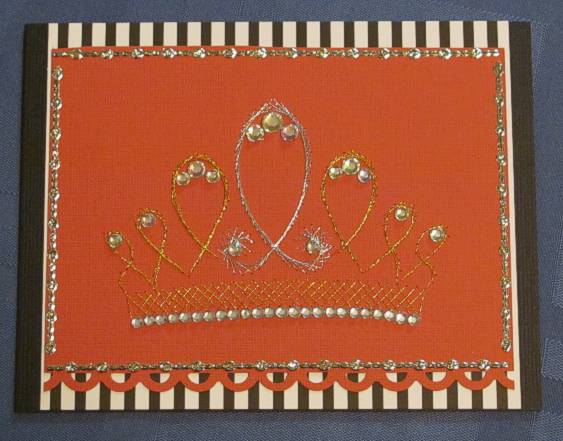
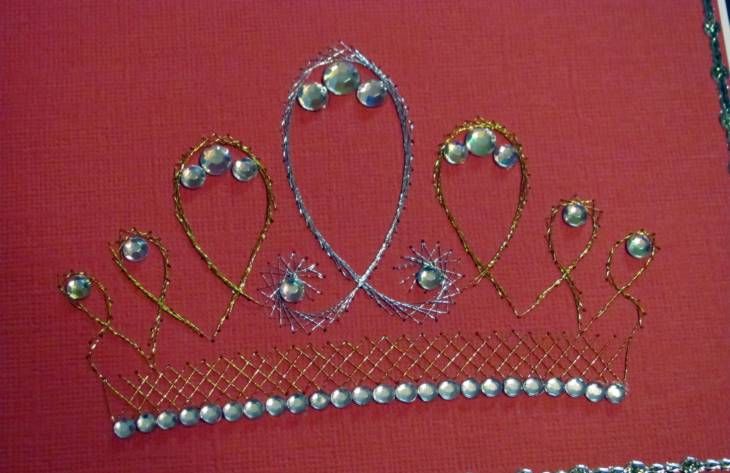
This challenge was to use a specific pattern - this crown.

I selected a coral cardstock and stitched with gold and silver metallic threads. The crown was then embellished with self-stick rhinestones in a variety of sizes. I used a scallop border punch along the bottom, added peel-off borders and mounted to black and white striped cardstock over a black card base.


As you can see, being metallic, it does not photograph well in a front view. It also throws the color off. In this close-up angle you get a better view of the stitching as well as a more realistic color rendition.


I like this pattern ans will probably use it again.

Ddd


Posted by studio3d@ccgmail.net at 12:01 AM PST
Tuesday, 14 February 2012
Going Round and Round
Topic: Fantastic Folds

Challenge: Make a Round Card

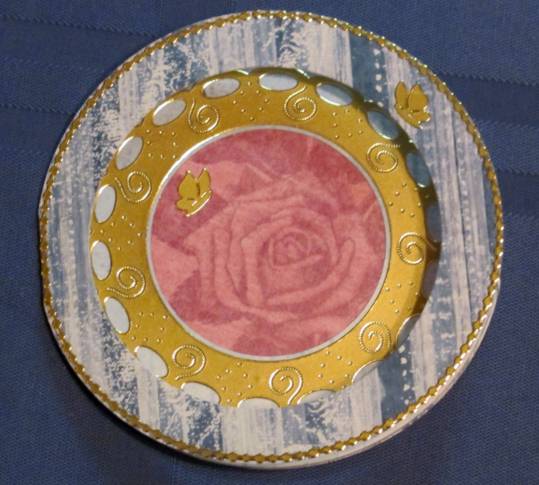
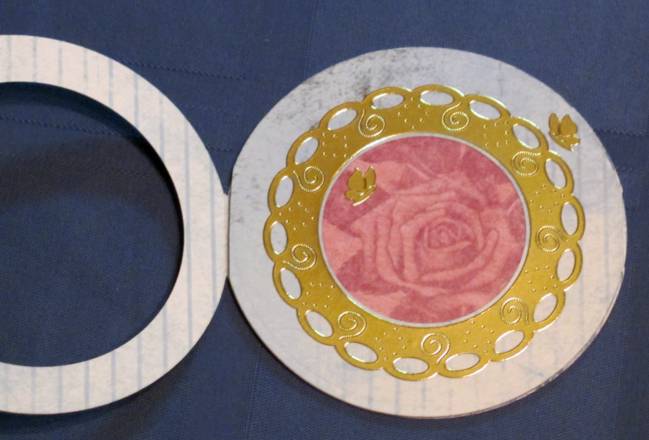
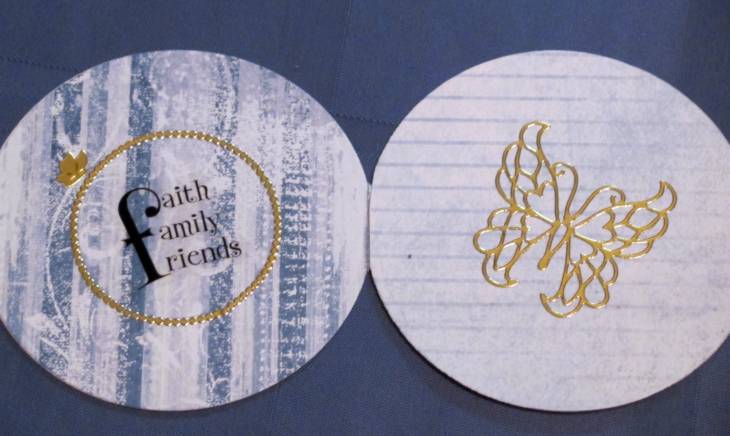
As soon as I read the challenge this idea popped into my head. I used a double-sided printed cardstock, multiple sizes of Spellbinders Nestabilities (round) and some images and gold peel-off stickers.

This is the front view with the card closed. The front is cut with an inner circle so the next layer shows through the aperture. I used a gold border around the outside edge and a tiny gold butterfly. It hinges on the left side.

When the first layer is opened this is the next view. This layer has a circle cut out and a rose-print mounted behind it. I added a gold medallion sticker as a border and two more tiny butterflies. This layer hinges on the right side.

When the second layer is opened this is the final view. I lined the back of the rose from view 2 and added a large gold butterfly. Then to the left side (which is actually the 'center' panel I added a gold border and a clear text sticker plus a final tiny gold butterfly.

Not sure whay I would use a card like this for but it does fulfill the requirements of the challenge.

Ddd


Posted by studio3d@ccgmail.net at 12:01 AM PST
Monday, 13 February 2012
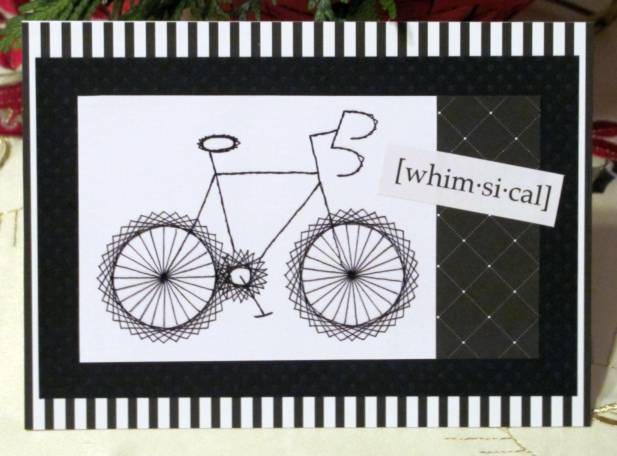
Right There In Plain Black and White
Topic: Paper Embroidery

Challenge: paper embroidery in black and white

I wanted to do something that would logically be just black and white and decided on this bicycle from a book I own. I stitched with only black threads on white cardstock.


I used layers of black and white scrapbook papers and then added a single text word sticker in black and white.

Ddd


Posted by studio3d@ccgmail.net at 12:01 AM PST
Sunday, 12 February 2012
Operation Write Home sketch 101
Topic: Sketch Challenge

Another sketch challenge from Operation Write Home:


...and my card:


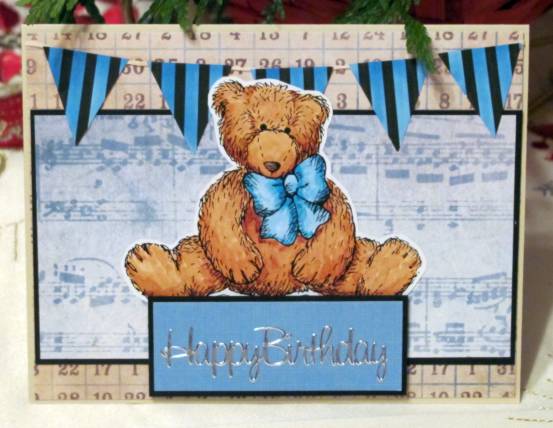
I used table scrapbook papers for the two background panels. The banner started as black and white stripe but I colored with Copics to match the bow on the bear. The triangle were cut and glued to scrappers floss. The bear is from the stamp catalog and colored with Copics. I used a peeloff greeting on the front panel and popped it up on foam tape. The whole thing is mounted to a kraft cardstock.

Ddd


Posted by studio3d@ccgmail.net at 12:01 AM PST
Saturday, 11 February 2012
Operation Write Home Sketch 100
Topic: Sketch Challenge

Here are a couple of cards I made for Operation Write Home from their 100th sketch. This is the sketch:


I used table scraps and cardstock stickers to create this one:


More table scraps, a stamped image and some rhinestone bling for this one:


The text is a peel-off sticker.

Ddd


Posted by studio3d@ccgmail.net at 12:01 AM PST
Friday, 10 February 2012
Easter Cross
Topic: Paper Embroidery

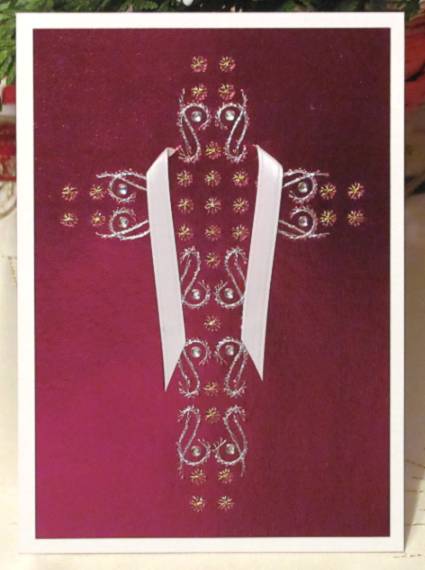
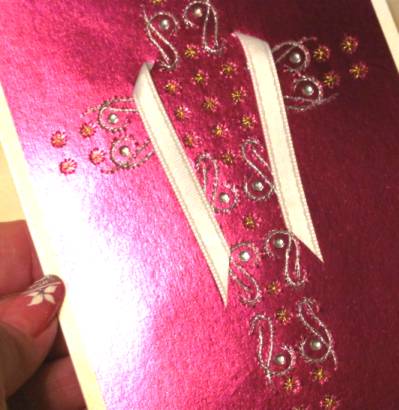
I started with a metallic finish purple cardstock and pricked out a cross pattern from a book I own. The scrolls are stitched in silver metallic thread and the stars are stitched in gold metallic. I added self-adhesive rhinestones in the scrolls and then made 45 degree cuts at the upper intersection and threaded white ribbon through as a drape.


The backing cardstock is shimmery silver/white. You get a little better view of all the shine here:


Ddd


Posted by studio3d@ccgmail.net at 12:01 AM PST
Thursday, 9 February 2012
Red Sails at Sunset
Topic: Paper Embroidery

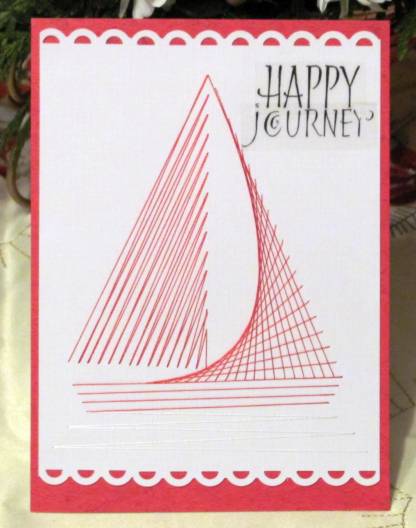
Challenge:paper embroidery in red and white

This pattern is actually made for string art but was easily translated into paper embroidery.  It stitches up very quickly, too. You can just barely see the white threads of the water.

I used a border punch at the top and bottom and layered on a folded red card base. The text is created with 2 clear stickers.

Ddd


Posted by studio3d@ccgmail.net at 12:01 AM PST
Wednesday, 8 February 2012
A Flutter of Thanks
Topic: Paper Embroidery

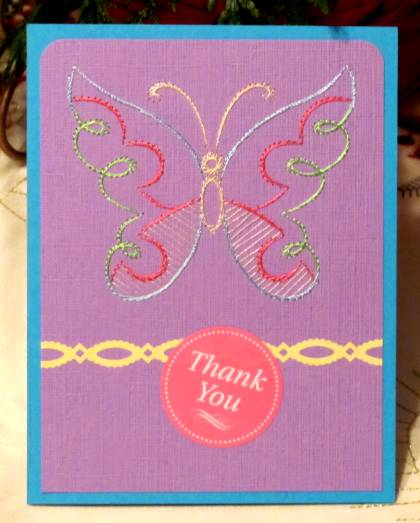
Challenge: paper embroidery butterfly

I just recently aquired this free pattern and was anxious to give it a try. I like it stitched up in multiple colors and added layers and trims to complement them.


Signs of spring??

Ddd


Posted by studio3d@ccgmail.net at 12:01 AM PST
Newer | Latest | Older