« July 2012 »
S M T W T F S
1 2 3 4 5 6 7
8 9 10 11 12 13 14
15 16 17 18 19 20 21
22 23 24 25 26 27 28
29 30 31
You are not logged in. Log in
Entries by Topic
All topics  «
3D paperwork
A - Z challenge 5
A - Z challenge 7
A - Z challenge round 4
A to Z challenge round 3
A to Z round 2
A to Z round 6
A-Z round 1
Around the House
Art Challenges
Artist Trading Cards
Backgrounds
Beads
Bible Journaling
Books
Boxes
Collage
Color Challenge
Coloring
cookbook
Die Cuts
Digital Projects
Digital Stamps
Drawing
Dry Embossing
Fabric Stuff
Fantastic Folds
Field Trip
Home Decor
How Does Your Garden Grow?
Hymnal Art
In The Kitchen
In the studio
Jewelry
Lettering
Links
Multi-Technique
Music to Work By
Musings
Nail Art
New Work
Online Class
Other Hobbies
Other Projects
Painting
Paper Embroidery
Paper Piecing
Photo
Pretty Paper
Quilting
Random
reading
Scrap Recovery
scrapbooking
Sewing
Sketch Challenge
Some Backlog
Stamping
Stencils
Stickers
Supplies
Teabag Folding
Techniques
Testing
tips and tricks
Tutorial
Web resources
Welcome to my Blog
Work By My Friends
workflow
Writing
Blog Tools
Edit your Blog
Build a Blog
RSS Feed
View Profile
Group One
In & Out of Studio 3D
Sunday, 22 July 2012
Potted Plant
Topic: Scrap Recovery

From the old stamp catalog I colored up all the elements of a little garden set and cut them all. Then I arranged them into a little vignette on a tag for this card front. Some bright striped paper and a brown cardstock complete the scene and I added some 3D elements to the upper left for balance.

The sentiment is a gold peel-off.

Ddd


Posted by studio3d@ccgmail.net at 12:01 AM PDT
Saturday, 21 July 2012
Hearts A Plenty
Topic: Stamping

I decided to work from the 'kits' I put together the other day and pulled out a bunch of them that use the stamped 'Love' heart image.

This one uses a variety of patterned papers. I unified them by using a gold metallic paint marker toadd a band to all of them. Two have rounded corners as well.

I had this 'postcard' tag  and decided to make the love heart the message. For the address portion I stamped 'hello handsome' in 'old paper' distress ink so it was a subtle image. I chose papers for the background that were more masculine.

I gave this heart some holographic pink brackets as 'wings'. A green card base coordinates with the green flourish tag and I added pink floral paper and a pink ribbon in the tag to go with the heart.

Some of the clock print was paired with a lined tag and a green heart. There was not enough contrast so I banded all the elements with dark green. A very tiny green houndstooth print is featured in the background.

All the colors of this card are keyed off the tag I selected. This gave me a pink, burgundy, and a seafoam green to work with. For a little interest I added a single white heart brad to replace the 'O' in one of the words.

These went together really quickly since I already had all the elements selected.

Ddd


Posted by studio3d@ccgmail.net at 12:01 AM PDT
Friday, 20 July 2012
Dreaming Mouse
Topic: Stamping

I just can't stop using this cute stamp! I had colored this one up and set it aside. But when I ran across this page from the scrapbooking page-a-day calendar I thought how fun it would be to feature him laying in the flowers. I used a bit of wiggly green trim to stand in for the grass and made a sun by punching a circle from yellow cardstock. I had lots of clouds stamped out on white card with raised dots so I trimmed out three of them to mount on the card.


I stamped the text on the sun and added dashed rays around it. Some fun, huh?

Ddd


Posted by studio3d@ccgmail.net at 12:01 AM PDT
Thursday, 19 July 2012
Blue on Blue
Topic: 3D paperwork

I used up more of the blue Hobby Dots as designed. This one makes a round frame which I had pricked out on a pink cardstock with doily print. I filled it with a dark blue floral 3D image and added a dark blue double-loop satin bow to the bottom. This is backed with a dark blue folded card base.


This is also a 5 x 6.5 card, like yesterday's.

Ddd


Posted by studio3d@ccgmail.net at 12:01 AM PDT
Wednesday, 18 July 2012
As Designed
Topic: 3D paperwork

The blue sheet of Hobby Dots is actually the one the book is designed for. So I tried a pattern using the dots as they were meant to be used. This one is two side borders and I filled the center with a frame-style foil 3D image. I love the effect of these. For the base card I used a brushed gold metallic so it would fit with the foil 3D.


I added a shimmery gold ribbon at the bottom and a prestamped sentiment at the top. The pattern makes a larger card than most I make but I trimmed it to fit envelopes I keep on hand. It is 5 x 6.5 inches.

Ddd


Posted by studio3d@ccgmail.net at 12:01 AM PDT
Tuesday, 17 July 2012
Hobby Dot to Dot
Topic: 3D paperwork

I had another run at doing a project from the Hobby Dots book my friend gave me. This, again, had to be done with a different page of dot shapes than those the pattern was designed for. I had a sheet of metallic finish pink shapes and I had already pricked out the design on pink... voila! Then I added some from the red sheet and went looking for a 3D element that would go along with these colors.

Only one really worked which made the 'decision' easy. I chose a dotted green cardstock to fill the other half of the page, coordinating it with the green of the leaves.


Crazy camera ... there is much more pink in the left side and the shine on the rose is because of the glossy finish.

I used one of the pre-stamped sentiments and backed it with a thin pink border.

Ddd


Posted by studio3d@ccgmail.net at 12:01 AM PDT
Monday, 16 July 2012
You Just Gotta Stick With It
Topic: Supplies

I thought I'd talk a bit about adhesives today. I realized that I had reached for three different products in the process of making one card and decided someone might benefit from knowing what choices I make for different parts of a process. So I wanted to share the products I have on hand and what I use them for. In some cases I am particular about the brand and in others I usedifferent brands of a similar product interchangeably.

LIQUID ADHESIVES:

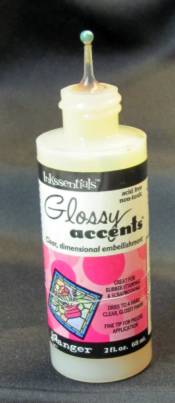
Without a doubt the liquid I use most is Glossy Accents. I use it as tiny dots to glue paper to paper, as a thin coat to glue acrylic to paper, as a top coat to seal glitter or create a shiny surface, and as a fill for 3D effect.

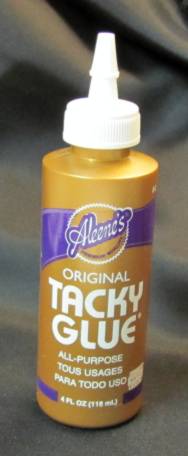
I use Aleene's Tacky Glue for adhering FlowerSoft to accent pictures. It also works pretty well when gluing cardboard and wood objects.

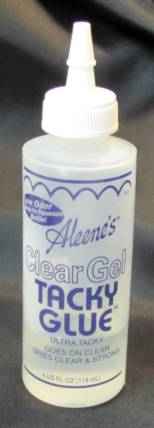
Aleene's Clear Gel Tacky Glue is also on hand. I think I got it to use with quilling but since I don't do quilling, I don't use this glue. Must be some other good use for it, though.

Also from the Aleene's line is Tack It Over & Over. I use this in a very thin coat on rubber unmounted stamps. This makes them cling to my acrylic blocks as well as to the CD cases I use to store them in. If it ever gets 'unsticky' it can easily be removed and reapplied.

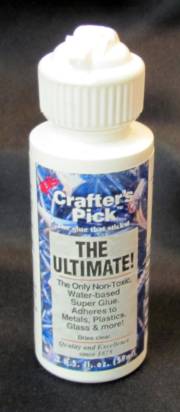
For heavy-duty adhesion I really like Crafters Pick The Ultimate. This is a super thick white glue that grips like nobody's business and creates a bond quickly. I used it to glue a canvas cover to a scrapbook and it works like a dream.


TAPES:

No sense in picturing the standards: Scotch Magic Tape which I use mostly to stick down my threads when doing paper embroidery, Scotch Removeable Tape which I use for taping patterns and templates to my cardstock, and Scotch Double Stick Tape which I use occasionally for a variety of applications.

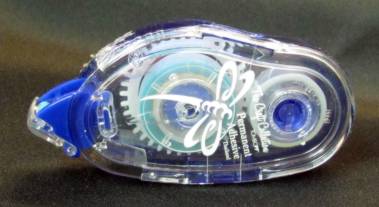
Mostly I use a 'snail' refillable tape runner for layering papers and cardstock on cards. I don't know what brand this is, I just buy 'the blue one' when I need refills! I have had other brands that did not have the staying power of this one.

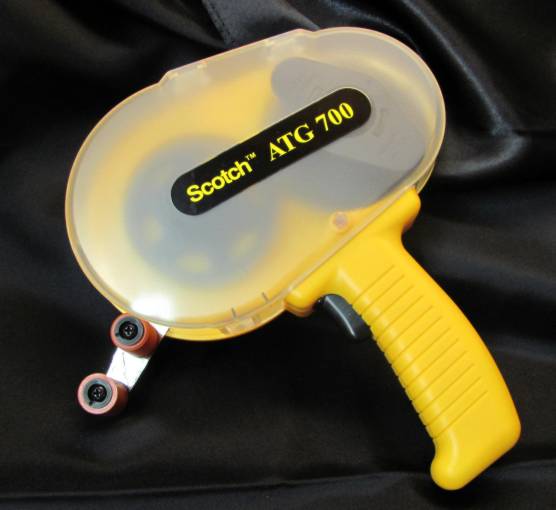
I bought an ATG gun on deep discount but picked up the wrong rolls of tape for it. So I haven't used the gun but I have used the tape right off the rolls. It is some powerful stuff.

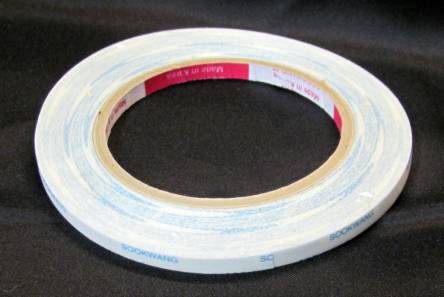
I use Scor-Tape when I want a dry adhesive that has gorilla-strength. I used this for adhering the papers to the wooden lighthouses and the cardstock would shred long before you could get the adhesive to let go.

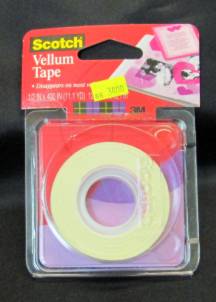
I have some vellum tape that is 'supposed' to not show under vellum and parchment. I am not impressed. You can still see it.


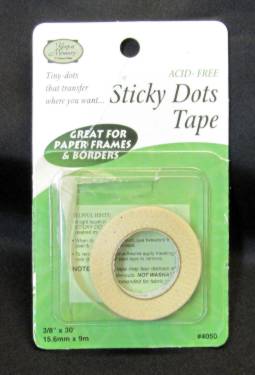
I also have some Sticky Dot Tape for the same uses. It is some better for vellum and parchment but I don't find it to adhere as well.


DIMENSIONALS:

Not Pictured: Clear Silicone  Kitchen and Bath Adhesive. This is used in little dabs (applied with a toothpick) to separate the layers of 3D images.

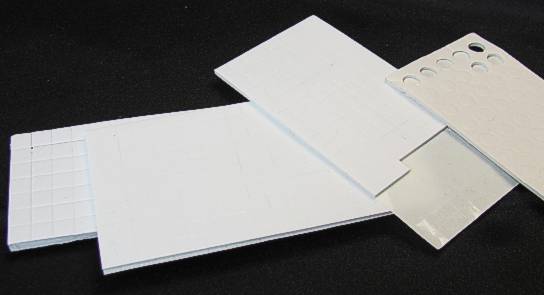
Foam squares are used for layering elements on cards, for making 3D pictures and for making focal pieces 'pop'. They come in varying thicknesses. Some are even round instead of square. The round ones waste so much product! I find they are all acceptable but preference goes to ones where the liner comes off easily, the foam is not as thick so layering does not raise your card to absurd heights, and ones that can be cut with scissors to make smaller pieces. There are some good ones that are about 1/4 inch square and 1/16 thick. Many of these have some from swaps or as gifts and they just keep getting put to the back of the supplies.

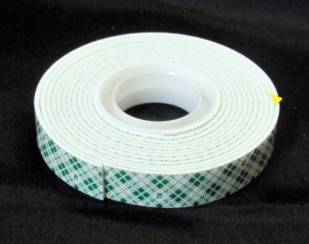
This is my REAL preference - 3M Foam Tape on a roll. It is thinner than many squares and can be esaily cut to whatever size needed. For a sentiment I can even just cut a strip of it.
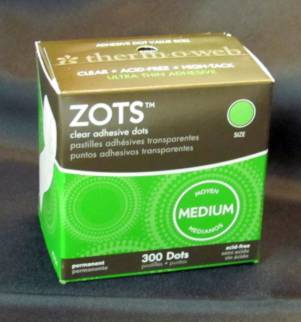
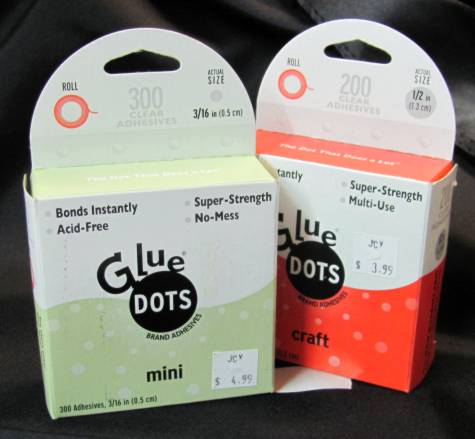

SPOT ADHESIVES:

I use two products interchangeably and have no problems with either. Zots is one brand and Glue Dots is the other. I get them in 1/2 inch, 1/4 inch, 1/8 inch and 1/2 inch that is thick for 3D.


OTHER ADHESIVES I USE:

Quickit Glue Pen is a new-to-me adhesive. It rolls off the pen like a gel roller ball so you can put the glue right where you need it. Unfortunately it takes some time to dry so you have to hold it in place to keep it from popping off. Goes on blue and dries clear so you can see where you are putting it.

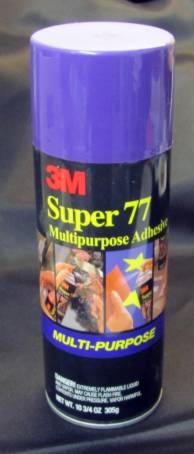
For a spray adhesive (when I need one) I prefer 3M Super 77. It does not come undone like other brands I have tried. WARNING: Despite what you see on TV craft and decorating shows you don't want to just spray this willy-nilly. It gets on everything and is a bear to clean up. Use a spray box to contain overspray, mask anything that it might get on where you don't want it and use sparingly - it stinks!

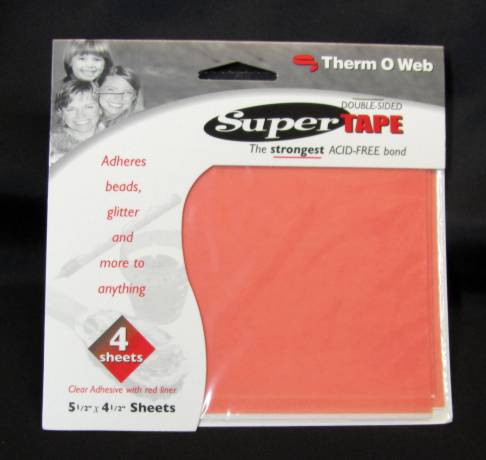
I have some sheet adhesive with a red liner front and back. This is great when you need super-grip with a strange shape. You can trim it to whatever shape you need and peel the liner to adhere it. It also comes in rolls in varying widths but I am all out of those.

And finally, the Xyron. I only have the one size although they have larger and smaller ones, down to sticker size. Mine will do a card front and that is big enough for me. I find this is my pest option for sticking down parchment or vellum as the adhesive goes over the whole thing so there are no lines or dots to show.

Ha! I almost forgot my glue gun. I have hot glue and cooler glue, large gun and mini. I mostly use the cooler mini. Actually, I mostly don't use my glue gun!


So there you have it. I can stick most anything to most anything else and be pretty sure of a secure hold.

Ddd


Posted by studio3d@ccgmail.net at 12:01 AM PDT
Sunday, 15 July 2012
Thank You, Two
Topic: Scrap Recovery

I've had a bunch of little bits-o-things laying around the studio waiting for me to get around to doing something with them. Some are from a page-a-day scrapbook calendar, some from the big stamp catalog, a few are stamped images, some jewelry pictures from a catalog, there are some die-cuts, etc. So I sat down and did all the trimming on all of them to make them ready for use. Then I found matching elements for them, usually a printed tag, and added matching printed cardstock from the table scraps bin. I found a piece of card base for each of them, folded these and tucked all the parts inside. Now I have a big stack of 'kits' to work on.

Once I got these kits set up I pulled out a couple of them and started cutting parts and assembling. 

For this one the element was the heart from the stamp catalog, colored with watercolor markers. The printed tag was backed with black to separate it from the background featuring three strips of paper. I added a ribbon snippet to the tag and pulled a pre-stamped sentiment to cut as a banner. It is popped up on foam tape.

For this one I started with the pie - a cut out image from the scrapbooking page-a-day calendar. I had the die-cut border in the 'use this soon' bin and backed it with a patterned block and a strip before mounting on a blue background with bitty stars. The sentiment is, again, from the pre-stamped bin and I added a single brad to repeat the image of the cherries on top of the pie.

Off to use up more of the 'kits'.

Ddd


Posted by studio3d@ccgmail.net at 12:01 AM PDT
Saturday, 14 July 2012
Jungle Wishes
Topic: Backgrounds

Finally, the end of the waxed paper backgrounds started way back when. This one is another of the brick patterns, mostly hidden by the other elements, though.

I added black-banded strips of dark red-brown and a green print. I pulled tones from these as well as the brick to color up the jungle image from the bargain stamp catalog. The Distress Markers worked great for this. Rounded corners softens the image and makes it fit better with the 'tag' element which came in the form shown. The image is popped up on foam tape.


The tag says "Wishes are the magic in our hearts that cause beautiful things to happen. --Flavius". In keeping with this theme I added "Best Wishes" to the card bottom using gold peel-off stickers.

Ddd


Posted by studio3d@ccgmail.net at 12:01 AM PDT
Friday, 13 July 2012
Billowing Sails
Topic: Backgrounds

Although not much of it shows, I started this card to feature the waxed paper background with woodgrain. Then I chose the three background strips. Thr dark red and the green both match stripes found in the center strip.

I pulled out my new Distress Markers and selected colors that were found in the other elements to color the ship (which was stamped and sent to me by a friend). I rounded the corners with a punch and used 'old paper' Distress Ink to tone the edges. Then I mounted it on a burgundy background and rounded those corners as well.


One of the pre-stamped sentiments was trimmed down and backed with burgundy before placement. Then I popped up the ship on foam tape.

Ddd


Posted by studio3d@ccgmail.net at 12:01 AM PDT
Thursday, 12 July 2012
Candied Poinsettia
Topic: Paper Embroidery

My friend who visited from The Netherlands brought me two spools of thread for paper embroidery. I decided to use both on this card and it looks like the poinsettia is made of spun sugar.

The flower portion is a verigated thread from white to burgundy in short repeats. For the leaves I used the thread that is made up of multiple pastels in yellow, green, blue and pink. I used a solid burgundy to stitch the greeting.

I mounted this on a burgundy card base and trimmed it with a scalloped gold peel-off sticker strip. Then I added Liquid Pearls dots in the flower center.

Ddd


Posted by studio3d@ccgmail.net at 12:01 AM PDT
Wednesday, 11 July 2012
We Three Trees
Topic: Paper Embroidery

I've stitched this set of trees up several time and I like it every time. I decided to place them on a patterned background this time and that required stitching with dark threads. I first stitched the stars  with a deep yellow and found they did not show up so I touched their threads with red marker which turned them into orange stars.

I used liquid pearls to make snowcaps on the branches and the ground (hard to see in the photo).

I hand-lettered the text on the background, using the pattern like a grid.

Ddd


Posted by studio3d@ccgmail.net at 12:01 AM PDT
Tuesday, 10 July 2012
Butterfly Kisses
Topic: Backgrounds

When I needed to make a background for round one of a serial swap card I fell back on the waxed paper technique. This time I worked directly on the surface of the folded card base. As each pressing creates two pieces I got to keep one for myself. This is what I used for today's card.

I inked it up with Mustard Seed distress ink. This rich yellow needed strong colors so I added a bold stripe and a block of patterned walnut brown. I rounded the corners to take the harsh edge off of all this color.

The little mouse sleeping in the tulip was trimmed close so he would fit with the background but not disappear. 


When I decided on the sentiment stamp the card called out for the adding of 'friends' so I chose three clear butterfly stickers with one resting on the mouse's nose.

How sweet.

Ddd


Posted by studio3d@ccgmail.net at 12:01 AM PDT
Monday, 9 July 2012
Sugarplum Wreath
Topic: Paper Embroidery

Oh My! I just fell in love with this printed scrapbook paper. When I ran across this pattern for a paper embroidery wreath I knew it would pair well with the paper if I used rich, dark colors. I was so right.

The pattern also calls for beads to stand in for the berries so I selected some with a candy-like finish.


I kept a long-card format and added sheer green ribbon, a cranberry folded card base and used a bit of cranberry to back the thick acrylic text sticker.

Perfect!

Ddd


Posted by studio3d@ccgmail.net at 12:01 AM PDT
Sunday, 8 July 2012
Same Colors - Different Day
Topic: Stamping

Yesterday's set was supposed to start with 8.5 x 11 cardstock but I had 12 x 12 on hand and cut them down. That meant I had blocks of those same colors left over but none large enough to use as card bases. I got out three cream card bases to build upon and chop, chop, chopped parts to use on them for cards.

First I stamped across the biggest piece with a floral silhouette. Then I used a large silhouette of a daisy on the square piece.This stamp is actually only 1/3+ of the flower so there was some judicious arranging to make a full flowerhead. Another of the small silhouettes was added to the extension backing and this was popped up on foam tape. I stamped a greeting on the long slip and tucked it behind the feature block.


I dropped the center block entirely from this next card and just went nuts with stamping the daisy silhouette including adding it to a contrasting piece. I used the same sentiment and really like this card.


When I saw how much 'chocolate' there was going to be in this arrangement I grabbed some sets of cupcake stamps to make a birthday card. YUM! I had a set of four little cupcakes and arranged them on the block to stamp all in a line. I stamped the group twice to reach all the way across the card. I stamped a larger cupcake on the big block and layered it with the apricot. Rounding the top corners sets off the sentiment. I used chalk ink to tint the edges. Then I created a multi-layer block to stamp the greeting and rounded the top corners of that, too. This layer is popped up on foam tape.


Scrappy, scrappy, scrappy and awesome, awesome, awesome!

Ddd


Posted by studio3d@ccgmail.net at 12:01 AM PDT
Saturday, 7 July 2012
Tri-Color With Sketch
Topic: Sketch Challenge

I went with a sketch for this set of cards (OWH#28) and a plan (from ClubScrap) that uses three 8.5 x 11 papers to plan-cut and mix and match. I started with a yellow/white dot, a brown antique print and an apricot fabric print. Here is the sketch:


By using the cutting diagram it allows for the large block and the long strip to be backed with an opposing color.

For the first one I started with the apricot base. The big strip in yellow dots was just too much so I turned it over and revealed a floral print! On the big block I used a brown chalk ink to stamp a silhouette daisy off the edges and added in some leaves from the same set. The same brown ink was used for the sentiment and this layer was popped up on foam tape. I added stamped leaves to the right ends of the skinny strips to tie them into the design.


For the second one I started with the brown card base. The skinny strips did not stand out from the big strip enough so I popped up all of them on foam. The brown center block had a round element on it so I stamped in that area with a clock face. This called for a particular sentiment and I kept it simple. I added foam tape so this piece would float over the skinny strips.


Then I got tired of the arrangement and used the skinny strips to band the big block. I also un-stacked the long strips and placed them side by side. This covers up a lot of the yellow dot paper and keeps it from taking over. I used brown chalk ink to stamp the house and added details with brown fine-line pen. These include bricks on the chimney, wood grain on the door and sills and clapboard siding.A stamped sentiment is the finish.


Three more done!

Ddd


Posted by studio3d@ccgmail.net at 12:01 AM PDT
Friday, 6 July 2012
Nine For The Troops
Topic: Collage

I ran across a multi-cut plan for using 3 sheets of 12 x 12 cardstock and 3 sheets of 8.5 x 11 cardstock (all coordinating) to mix and match parts and create 9 cards. I chose from a patriotic 12 x 12 pad for all the papers and just cut three of them down to meet the 8.5 x 11 size for half of them.

For this first one I used the blue paisley as the card base and added a red swirl and a blue and white star papers. I banded all of them with a white shimmer paper and also used my big star punch to create an added feature. I backed it with some of the red and stamped the striped star in the center. The star and the sentiment strip are raised up on foam tape.


On the next one I used a text background as the card base. Red and blue striped papers are mixed with the blue star and blue paisley. I added a holographic flag sticker to the largest block and used white gel pen to add stitches around the pieces.


Next up is a red card base on which I stamped blue striped stars. Then I used the same ink to stamp open and solid stars to the blue striped paper to totally change the look of it. I layered the red stripe over the blue star paper and used it as a place to stamp the sentiment. A couple of goldstar brads grace the sides and this layer is popped up on foam tape.


This one is more subdued and with all of the blue papers they just melted into each other. So I mounted all the pieces on red backing to define the edges. I used more of the red backing to stamp the sentiment and set it off with some white faux-stitching.


The blue star cardstock makes a great base card. I defined most of the decorative pieces with more of the red backing and reserved another red piece for stamping. For this I used a stamp that says "AEIO missing U". I stamped this once then masked multiple times to stamp just the AEIO part. The 'missing U' then got set off with white gel pen.


The blue paisley makes another appearance with stars and stripes. I used the blue star paper and colored in various stars with 'Spica' glitter pens in red, white, and blue. A sentiment stamped on the red stripe paper finished it.


With a blue striped base card I stacked varying lengths and widths of strips and outlined them with faux stitching in white gel pen. There's that sentiment again.


Busy, busy, busy - that is the look of this card. I started with the text background and added the blue star paper and a red swirl paper. I wanted to use more of the star paper so I punched big stars out of it and banded them in red to give them contrast. I popped them up on foam tape for more definition.


And finally, the super-simple one. I started with the red swirl base and added red stripe and blue star in a traditional flag arrangement. I had one long strip of the blue stripe so I trimmed it down to have only one stripe on each side, cut flag ends, stamped the sentiment repeatedly and then folded it into a banner. The center section is raised on foam tape while the flag ends attach directly to the background.


So there you have it. Nine cards from one cutting session with coordinating cardstocks. Every one is an original but they go together very quickly.

Ddd


Posted by studio3d@ccgmail.net at 12:01 AM PDT
Thursday, 5 July 2012
Christmas in July
Topic: Paper Embroidery

Another free pattern I snagged to make one of my 'two Christmas cards per month' in paper embroidery. Love this, but what a thread hog!

I kept the colors traditional for the holiday parts but had to make the goose in gray so it would show against the white background. I guess there really are grey geese, even though I have never seen one personally, so it is realistic enough.


I didn't put a greeting or sentiment on it but I suppose if a card arrives in mid-December sporting a goose with two wreaths, the recipient will probably figure out the occasion it is celebrating. LOL!

Ddd


Posted by studio3d@ccgmail.net at 12:01 AM PDT
Updated: Tuesday, 26 June 2012 11:07 PM PDT
Wednesday, 4 July 2012
Stars, Stars, Stars and Stripes, Stripes, Spots!
Topic: Backgrounds

HAPPY INDEPENDENCE DAY!

For today's entry I used the three waxed paper backgrounds with stars to make patriotic cards.

For this background I swiped the red and blue inks on in wide stripes at an angle. This makes a subtle pattern with movement. I added a strip of checked paper and a strip of ledger paper, both backed with dark red. A sentiment from the pre-stamped bin with corners rounded with a punch was added. Then I stamped a row of open stars on the ledger paper.

Then I pulled out the background on which I had spot-colored the stars with red ink and filled in the background with blue. This makes a much more iconic background. I used a similar layout to the last one but made the vertical stripe double layered and made the horizontal stripe go only partway across the width. This also became the place for the sentiment, which was ctamped specifically for this card (not pre-stamped)

This last background was my least favorite... to begin with. But after I stamped "thinking of you' with 4 different stamps I began to LOVE it!. The placement of the stars within the blue area made it so a single stamped star wal 'almost' centered. I just could not add any decoration to this that would make it better, so it is just the background and the stamping. I did learn my lesson from the day I stamped with ink that did not want to dry on the waxed paper background. So this has been stamped with Staz-On which is made for non-porous surfaces.


SALUTE!

Ddd


Posted by studio3d@ccgmail.net at 12:01 AM PDT
Tuesday, 3 July 2012
Fireworks Fingernails
Topic: Nail Art

The biggest problem with the Dollar Store nail polishes is their lack of 'staying power'. They began chipping off the nail ends at about 5 days and I just lived with the raggy look too long. But that means I get to play with nail art sooner than if I had used more 'expensive' polish.

I decided to stay with the red, white, and blue theme but this time I painted every other nail red or blue. I also had picked up a nail stencil kit from the discount bin at the store and thought I'd give that a whirl.

The stencil I chose to use looks a little like fireworks to me and has one large and two small bursts on the design. I used white nail art polish for the stamping and then added a dot of gold glitter polish to the large burst and a dot of silver glitter polish to the small bursts.


It's kind of like rubber stamping on your fingernails, but with polish. If you mess up with the stamping there is no way to fix it but to strip that nail and add all the layers from the base coat through the two coats of color, let it dry and stamp again. I had only one that could have used it but I'm just going to live with the two tiny smudges. After all, this polish does not last that long so I will get to play again soon!

Here's a closeup of a couple of nails.


Now I have my own Fireworks for the 4th!

Ddd


Posted by studio3d@ccgmail.net at 12:01 AM PDT

Newer | Latest | Older