« February 2013 »
S M T W T F S
1 2
3 4 5 6 7 8 9
10 11 12 13 14 15 16
17 18 19 20 21 22 23
24 25 26 27 28
You are not logged in. Log in
Entries by Topic
All topics  «
3D paperwork
A - Z challenge 5
A - Z challenge 7
A - Z challenge round 4
A to Z challenge round 3
A to Z round 2
A to Z round 6
A-Z round 1
Around the House
Art Challenges
Artist Trading Cards
Backgrounds
Beads
Bible Journaling
Books
Boxes
Collage
Color Challenge
Coloring
cookbook
Die Cuts
Digital Projects
Digital Stamps
Drawing
Dry Embossing
Fabric Stuff
Fantastic Folds
Field Trip
Home Decor
How Does Your Garden Grow?
Hymnal Art
In The Kitchen
In the studio
Jewelry
Lettering
Links
Multi-Technique
Music to Work By
Musings
Nail Art
New Work
Online Class
Other Hobbies
Other Projects
Painting
Paper Embroidery
Paper Piecing
Photo
Pretty Paper
Quilting
Random
reading
Scrap Recovery
scrapbooking
Sewing
Sketch Challenge
Some Backlog
Stamping
Stencils
Stickers
Supplies
Teabag Folding
Techniques
Testing
tips and tricks
Tutorial
Web resources
Welcome to my Blog
Work By My Friends
workflow
Writing
Blog Tools
Edit your Blog
Build a Blog
RSS Feed
View Profile
Group One
In & Out of Studio 3D
Saturday, 2 February 2013
Chinese New Year Kanji
Topic: Paper Embroidery

On assignment to make a card for Chinese New Year I REALLY wanted to stay away from the zodiac sign for 2013 so I used a Kanji 'good luck' pattern that I designed a few years back. I stitched it up in red on a metallic gold background and placed on a red folded card base.

I used gold peel-off stickers to add corners, borders and text.

Ddd


Posted by studio3d@ccgmail.net at 12:01 AM PST
Friday, 1 February 2013
Gracious Get Well
Topic: 3D paperwork

The card that started this whole 3D marathon was this one for the challenge ("make a card using 3D sheets"). This is another of the images that looks like a woodcut and includes the strip of lace with 'woven' ribbon. I placed this over a lattice background and added two butterflies from elsewhere on the 3D sheet.

The text is silver peel-off sticker.

Ddd


Posted by studio3d@ccgmail.net at 12:01 AM PST
Thursday, 31 January 2013
Chocolate and Peppermint
Topic: 3D paperwork

We had a challenge to make a card with brown and pink. This is one of my personal favorite color combinations so I had fun with this challenge.

I used 3D roses from the same sheet as yesterday and placed it on a tone on tone brown dot cardstock ofer a pink folded card base.


The text is a silver peel-off script. I used a butterfly from a set of 3D stickers rather than from the 3D image sheets.

Ddd


Posted by studio3d@ccgmail.net at 12:01 AM PST
Wednesday, 30 January 2013
A Bouquet of Thanks
Topic: 3D paperwork

Well, with these diecut 3D images that just get popped out (no cutting!) a complementary patterned background and a colored card base for framing these cards have really been coming together fast.

Today I selected a lacy diamond background in gray over a pink card base.

The butterfly was the only thing with a touch of blue so I used Copics to color a silver text peel-off before putting it on the card.

Ddd


Posted by studio3d@ccgmail.net at 12:01 AM PST
Tuesday, 29 January 2013
An Elegant Thank You
Topic: 3D paperwork

I pulled out a second sheet of 3D images to work with. These are more photographic than the last ones. I built today's white roses on a patterned aqua background and mounted that on a yellow card base to match the butterfly image.


The text is a silver peel-off greeting that I colored with Copic marker (yellow) before adhering.

Ddd


Posted by studio3d@ccgmail.net at 12:01 AM PST
Monday, 28 January 2013
Congrats, Congrats, Congrats
Topic: 3D paperwork

This rose spray is from the same 3D sticker sheet as yesterday. they have a woodcut feel to them and look very old fashioned. I tried to reinforde that by using more of the cardstock sticker trim, this time on  apricot card base.

The text is diecut from irridescent cardstock that matches the sticker trim borders.

Ddd


Posted by studio3d@ccgmail.net at 12:01 AM PST
Sunday, 27 January 2013
Merci
Topic: 3D paperwork

I pulled out some 3D sheets for a challenge and ended up making more than I needed to for fulfilling the assignment. So that gives me some shares for the next 6 days! Enjoy...

This one is built upon a diecut medallion in 3D. I used a clear sticker to place the text and added the butterfly from another part of the 3D sheet. The background is the front of the lavender folded card base. to this I added three rows of cardstock border trim.

I added some pink 'dew drop' stickers in the trim and also added a couple to the centers of the roses.

Ddd


Posted by studio3d@ccgmail.net at 12:01 AM PST
Saturday, 26 January 2013
We've Been Framed
Topic: Techniques

As a follow-up to yesterday's introduction of the embossed tape technique, I promised to show the cards I made with the tape I created.

I used the red and gold tapes to frame out a sticker with red and yellow in it. I trimed around it and rounded the corners. I used a horizontal band of gold cardstock to pick up the gold in the embossing and cut a flag end on the right. A printed background of text (love) was layered with a red hexigon and a black/white chevron. Red and yellow layers around the frame and a gold peel-off greeting finish it up.

I used another of these little girl stickers for the second card, framing it with the green and silver tapes. I built a card base for it with yellow and green topped with black pinstripe and silver. The silver has a textured stripe on it. I cut a pre-stamped greeting strip with flag ends on both sides and curved it for interest. The center is popped up on foam but the ends are flush with the background. I echoed the flowers in the sticker with three white paper flowers and added yellow rhinestones to the centers.

With the use of metallics in the layering papers the metallic embossing really stands out.

Ddd


Posted by studio3d@ccgmail.net at 12:01 AM PST
Friday, 25 January 2013
Really Tacky Embossing
Topic: Techniques

The online class I am taking this month started out with a technique for embossing on double-stick tape. The tape and liner (I'm using Scor-Tape) are stuck down to a non-stick craft mat. A bit of the liner is peeled up and embossing powder is sprinkled on the exposed tape.

You can mix powders so I did one of red and gold with distinct areas and one with them combined. I did the same with a green and silver combination. The powders are pressed into the sticky and the extra brushed away.

Then the heat gun is used to emboss the powders. When they are cool the tape can be peeled up and you have a sticky strip of embossing.


The one that is second from the top is the one I used yesterday behind the 'Celebrate' diecut. I used two strips side by side for a wider block.

I will use the remaining tape on projects over the next few days.

Ddd


Posted by studio3d@ccgmail.net at 12:01 AM PST
Thursday, 24 January 2013
Golden Celebration
Topic: Stickers

I picked up the fantastic set of 3D Susan Branch stickers (K & Company) the other day and wanted to use them right away. I created the backing for the Celebrate diecut with an embossing technique that I'll share tomorrow. I learned it in the online class I'm taking 'Creative JumpStart'.

I arranged the stickers and embossed panel on shiny gold cardstock and rounded the corners.

A yellow folded card base coordinates with the butterfly stickers.

Ddd


Posted by studio3d@ccgmail.net at 12:01 AM PST
Wednesday, 23 January 2013
Basic Shapes
Topic: Stickers

Here's another of the clear stickers of framed girls. I used only basic shapes (heart embossed background and striped paper) to continue the graphic look started with the tiny checks and dots in the sticker. I wrapped and tied red twine around the black strip and cut the text with a die.


The blue from the sticker is echoed in the fine border showing from the folded card base.

Ddd


Posted by studio3d@ccgmail.net at 12:01 AM PST
Tuesday, 22 January 2013
Beautiful Inspiration
Topic: Stickers

Today's card is a repeat of the ballet girl stickers. I gave this set pink distressed circles and overlapped them over striped paper. I cut off the right edge before mounting on a pink card base and then used a pearlized border sticker strip along it.


The leotards were, again, filled with Pearl Pen - white this time, and the text is created with Tim Holtz word stickers.

Ddd


Posted by studio3d@ccgmail.net at 12:01 AM PST
Monday, 21 January 2013
You Go Girl
Topic: Stickers

I liked the outline stickers of ballet girls that I made last week and decided to use them again since I had more on the sheet. I wanted them to really be front and center so I mounted them each on a punched circle and distressed the edges before grouping them closely so the grid marks were all continuous between them.

I popped the group on foam tape over a Spellbinders label shape and a striped paper.

The lighting is not so good on this but you can see that I filled in the leotards with pink Pearl Pen.

The text is created with word stickers from Tim Holtz.

Ddd


Posted by studio3d@ccgmail.net at 12:01 AM PST
Sunday, 20 January 2013
Truly Amazing Kid
Topic: Stickers

These little framed girls in clear stickers are so cute. They remind me of Mary Englebreit but they are not. I had pulled out the two black papers to use with this one and then had to find some way to pull the other colors into it. I went with a red border and red rhinestones to go with her hair bow. Then I created the flags by stamping individual parts of a phrase so they could be cut out separately.

The only color not repeated is the yellow of her hair but I think that draws attention back to her.

Ddd


Posted by studio3d@ccgmail.net at 12:01 AM PST
Saturday, 19 January 2013
Drive, Fly, Sail
Topic: Stickers

Some little boy will love getting this card from mom or dad overseas. I started with the sticker - as with all those I have been making lately - and pulled papers and cardstock to match. The cream piece was too plain so I used a text stamp to create a background on it. (How can I NOT have any dark blue ink pads? This one really comes off looking purple.)

I used a stamp and black ink to create the caption at the top.

Ddd


Posted by studio3d@ccgmail.net at 12:01 AM PST
Friday, 18 January 2013
Take a Peek
Topic: Stickers

I usually don't have a lot of use for 'baby' stickers but have some in my files anyway. I thought there might be some soldier who would want to send a card to a real little one at home so I pulled out this clear sticker. I put it on a patterned paper with a scrolled corner so he had a place to rest.

I used my letter punches to create the phrase from the same paper as backs the side borders.

To line up the letters I placed a strip of clear removable tape sticky side up on a grid mat. Then I used the grid to place the letters and then applied glue to the letters, flipped the tape over and lowered the letters to the card front. When the glue was dry I peeled off the removable tape.

I used rhinestones for the dashes in 'peek-a-boo' and a heart rhinestone in the word 'love'.

Ddd


Posted by studio3d@ccgmail.net at 12:01 AM PST
Thursday, 17 January 2013
Tumbling Gymnasts
Topic: Stickers

I like stickers that can be combined to create a logical scene. Such is the case with the sheet these little gym rats came from. I chose the one doing a headstand just for fun and then added the two bending ones to surround her. I used three patterned papers with colors from the bears and created a border underneath them with washi tape with a musical print.

The text is a large holographic sticker.

Ddd


Posted by studio3d@ccgmail.net at 12:01 AM PST
Wednesday, 16 January 2013
You're So Tweet
Topic: Stickers

Back to the kids' cards made with stickers...

These 'Tweety' stickers came on a sheet with a pink plaid background. I cut pink circles for each of them and then created a setting for the using solid and patterned papers from the scrap bin. The three circles are all popped up on foam tape.


The text is created with sticker dots and white rubons. The apostrophe is created with a small rhinestone with a tail of green marker.

Ddd


Posted by studio3d@ccgmail.net at 12:01 AM PST
Tuesday, 15 January 2013
Make-Over
Topic: Sewing

Back in about 1978-9 I got tired of my wardrobe and decided to replace some clothes and use the old ones to recycle into new outfits for my daughter. There were quite a few of them but the only one I found evidence of in the old photo files was this transformation from 'mom jeans' to toddler overalls.

I kept the structural elements wherever I could to create the styling around them (front tucks, waistband, button closure, zipper) and used the parts that I cut away to add new elements as needed (shoulder straps).

I can't believe I had enough foresight to take a 'before' picture:


As well as an 'after' picture:

Fresh out of my degree in Clothing, Textiles and Design and THIS is the project I chose to memorialize! LOL!

Ddd


Posted by studio3d@ccgmail.net at 12:01 AM PST
Monday, 14 January 2013
Woven Falls
Topic: Other Hobbies

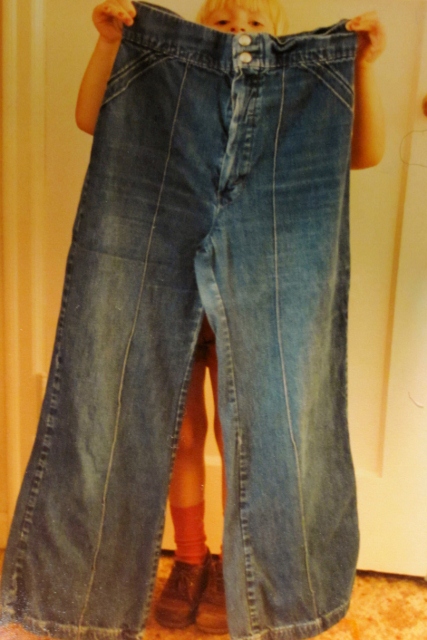
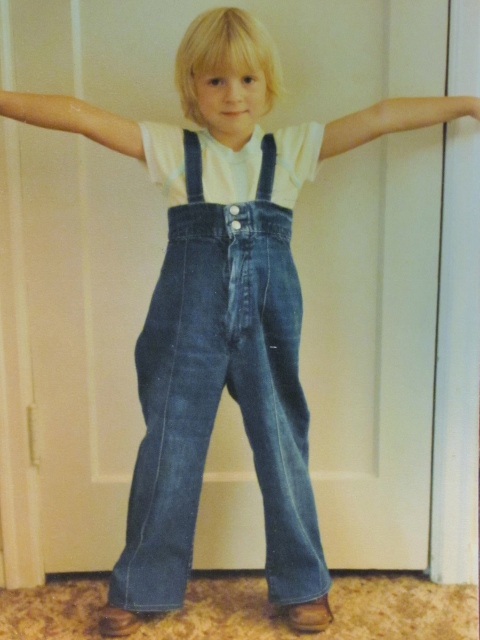
Oh, the joy of looking through huge boxes of old photos with adult children! Many memories, laughs and stories later, I pulled out a couple of art projects from 'w-a-a-a-y' back to share with you.

More than 30 years ago I made this wall hanging for my folks. It is an image of Multnomah Falls in Oregon. I wrapped a metal hoop with yarn then used a needle to string a warp of yarns vertically. This became the base for a tapestry weaving for the background. The falls themselves are in freefall made of a slub yarn. The trees are made in a rag rug style by tying tufts of yarn onto the base and then trimming them to shape. The bridge - an iconic part of the falls view - is crocheted.

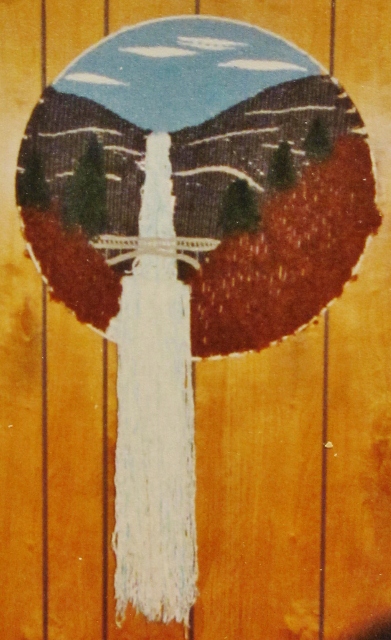
Sorry about the quality of the photo as it is a digital pic of a printed snapshot.

I used to do a lot of weaving back in the 70's and may show some more of those projects along the way. I still have a few of them after all these years. I still have my floor loom, too, but haven't had a warp on it since about 1983!

Ddd


Posted by studio3d@ccgmail.net at 12:01 AM PST

Newer | Latest | Older