« March 2013 »
S M T W T F S
1 2
3 4 5 6 7 8 9
10 11 12 13 14 15 16
17 18 19 20 21 22 23
24 25 26 27 28 29 30
31
You are not logged in. Log in
Entries by Topic
All topics  «
3D paperwork
A - Z challenge 5
A - Z challenge 7
A - Z challenge round 4
A to Z challenge round 3
A to Z round 2
A to Z round 6
A-Z round 1
Around the House
Art Challenges
Artist Trading Cards
Backgrounds
Beads
Bible Journaling
Books
Boxes
Collage
Color Challenge
Coloring
cookbook
Die Cuts
Digital Projects
Digital Stamps
Drawing
Dry Embossing
Fabric Stuff
Fantastic Folds
Field Trip
Home Decor
How Does Your Garden Grow?
Hymnal Art
In The Kitchen
In the studio
Jewelry
Lettering
Links
Multi-Technique
Music to Work By
Musings
Nail Art
New Work
Online Class
Other Hobbies
Other Projects
Painting
Paper Embroidery
Paper Piecing
Photo
Pretty Paper
Quilting
Random
reading
Scrap Recovery
scrapbooking
Sewing
Sketch Challenge
Some Backlog
Stamping
Stencils
Stickers
Supplies
Teabag Folding
Techniques
Testing
tips and tricks
Tutorial
Web resources
Welcome to my Blog
Work By My Friends
workflow
Writing
Blog Tools
Edit your Blog
Build a Blog
RSS Feed
View Profile
Group One
In & Out of Studio 3D
Tuesday, 12 March 2013
Don't Cross this Line
Topic: Supplies

To mark the critical lines on my rulers for the current project I have mainly used blue painters tape, which blocks out the view below it or I have marked on the non-print side of the ruler with Sharpie marker, which is hard to see when used on darker fabrics (it can later be removed with rubbing alcohol)

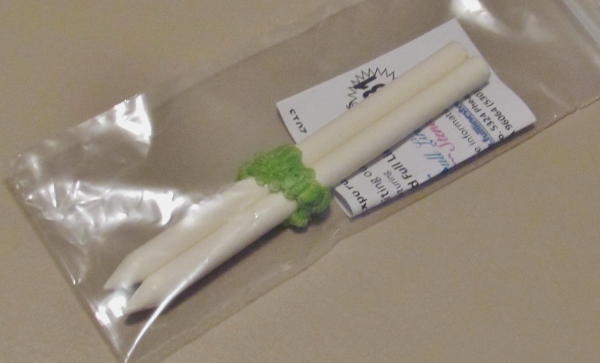
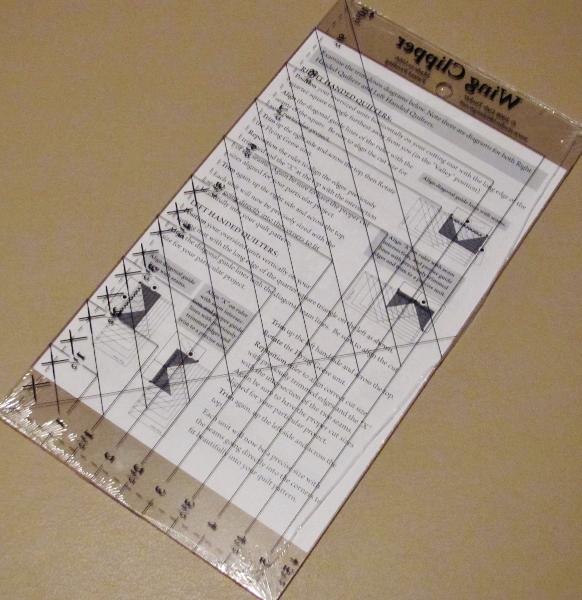
At the Sewing Expo I saw demonstrators using GlowLine tape to mark their rulers. Makes it a snap to line up the right rule line over and over without error - and you can see right through it.

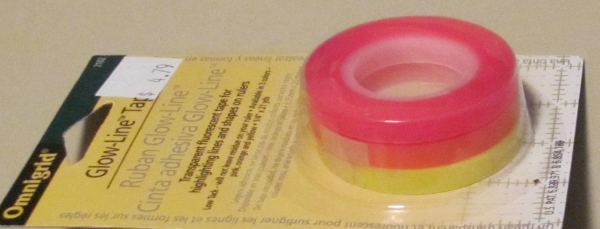
As you can see the package comes with pink, orange and yellow tapes so you can easily find one to use against any fabric.

Ddd


Posted by studio3d@ccgmail.net at 12:01 AM PDT
Monday, 11 March 2013
Make Your Mark
Topic: Supplies

Most of the quilting I have done is A) stitch in the ditch B) totally random like stippling or C) outlining a motif on the fabric. I have done a couple where I needed to mark the fabric to free-motion stitch and have had varied success with different methods of marking with disappearing pens, erasable pencils and stitching through printed papers.

I decided to pick up these marking sticks. They are very waxy feeling and supposedly disappear completely when passed over with a steam iron.

A standard pencil sharpener can be used on them to maintain a point.

Ddd


Posted by studio3d@ccgmail.net at 12:01 AM PST
Sunday, 10 March 2013
Rounders
Topic: Supplies

Since I started quilting I have been using this rotary cutter

Like many of the other rotary cutters cuts are made by pressing down on the blade which pushes the safety rim (the blue circle portion) out of the way. I have found though that when cutting through stacks of fabric (say 6 layers and up) the blue safety rim rides along the fabric causing it to bubble along the edge you are cutting and can mis-align it. If you are cutting with the created strips off the ruler this can be not so much of a problem. But if the measured parts are under the ruler then the layers becoming mis-aligned are those you need to cut next.

Well I decided to look for another type of rotary cutter and found two options. Option one was to go with one where the blade locks exposed. then you have to continually close it when you lay it down or risk cutting yourself if it is left locked open.

Option two was to go with the OLFA cutters that have a grip handle that exposed the blade and when you let off grip the blade retracts. This is what I chose to get. In fact I decided to get it in two sizes. The 45mm fits the blades I already had and the 60mm will allow me to cut faster on big units.


While I was at it I bought extra blades for each from KAI in tungstun steel. These are supposed to hold an edge longer.


Ready to roll!

Ddd


Posted by studio3d@ccgmail.net at 12:01 AM PST
Saturday, 9 March 2013
Getting My Ducks (um, Geese) In a Row
Topic: Supplies

While at the Sewing Expo I picked up a ruler for accurately trimming Flying Geese blocks. This ruler lets you trim out multiple sizes, which is just awesome.

Here you can see the variety of size markings

I am actually in the middle of a quilt project that the next step is trimming up flying geese blocks! Talk about timing!

Ddd


Posted by studio3d@ccgmail.net at 12:01 AM PST
Friday, 8 March 2013
Free For Me
Topic: Supplies

At the Sewing Expo I won a door prize at one of the sessions. I got to choose two patterns for paper pieced wall hangings at one of the vendors. YAY!

I chose a Christmas banner with mittens and snowmen and a spring pattern with three birdhouses.


I already have ideas for both of these.

Ddd


Posted by studio3d@ccgmail.net at 12:01 AM PST
Thursday, 7 March 2013
Fabulous Fabrique
Topic: Supplies

From the Sewing Expo:

For the next few days I will be sharing the goodies I picked up on my recent field trip. Today it is this totally cool piece of yardage.

Is this not truly awesome? Secret project in progress...

Ddd


Posted by studio3d@ccgmail.net at 12:01 AM PST
Wednesday, 6 March 2013
Double Delight Embossing
Topic: Dry Embossing

To make a special card with dry embossing I decided to double the delight.

I ran the cardstock through the Cuttlebug with a corner floral folder and used a foam blender to color the raised portion with 'Spun Sugar' distress ink. Then I ran the cardstock back through the Cuttlebug with the script embossing folder. I followed that with the foam blender and 'Old Paper' distress ink, keeping it off the floral area.

I added a couple of die-cut corner swirls embellished with pink 'dew drops'. I added a diecut text last.

Ddd


Posted by studio3d@ccgmail.net at 12:01 AM PST
Tuesday, 5 March 2013
It's In The Bag
Topic: Sewing

I was given a challenge to sew up a handbag using a plastic one as a model. It was the right size and shape but a poor choice of materials for the user.

I pulled out the leftover fabric that I had used on the cushion the other day and some complementary floral fabric to use as a liner. I used iron-on interfacing on both pieces before cutting.

I measured the model bag and wrote up a plan of cutting and construction. I had to make plans for a different way of attaching handles as the model had leather ones attached with rivets. The closing zipper and an inside pocket were also eliminated.

As it happened I had a packet of magnetic snaps in my stash that I had picked up on clearance several years ago.

So, here is the finished purse:


Here you can see the magnetic snap closure:

Here is a view of the lining. You can see that the straps are also lined so you get a little view of that blue and golden fabric there as well.


This all went together in a couple of hours - including planning time. Next ones (yes, there will be more) will go faster since I can skip that step altogether.

Ddd


Posted by studio3d@ccgmail.net at 12:01 AM PST
Updated: Tuesday, 26 February 2013 9:38 AM PST
Monday, 4 March 2013
Sleepy Bears
Topic: Stamping

In my new sets of MFT fundraiser stamps I got two of them with bears. I especially like this sleepy bear sharing his nap time with a little mouse.

I colored these up on watercolor paper with Distress Markers and added a little line with Sharpie marker to ground him. Rounding the corners lends a more casual feel to the image.

I matched each bear up to come background papers, drew in doodle lines, and stamped the sentiments.

On this last one I replaced the sentiment with some little dream hearts.

The background papers with hearts and 'love' text match the theme.

Ddd


Posted by studio3d@ccgmail.net at 12:01 AM PST
Updated: Tuesday, 26 February 2013 9:37 AM PST
Sunday, 3 March 2013
Bent Poppies
Topic: Stamping

As a followup to the whacked bunny ears I went looking for other line image stamps in my collection that could have the background removed to make them shape shifters. I came up with a poppy image and not only cut out the petals bue made slits between the elements of the inner flower so it could shift too.

I applied the image to the acrylic block, stamped one poppy on watercolor paper then adjusted the petals to stamp two different arrangements on each sheet. I ended up with 4 groupings.

After coloring (Distress Markers and watercolor techniques) I trimmed them very close so the images would spill out of the frame. Each was paired up with matching papers and mounted to card fronts.

The doodle lines were drawn in with Sharpie marker and the sentiments stamped from the new bunny stamp sets.

Ddd


Posted by studio3d@ccgmail.net at 12:01 AM PST
Updated: Tuesday, 26 February 2013 9:37 AM PST
Saturday, 2 March 2013
Field Trip - Sew and Stitchery Expo - Day 3
Topic: Field Trip

Today (like Thursday) is only a half day at the Expo so the list of workshops is shorter:

Quick Gifts From your Stash: Think all you can make from your treasured fabric scraps is Scrap Quilts? This class is filled with OTHER creative ways to use your mountain of scraps. Cindy has some great gift ideas and she will provide some unique sewing tips and techniques that will save time and money.


Stash Buster Scrap Quilts: Have more fabric than you can use in two lifetimes? This is all about making beautiful quilts from fabrics you already own. Marti’s trunk show is packed with tips about selecting fabrics, understanding and using color value effectively. Marti will share tricks and tools to make cutting and sewing scrap quilts easy and efficient.


Successful Quilt Piecing: Set yourself up for success!! Mech will review piecing and pressing techniques that help make quilting easier and more beautiful, whether you plan to do the quilting yourself or have it done. A great class for beginners. Limited to 30 people.

You'll note that I have focused mainly on quilts but did throw in some other workshops for using up fabrics in other ways.

Ddd


Posted by studio3d@ccgmail.net at 12:01 AM PST
Friday, 1 March 2013
Field Trip - Sew and Stitchery Expo - Day 2
Topic: Field Trip

Another day on my field trip. Today's workshops are:

More Quick Gifts to Make: Sue is known for Quick, Quicker, and Quickest Gifts and this class is all about her newest and favorite gift projects. You will see ideas for every age and virtually every occasion. This is Sue’s favorite topic and many of these projects can be made  in two or three hours.


Spring Leaves Art Quilt: Festive leaves floating through the air cheer your soul. Make this gentle leaf quilt with fused fabrics, an easy pattern transfer process, and decorative rotary cutter blades. It’s a simple design with lots of variation and options for embellishment and personal design.


Successful Paper Piecing: Trouble getting to the point in your quilt piecing? Paper piecing is easy, precise and variable (you can enlarge or reduce the  blocks). Most importantly, you get perfect points every time. We supply pattern, fabric, and inspiration. Bring scissors and glue stick for this hands-on experience.


Top Secret Bindings: Learn how to make a perfect binding in this Know Before You Sew™ lecture. Problems like rounded, pointed, and tucked corners, lumpy finishes, and bindings that are not filled to the edge will be covered. Make your own sample and learn about bias, grain, double-fold, strip width, mitered corners and a smooth ending.


Eleanor Burns Five Perky Patterns: Eleanor shares her five newest patterns featuring accurate techniques and tools to achieve great perky points. Braid in a Day, Kylee’s Kite, Storm at Sea, Oriental Fan and Mini Dresden Plate offer a great range of variety—something for everyone! Come join the humorous presentation Eleanor is famous for.


Finishing Touches for Your Quilt: This is the class for alternative quilt binding techniques. Learn ways to do a scalloped edge, or how and when to consider a picot treatment instead of traditional binding. Learn how to use tools combined with tips and tricks to make a flawless, unique finish for your original quilts.


Kick It Up a Stitch: Nancy Zieman and her side kick—or should we say Sous Chef—Mary Mulari invite you to a second helping of Kick It Up a Stitch. “Lettuce entertain you” is the motto of their newest sewing and cooking extravaganza. If you attended the first helping of Kick It Up a Stitch, you know that sewing and cooking have a lot in common. You can sew or cook very simply—then Shazam! you’ll learn how to Kick It Up A Stitch. Nancy and Mary promise plenty of sizzle, spice, and sass, plus an entirely new menu for the second helping show.

With the exception of the last, these are all 45 minute sessions.

Ddd


Posted by studio3d@ccgmail.net at 12:01 AM PST
Thursday, 28 February 2013
Field Trip - Sew and Stitchery Expo - Day 1
Topic: Field Trip

Today you will find me... gone! I am off to the Sew and Stitchery Expo in Puyallup Washington for a few days.

Today the workshops I will be taking are these:

Nancy's 30 Favorite Quilt Tips: Don’t miss this lecture featuring 30, yes, 30 tips to celebrate 30 years of Sewing With Nancy! Garnered over three decades, learn Nancy’s favorite cutting, piecing, layering and binding tips. You’ll ask, why didn’t I think of that?

Quilt Improvement Show Eleanor Burns: With years of experience and an impressive tool belt of quilting magic, Eleanor will once again bring her unique and humorous approach to the quilting stage. She will share insights into specific techniques she has pioneered aimed to help every quilter—from the beginner to the advanced. The long list of techniques discussed and quilts displayed will leave your head whirling.

These are a couple of ladies I have been watching on TV and the web for years so I am excited for the in-person exposure.

Ddd 


Posted by studio3d@ccgmail.net at 12:01 AM PST
Updated: Tuesday, 26 February 2013 9:39 AM PST
Wednesday, 27 February 2013
Rabbit Food
Topic: Stamping

I mangled the ears on my other bunny stamp and had a go at making some cards with it. This one is of a bunny roasting marshmallows over a campfire. I resisted the urge to blacken the marshmallows or set them afire - just left them white like they are straight out of the package.

I used lots of different color combos for the different rabbits but colored the fire and grass consistently. I trimmed the panels, rounded the corners, drew in doodle lines and mounted with a variety of matching papers.

The greetings are stamps from the bunny sets.

Ddd


Posted by studio3d@ccgmail.net at 12:01 AM PST
Updated: Tuesday, 26 February 2013 9:36 AM PST
Tuesday, 26 February 2013
Twisted Bunnies
Topic: Stamping

The bunny stamp I used yesterday has these big loopy ears. I decided to do a little surgery on him to make him more flexible. Here's how:

Here you can see the flat material inside the ears. This is what I removed:

I folded the ear in half from the end and used sharp scissors to cut a slit:


With the ear flattened back out I put the point of the scissors in the slit and cut the material out:

This is what it looks like after the surgery:


The bunny still lays normally on the acrylic block if you want it to:

But you can lift the ear off the block adjust the line and stick it back down:

Adjust one ear or both:

Now you can give your bunnies more personality. These are the cards I made - same stamping, coloring and mounting process:

Some are less successful than others:

I have another bunny stamp that I plan to subject to the same treatment before stamping him.

Ddd


Posted by studio3d@ccgmail.net at 12:01 AM PST
Monday, 25 February 2013
Bunny Bonanza
Topic: Stamping

I recently picked up some stamps from My Favorite Things and two of them are adorable bunnies. I stamped one of them on watercolor paper a few times and used Distress Markers and a water brush to color them in.

I pulled out a variety of shape dies and used a technique called 'out of the box' to cut the die shapes while leaving bits of the bunny and hearts overhanging the shape edge.

Then I scanned through my papers to select two or more to go with the coloring of each image. These are the cards I ended up with.


Something really fun with this stamp tomorrow.

Ddd


Posted by studio3d@ccgmail.net at 12:01 AM PST
Sunday, 24 February 2013
Cushie
Topic: Sewing

I offered to make a cushion to turn a small chest into a seat for an apartment. The chest has a rim along the back and two sides so the cushion was designed to fit in this space.

I constructed it in my head a couple of times and then started whacking away at 2-inch foam and some upholstery fabric. I had two white zippers in my stash and made them work by coloring the tape with Copic markers and stitching them end to end. They meet in the center of the back.

I made the construction like a box so there is a seam at every edge of the foam.

Here you can see the zippers where they meet


The zipper is hidden by a placket. Too many waves in the placket for me but it was difficult getting the sturdy zipper tape and the slippery fabric to play nicely together. It will be on the back of the cushion anyway.


This is a better color rendition than the first photo of the whole cushion. We'll blame that on the shiny fabric.

Ddd


Posted by studio3d@ccgmail.net at 12:01 AM PST
Saturday, 23 February 2013
Early Or Late?
Topic: Paper Embroidery

I worked on a couple of Christmas cards this week! These are stitched on white cardstock and mounted on foam tape over snowflake embossed card bases.


Both of these are made with stitching stickers from Dazzles.

Ddd


Posted by studio3d@ccgmail.net at 12:01 AM PST
Friday, 22 February 2013
Wag the Dog
Topic: Paper Embroidery

I love this little free pattern of a dog and his bone. I created on kraft paper with a verigated thread and matched backing papers to the thread.


Colors: kraft, burgundy, goldenrod (not gray, cherry, lemon yellow)

Ddd


Posted by studio3d@ccgmail.net at 12:01 AM PST
Thursday, 21 February 2013
Flowers In a Twist
Topic: Paper Embroidery

I finally used this paper embroidery pattern as it was intended - as a bookmark.

I kept it pretty straightforward and actually followed the directions, too. Who even knew I could DO that?

Colors are butter yellow for the background, emerald green for the backing, purple for the ribbon, lavender for the flowers with purple centers and dark moss green for the stems.

Dear camera-makers: Please invent a digital camera that sees colors in their true form and reproduces them that way. Why should I have to resort to describing colors when I have a photo to show? Thank you.

Ddd


Posted by studio3d@ccgmail.net at 12:01 AM PST

Newer | Latest | Older