« December 2012 »
S M T W T F S
1
2 3 4 5 6 7 8
9 10 11 12 13 14 15
16 17 18 19 20 21 22
23 24 25 26 27 28 29
30 31
You are not logged in. Log in
Entries by Topic
All topics
3D paperwork
A - Z challenge 5
A - Z challenge 7
A - Z challenge round 4
A to Z challenge round 3
A to Z round 2
A to Z round 6
A-Z round 1
Around the House
Art Challenges
Artist Trading Cards
Backgrounds
Beads
Bible Journaling
Books
Boxes
Collage
Color Challenge
Coloring
cookbook
Die Cuts
Digital Projects
Digital Stamps
Drawing
Dry Embossing
Fabric Stuff
Fantastic Folds
Field Trip
Home Decor
How Does Your Garden Grow?
Hymnal Art
In The Kitchen
In the studio
Jewelry
Lettering
Links
Multi-Technique
Music to Work By
Musings
Nail Art  «
New Work
Online Class
Other Hobbies
Other Projects
Painting
Paper Embroidery
Paper Piecing
Photo
Pretty Paper
Quilting
Random
reading
Scrap Recovery
scrapbooking
Sewing
Sketch Challenge
Some Backlog
Stamping
Stencils
Stickers
Supplies
Teabag Folding
Techniques
Testing
tips and tricks
Tutorial
Web resources
Welcome to my Blog
Work By My Friends
workflow
Writing
Blog Tools
Edit your Blog
Build a Blog
RSS Feed
View Profile
Group One
In & Out of Studio 3D
Tuesday, 25 December 2012
A Show Of Hands
Topic: Nail Art

My fingernails grew out enough to go back to playing with artistic treatments - just in time for the Holiday!

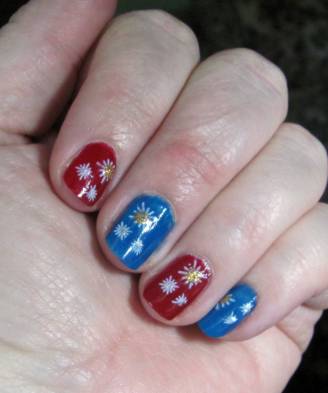
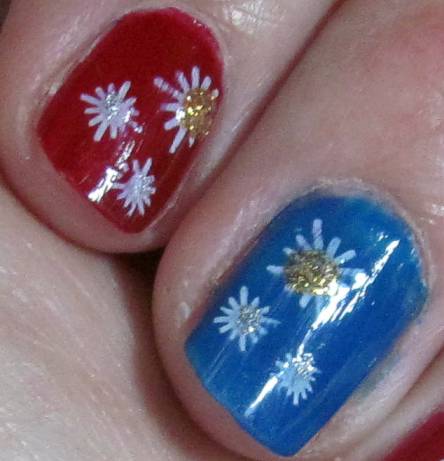
Last summer I had bought some bold colored polish at the dollar store so I could do patriotic nails. While picking up the Red and Blue I also grabbed some Purple (for Easter) and some Green to use with the Red for Christmas.

For these nails I did two coats of green on the nail bed and two of red on the tips. When this was dry I used a makeup sponge to apply silver glitter over the whole nail, dried it, and added gold glitter over that.

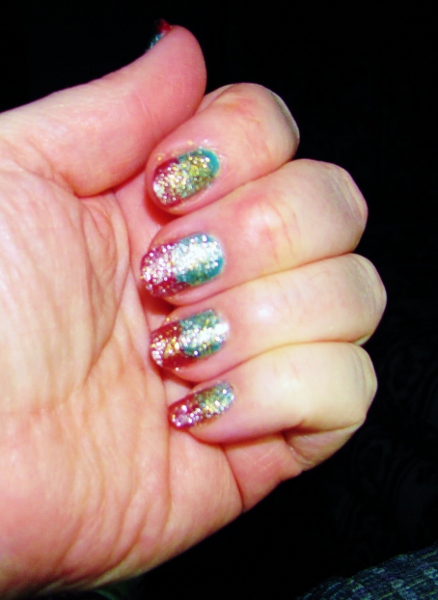
Super sparkly with underlying seasonal colors. One nail for each letter... C-H-R-I-S-T-M-A-S-Y!

Ddd


Posted by studio3d@ccgmail.net at 12:01 AM PST
Saturday, 18 August 2012
She Did It Again
Topic: Nail Art

It was time for a new manicure so I played with my stencil set again. This time I started with a base of a sheer purple (2 coats) and an over layer of a color shifting lighter purple in one coat. The end result looks more pink than purple but has wonderful depth.

I wanted to do the 'stamping' with the stencils again and chose an image with multiple flowers in the design. It also has a couple of leaves and some dots. I had to use it twice for each of the thumbs. I decided that I would do it in white since the base polish was so light.

I've noticed that, although they are the same brand of polish and MADE for nail art, the white is much more apt to smear with the application of topcoat. This is true no matter how long I let it dry. Kind of annoying as I had a couple of nails that it smeared so badly I had to take the polish off to the nail and start completely over with all the layers.

In the end, I like the result. It is much more low-key than the last few manicures I have been sporting but totally appropriate for a breezy summer look.

Ddd


Posted by studio3d@ccgmail.net at 12:01 AM PDT
Updated: Monday, 30 July 2012 2:24 PM PDT
Wednesday, 1 August 2012
Buggy Fingers
Topic: Nail Art

We were having a barbeque at the house and I needed to have a new manicure. I REALLY wanted to have little ants on my nails but did not have a stencil for them in my kit. So I settled for dragonflies, of which there were two. But that is A-OK cause I do like me some dragonflies.

I used a metallic magenta for the base color and stamped with the black nail art polish. This time I sealed the tips with an extra coat of topcoat in hopes of making the manicure last a little longer.


As you can see I used the two dragonflies on apternate fingers and also twisted them this way and that for a little more interest.

Here is a close view of two nails.

Ddd

Posted by studio3d@ccgmail.net at 12:01 AM PDT
Tuesday, 3 July 2012
Fireworks Fingernails
Topic: Nail Art

The biggest problem with the Dollar Store nail polishes is their lack of 'staying power'. They began chipping off the nail ends at about 5 days and I just lived with the raggy look too long. But that means I get to play with nail art sooner than if I had used more 'expensive' polish.

I decided to stay with the red, white, and blue theme but this time I painted every other nail red or blue. I also had picked up a nail stencil kit from the discount bin at the store and thought I'd give that a whirl.

The stencil I chose to use looks a little like fireworks to me and has one large and two small bursts on the design. I used white nail art polish for the stamping and then added a dot of gold glitter polish to the large burst and a dot of silver glitter polish to the small bursts.


It's kind of like rubber stamping on your fingernails, but with polish. If you mess up with the stamping there is no way to fix it but to strip that nail and add all the layers from the base coat through the two coats of color, let it dry and stamp again. I had only one that could have used it but I'm just going to live with the two tiny smudges. After all, this polish does not last that long so I will get to play again soon!

Here's a closeup of a couple of nails.


Now I have my own Fireworks for the 4th!

Ddd


Posted by studio3d@ccgmail.net at 12:01 AM PDT

Newer | Latest | Older